In the Pro Mail Hosting service at AZDIGI, there is an advantage that you can manage mail on the cPanel control. AZDIGI will guide you through creating your first email account in this article.
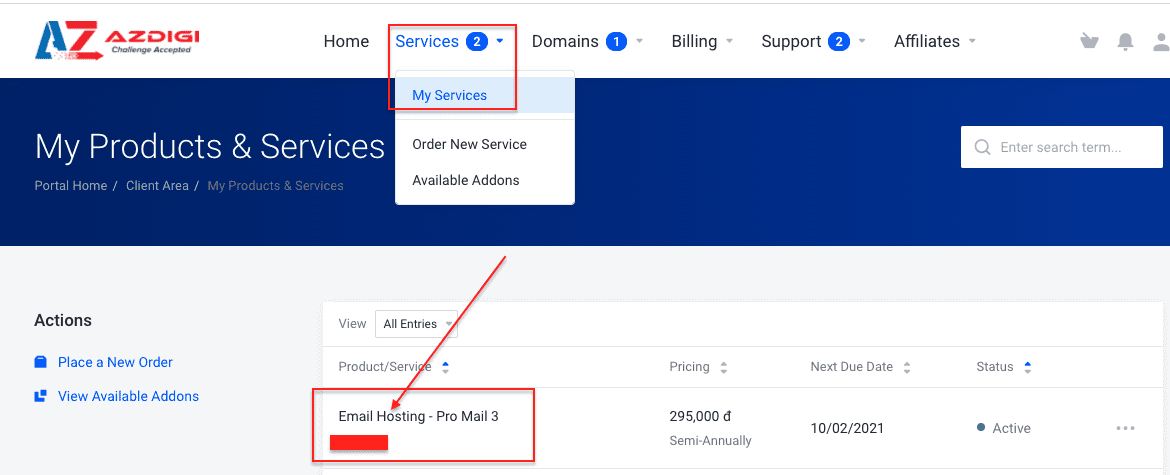
You log in to the service administration in my.azdigi.com
Click Services => My Services => select the corresponding mail service.
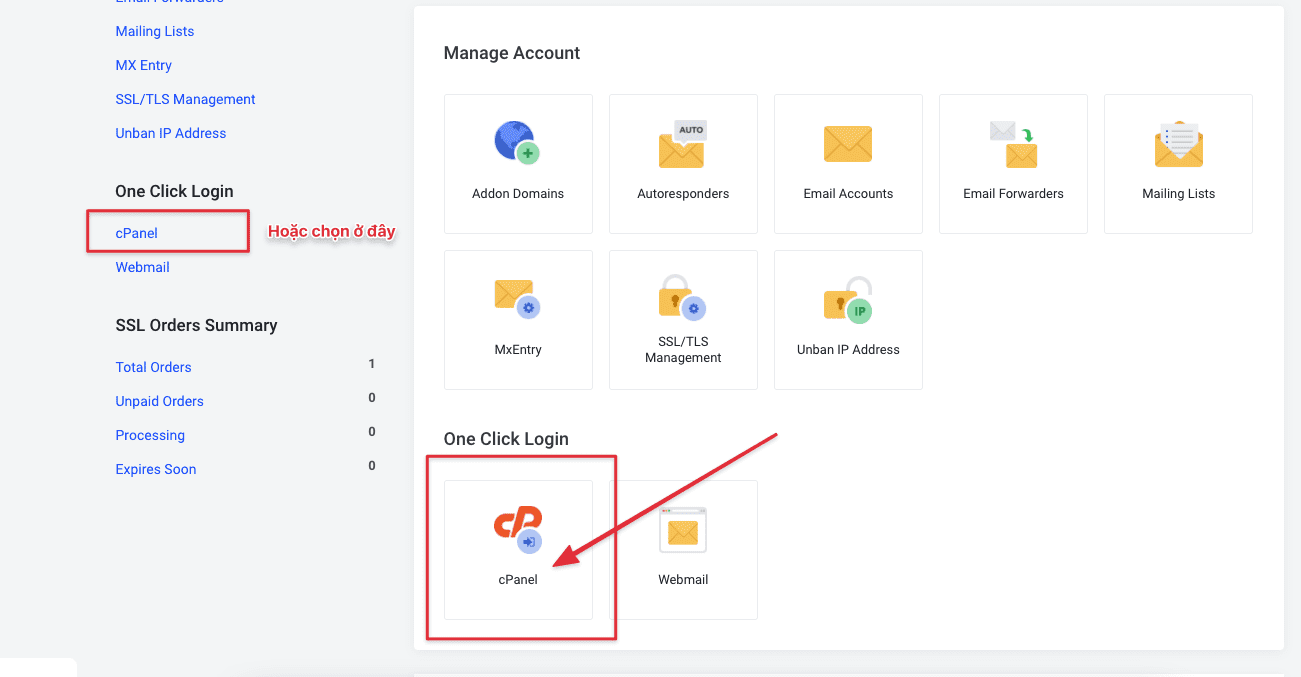
Next, you select the cPanel icon as shown below:
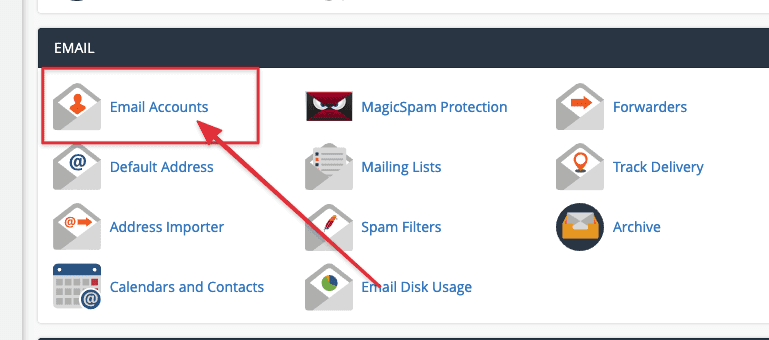
At the cPanel interface, go to the EMAIL section and select Email Accounts to start creating emails.
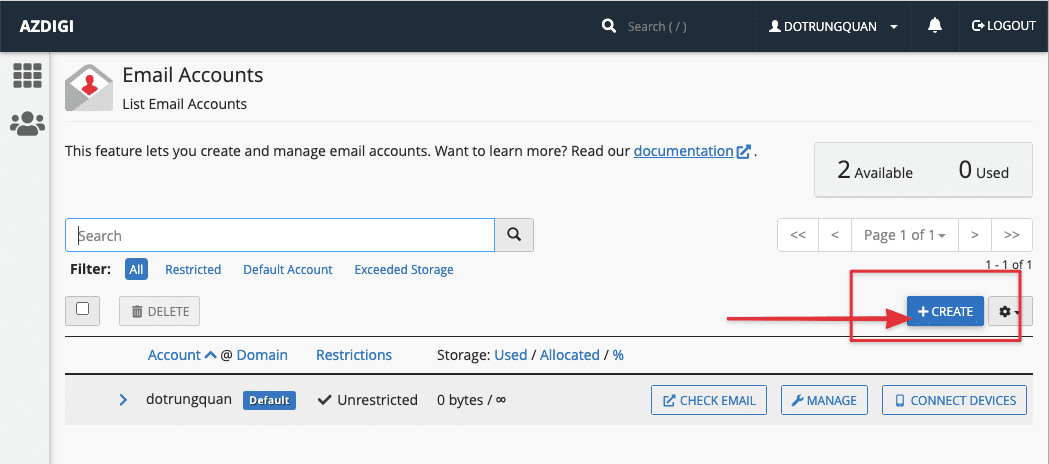
After going to Email Accounts, select CREATE to create a new one.
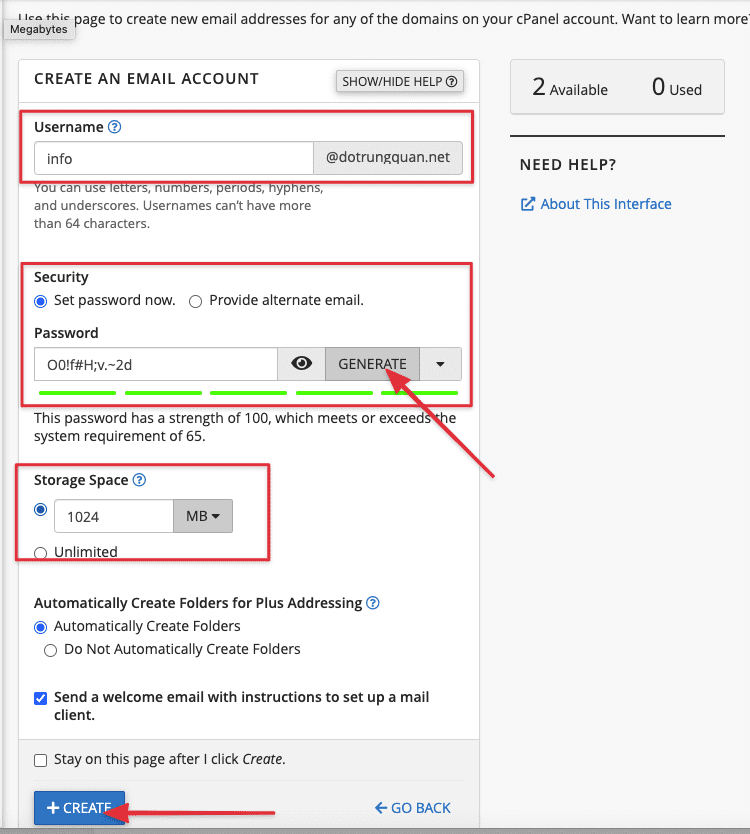
Please create an account as shown below:
- Username: Enter your email account name
- Password: Enter your password, AZDIGI recommends you choose GENERATE so that the system automatically generates a secure password.
- Storage Space: Enter the capacity for each account
Note: Other parameters you can leave as default
After entering, press the CREATE button.
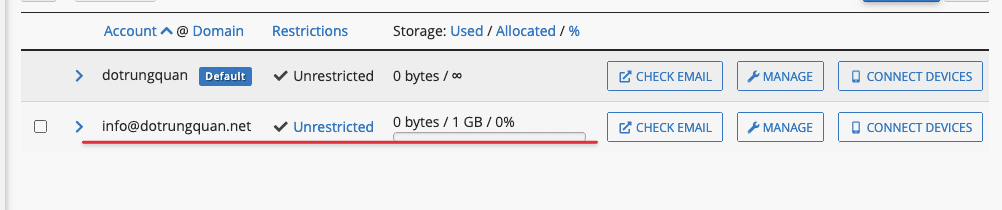
Now check the email account created as below:
To login to webmail, select CHECK EMAIL.
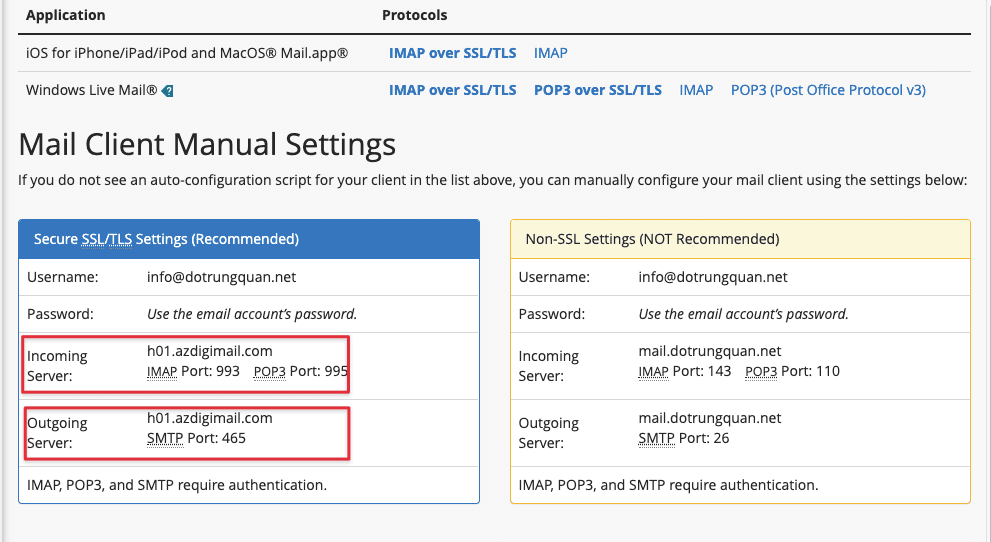
To view the connection parameters with 3rd party applications, select CONNECT DEVICES
So AZDIGI has shown you to complete the steps to add a mail account to cPanel. To refer to the documentation for using mail, you can access the Pro Mail Hosting Guide at the link below: https://azdigi.com/blog/email-hosting/
You might also like
- Pro Mail Hosting: How to login to WebMail
- Pro Mail Hosting: How to create a mail account
- Pro Mail Hosting: How to add a domain email account to Gmail
- Pro Mail Hosting: How to change the password of your email hosting account
- Pro Mail Hosting: Create the HTML Signature in RoundCube
- Add an Email Account to the Mail MacOS App
About the author

Thạch Phạm
Đồng sáng lập và Giám đốc điều hành của AZDIGI. Có hơn 15 năm kinh nghiệm trong phổ biến kiến thức liên quan đến WordPress tại thachpham.com, phát triển website và phát triển hệ thống.