
Continuing with the Zimbra series, AZDIGI will help you install SSL certificates on Zimbra Mail Server in this article. The certificate used will be issued by Let’s Encrypt.
Not only mail servers but most websites operating on the internet will also need SSL (Secure Sockets Layer) certificates, which will help encrypt data transmitted on the internet, making data much safer.
In this article, AZDIGI will guide you to install an SSL certificate with Zimbra’s default commands.
I. Implementation steps
Step 1: Prepare SSL Certificate
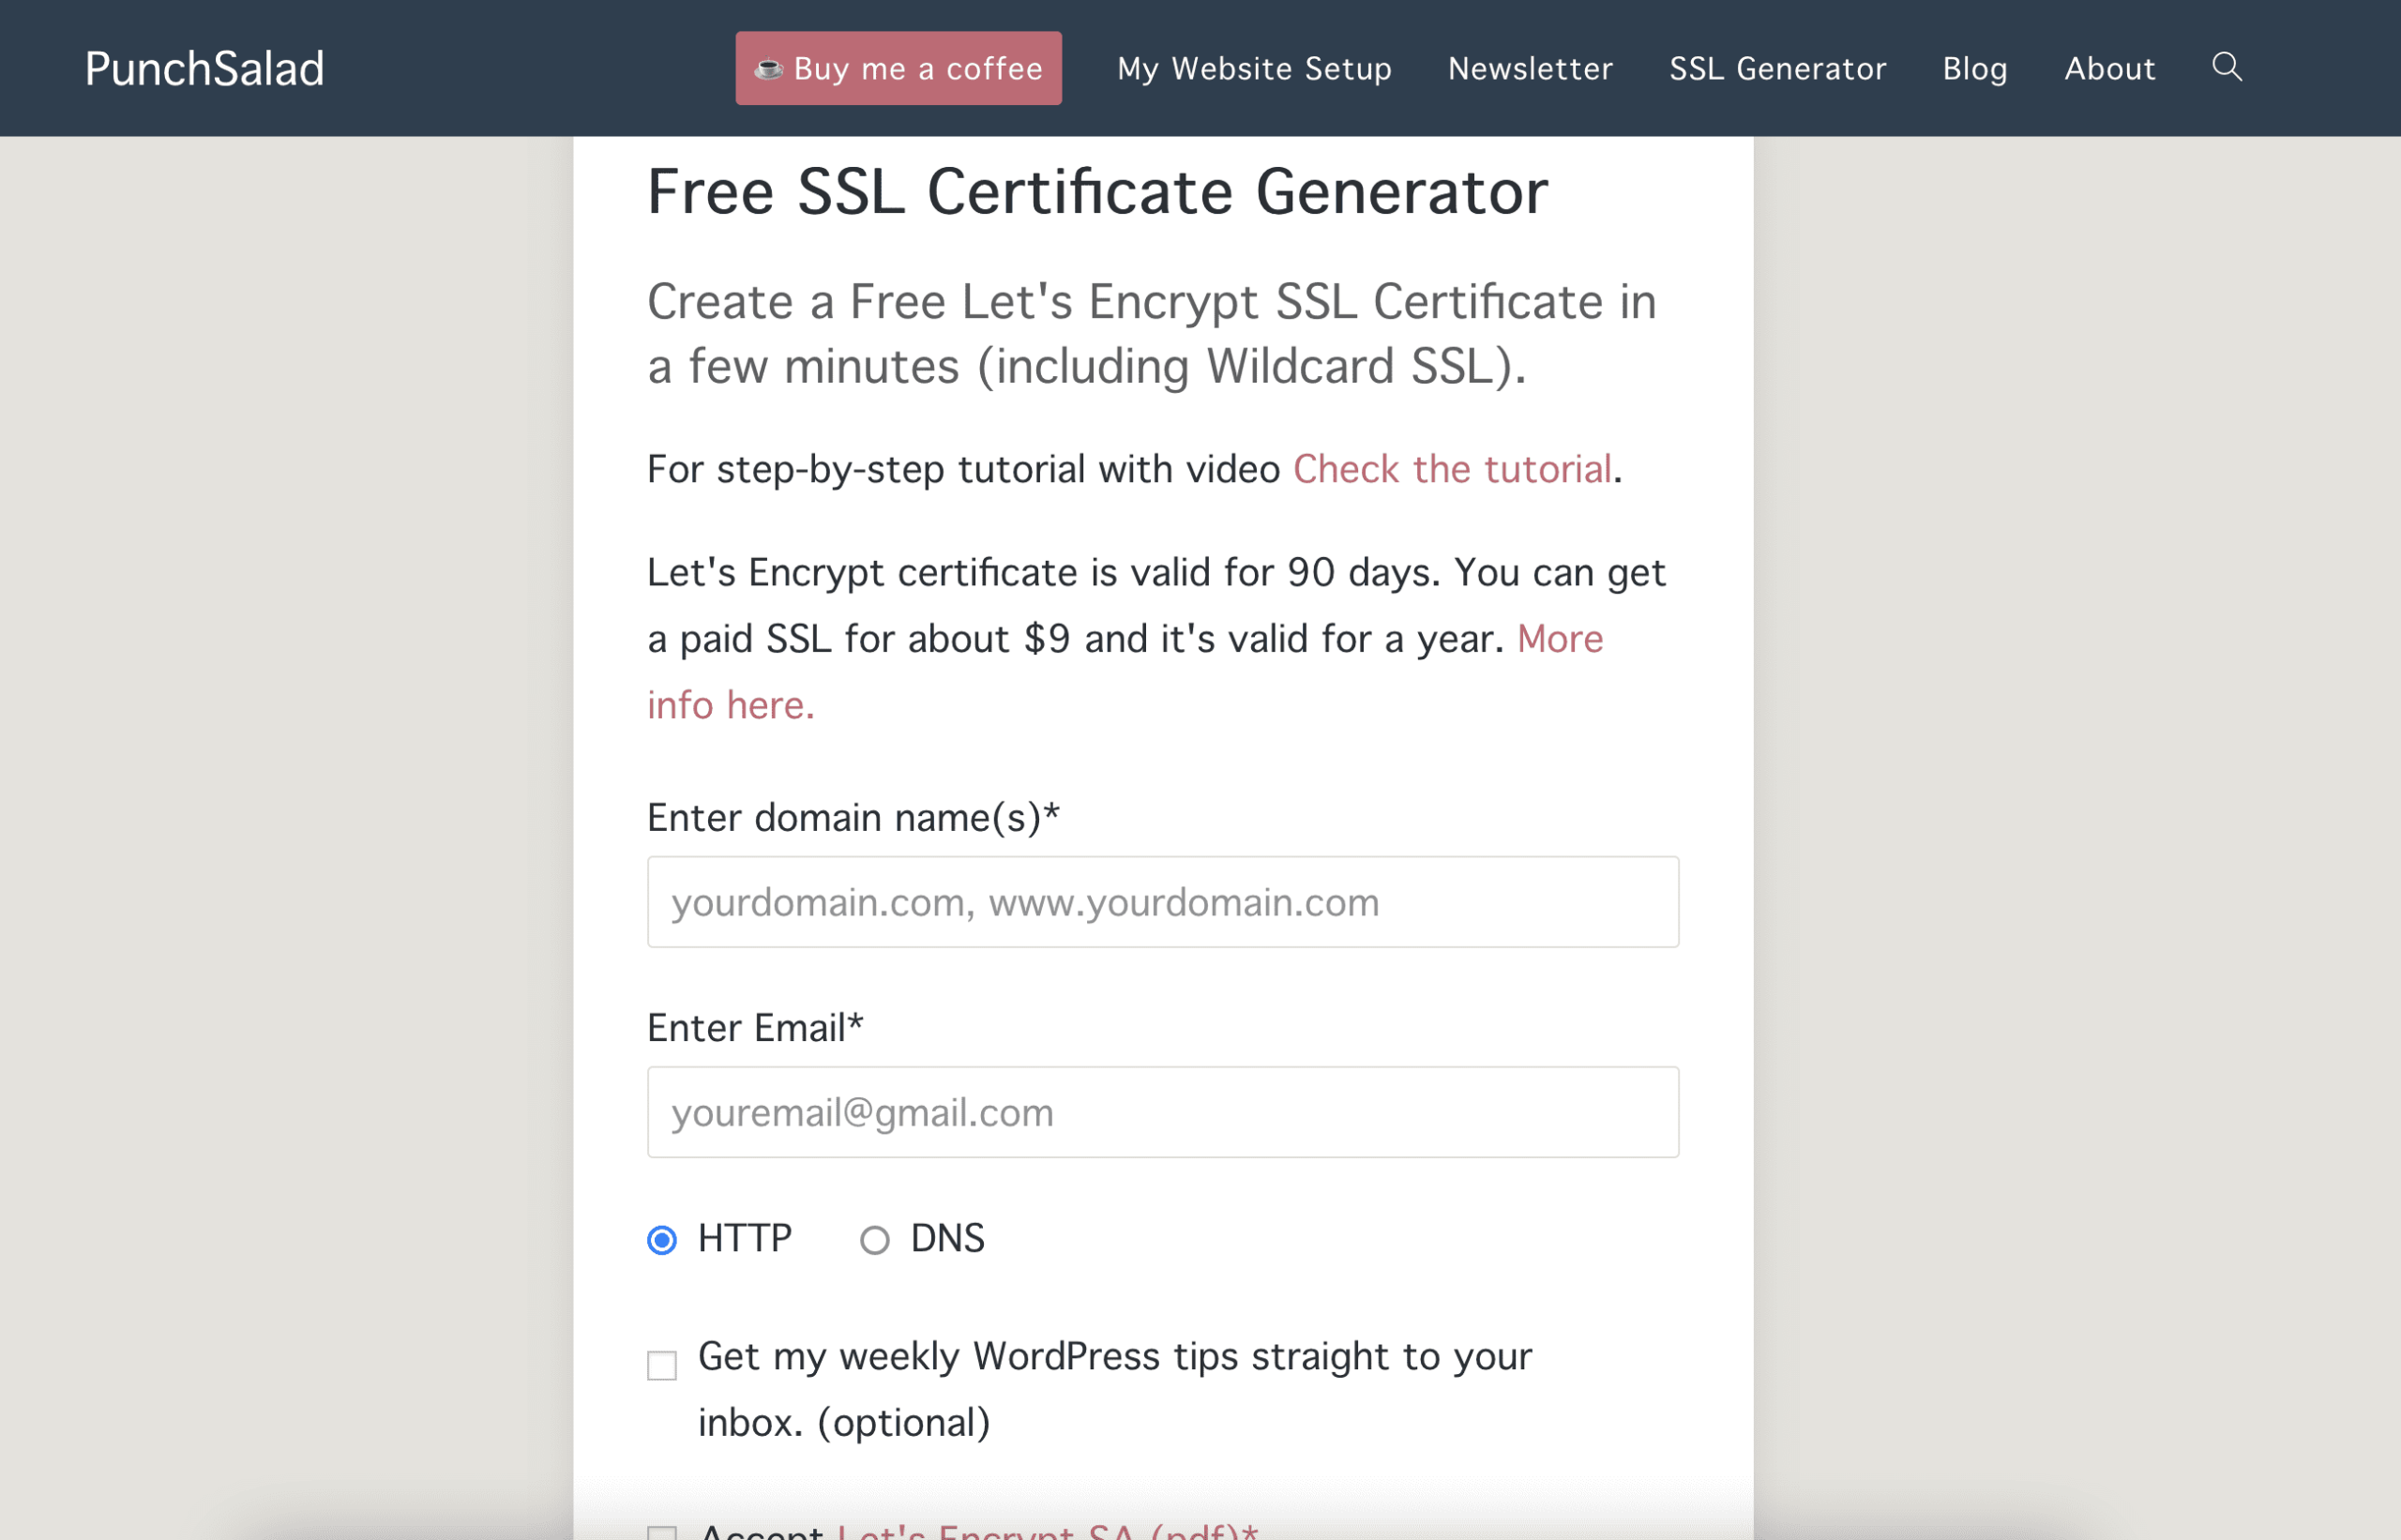
I will get the Let's encrypt certificate in the link below, you can also download the certificate from other Let's encrypt SSL certificate websites.
- Link: https://punchsalad.com/ssl-certificate-generator/
And you need to have a ca root certificate file of the company. With Let's encrypt, you download the certificate file with the command below:
[root@webmail ~]# wget -O /opt/ssl/chain.pem https://letsencrypt.org/certs/isrgrootx1.pem.txt
Here I will create an ssl folder and upload it to the server with the path: /opt/ssl (You can upload the certificate file to another location, but you need to remember the uploaded location).
Step 2: Upload the certificate to the server
Note: First, put the private key for your certificate in the following directory: /opt/zimbra/ssl/zimbra/Commercial/ and the Private key file you need to name is commercial.key. If you have already uploaded the Private key file to the server, please change the existing name of the file.
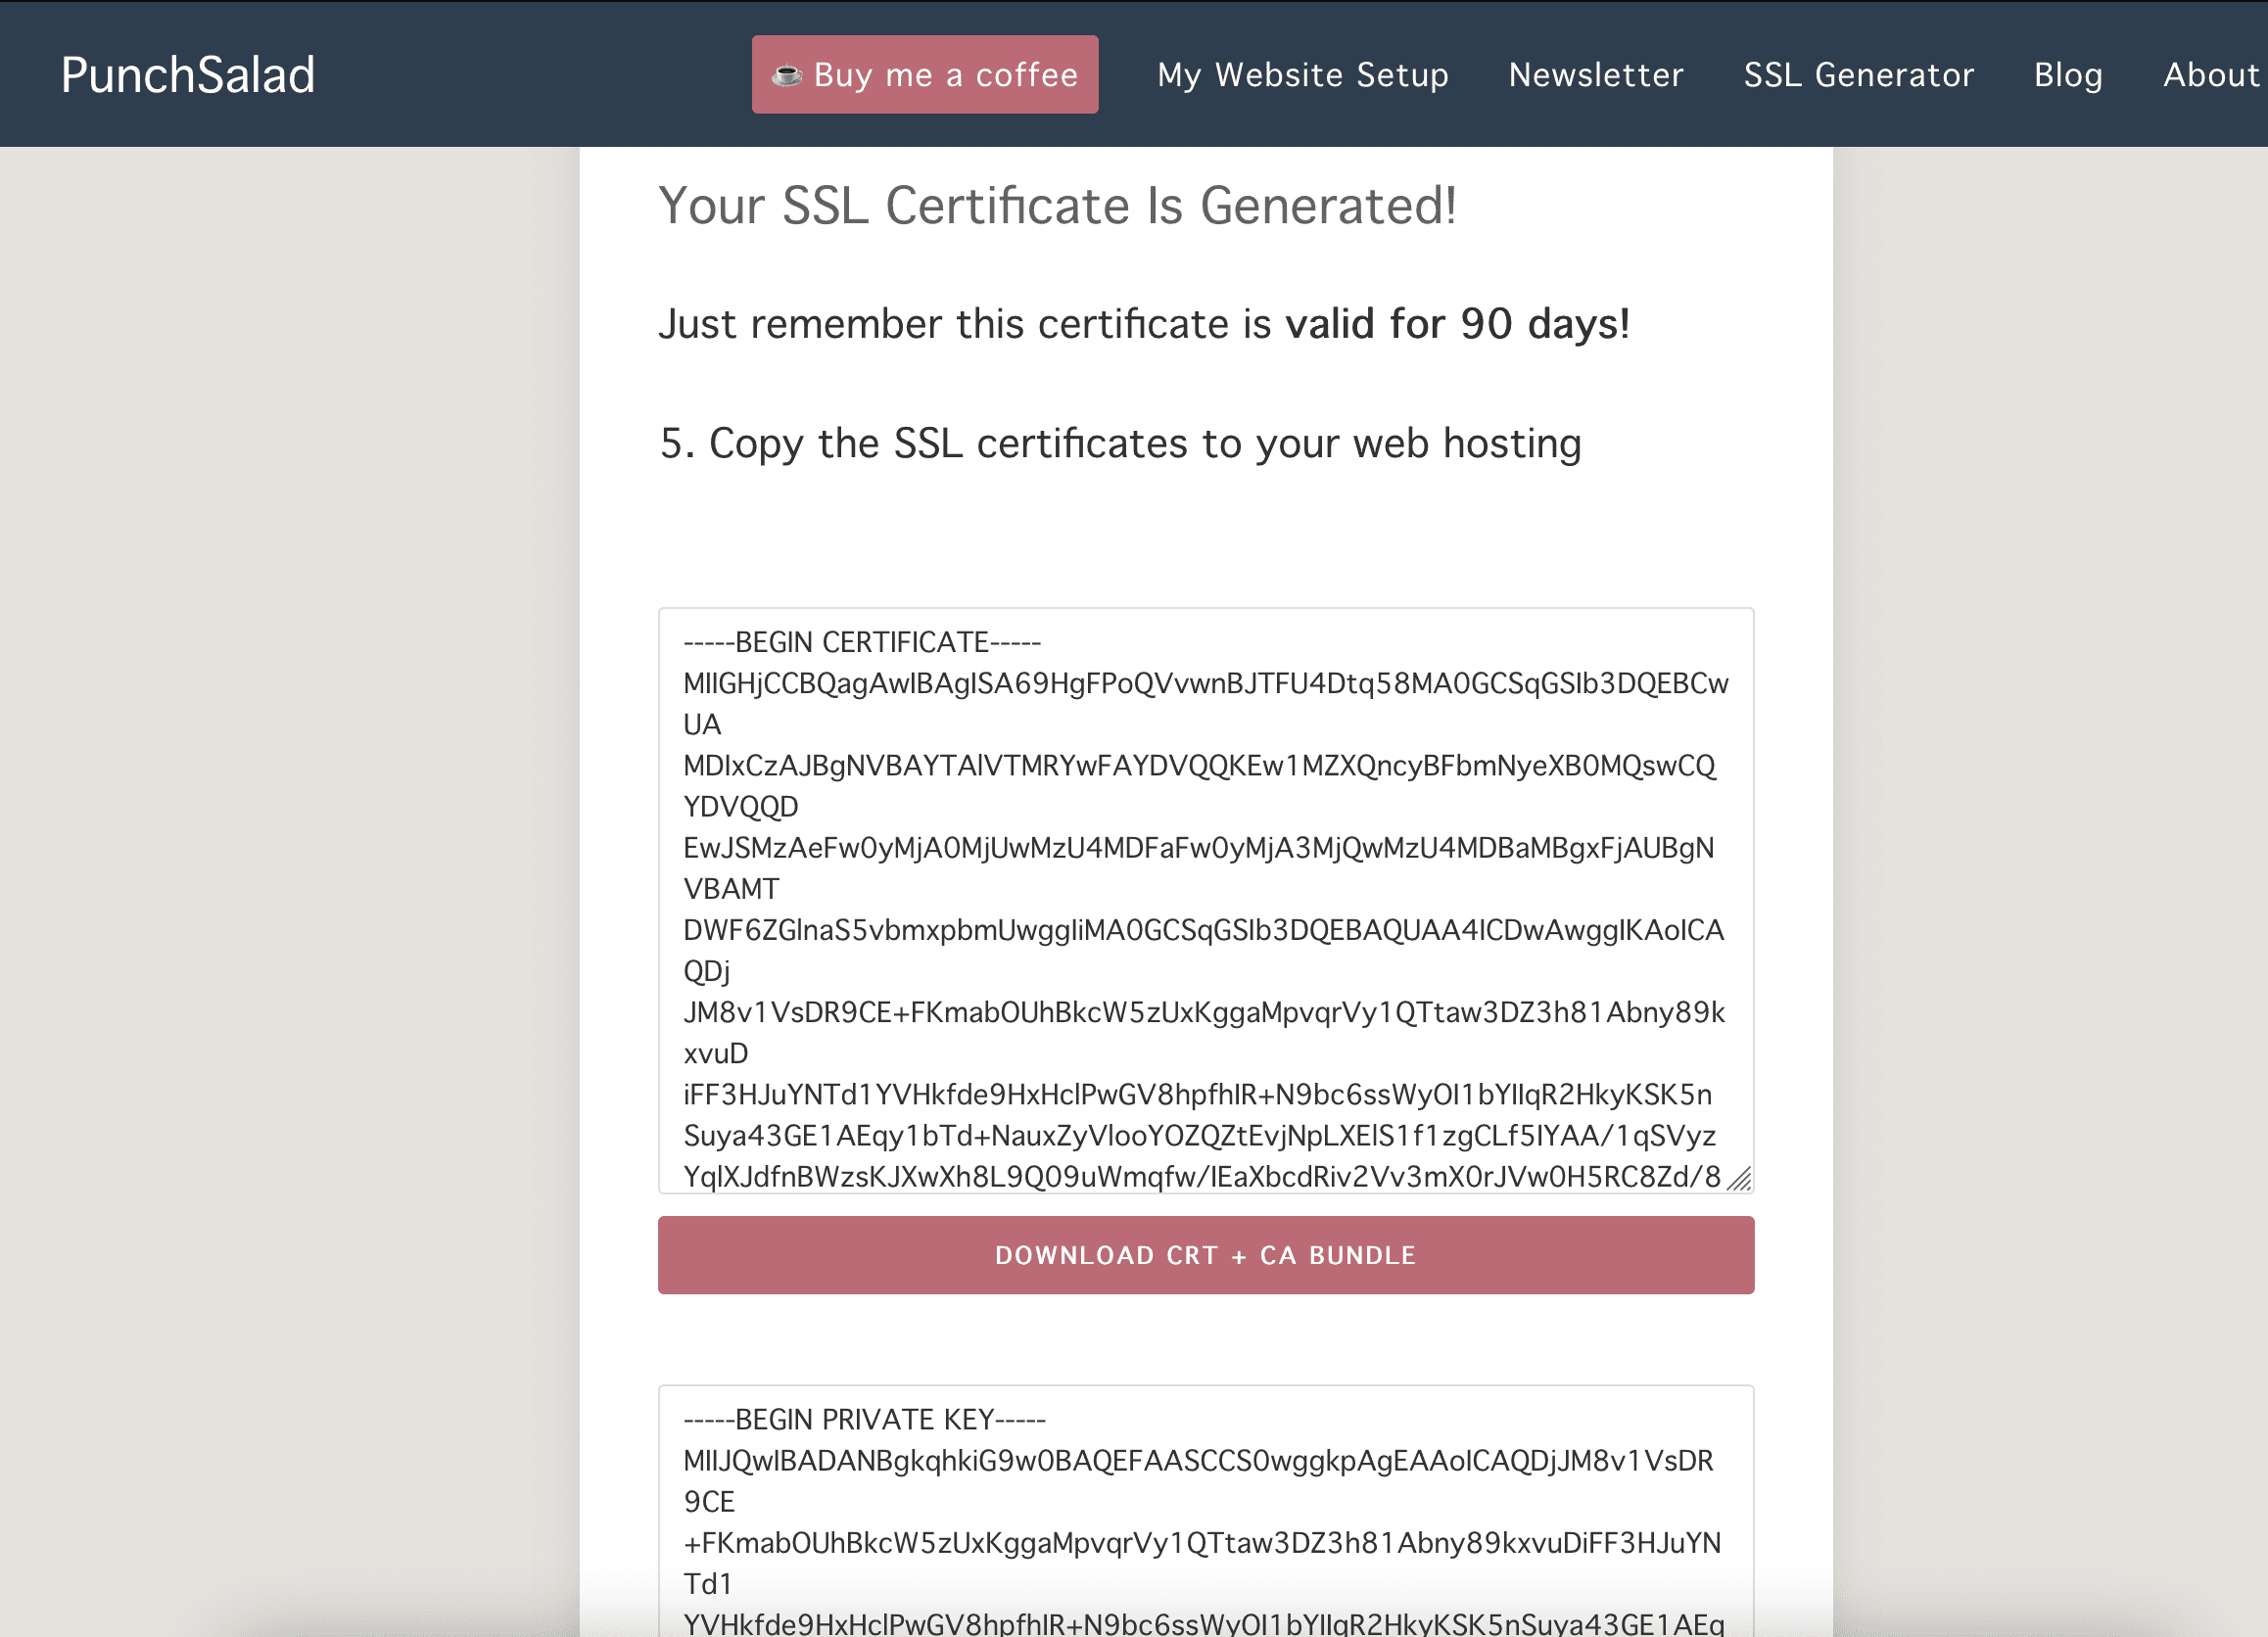
After having the Private key file, you upload two files certificate(.crt) and ca-bundle(.ca-bundle), to any folder on the server (in the above step, I uploaded to the ssl folder with the path /opt/ssl). And you can rename the two certificate files as you like. These certificate files you get in Bước 1.
There will be four certificate files, and you need to authorize the zimbra user.
[root@webmail ssl]# ll
total 12
-rw-r--r-- 1 zimbra zimbra 3749 Apr 25 14:36 cert.ca-bundle        #Chứng chỉ trung gian
-rw-r--r-- 1 zimbra zimbra 2183 Apr 25 14:35 cert.crt              #Chứng chỉ certificate
-rw-r--r-- 1 zimbra zimbra 1939 Apr 25 14:49 chain.pem             #Chứng chỉ CA-root
[root@webmail ssl]# ll /opt/zimbra/ssl/zimbra/commercial/
total 4
-rw-r--r-- 1 zimbra zimbra 1705 Apr 26 14:30 commercial.key        #Private key
Step 3: Install SSL certificate
To install the certificate you use the default zimbra command zmcertmgr (this tool is located at /opt/zimbra/bin/zmcertmgr)
1. SSL Certificate Verification
First, you merge two files cert.ca-bundle and chain.pem into a file cert.ca (remember the cert.ca file permissions with zimbra user)
[root@webmail ssl]# cat chain.pem cert.ca-bundle >> cert.ca     #Chứng chỉ trung gian + CA-root
[root@webmail ssl]# chown zimbra. cert.ca                       #Phân quyền
Next, you switch to zimbra user (if you are in zimbra user, skip this part).
[root@webmail ~]# su zimbra
You can verify that the two certificate files match the private key by using the following command:
zmcertmgr verifycrt comm /opt/zimbra/ssl/zimbra/commercial/commercial.key /opt/ssl/cert.crt /opt/ssl/cert.ca[zimbra@webmail ssl]$ zmcertmgr verifycrt comm /opt/zimbra/ssl/zimbra/commercial/commercial.key /opt/ssl/cert.crt /opt/ssl/cert.ca
** Verifying '/opt/ssl/cert.crt' against '/opt/zimbra/ssl/zimbra/commercial/commercial.key'
Certificate '/opt/ssl/cert.crt' and private key '/opt/zimbra/ssl/zimbra/commercial/commercial.key' match.
** Verifying '/opt/ssl/cert.crt' against '/opt/ssl/cert.ca'
Valid certificate chain: /opt/ssl/cert.crt: OK
2. Deploy SSL certificate
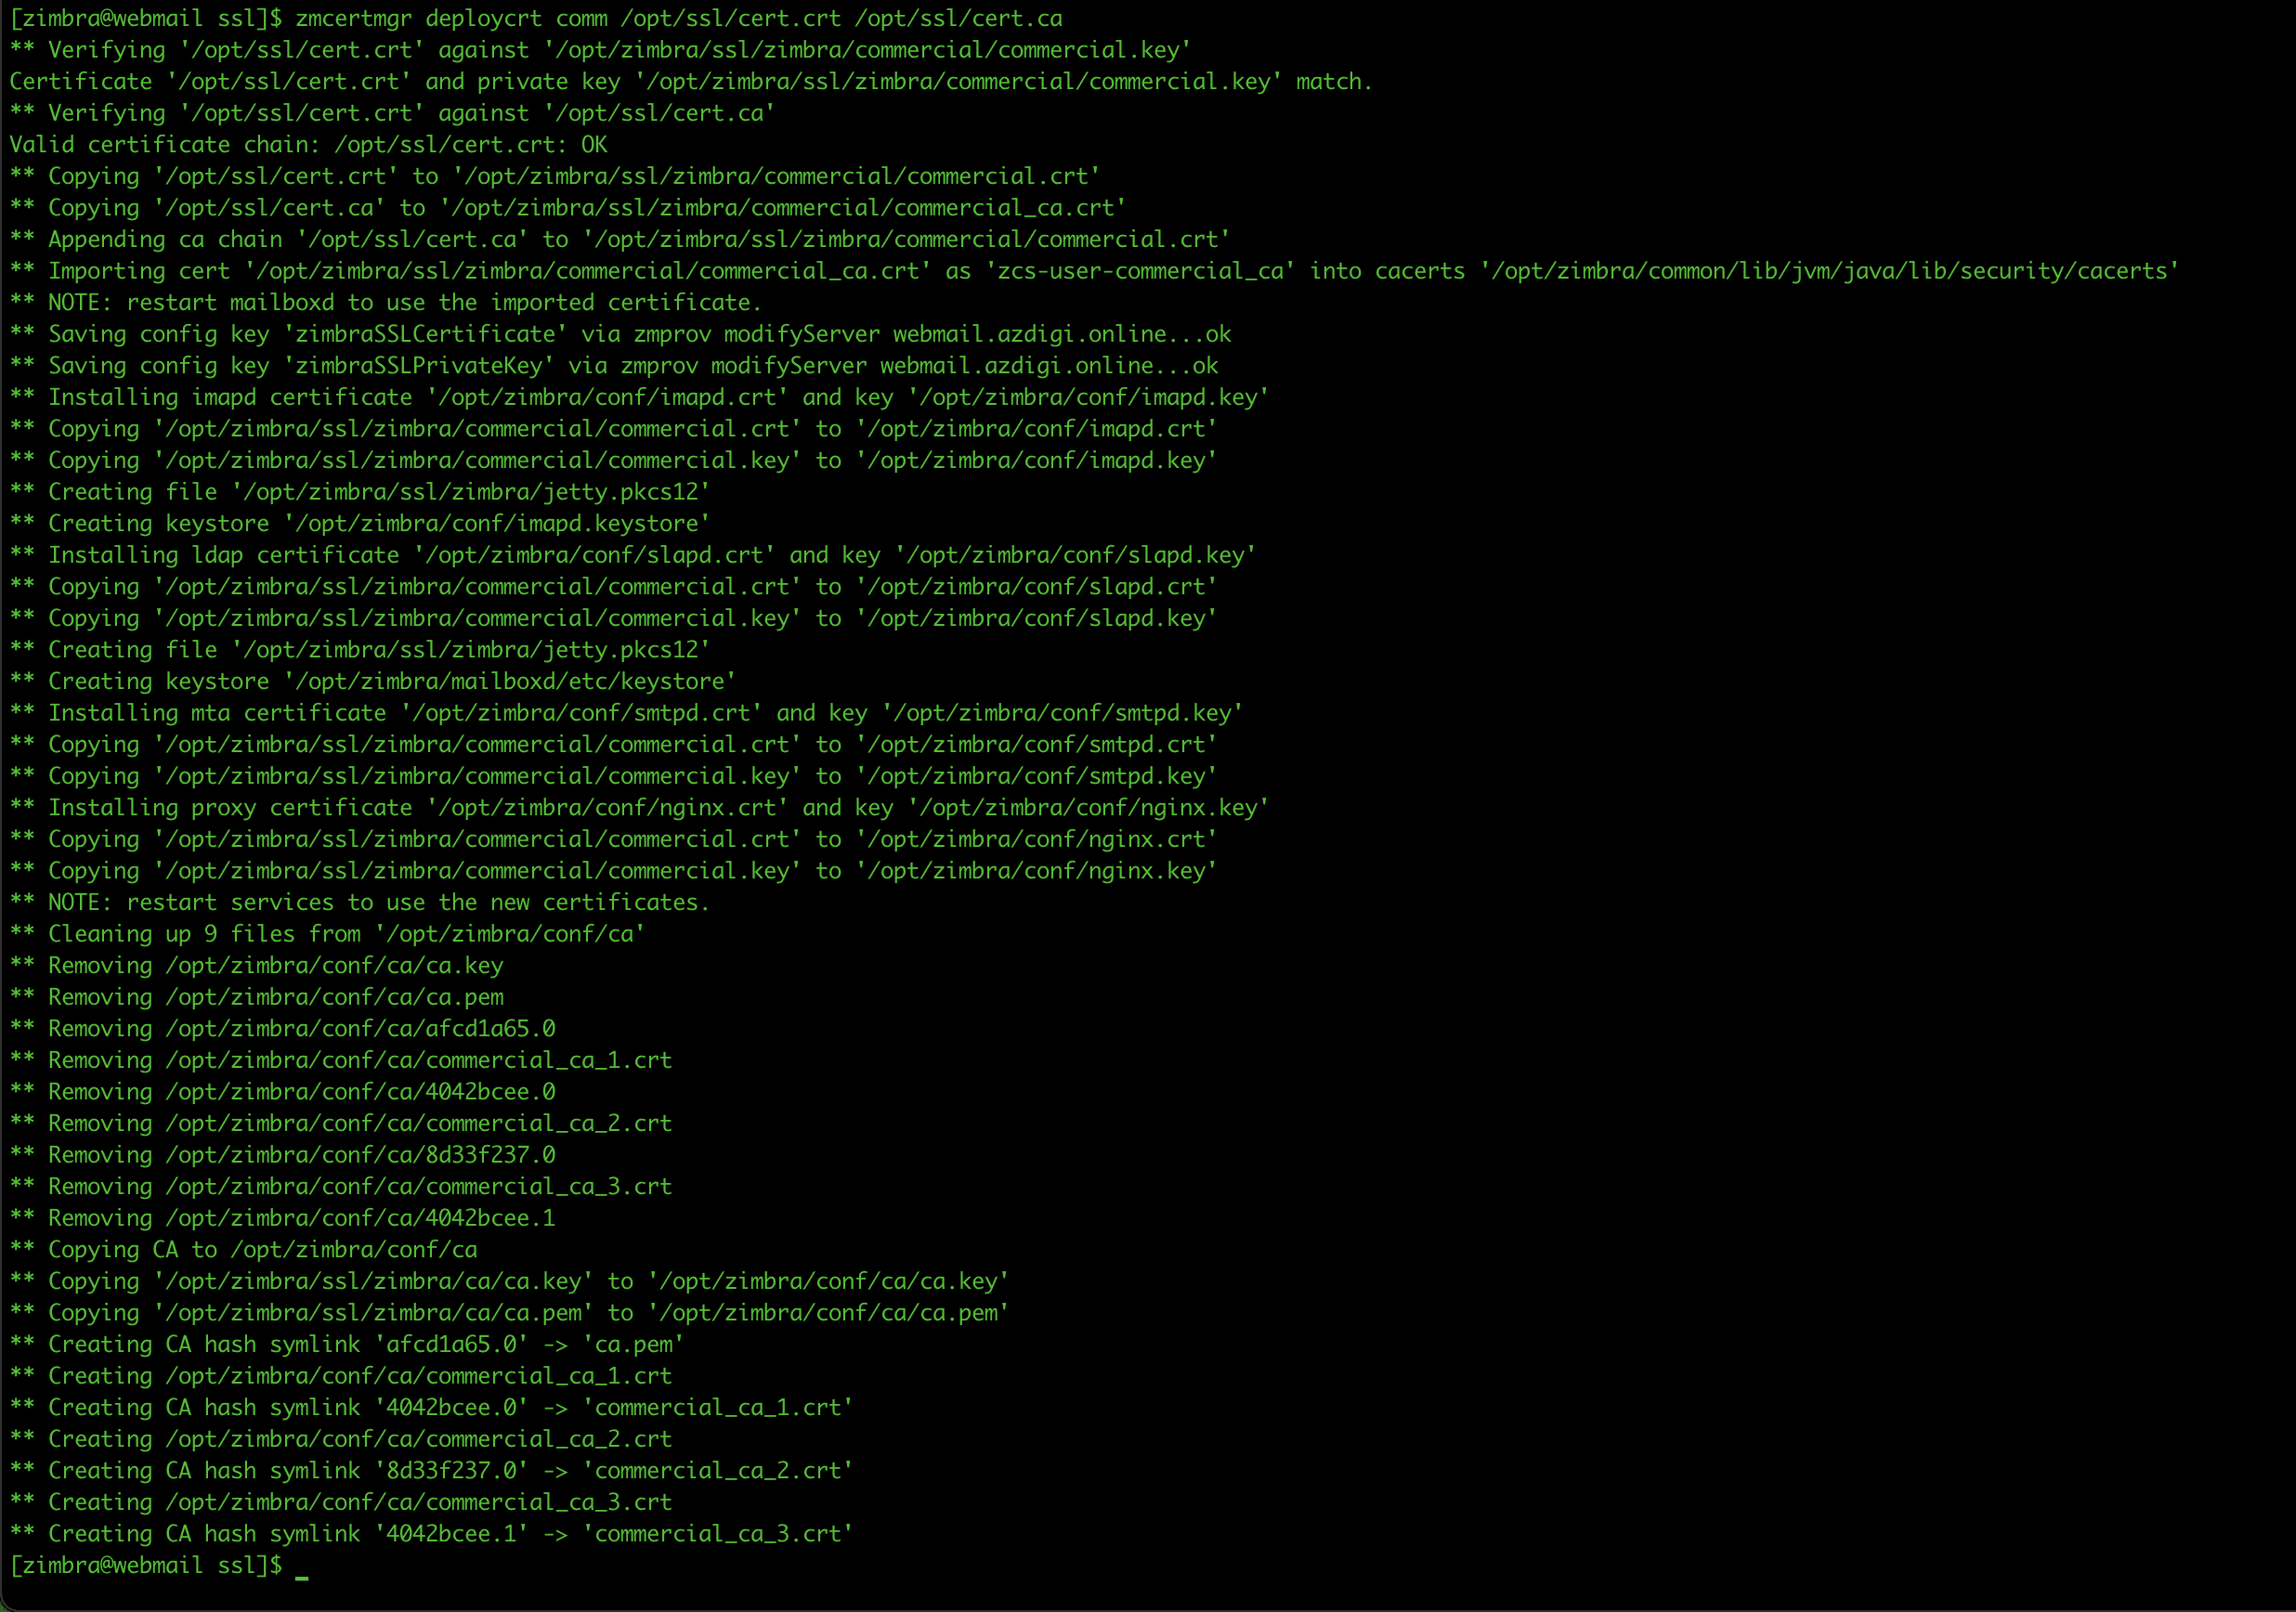
You execute deploy with the command below:
[zimbra@webmail ssl]$ zmcertmgr deploycrt comm /opt/ssl/cert.crt /opt/ssl/cert.ca
Finally, you restart the services of zimbra.
[zimbra@webmail ssl]$ zmcontrol restart
II. Check the result
To check you have 2 methods to check as follows:
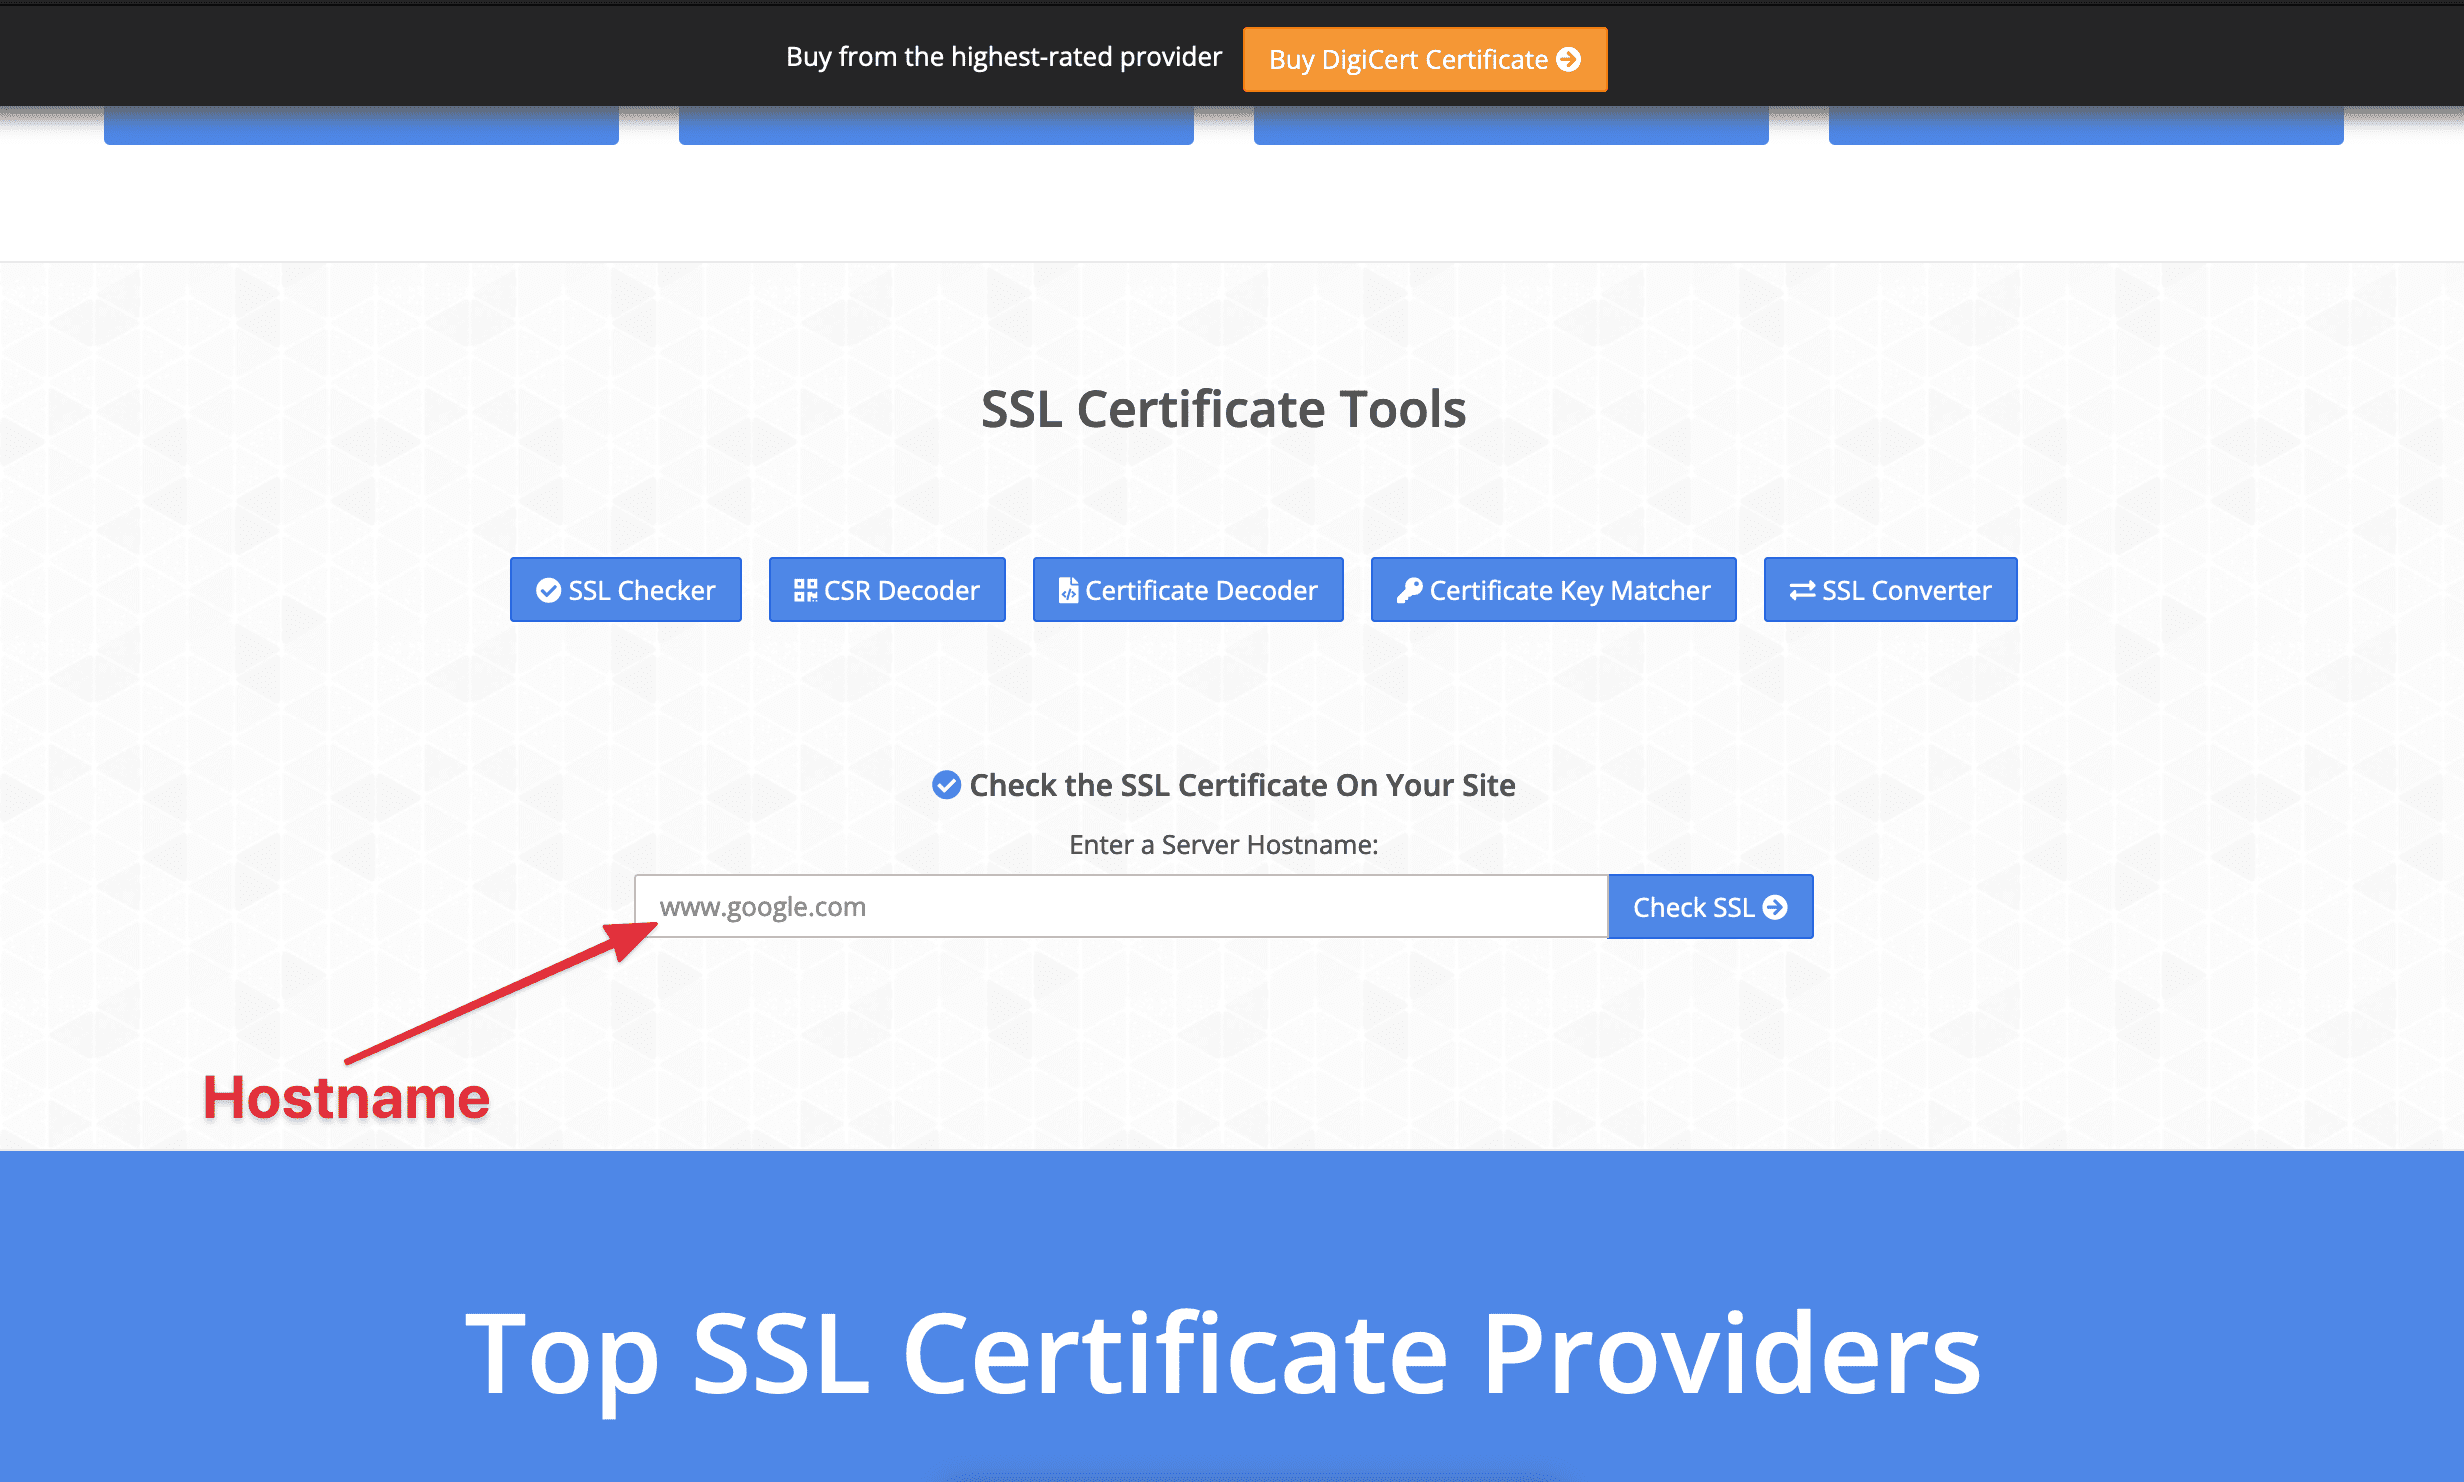
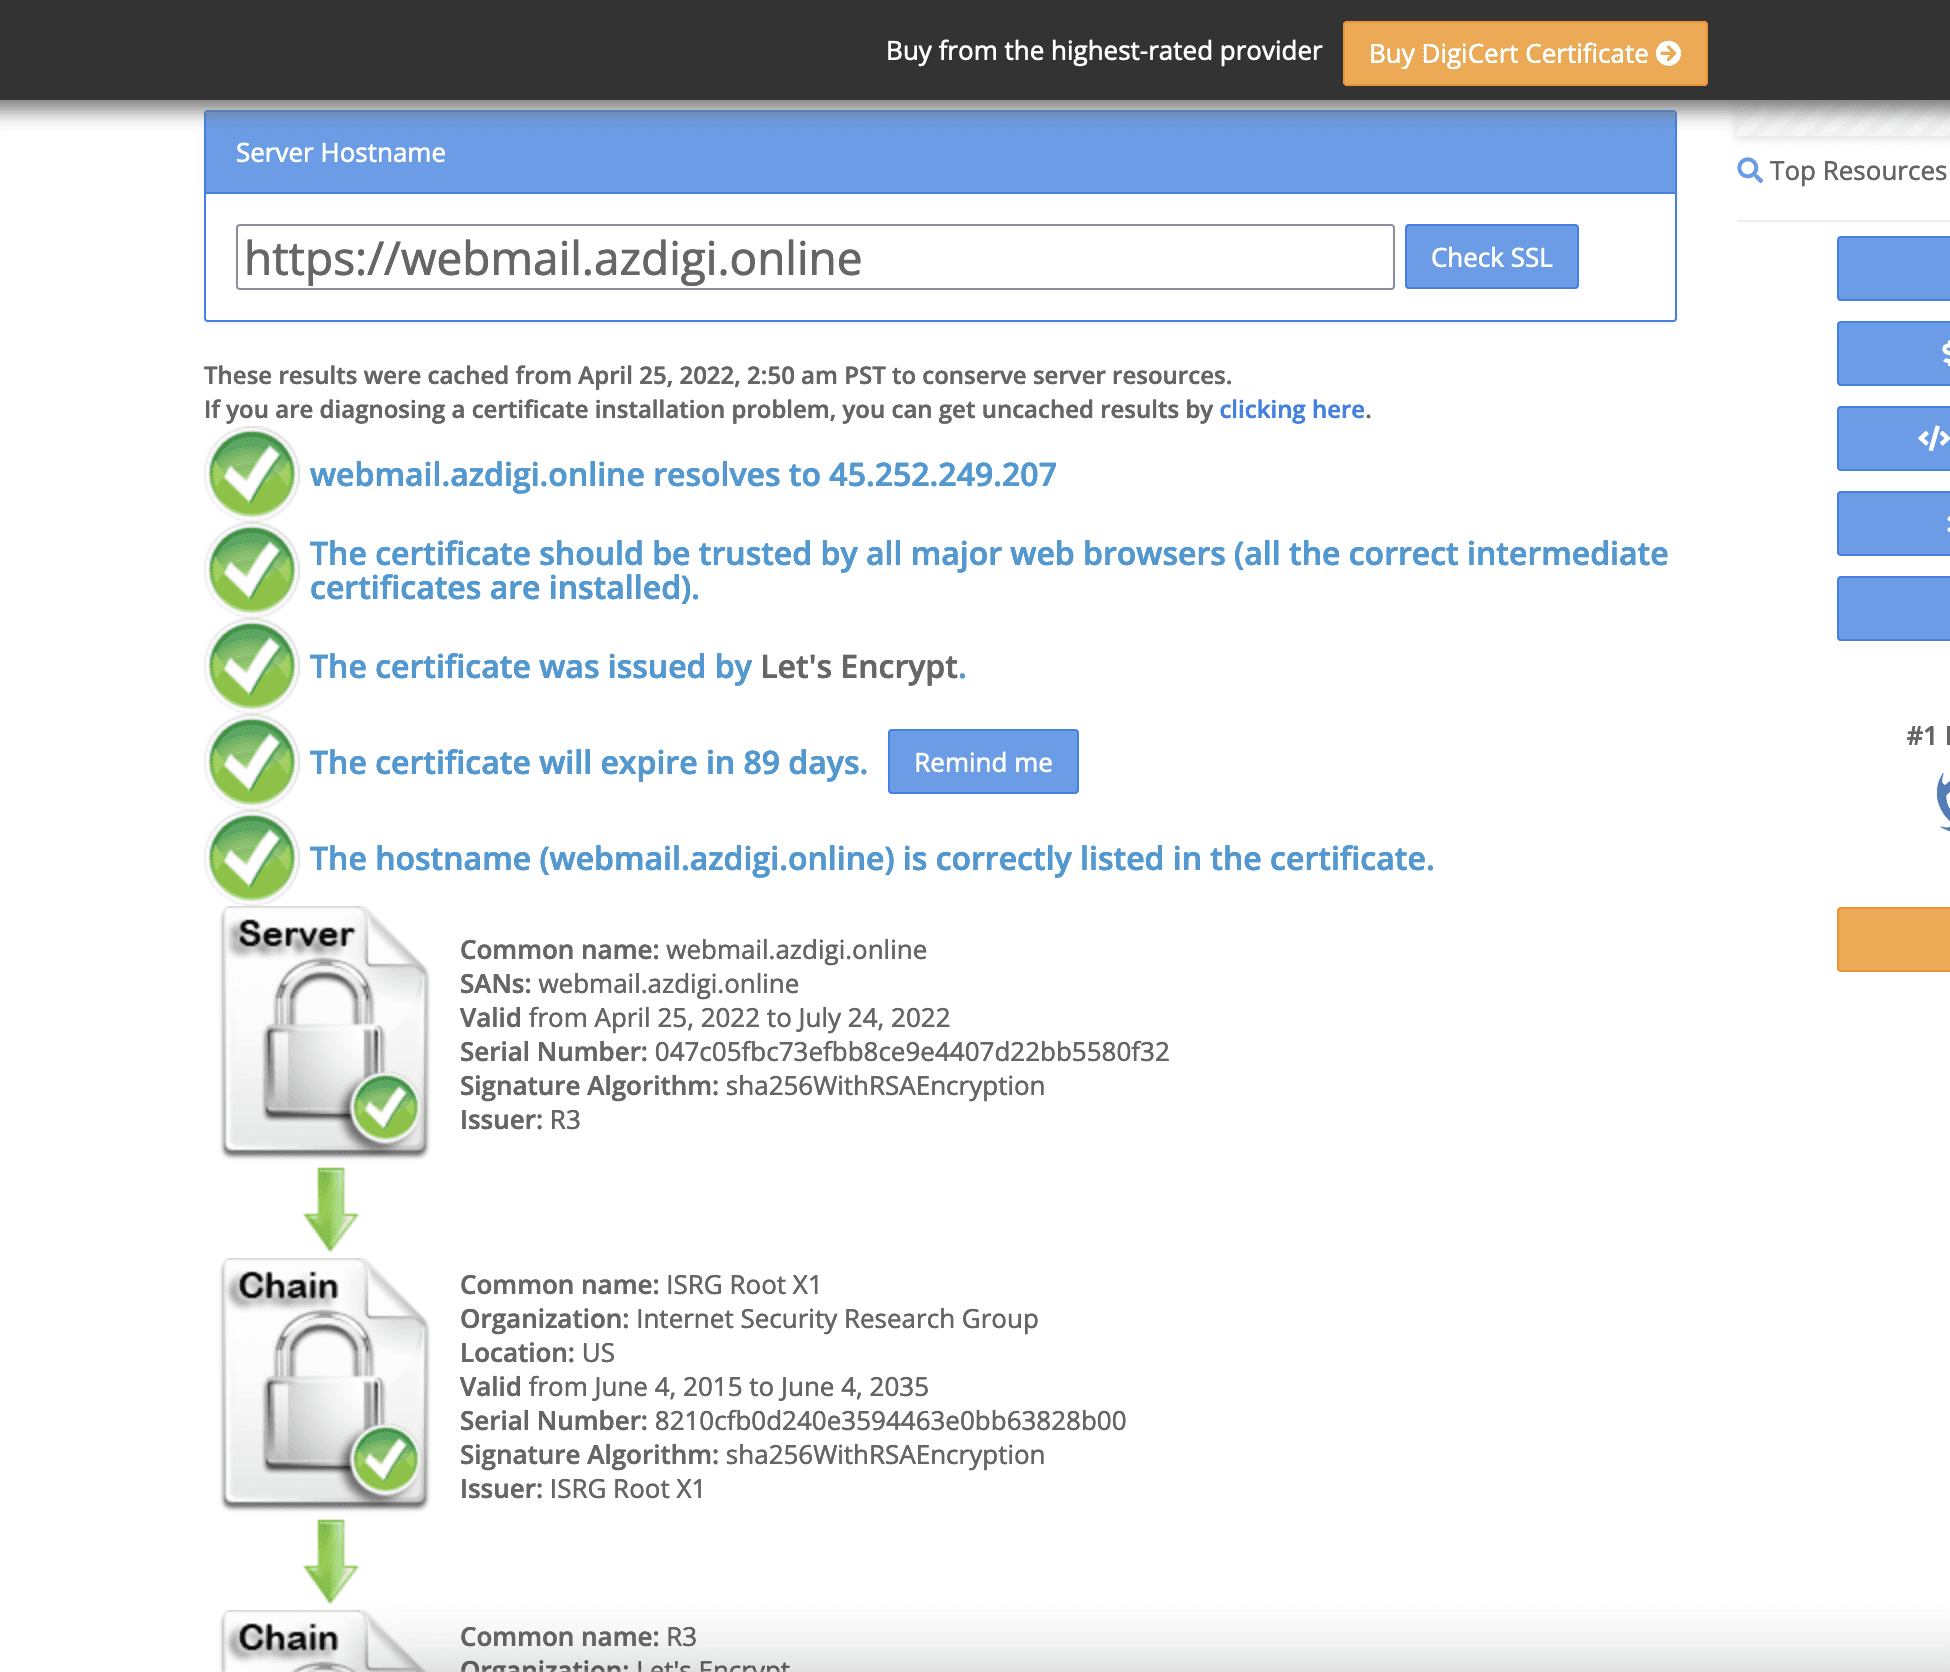
Method 1: Check with an online tool
You access the link below and enter the hostname to check:
- Link: https://www.sslshopper.com/
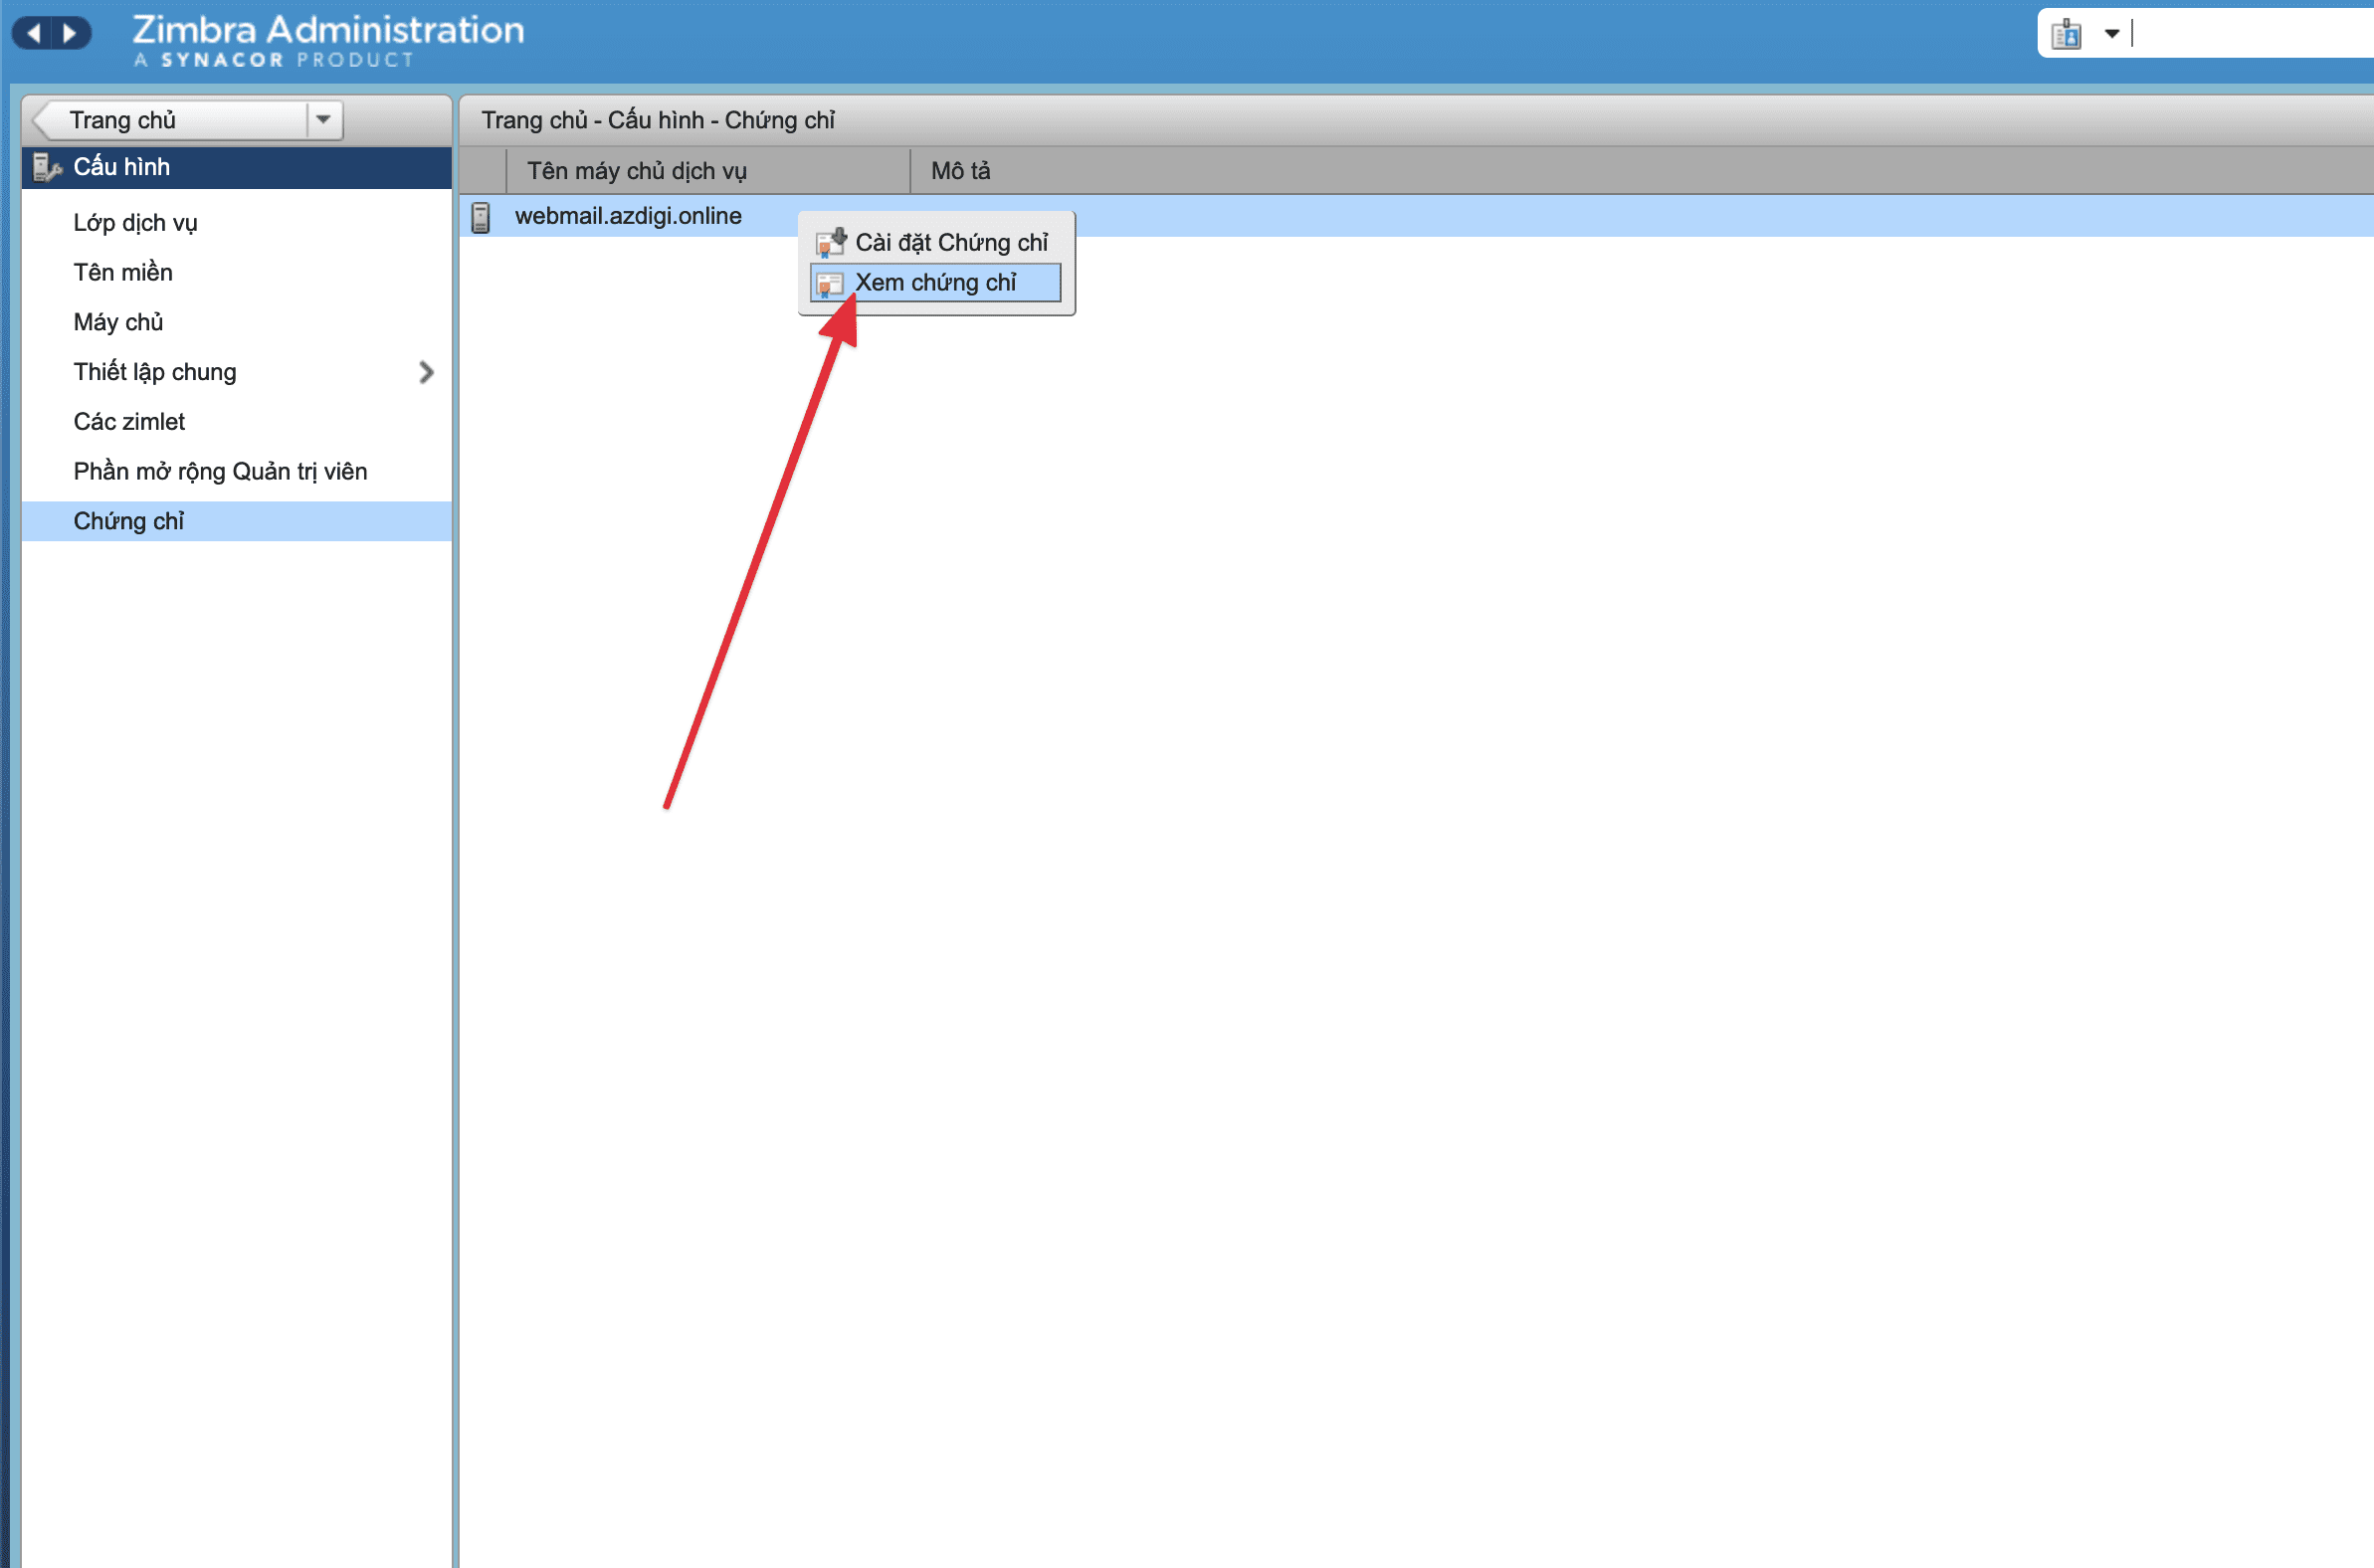
Method 2: Check directly on the zimbra interface
You access and login to zimbra by following the link:
- https://hostname:7071
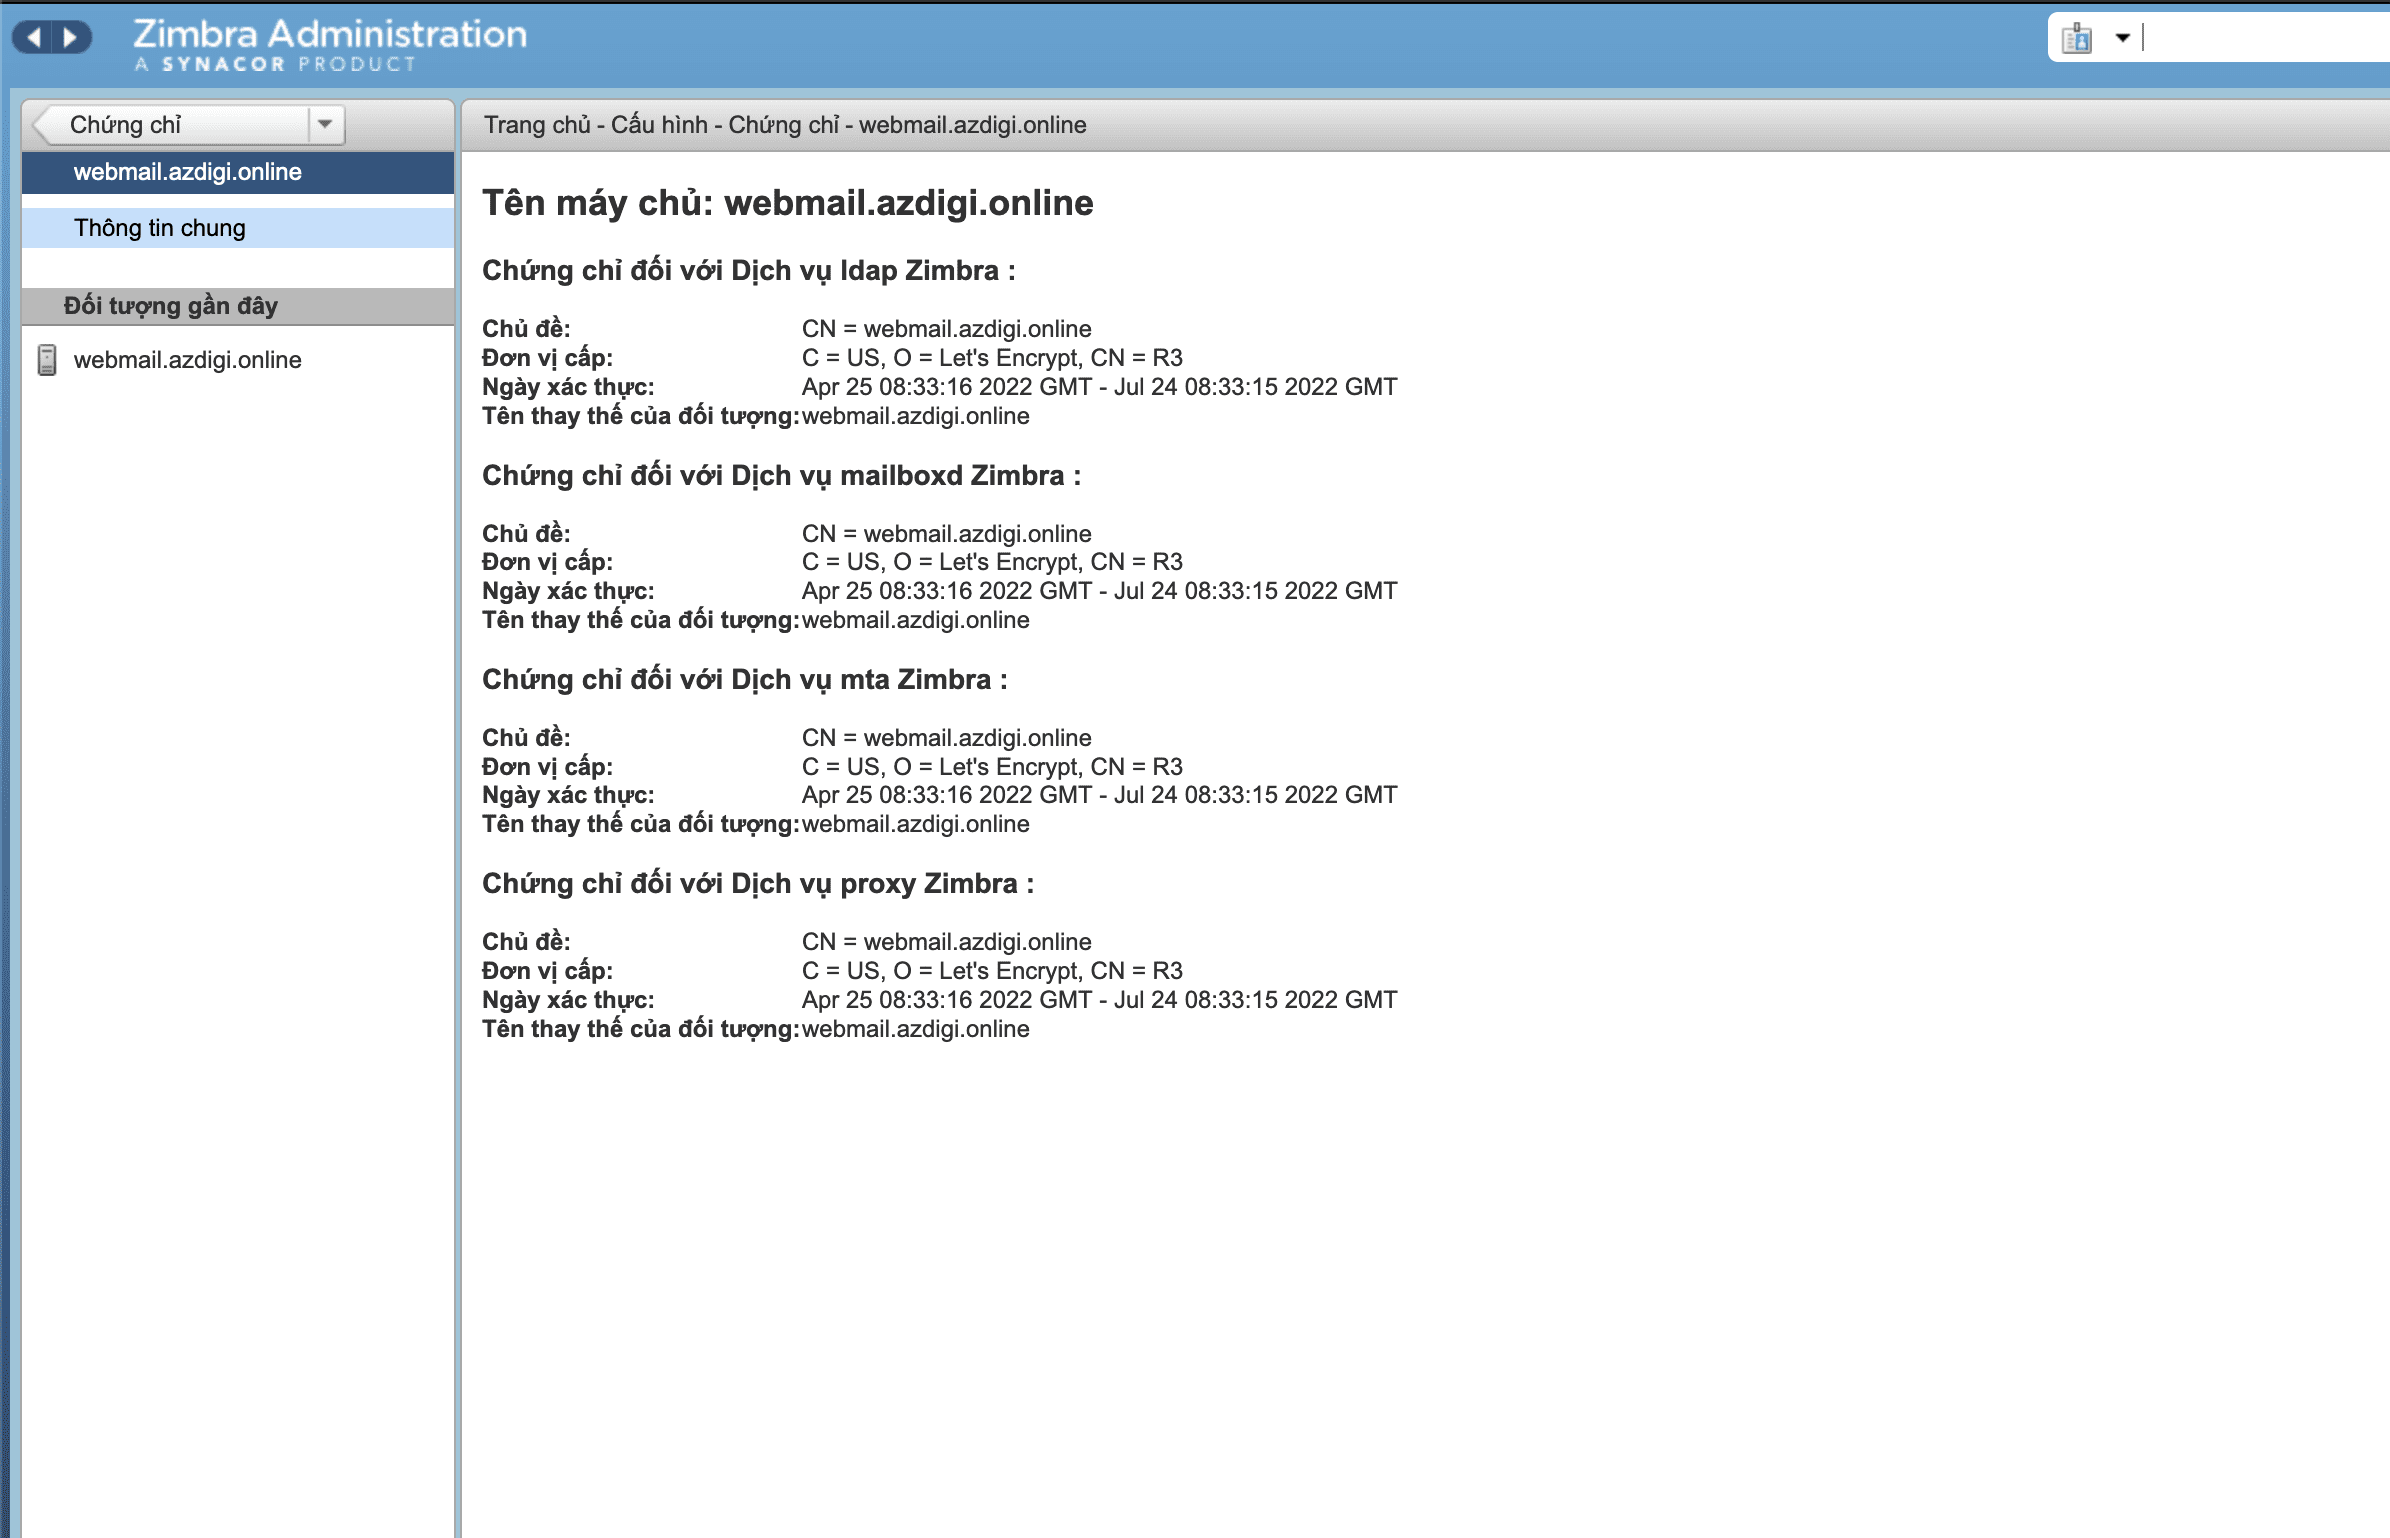
And go to the function cấu hình => chứng chỉ => right-click hostname => select Xem chứng chỉ.
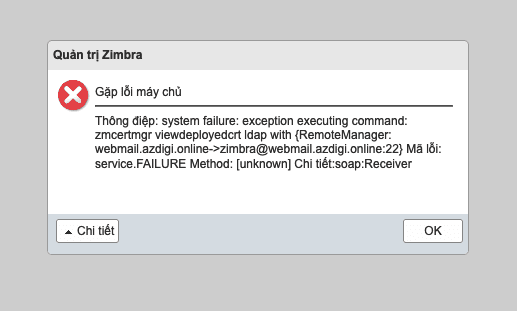
Note: If you do it and the system gives an error system failure: system failure: exception executing command, you can see the instructions to fix the error here.
Hopefully, this article will help you to set up an SSL certificate for the zimbra mail server service successfully and smoothly.
If you need assistance, you can contact support in the ways below:
- Hotline 247: 028 888 24768 (Ext 0)
- Ticket/Email: You use the email to register for the service and send it directly to: support@azdigi.com .
About the author

Thạch Phạm
Đồng sáng lập và Giám đốc điều hành của AZDIGI. Có hơn 15 năm kinh nghiệm trong phổ biến kiến thức liên quan đến WordPress tại thachpham.com, phát triển website và phát triển hệ thống.