
In this article, AZDIGI will guide you on how to install and use CSF on CyberPanel, we first need to find out what CSF is.
What is CSF?
CSF stands for “Config Server Firewall”, which is a Stateful Packet Inspection (SPI) firewall, security application and login and intrusion detection for Linux servers. Released for free to increase server security (VPS and Dedicated). CSF works based on iptables and ldf process to scan log files for signs of unusual attacks.
Functions of CSF
- Anti-DdoS of all kinds
- Anti Scan Port
- Prevent BruteForce Attacks on FTP server, web server, mail server, DirectAdmin, cPanel…
- Anti Syn Flood
- Anti Ping Flood
- Allow blocking access from 1 country by specifying ISO standard Country Code
- Support IPv6 and IPv4
- Allows temporary and permanent IP locking at the network layer
- Allows redirecting requests from blocked IPs to an html file to notify users that their IP is blocked…
How to install CSF
First, you access the Cyber Panel administration interface by following the link: https://IP:8090. For example, https://103.221.220.49:8090/
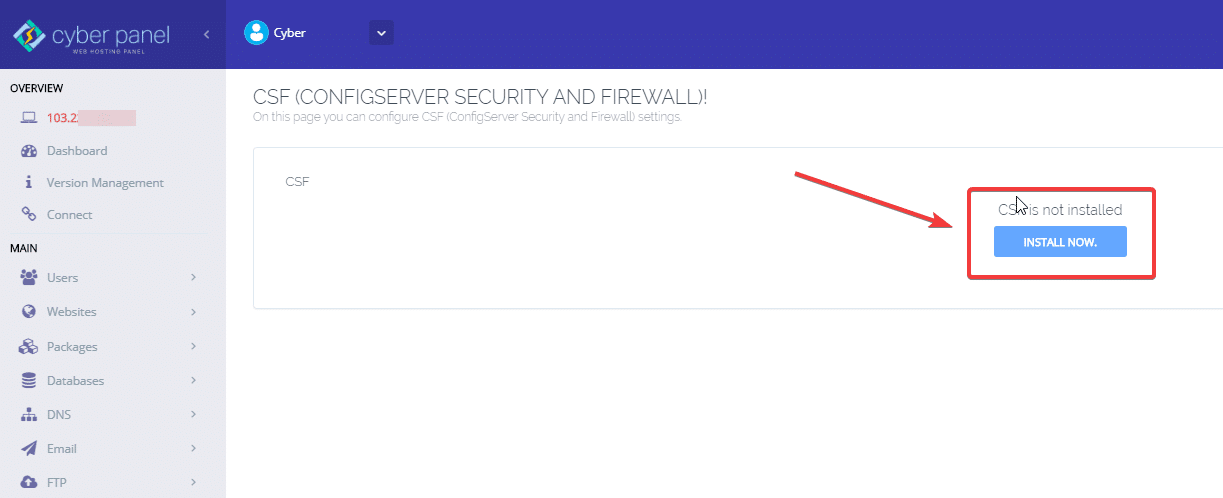
After successfully logging in with admin user rights, you can access => SECURITY => CSF
Next, click INSTALL NOW to proceed with the installation
The installation of CSF will take a few minutes, if successful, you will receive a message as shown below:
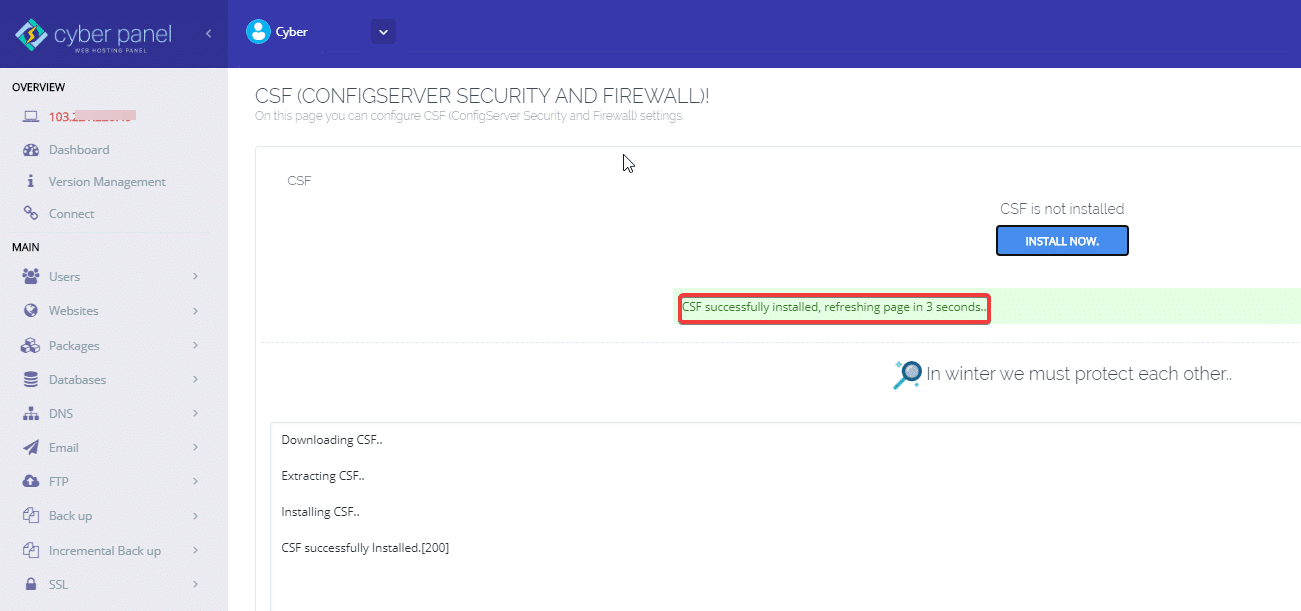
You press f5 to reload the page and the CSF interface will appear as follows:
- Remove CSF
- Firewall (this feature may or may not be enabled)
- Testing Mode
- TCP IN Ports
- TCP Out Ports
- UDP In Ports
- UDP Out Ports
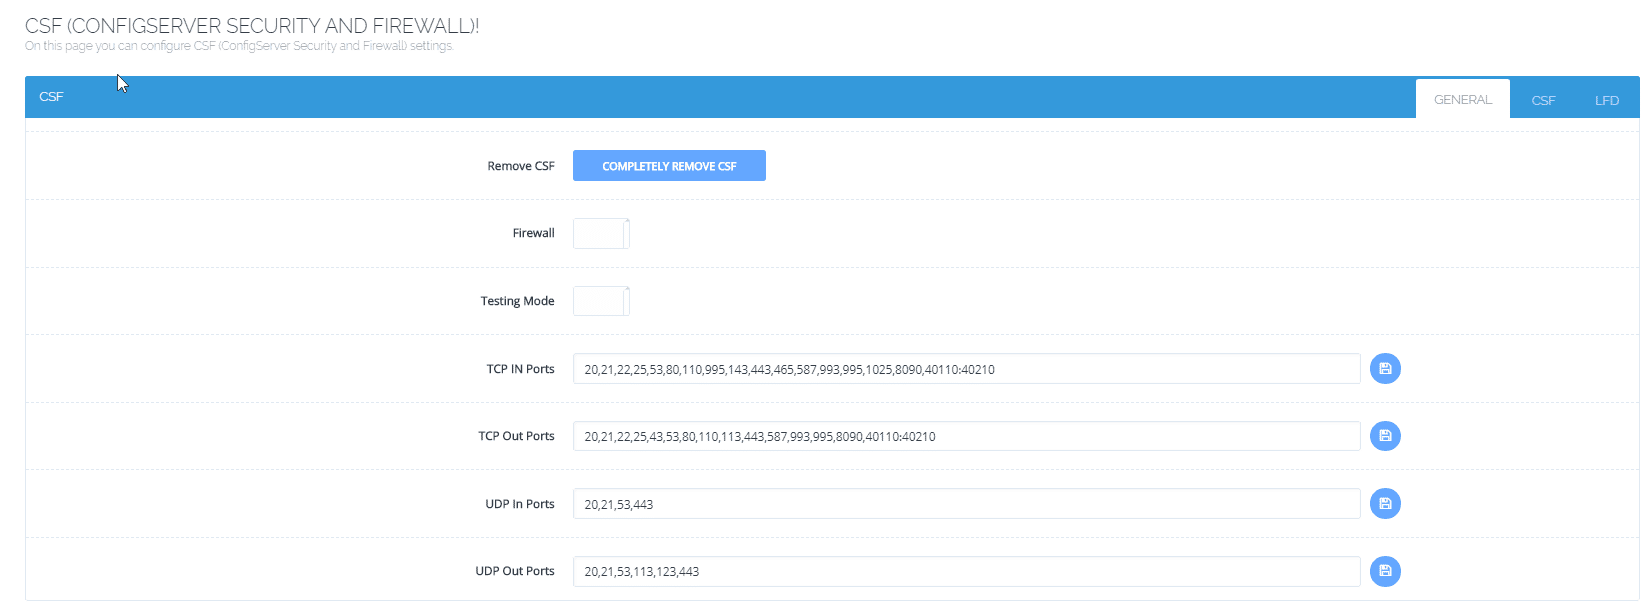
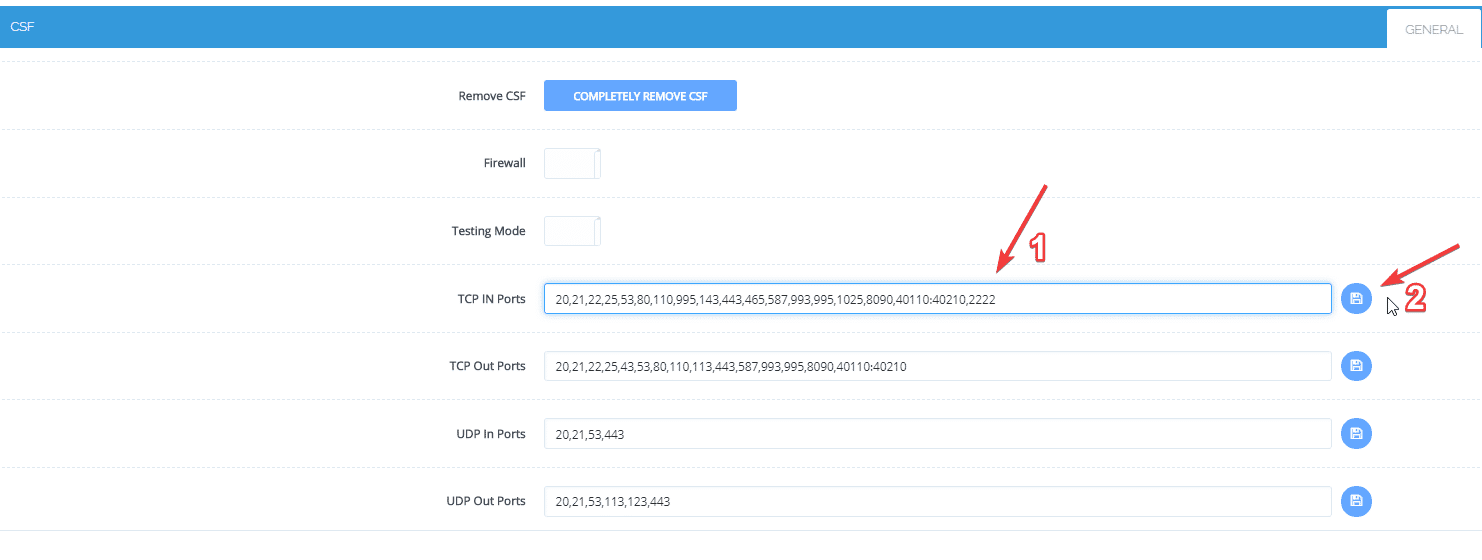
In the GENERAL tab, to add any port, you add a “,” and proceed to enter the new port to add (1), then click Save(2)
To delete a port, you select the port you need to delete => click Save (2)
As shown below, I have opened port 2222
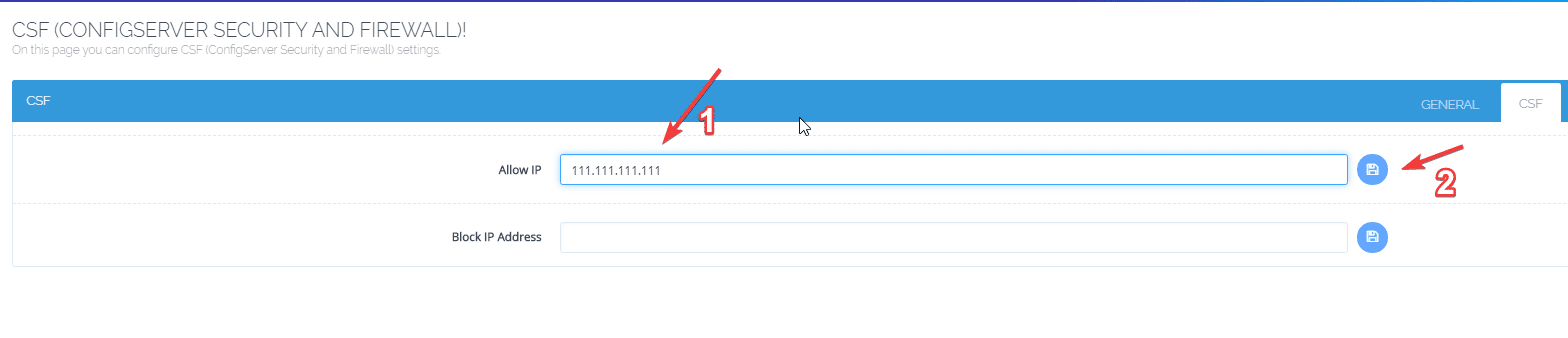
In the CSF tab, to allow or block any IP access, enter IP (1) => Save (2)
- Allow
- Block
So in this article, AZDIGI has shown you how to install and use the basic features of CSF for security on CyberPanel.
Wishing you success!
About the author

Thạch Phạm
Đồng sáng lập và Giám đốc điều hành của AZDIGI. Có hơn 15 năm kinh nghiệm trong phổ biến kiến thức liên quan đến WordPress tại thachpham.com, phát triển website và phát triển hệ thống.