How to install WordPress on HestiaCP. In this tutorial, AZDIGI will show you to install WordPress on HestiaCP automatically, similar to Softaculous with the Quick Install App.
I. OVERVIEW
WordPress is the most popular website source code in the world and currently accounts for 63.5% of worldwide (Updated September 3, 2020), you can see it directly by searching the keyword “WordPress market share” on Google.
Most other free controls support automatic WordPress installation, HestiaCP is no exception. With HestiaCP, you can completely install WordPress with just a few clicks. Follow the article and learn how to do it.
II. How to install WordPress on HestiaCP
To install WordPress on HestiaCP, you need to create Web and User first and then you do the following steps:
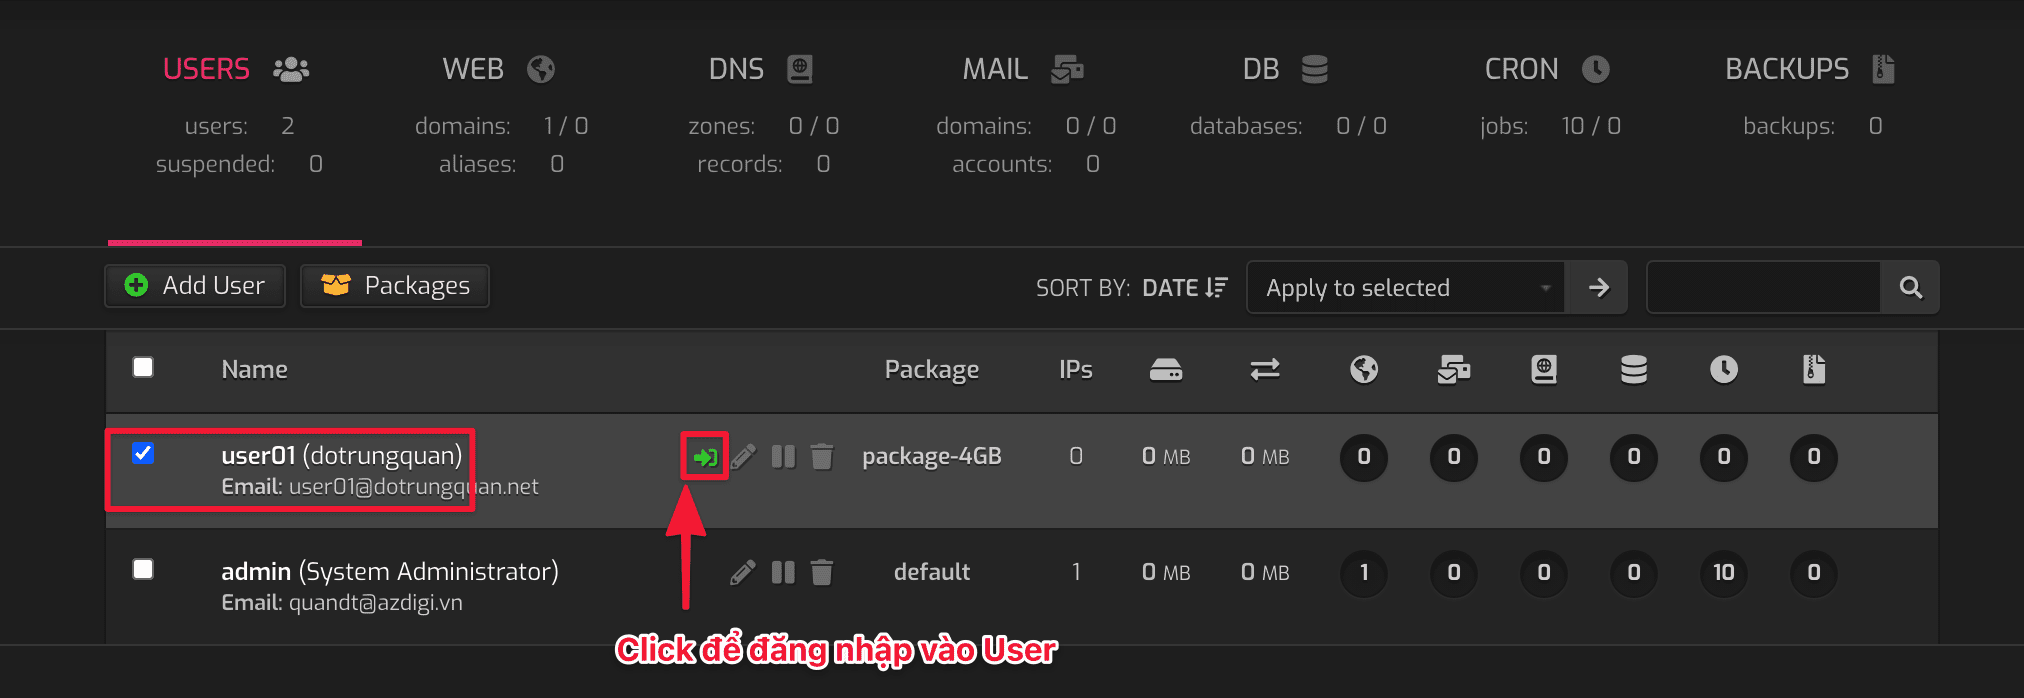
Step 1: Log in to HestiaCP in User
First, log in to the User to install WordPress. To log in, click on the => icon, as shown below. Or you can log in directly from https://my-ip:8083 with the user and password created earlier.

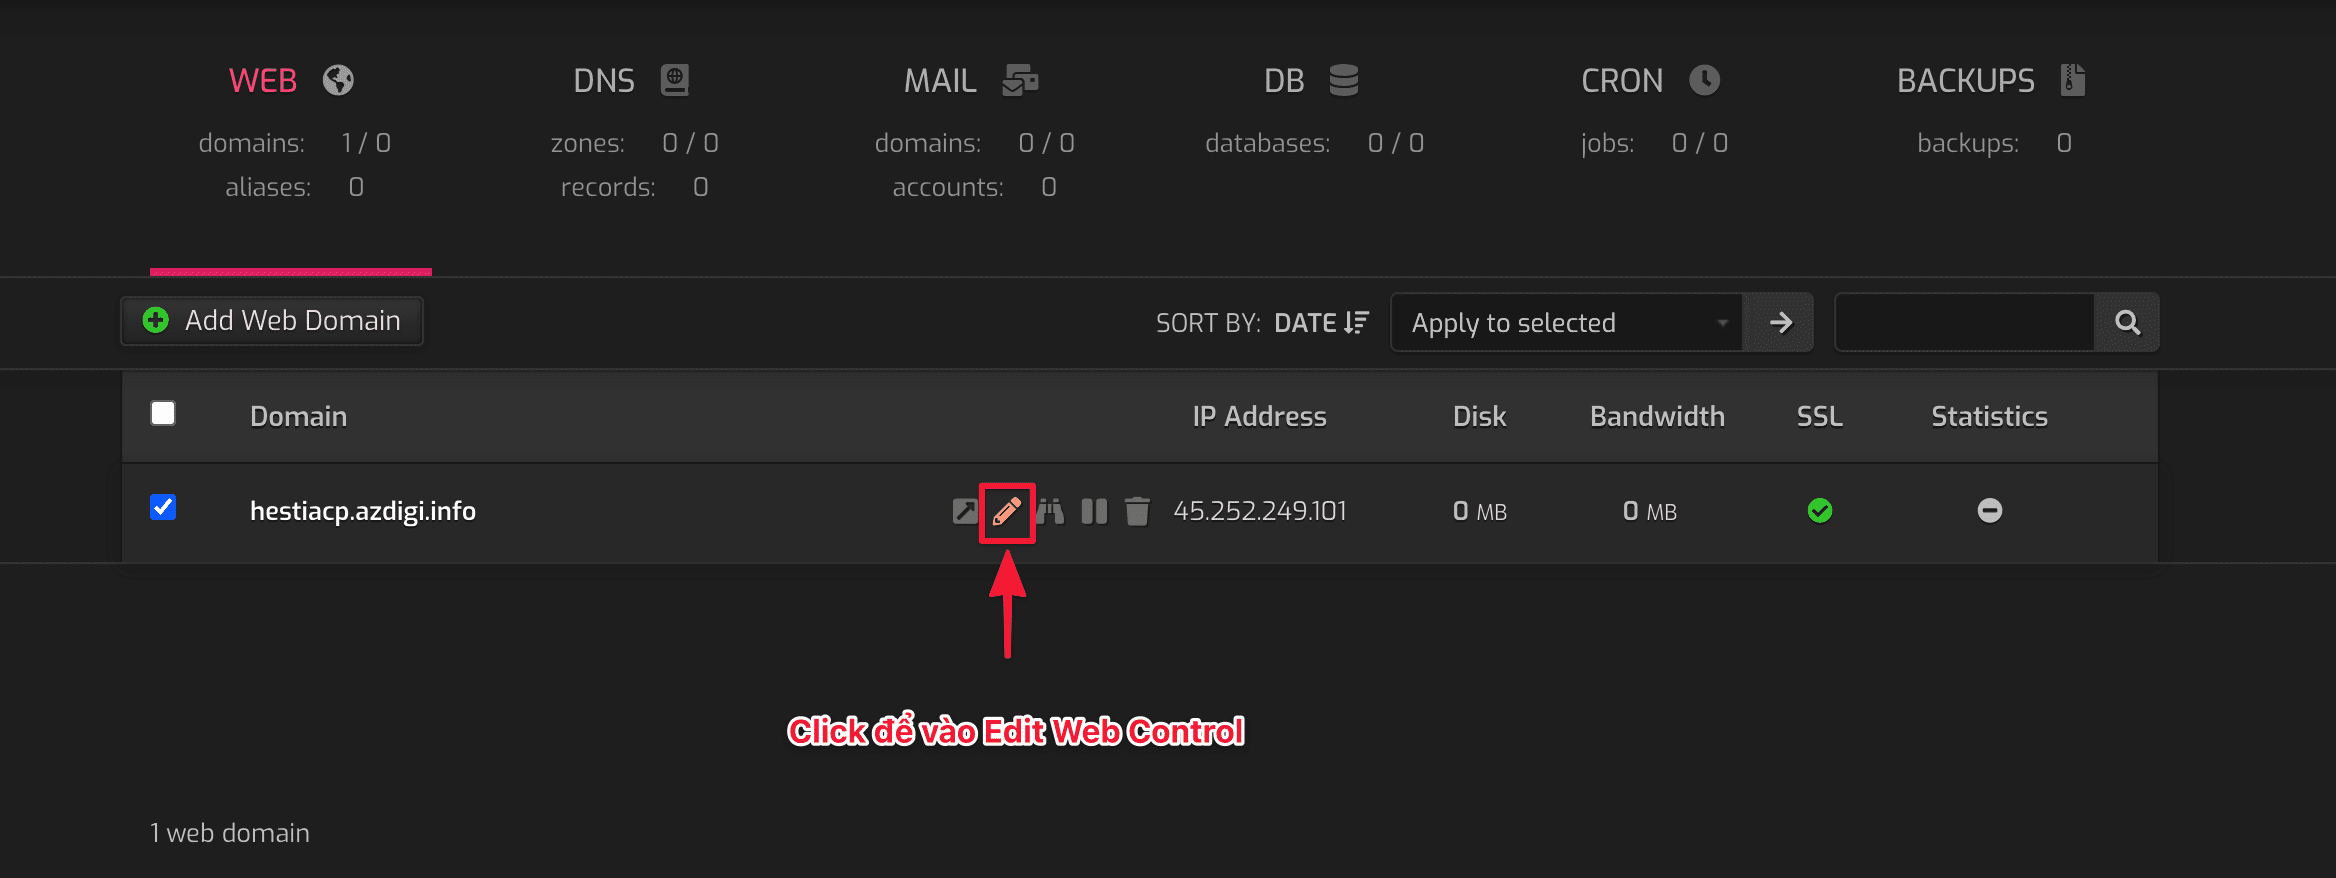
Step 2: Install the source code
After entering the User interface, click the pen icon to enter the Edit Web Control interface.
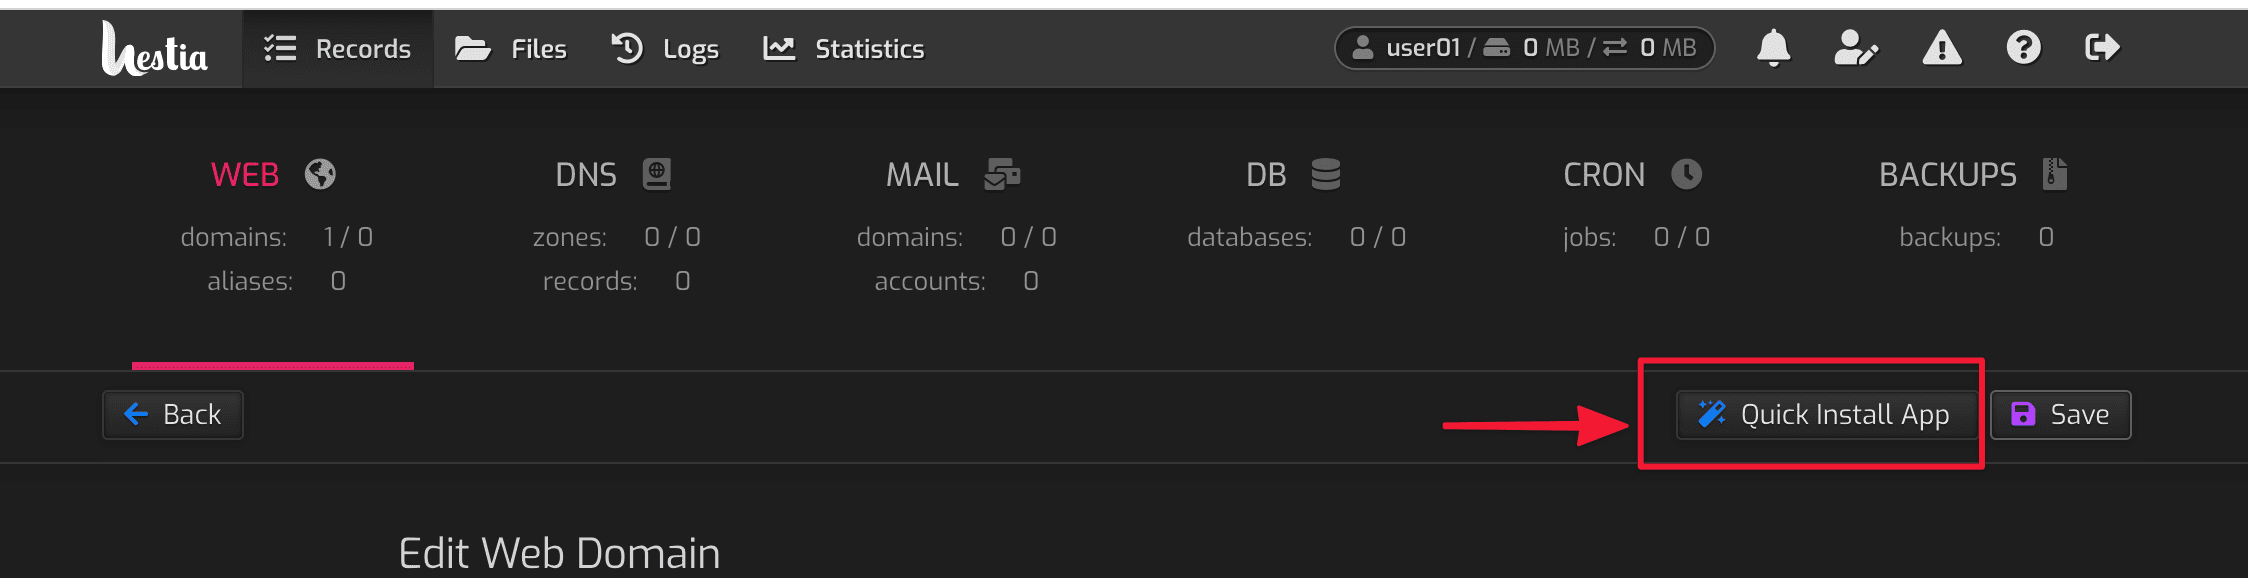
Next, click Quick Install App to go to the source code installation page.
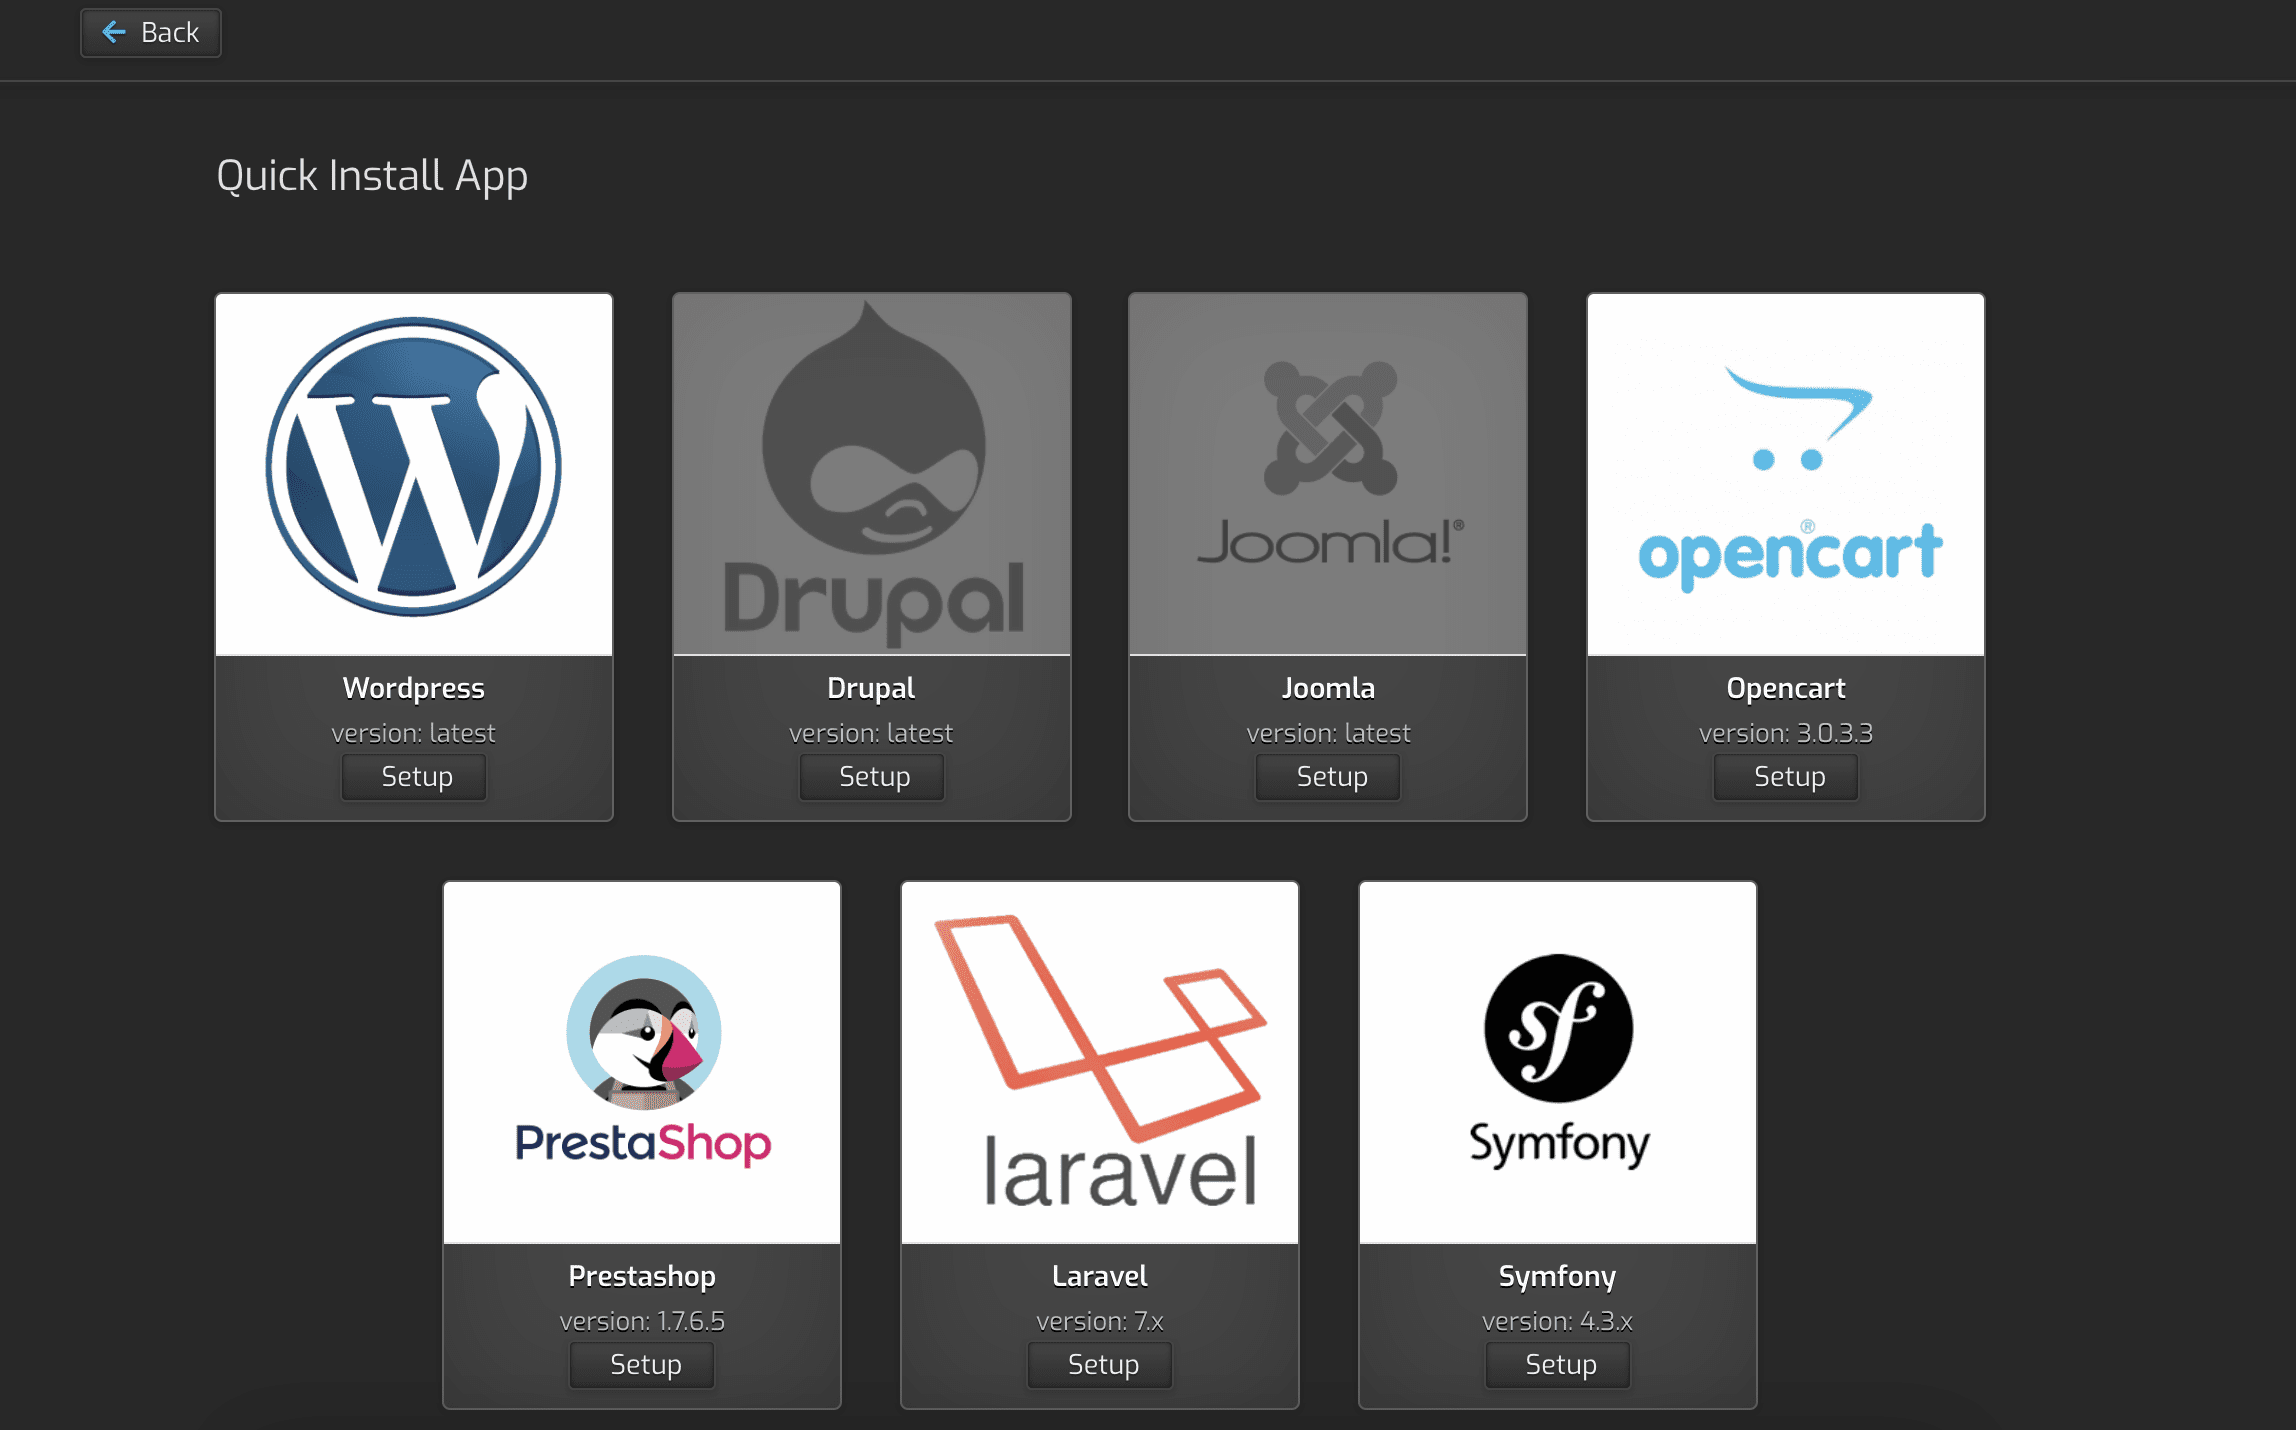
A free control but unbelievable, it supports almost full source code. Popular source codes are available such as WordPress, Drupal, Joomla, Opencart, PrestaShop, Laravel, Symfony.
You need to choose the corresponding source code to install, I will choose WordPress to make the source code for the website, so I click the SETUP button.
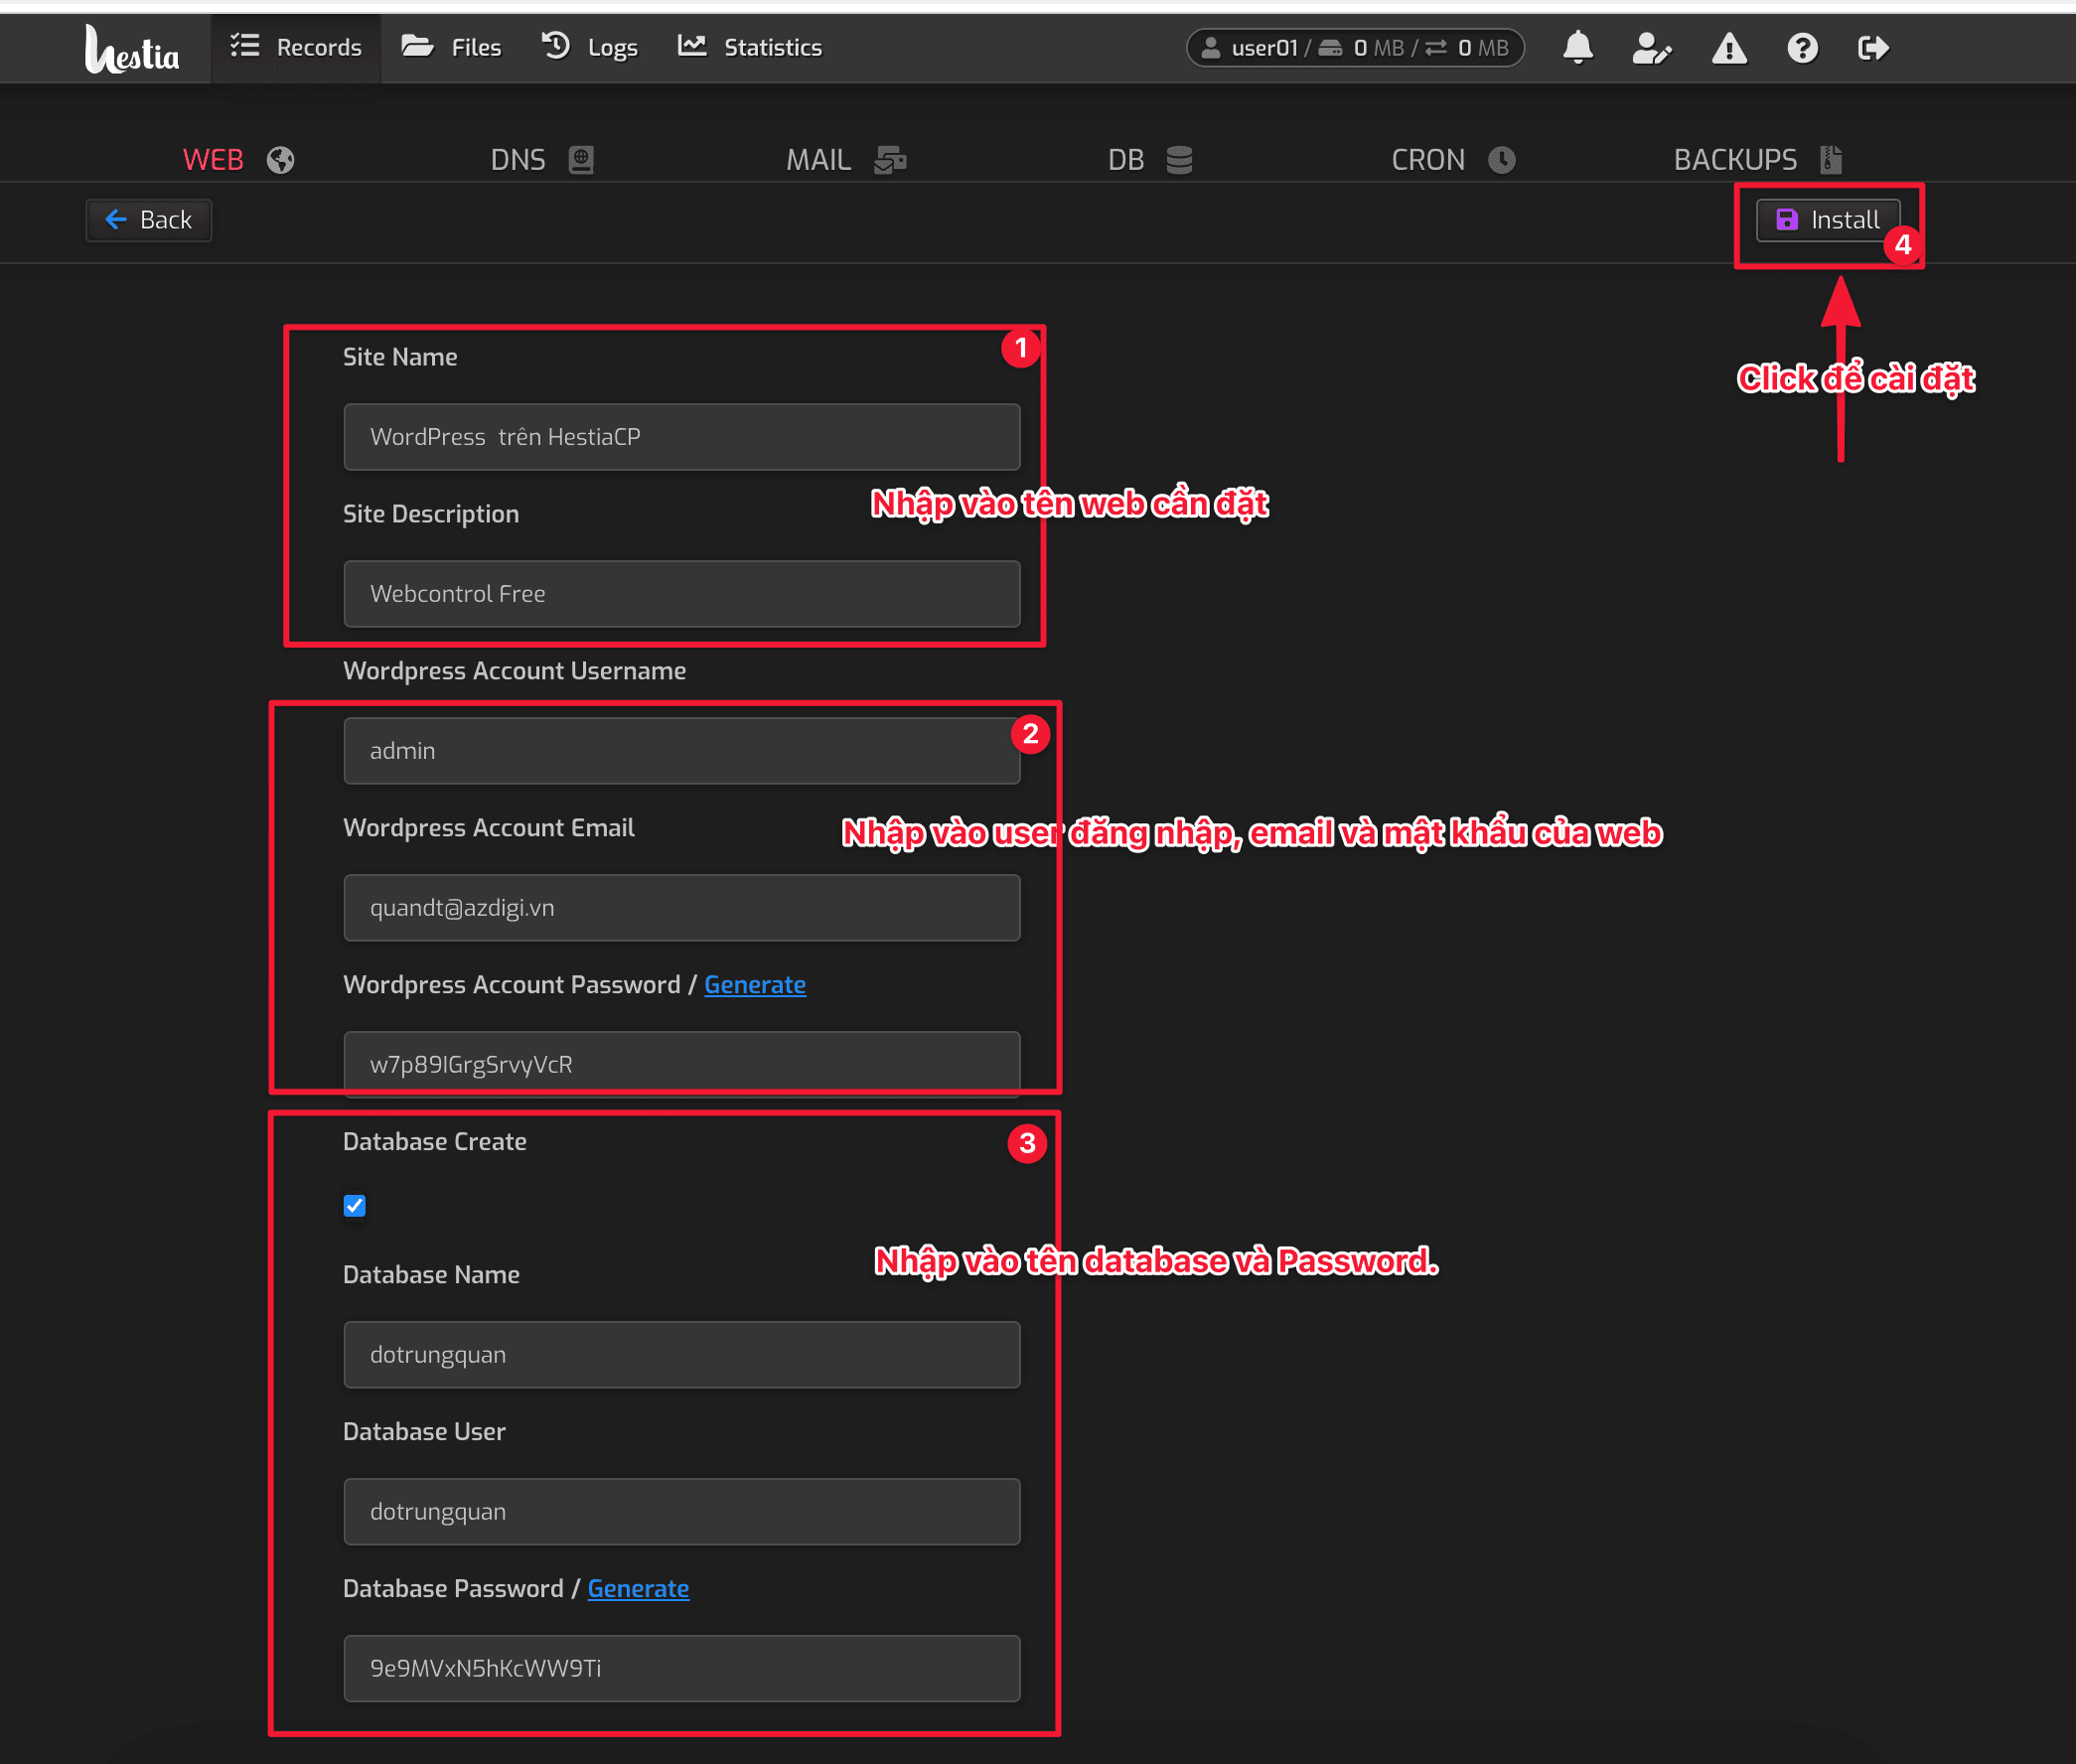
Next, in the website information setting interface, please enter all the following information:
- Site Name
- Site Description
- WordPress Account Username
- WordPress Account Email
- WordPress Account Password/Generate
- Database Create
- Database Name
- Database User
- Database Password/Generate
After entering all the information, click Install to install the source code. Control will automatically download the latest source code from the homepage and configure the Database for you. It only takes 1 minute to install and when it’s done, you’ll get the message “WordPress App was installed successfully!” => Now go to the website.
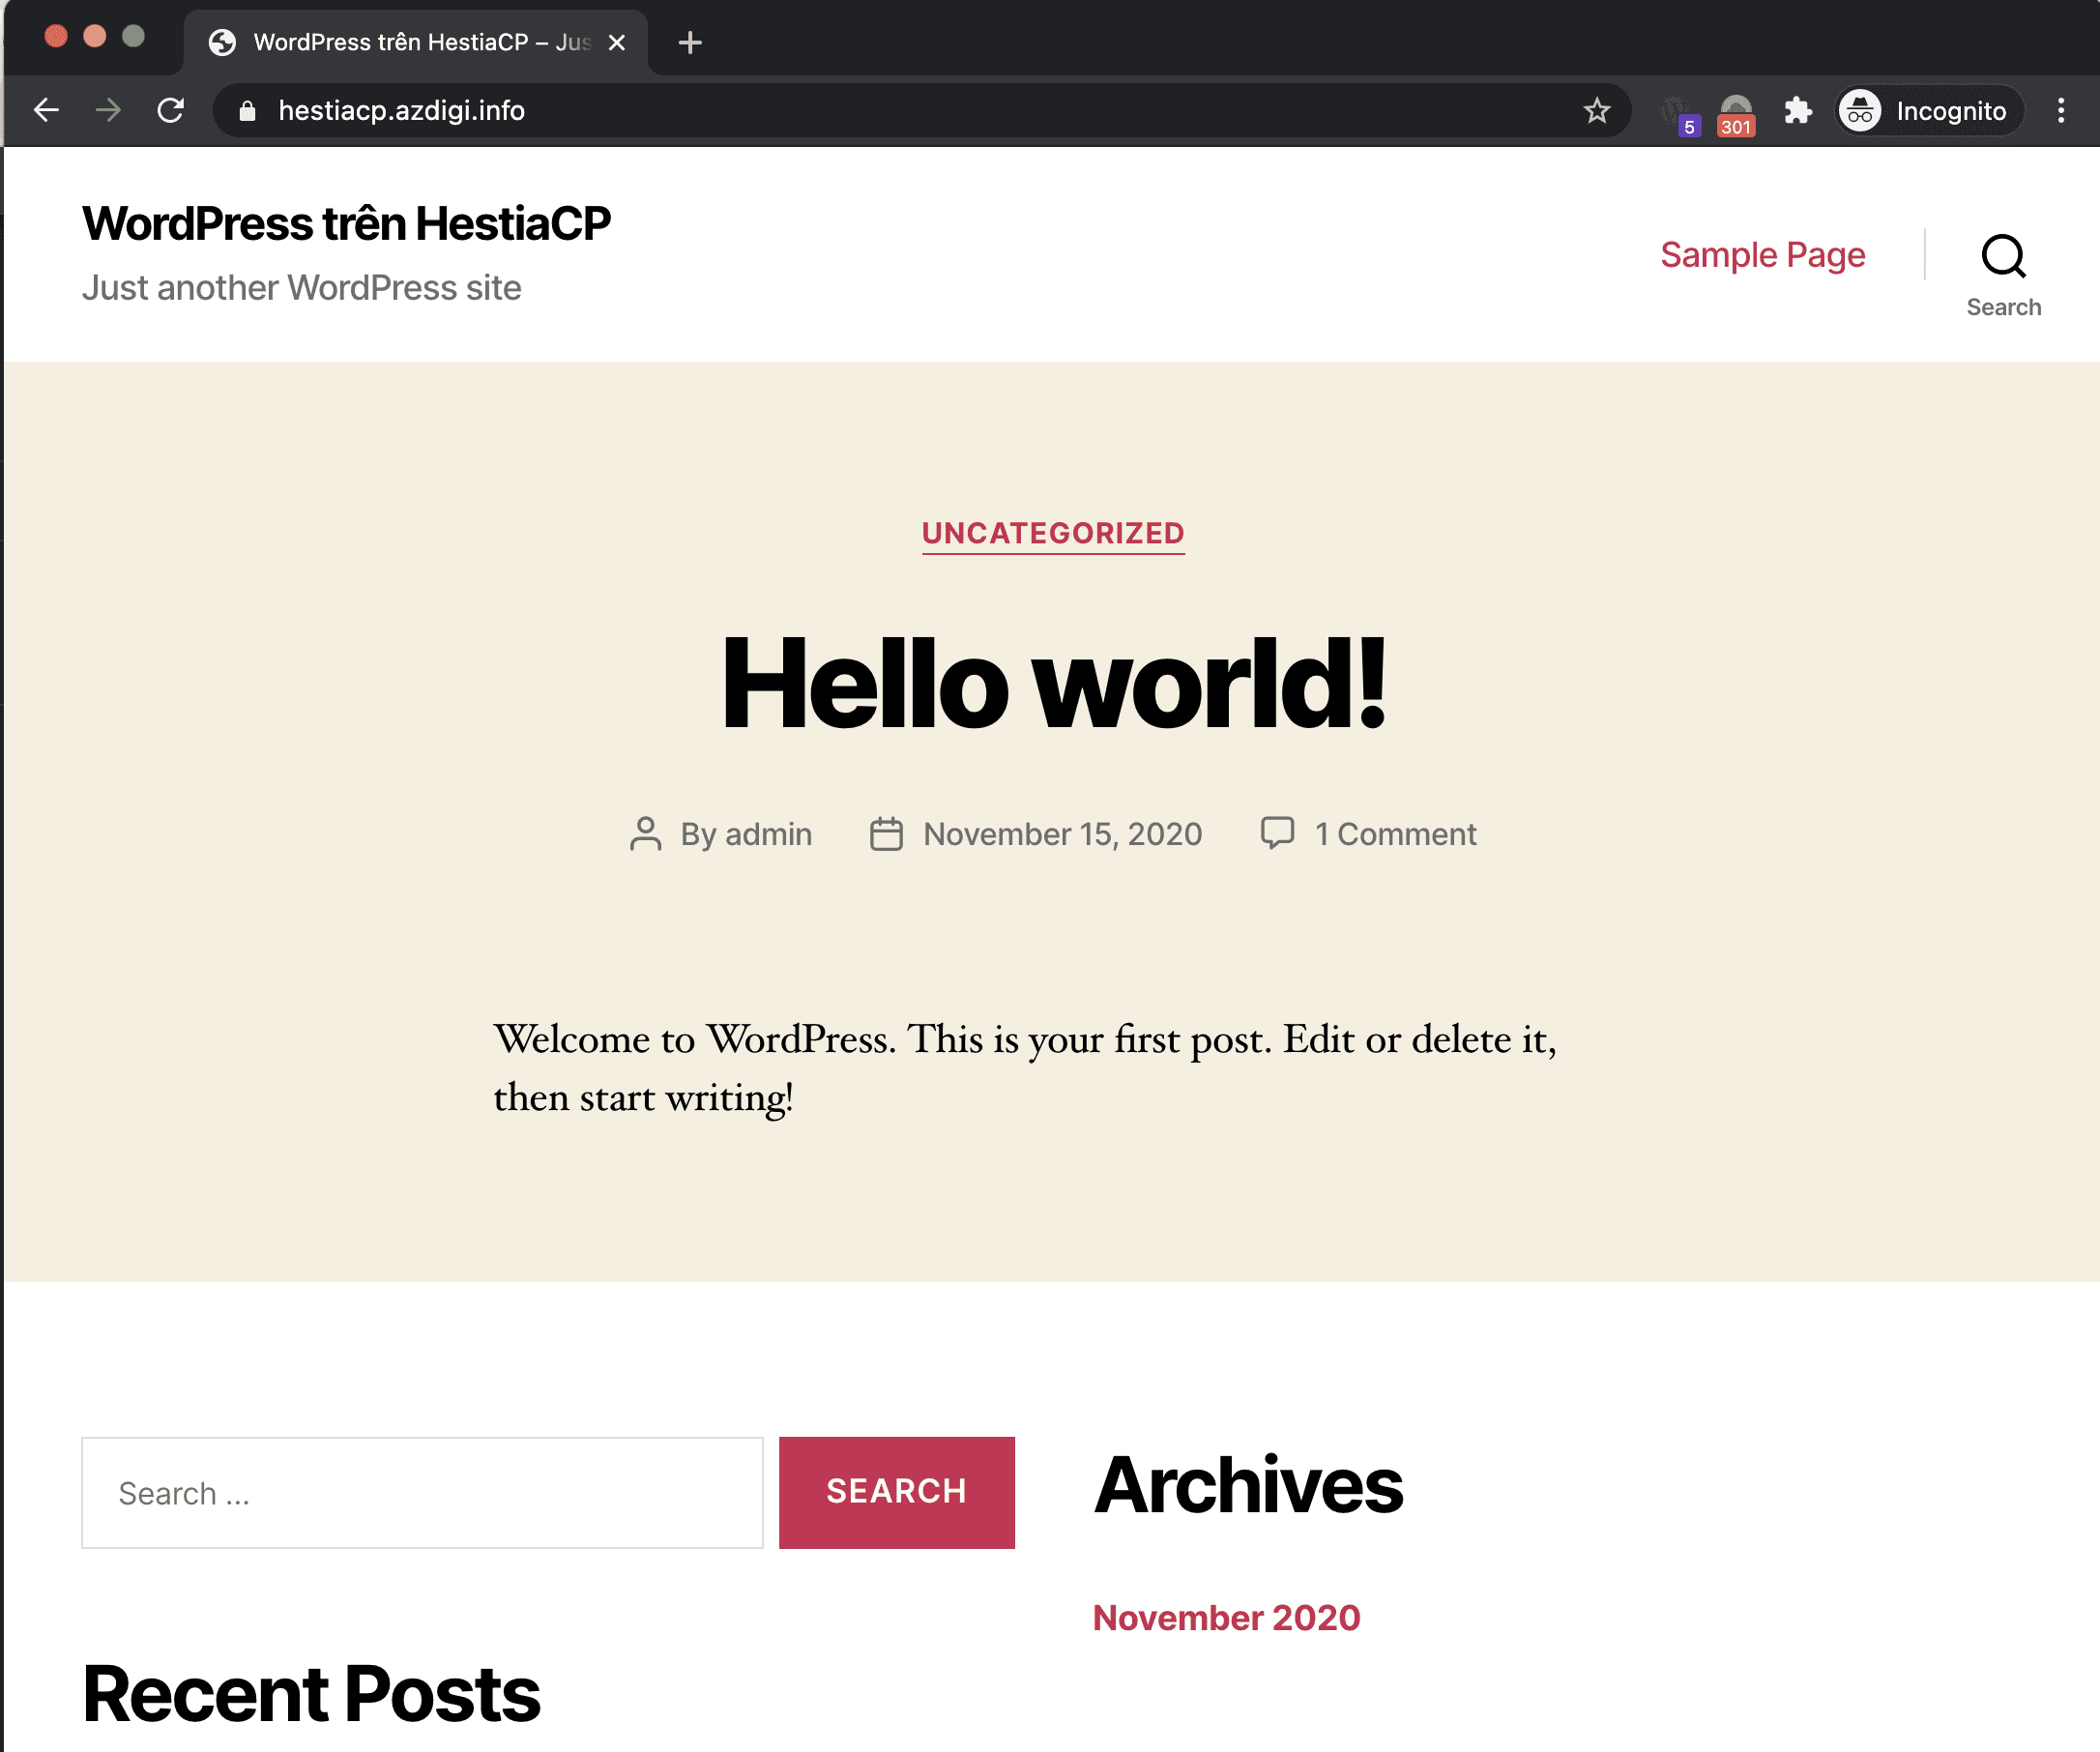
Here is my result. And as a result, a default WordPress website is installed. So now you can design your website.
III. SUMMARY
Hopefully, this tutorial will help you to install your WordPress website safely and quickly. I like this fork of VestaCP is HestiaCP, everything is done automatically and quickly.
About the author

Thạch Phạm
Đồng sáng lập và Giám đốc điều hành của AZDIGI. Có hơn 15 năm kinh nghiệm trong phổ biến kiến thức liên quan đến WordPress tại thachpham.com, phát triển website và phát triển hệ thống.