Changing the SSL certificate issued on ACME with 3 steps.
Introduction
What is ACME?
ACME stand for Automatic Certificate Management Environment, is a communication protocol for automating the exchange between certificate authorities and web server owners.
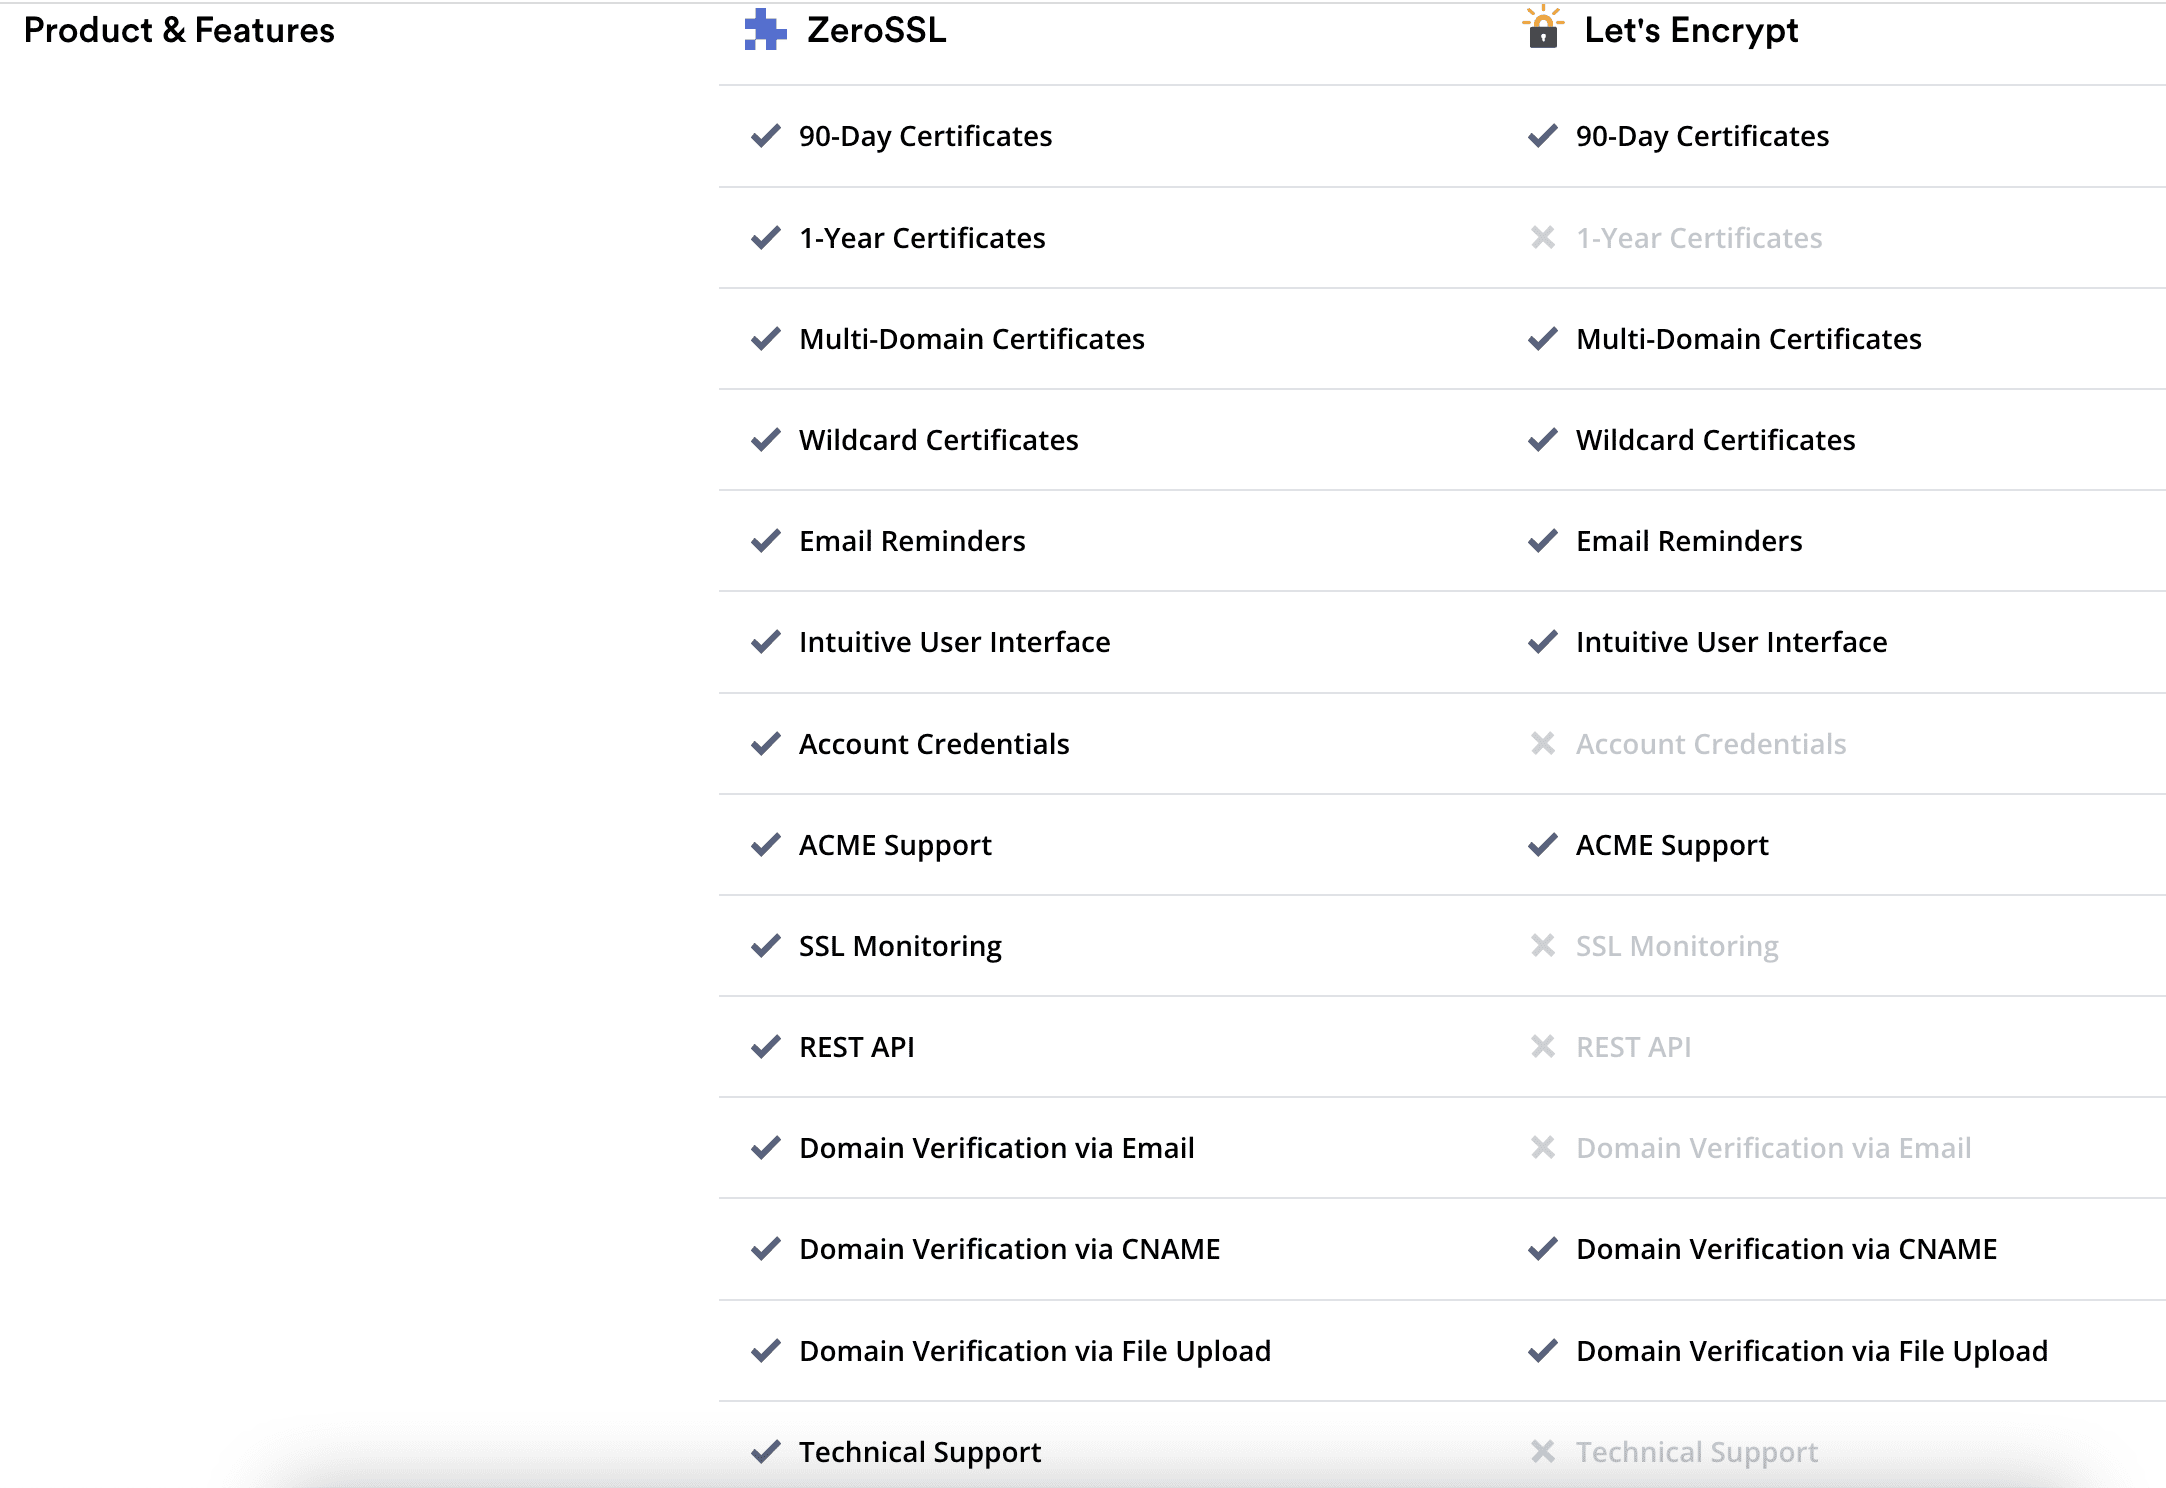
Previously by default, ACME would use Let’s Encrypt’s certificate issuance system, but at the time of this writing, ACME had switched to using ZeroSSL instead of Let’s Encrypt, and why did they change the issuance system like that? Then you can see the different benefits that ZeroSSL and Let’s Encrypt bring to users below.
Compared to Let’s Encrypt, ZeroSSL is almost superior in every way. But some users report that ZeroSSL certificates are often unstable, error-prone or take longer to issue than Let’s Encrypt. Therefore, they still want to use Let’s Encrypt but do not know how to get ACME to reissue this type of certificate. If you are also looking for the answer to the above problem, this article is your solution.
Implementation Guide
Step 1: Install ACME
If ACME is not installed on your server, please install it with the following command:
Note: Replace kiendt@azdigi.com with your email.
- Method 1: Install Online
curl https://get.acme.sh | sh -s email=kiendt@azdigi.com

- Method 2: Install from GIT
git clone https://github.com/acmesh-official/acme.sh.git
cd ./acme.sh
./acme.sh --install -m kiendt@azdigi.com
After the installation is complete, create an Alias and add the content to the /root/.bashrc path with the command below:
echo "alias acme.sh='~/.acme.sh/acme.sh'" >> /root/.bashrc
source /root/.bashrc
Now check if ACME is installed successfully with the following command:
acme.sh --version
If the results are displayed below, the installation is successful.
[root@sv ~]# acme.sh --version
https://github.com/acmesh-official/acme.sh
v3.0.5
Step 2: Change the issuing certificate type
I mentioned above that ACME now uses ZeroSSL as the default certificate issuance system, so if you don’t want to use ZeroSSL and want to set Let’s Encrypt as the default issuing system, you can be done as follows:
- Find the acme.sh file
Suppose you have not determined the path of the acme.sh file, you can use the command below to find it quickly.
find / -name 'acme.sh'
- Backup and edit acme.sh file content
Before editing, you need to back up a copy for yourself in case you do something wrong.
cp /root/.acme.sh/acme.sh /root/.acme.sh/acme.sh.bak
vi /root/.acme.sh/acme.sh
Next, find the value below and replace it with the type of certificate you want to issue.
DEFAULT_CA=$If you need to use Let’s Encrypt, enter CA_LETSENCRYPT_V2
If you need to use ZeroSSL, enter CA_ZEROSSL
For example, by default, it will be set to CA_ZEROSSL, and I need to switch to Let’s Encrypt, then I will fill in the content as shown below:
If you don’t want to fix it manually like above, you can quickly set it with the command below:
acme.sh --set-default-ca --server letsencrypt

Step 3: Install the certificate and check it works
After you have set the type of certificate to use, now proceed to install SSL for the website according to the command below:
Note: Replace sitewp.tk with your domain name.
acme.sh --issue -d sitewp.tk -d www.sitewp.tk -w /www/wwwroot/sitewp.tk --force
In there:
- -d: To install SSL for a domain, you just need to add -d before the domain name needs to be installed.
- -w : You add -w before the path containing the website’s source code to be installed.
As you can see, the installation process has started and ACME is connecting to the Let’s Encrypt server instead of ZeroSSL as default.

After successful installation, you will receive the certificate files at the specific link below, you just need to use the contents of 2 files *.key and fullchain.cer to install SSL for the website.

After importing the certificate, you can visit the website or check directly through the online page below:
Thus, AZDIGI showed you how to change the certificate issuance system between Let’s Encrypt and ZeroSSL on Acme.sh. Hopefully, this article will help you easily manage and set up SSL certificates on your server. Wishing you success!
You might also like
About the author

Thạch Phạm
Đồng sáng lập và Giám đốc điều hành của AZDIGI. Có hơn 15 năm kinh nghiệm trong phổ biến kiến thức liên quan đến WordPress tại thachpham.com, phát triển website và phát triển hệ thống.