Nội dung
Generate CSR on Linux using OpenSSL in 4 easy steps.
Introduction
In this article, AZDIGI will show you how to generate a CSR to serve the needs of installing free and paid SSL on a Linux server, please see the specific steps below.
Implementation Guide
Step 1: SSH into your Linux server
To generate CSR on Linux, we first need to SSH or access your VPS/server as root. If you don’t know how to SSH into your VPS/Server, you can refer to the following tutorial:
After successfully SSH, we continue with step 2 to continue the configuration.
Step 2: Check and install OpenSSL
First, use the command below to check if OpenSSL is installed on your server.
rpm -qa | grep -i openssl
If the results show the content below, your server has OpenSSL installed.

Conversely, if the system doesn’t display anything, it means that OpenSSL is not installed and you need to install it with the following command:
- CentOS/RedHat
yum install -y openssl openssl-devel openssl-dev
- Debian/Ubuntu
apt-get install -y openssl
Step 3: Create a folder containing the private key and public key (CSR)
Before going into creating the private key and public key, you need to create a folder containing them, you can create and save them in an easy-to-remember place.
- Create a folder containing the private key
mkdir /usr/local/ssl
mkdir /usr/local/ssl/certificate
- Initialize private key file (replace thegioibecon = file name to set)
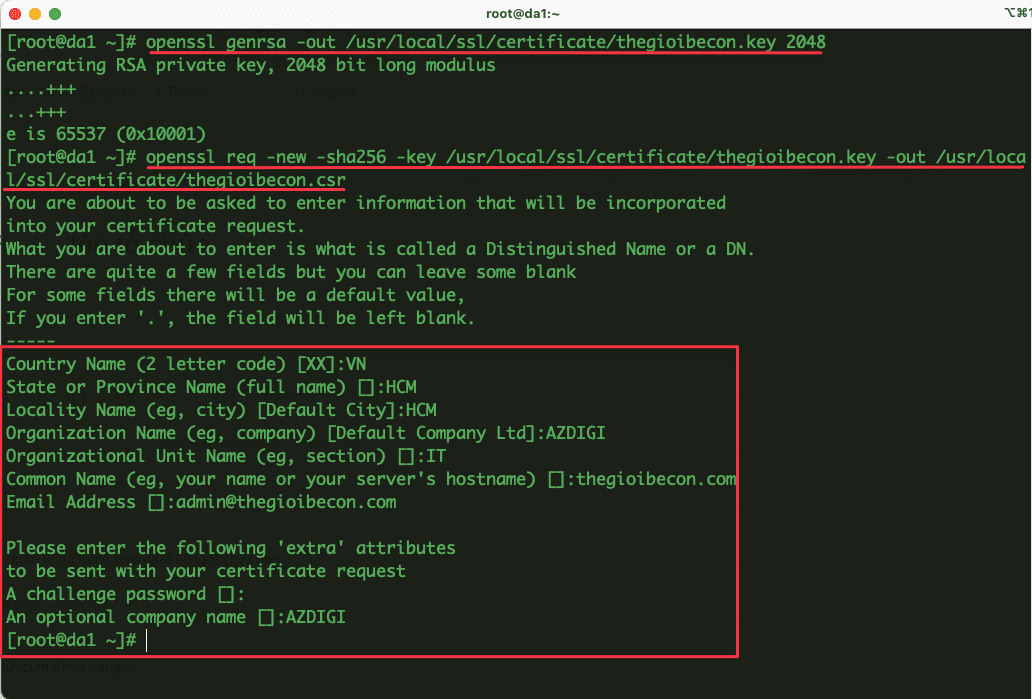
openssl genrsa -out /usr/local/ssl/certificate/thegioibecon.key 2048
- Initialize CSR with the newly created private key input (replace thegioibecon = file name to set)
openssl req -new -sha256 -key /usr/local/ssl/certificate/thegioibecon.key -out /usr/local/ssl/certificate/thegioibecon.csr
Next, you will need to enter the necessary information as follows:
- Country code: Enter VN in capital letters
- State: Enter Hanoi or Ho Chi Minh
- Locality: Enter Hanoi or Ho Chi Minh
- Company (or Organization): Enter the company name in English, just like in the BUSINESS license
- Organization Unit: Enter IT Department
- Common name: Enter the domain you want to install SSL (important)

After creating, you need to proceed to store these 2 files carefully to use in setting up SSL later.
Step 4: Check the generated CSR
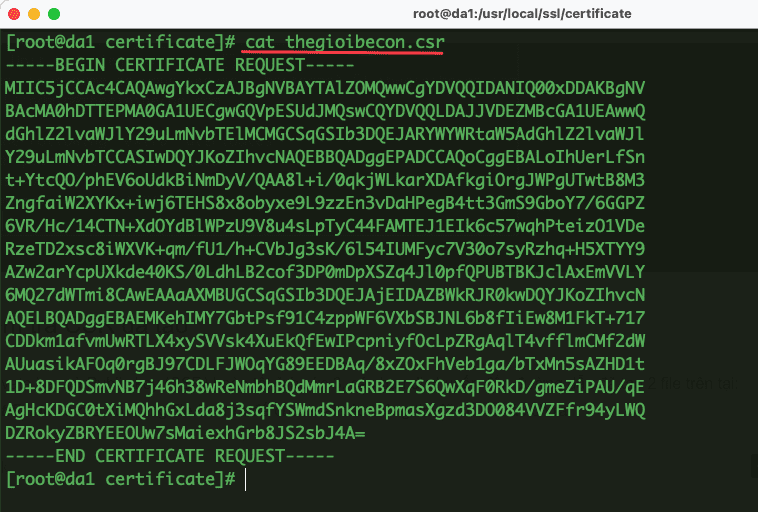
After creating the Private key and Public key (CSR) completed in step 3, you moved to the path created by the 2 files above at: /usr/local/ssl/certificate and opened the content of the *.csr file to check if the information is correct.
Here I open a file named thegioibecon.csr, this is my CSR file.

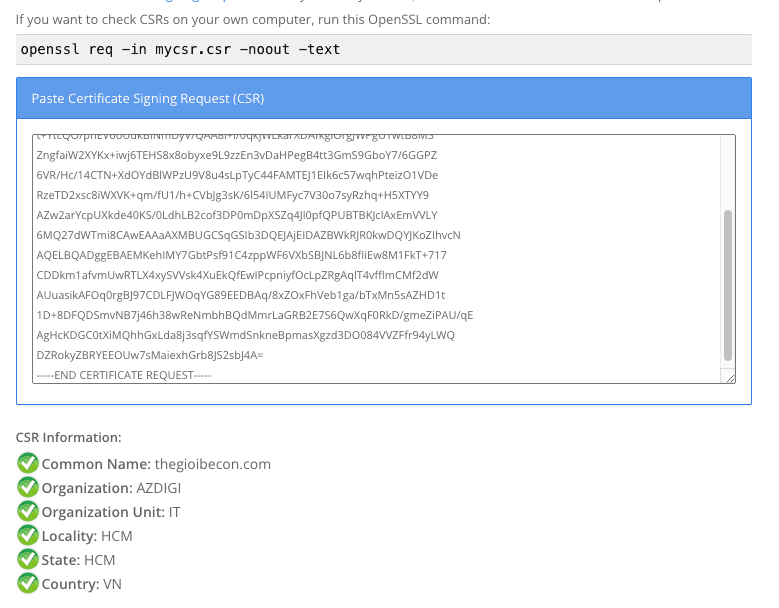
Now you can access some online CSR check pages below and paste the content of the CSR file to check the information.
– SSLShopper CSR Decoder
– CSR Decoder

If the information is correct, you can send this CSR content to the unit you bought the SSL from to get the Certificate.
So in this article, AZDIGI showed you how to create a Private Key and CSR on Linux. If you find this article useful, don’t forget to share it widely!
You can refer to other instructions at the link below:
If you need assistance, you can contact support in the ways below:
- Hotline 247: 028 888 24768 (Ext 0)
- Ticket/Email: You use the email to register for the service and send it directly to: support@azdigi.com .

