
What is Almalinux?
AlmaLinux is an open-source Linux operating system based on CentOS source code. It was born as a community and business response following CentOS Linux’s decision to change its development strategy, moving from a Red Hat Enterprise Linux (RHEL) extension project to CentOS Stream.
The launch of AlmaLinux aims to provide a stable and RHEL-compatible option for the community and businesses, keeping the traditional development model of CentOS intact.
Here are some key points about AlmaLinux:
- RHEL Compatibility Targets:
- AlmaLinux is designed to be fully compatible with RHEL. This means that applications and services you deploy on AlmaLinux can be migrated to RHEL without major problems.
- Long Term Support:
- Like CentOS before it, AlmaLinux also promises long-term support, similar to RHEL’s support cycle.
- Development model:
- AlmaLinux retains the traditional development model, providing stable and secure updates.
- Free and Expandable:
- AlmaLinux is an open source project, free to use and develop. Anyone can download and use this operating system without paying any cost.
- Support from the Community and Businesses:
- AlmaLinux receives widespread support from the user and business community, mainly from those who have used CentOS before.
With the arrival of AlmaLinux, users and businesses have another option to deploy a stable and RHEL-compatible Linux operating system without having to worry about changing development strategies.
Download the AlmaLinux ISO file at : https://mirrors.almalinux.org/isos.html
Steps to install Almalinux
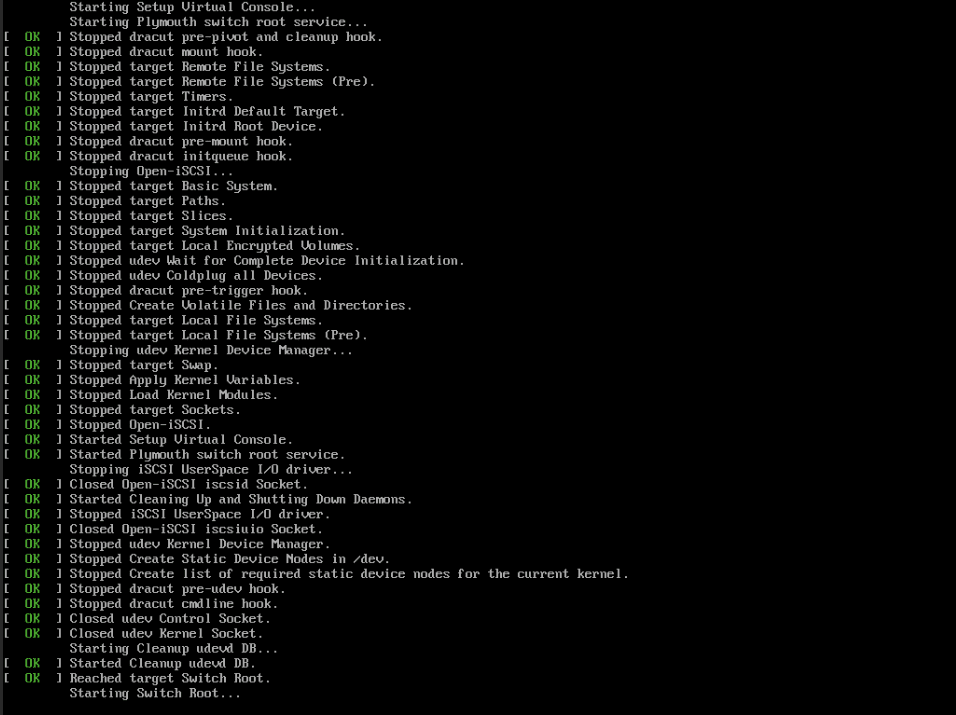
Step 1: Boot into ISO
Immediately after booting, a startup message will appear as shown. Just let the system initialize
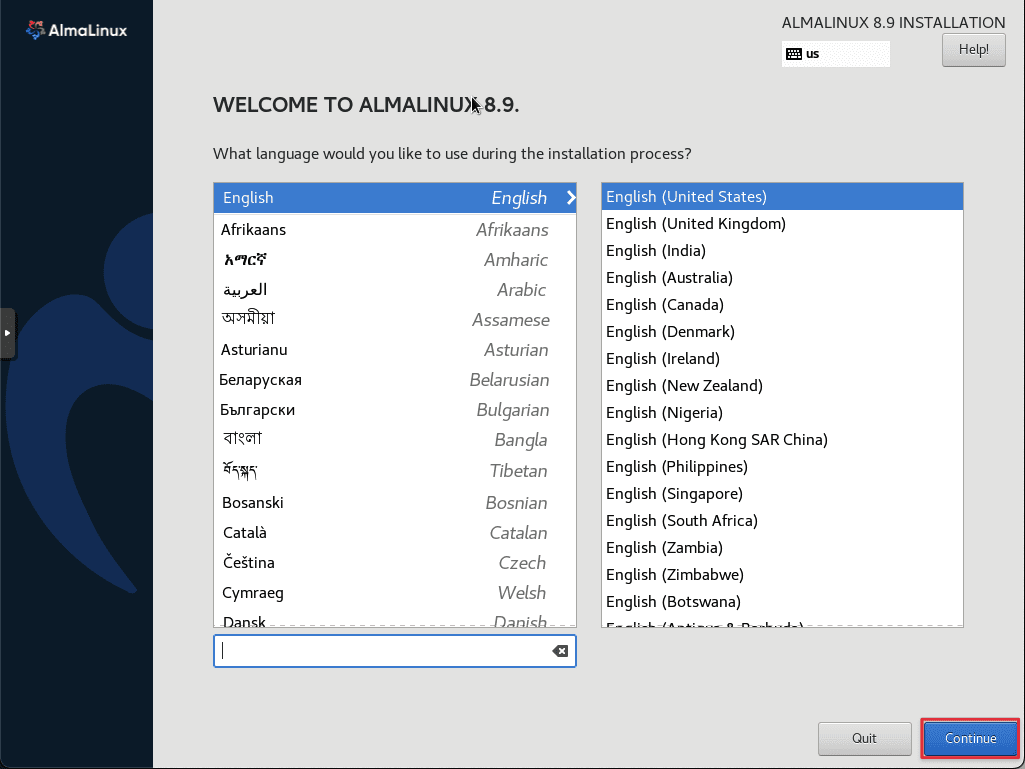
Step 2: Set up AlmaLinux
When the system is initialized, the AlmaLinux window will appear as shown. Select your preferred installation language and click the button Continue.
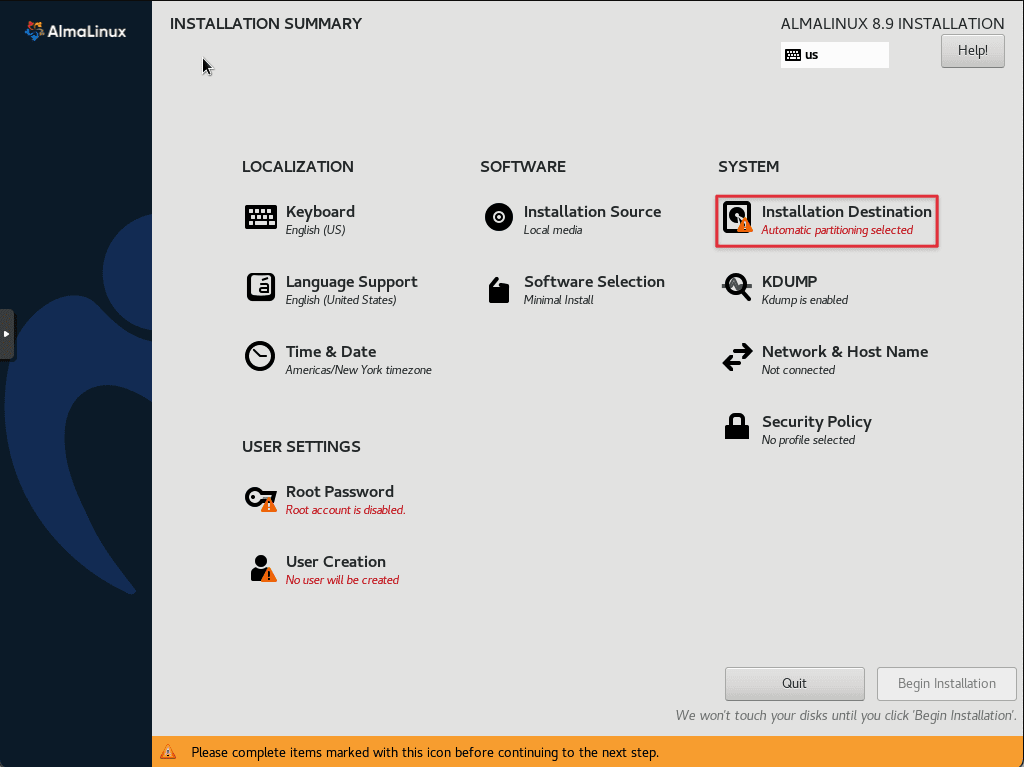
In the next step, you will receive a settings summary presenting a list of settings that need to be configured before continuing. We will start by configuring 4 important settings which are:
- Partitioning – Installation destination
- Network and hostname
- User Settings
- Software Selection
Step 3: Set up the drive
Here you clickInstallation Destination to begin .
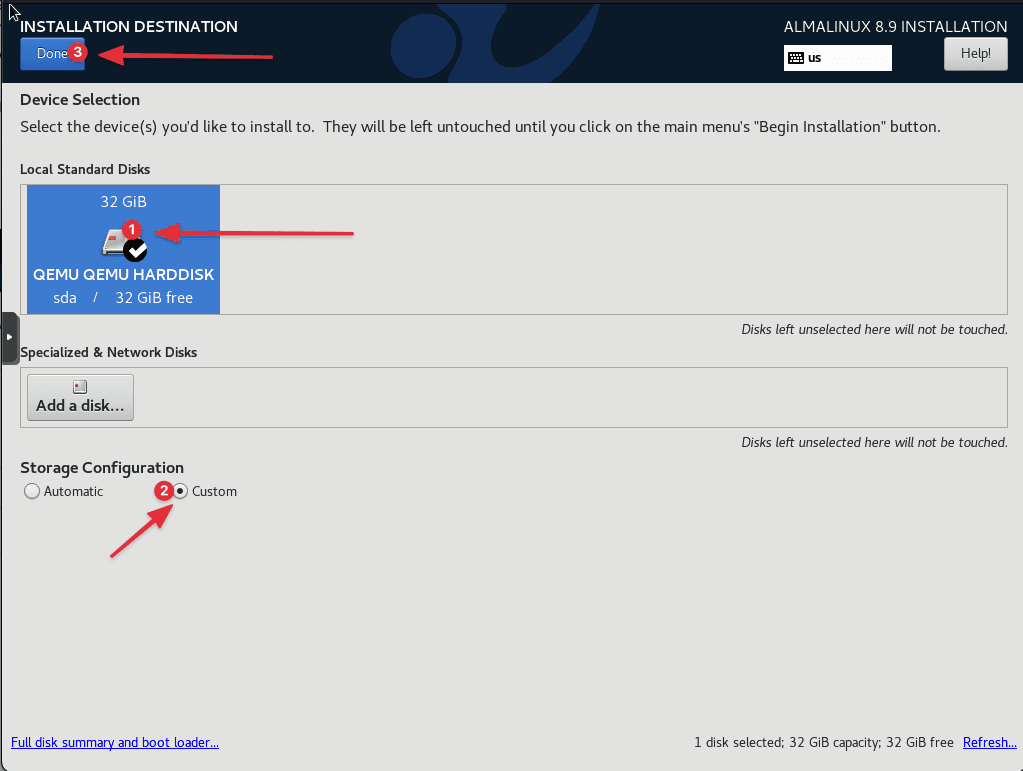
Just click on the hard drive and make sure that there is a white check mark on the hard drive icon. If you are new to Linux, then You can choose to partition intoAutomatic . With this option, the installer will automatically and intelligently partition your hard drive, and save you the trouble of manual partitioning.
In case you want to create custom partitions, choose the methodcustom . In this article, I will create custom partitions by selectingcustom .
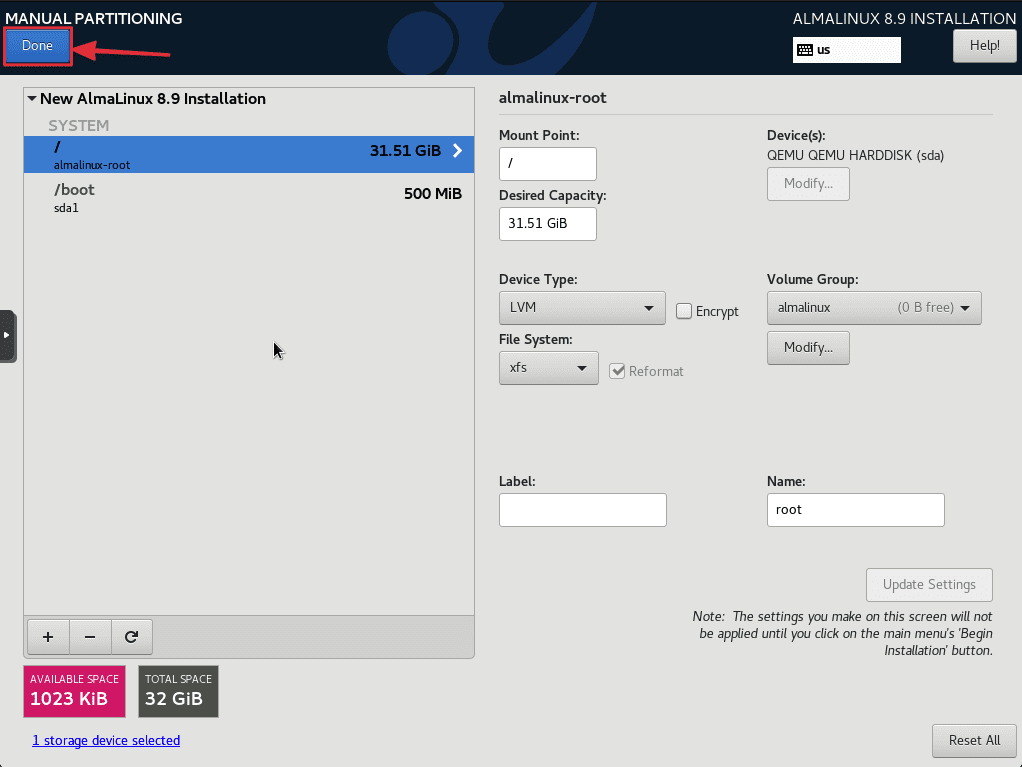
When you’re done, click the buttonDone in the far left corner.
Here I will create a partition/boot500MB , I will not divide the remaining capacity and leave it alone/root always. You can also addswap You can add it or add it after installing the operating system.
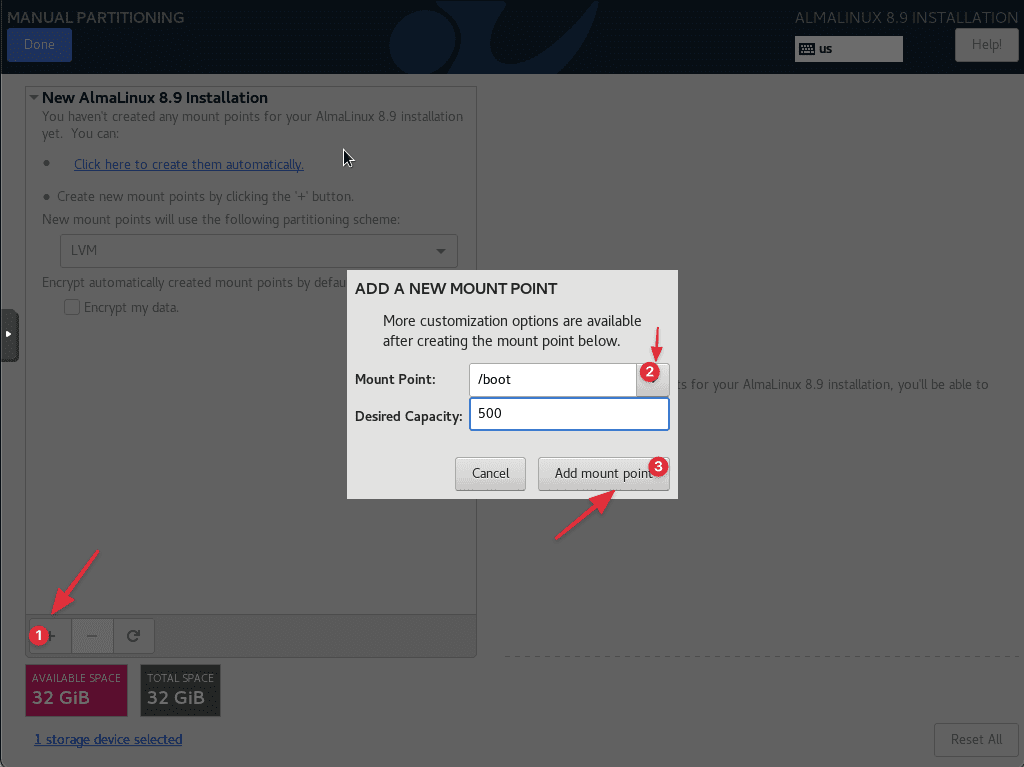
Once completed, click on the iconDone .
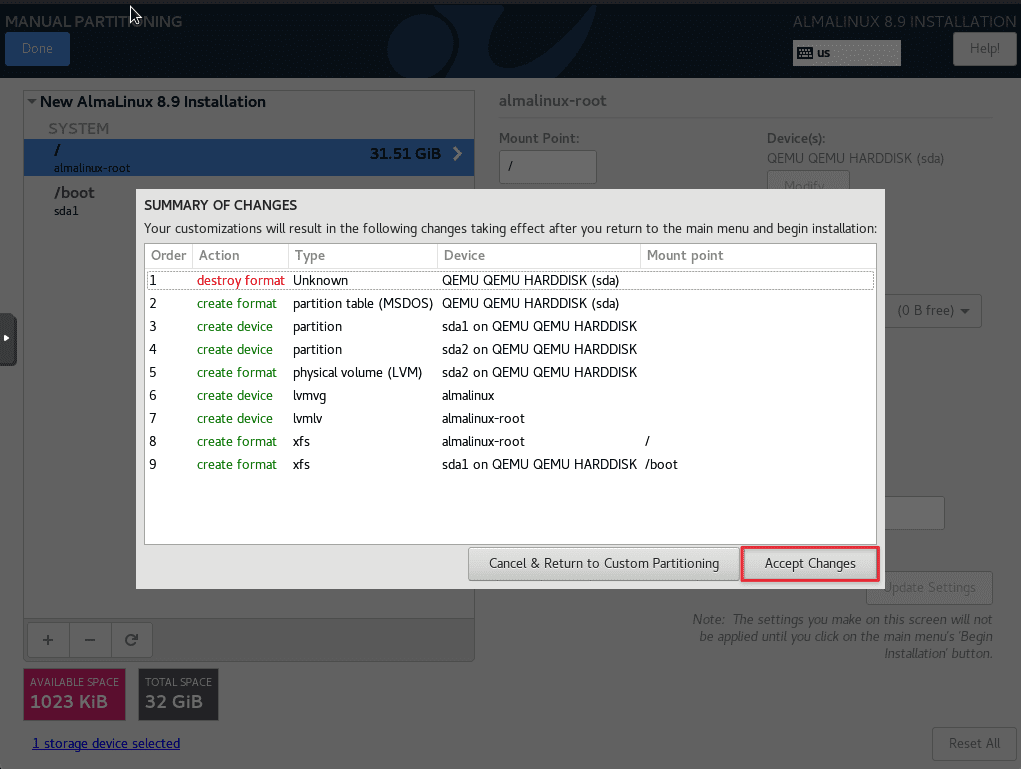
In the next screen, selectAccept Changes to write changes to disk.
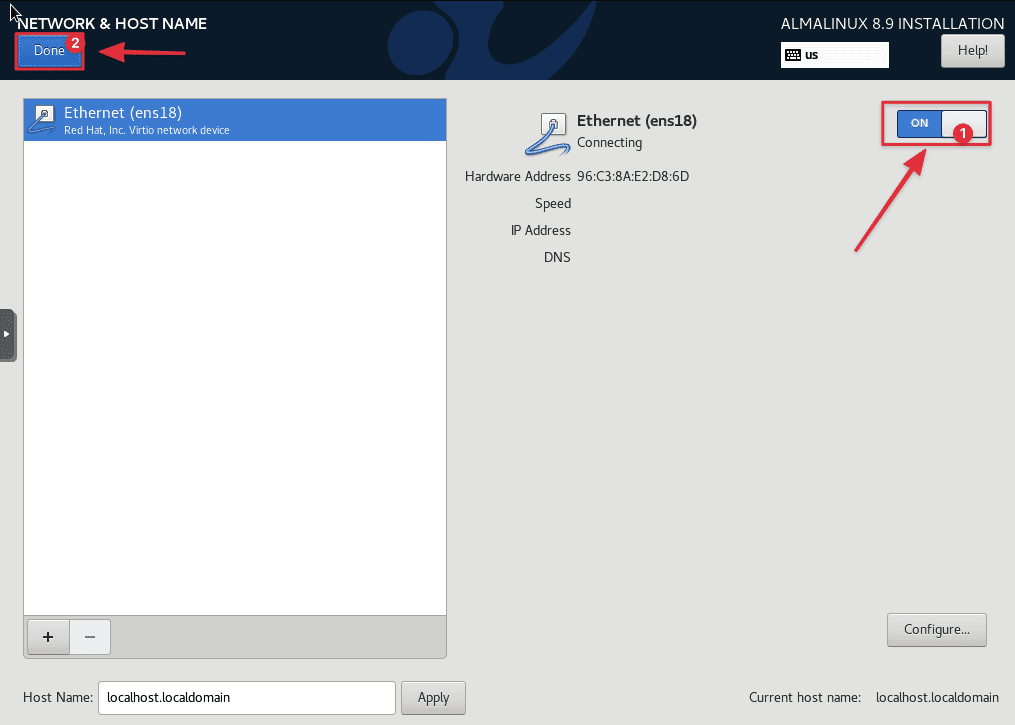
Step 4: Set up network card
By default, network connectivity is disabled. We need to enable networking for our system to connect to the internet, this will be required for installing packages and setting the correct Date and Time.
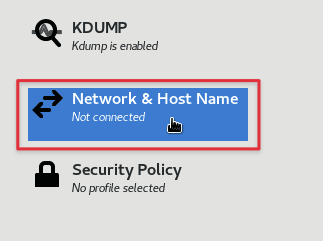
So click on the ‘Network and Hostname ‘. “Turn on ” Ethernet corresponds to your network interface as shown.
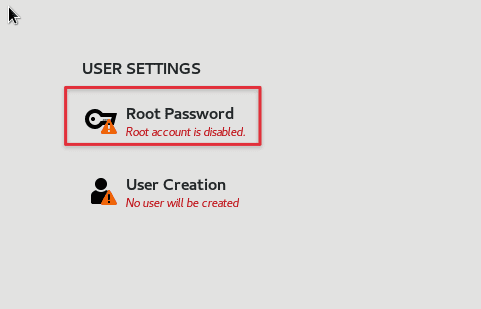
Step 5: Create a Root password
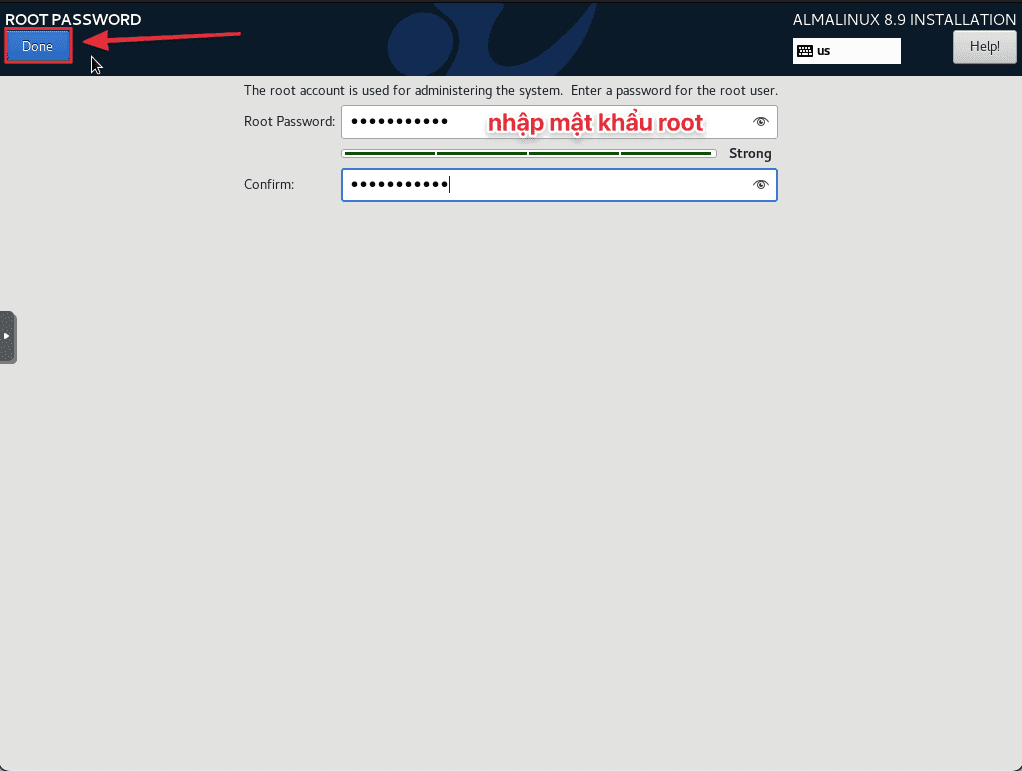
Next, we need to set the root user and password for the root user. The root user has absolute privileges in the system and can make any necessary changes. Therefore, in section ‘USER SETTINGS ‘, click ‘Root Password ‘ same picture.
To create a root user, make sure to provide the root password and confirm it as shown. For security purposes, provide a strong password with a combination of uppercase letters, lowercase letters, numbers, and special characters.
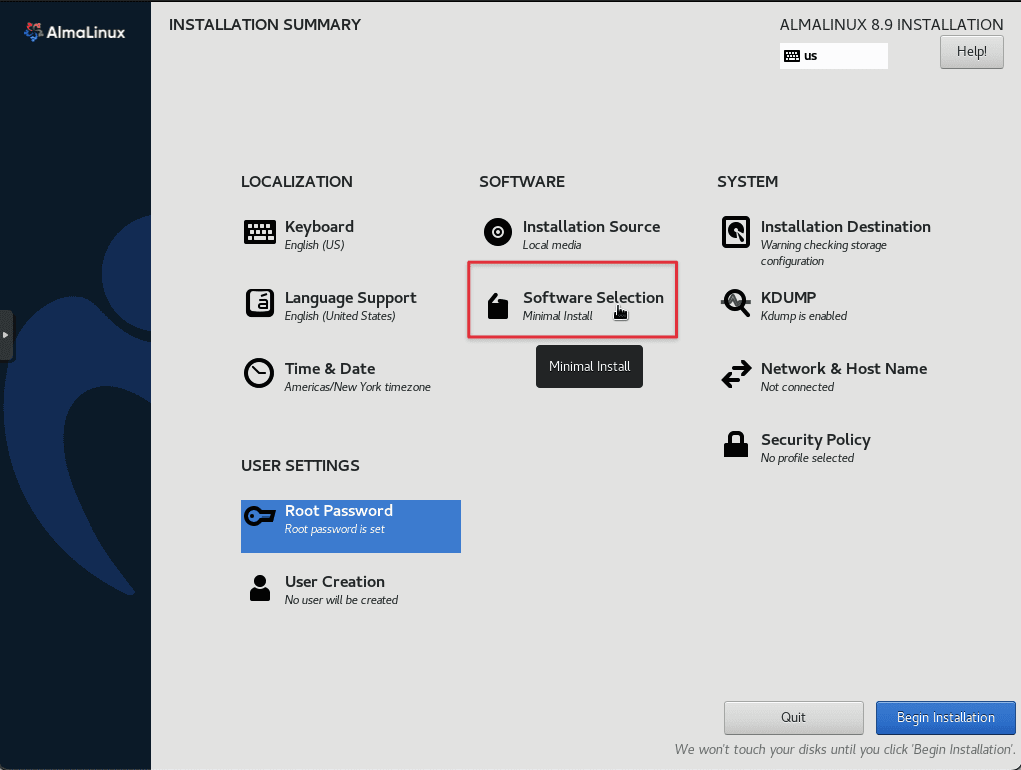
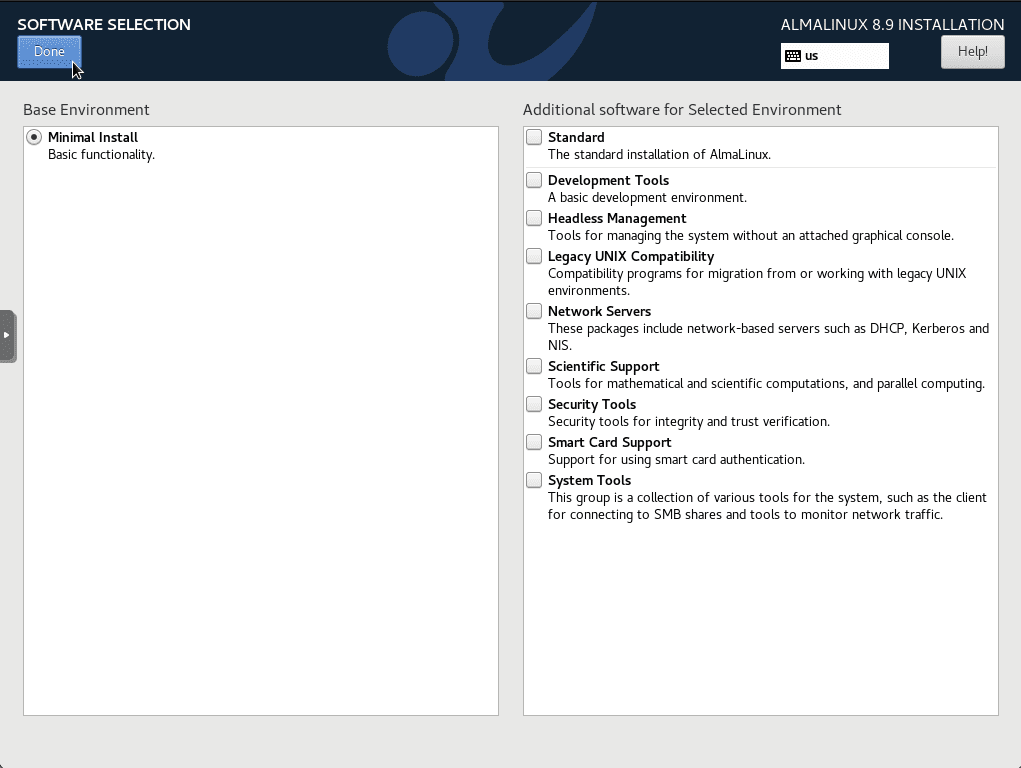
Step 6: Install additional Software
By default, Software Selection is setServer with GUI orMinimal Install . If you need to change this and select other options, clickSoftware Selection as illustrated.
You select any plugin of your choice and click the buttonDone to go back.
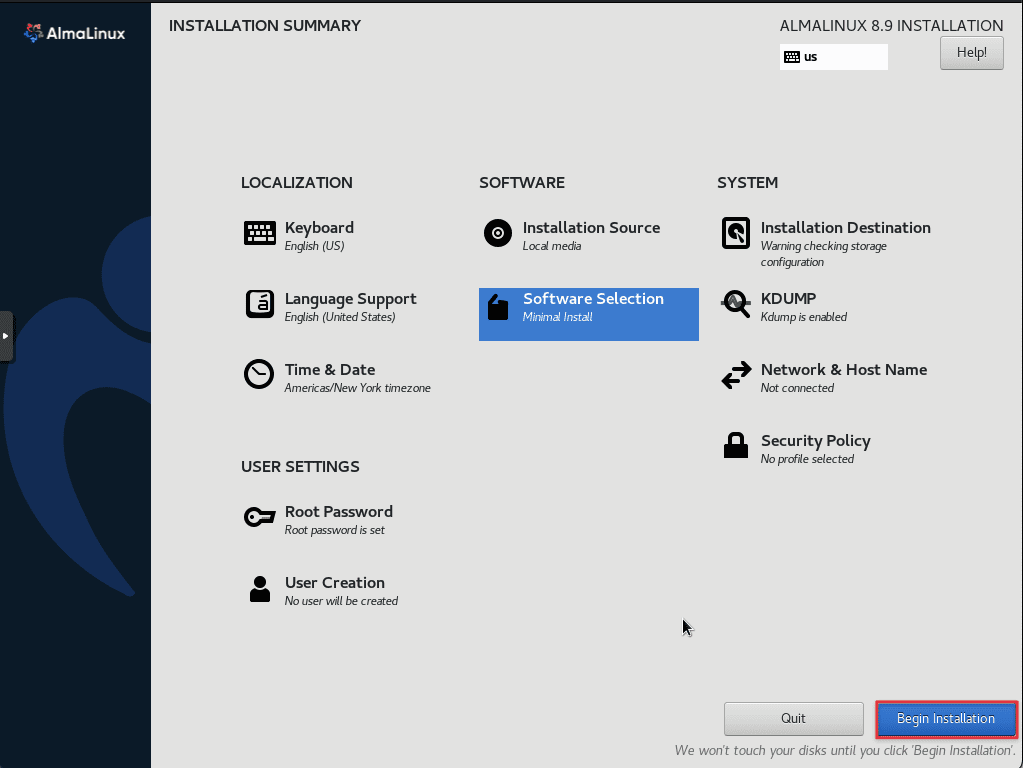
Step 7: Install AlmaLinux
With all the main settings configured, clickBegin Installation in the bottom right corner to start the installation.
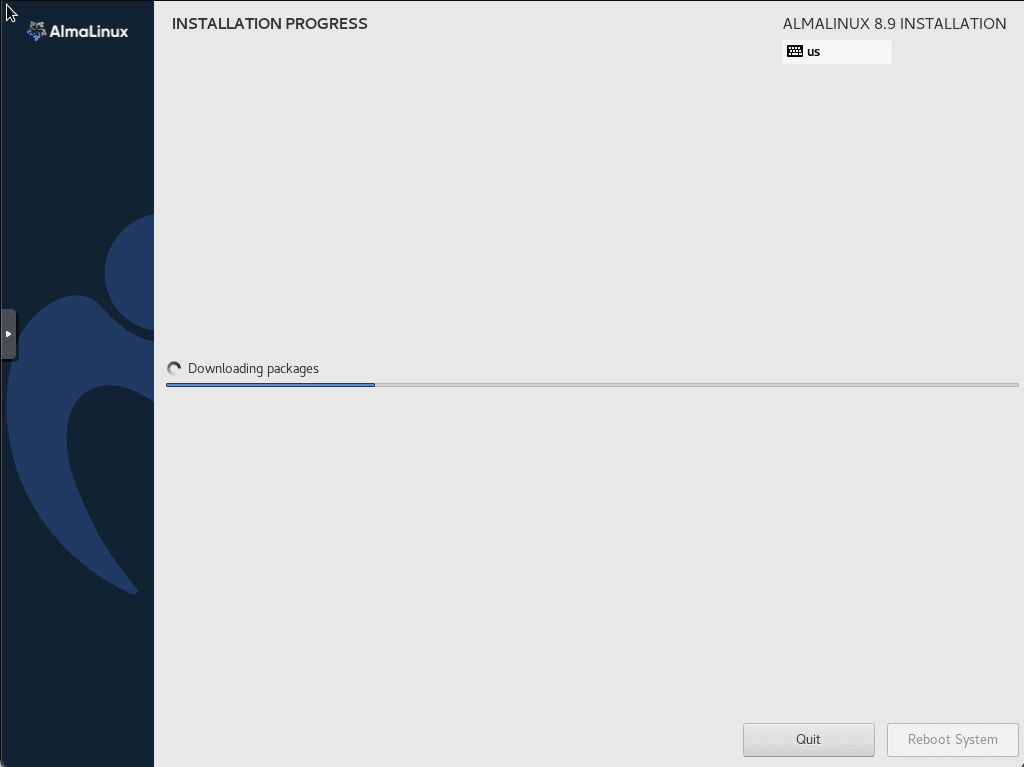
Wait a few minutes for the system to automatically install.
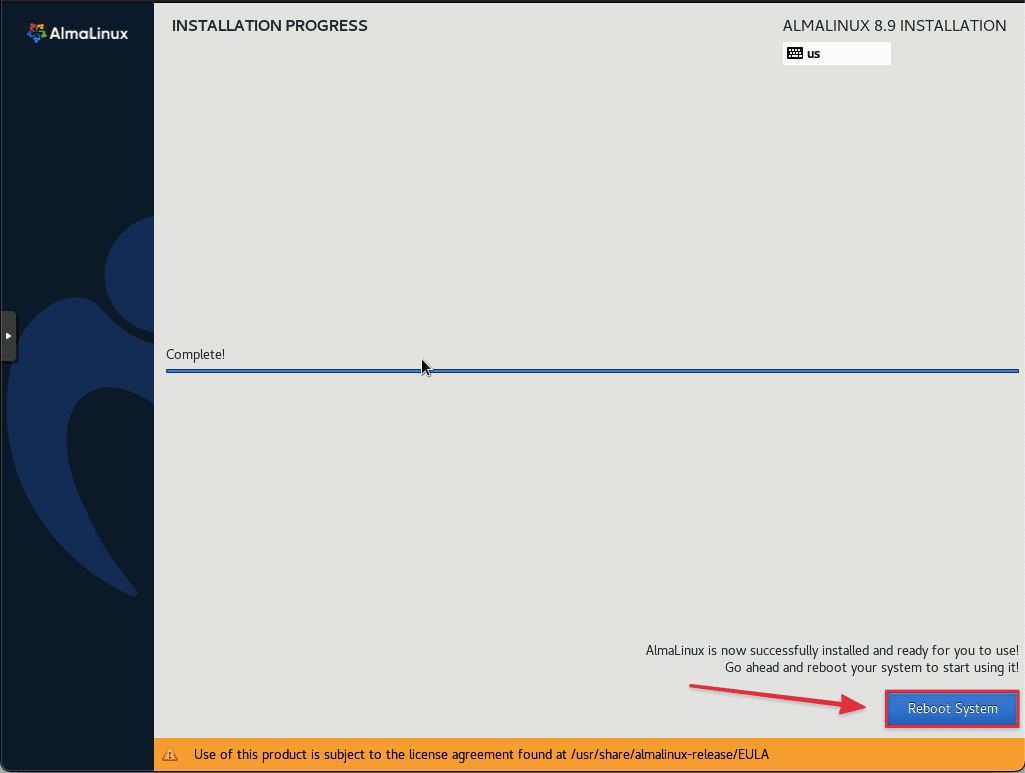
After completing the installation process, clickReboot System to begin booting Almalinux
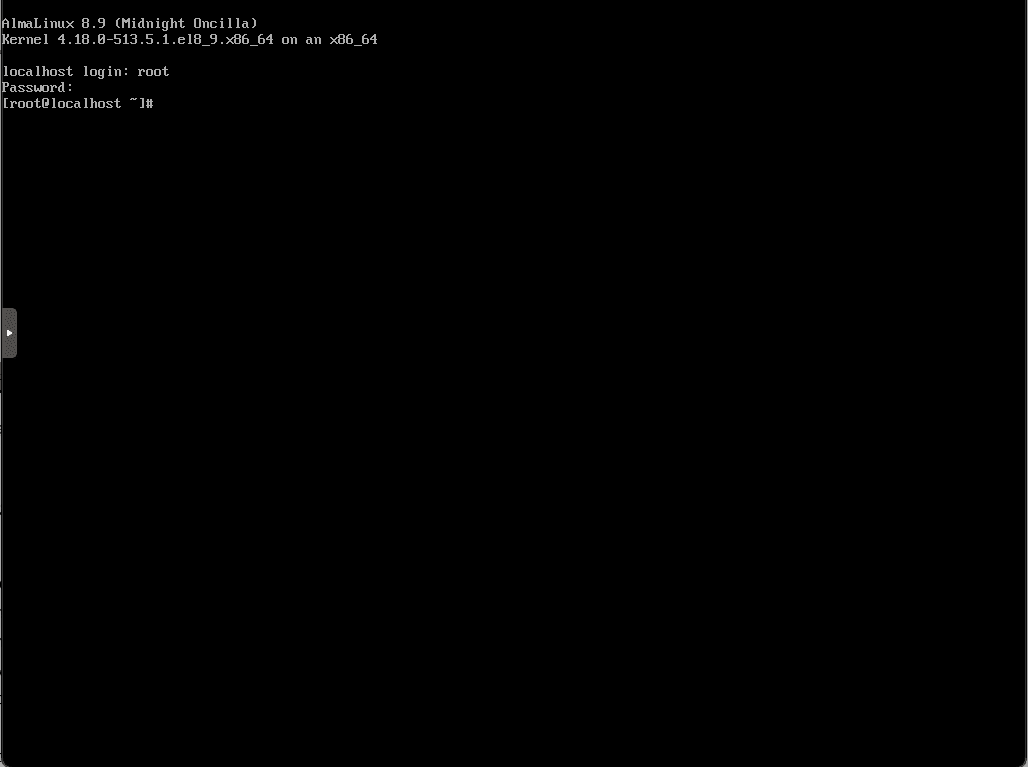
Step 8: Check connection.
Here you log in with your accountroot andpassword previously booked.
You have successfully installed AlmaLinux. You can now update system packages and perform other post-installation tasks as you see fit.
Wishing you success!
If you need assistance, you can contact support in the ways below:
- Hotline 247: 028 888 24768
- Ticket/Email: You use the email to register for the service and send it directly to: support@azdigi.com.
You might also like
- Convert CentOS 8 to AlmaLinux
- Instructions for installing OpenVPN on Linux server
- Turbo Business Hosting AZDIGI - The Next Generation: Pioneering Technology
- CrowdSec on Linux VPS - Next-Generation IDS to Replace Fail2ban
- Upgrade Kernel 5 on CentOS 7
- Troubleshooting Linux VPS - How to Handle Common VPS Issues
About the author

Thạch Phạm
Đồng sáng lập và Giám đốc điều hành của AZDIGI. Có hơn 15 năm kinh nghiệm trong phổ biến kiến thức liên quan đến WordPress tại thachpham.com, phát triển website và phát triển hệ thống.