In this tutorial, AZDIGI will show you how to create and enable Swap on Linux.
I. What is Swap?
Swap, also known as virtual RAM, is used to support storing data in hard disk memory when physical memory (RAM) is full. Sometimes Swap is also used in parallel to increase cache capacity even if the physical memory is not used up yet. Swap is usually used by default on Linux, Ubuntu or CentOS operating systems.
II. When should we use Swap?
One of the most important situations where a Swap is needed is when your system is running out of physical memory (RAM).
It can be understood simply: you can never predict the amount of memory for all programs on the operating system. So when the problem occurs (memory overflow RAM), Swap will do the job of maintaining all normal operations even though the speed is significantly slower instead of stopping the whole system, making the data vulnerable because it has not been written to the hard disk.
III. When do we not need to use Swap?
In case your server has enough RAM or does not require Swap space usage or having Swap significantly reduces your system performance, then you should consider disabling the Swap partition.
If you need to disable Swap, you can refer to the following tutorial:
IV. How to create and enable SWAP on Linux
To create and enable SWAP on Linux, we follow these 3 steps.
Step 1: SSH into your Linux system
To create and enable SWAP on Linux, we first need to SSH or access your VPS or server with root privileges. If you don’t know how to SSH into your VPS/Server, you can refer to the following tutorial:
After successfully SSH, we continue with step 2 to check Swap .
Step 2: Check Swap
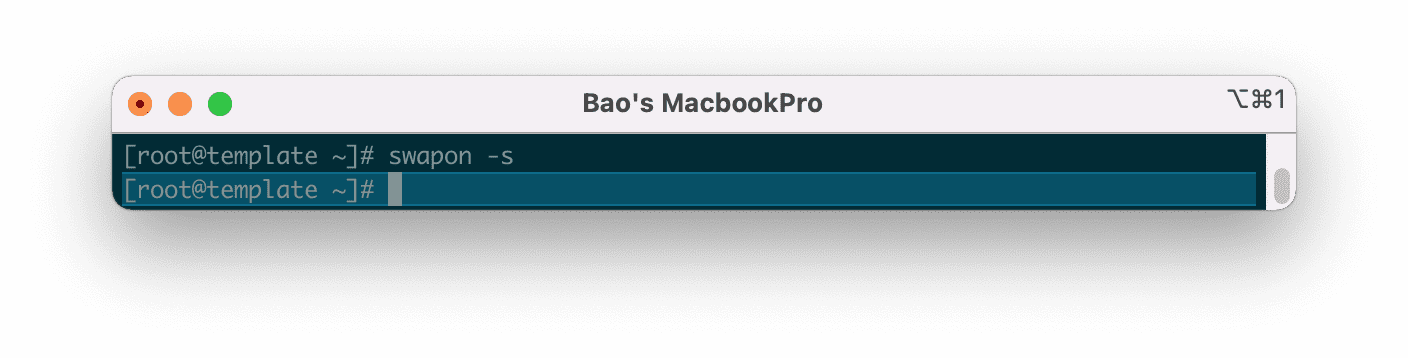
Before proceeding to create the Swap file, we need to check if the current system has Swap enabled or not by running the following command:
swapon -s
If after running the command no information is displayed, it means that our server has not enabled Swap.

Step 3: Check the free disk space
Check the free disk space so we can consider creating Swap file space in the next step. To check the free disk space, we use the following command:
df -h
My free space is up to 31GB, so it’s quite comfortable to create Swap. Because after creating Swap, your server capacity will be lost corresponding to the amount you have allocated for Swap.
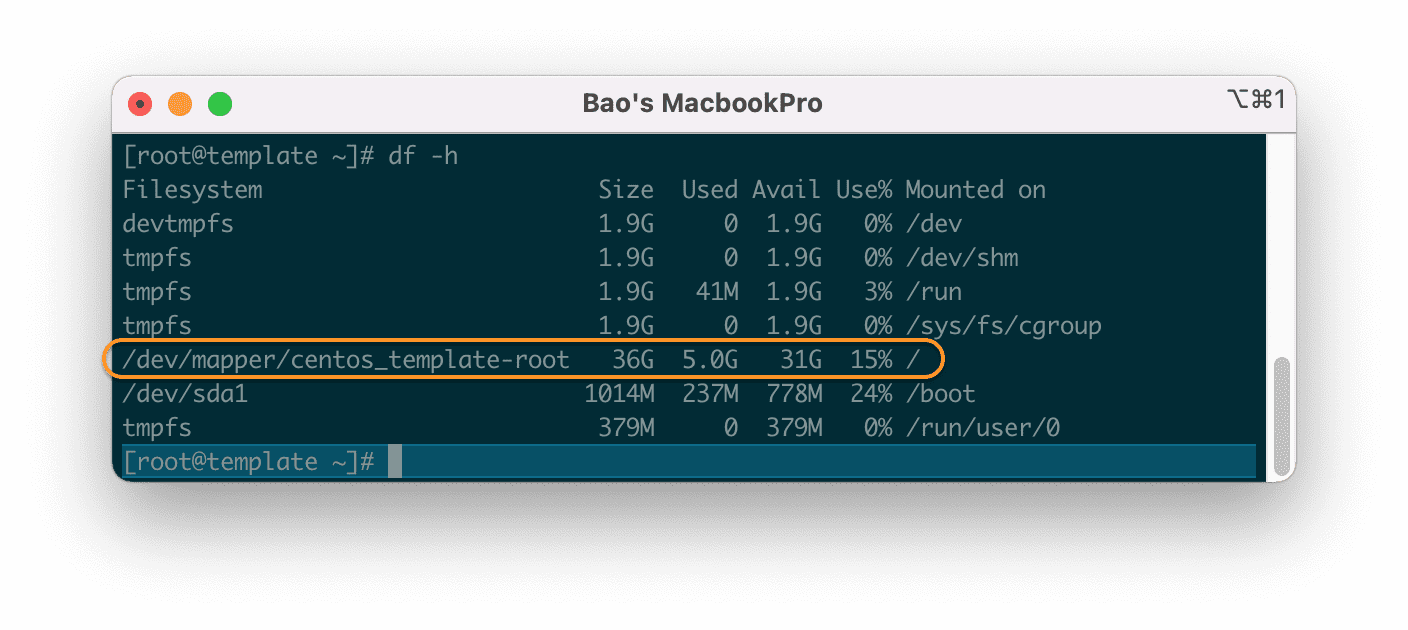
df -h command.Step 4: Create the Swap file
For my server with only 4GB of RAM, I will create a Swap partition from 1GB to 2GB is suitable.
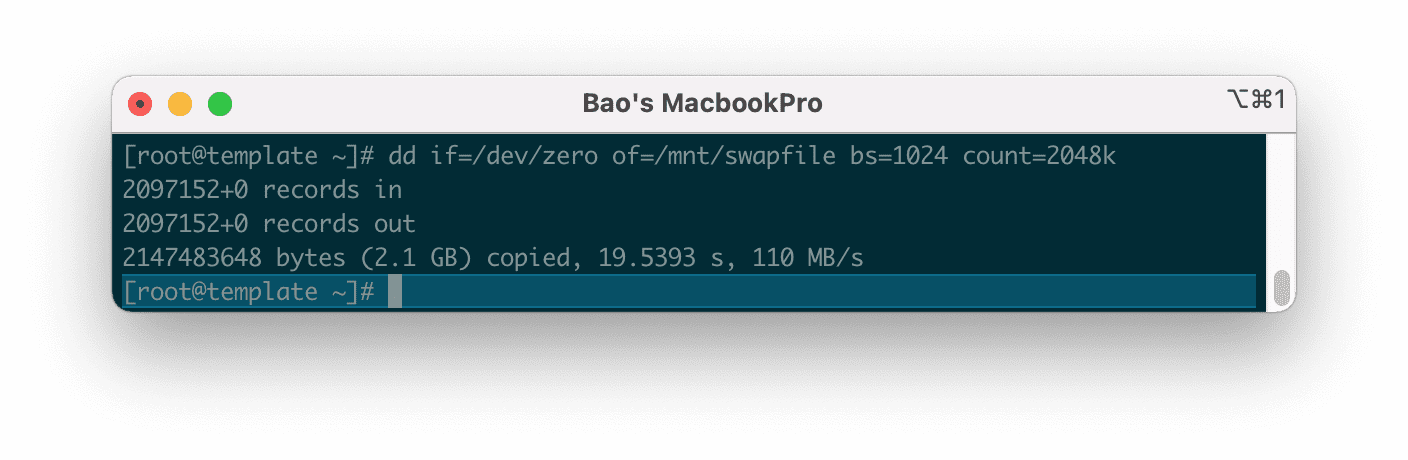
Here I will use the dd command to create a Swap file with a capacity of 2GB.
dd if=/dev/zero of=/mnt/swapfile bs=1024 count=2048k
The above command will create a 2GB Swap file. You can change count=2048k to count=1024k … to create a 1GB Swap. The maximum Swap capacity should only be twice the physical RAM.
After we have created the Swap file, we need to create a partition for it in step 5.
Step 5: Create Swap Partition and enable Swap on Linux
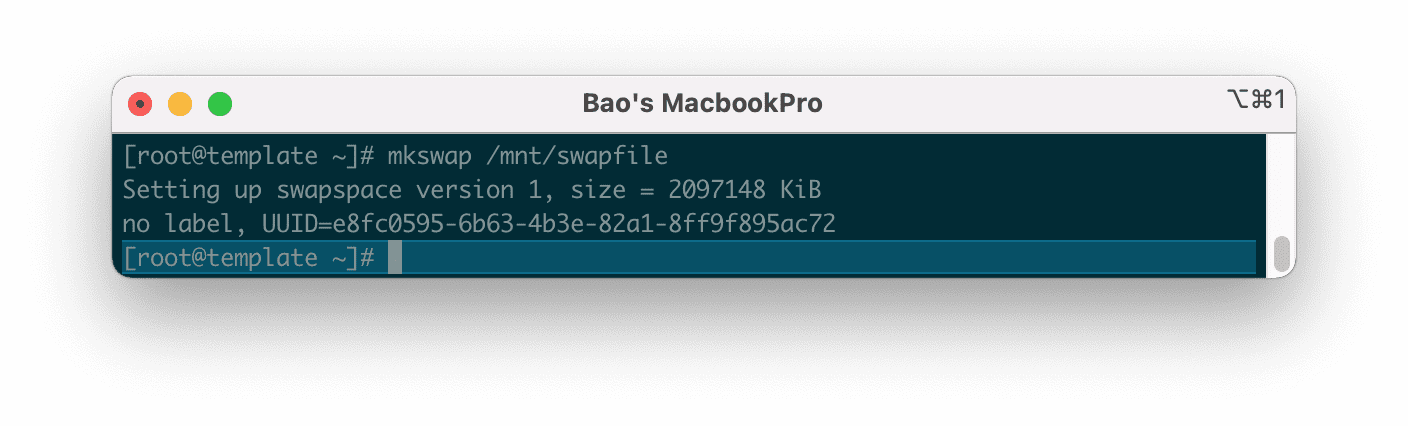
To create a Swap partition, run the following command:
mkswap /mnt/swapfile
Then we continue to enable Swap on Linux with the command below:
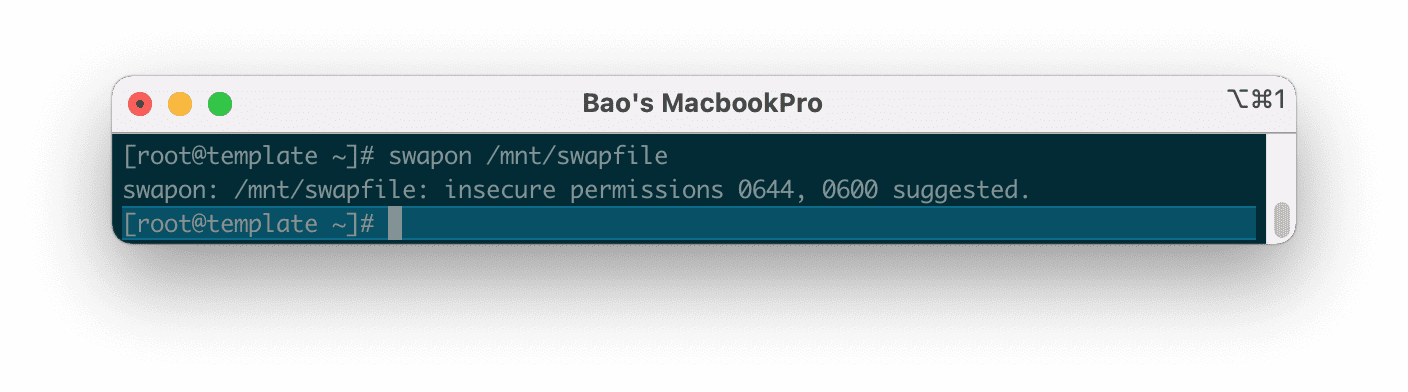
swapon /mnt/swapfile
You will get a warning that the permission should be0600 to make this partition more secure because by default when initializing the directory, it will have permission 0644 . Please ignore this because we will perform the decentralization in the next step.
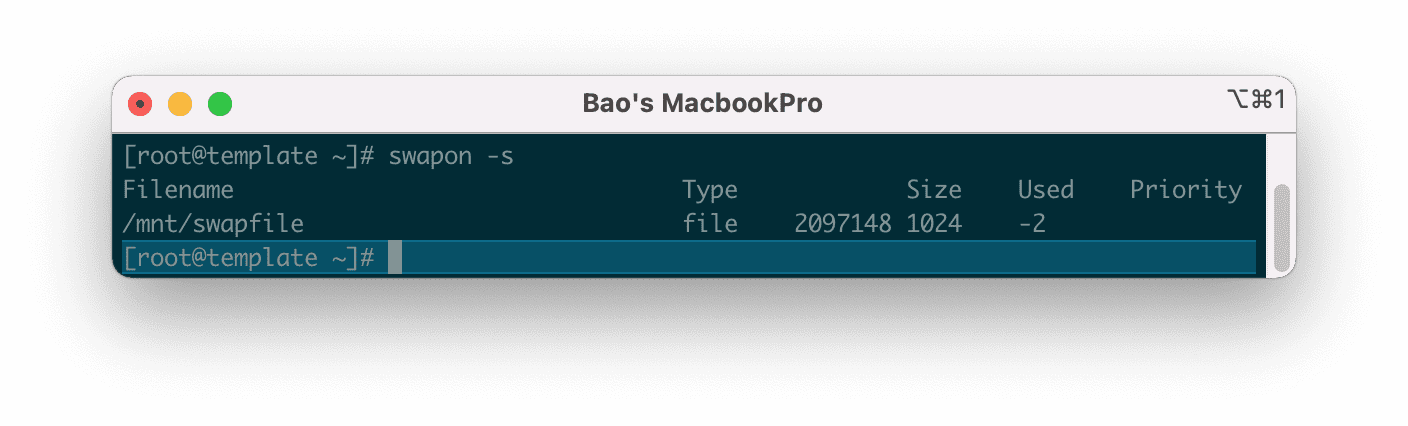
0600 .Check the Swap status again as in step 2, you will see that everything is different now.
swapon -s
Next, we need to set up the Swap partition to automatically activate after rebooting the system.
echo /mnt/swapfile none swap defaults 0 0 >> /etc/fstab
Continue to perform security settings for the Swap partition with the following two commands:
chown root:root /mnt/swapfile
chmod 0600 /mnt/swapfile
Explanation of the two commands above:
- Command 1: Delegation of group owner permissions belong to root.
- Command 2: Authorize only the root to access and read and write data.
So we have successfully enabled Swap on Linux. However, if you need to prioritize using Swap when the ram level reaches the limit, then follow the rest of the article.
V. Configure Swappiness
Swappness is the priority of using Swap of Linux system. When the amount of free RAM remaining equals the value of Swappiness (as a percentage), the Linux server will switch to use. For example, if your server has only 10% free RAM and Swappiness is set to 10, the server will switch to using Swap.
Because the speed of RAM is many times faster than the speed of the hard disk, when data is written/read from Swap, it will give a much slower speed when used on RAM. So you should consider tweaking the Swappiness range from 5 to 10 as appropriate.
Note: The higher the number, the more often the server uses Swap, which means that the hard disk will have to read and write more and degrade faster.
Swappiness will have a value between 0 – 100.
Here are some commonly used scenarios:
- swappiness = 0: swap is only used when RAM is used up.
- swappiness = 10: swap is used when 10% RAM is available.
- swappiness = 60: swap is used when the RAM is 60% free.
- swappiness = 100: swap takes precedence as RAM.
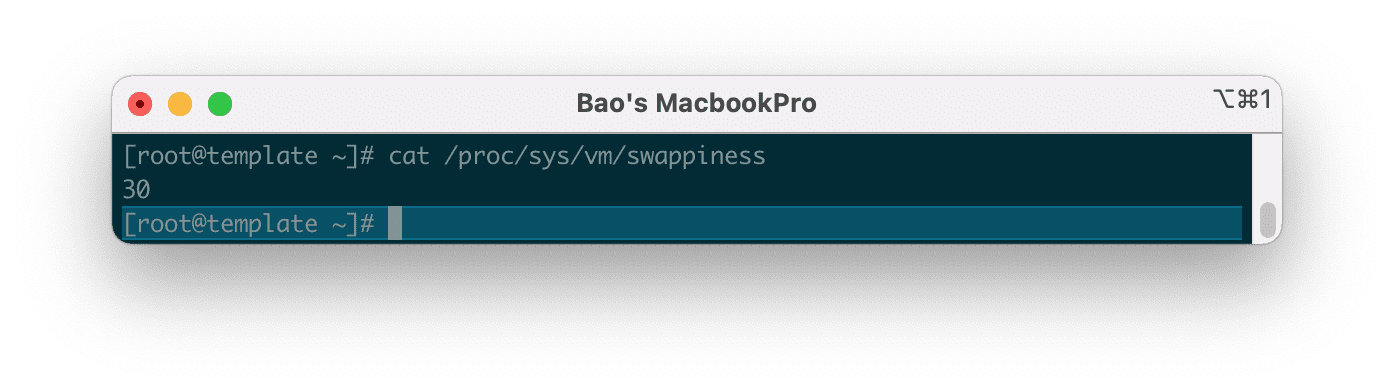
You can check the Swappiness parameter with the following command:
cat /proc/sys/vm/swappiness
Here are the results on my server.
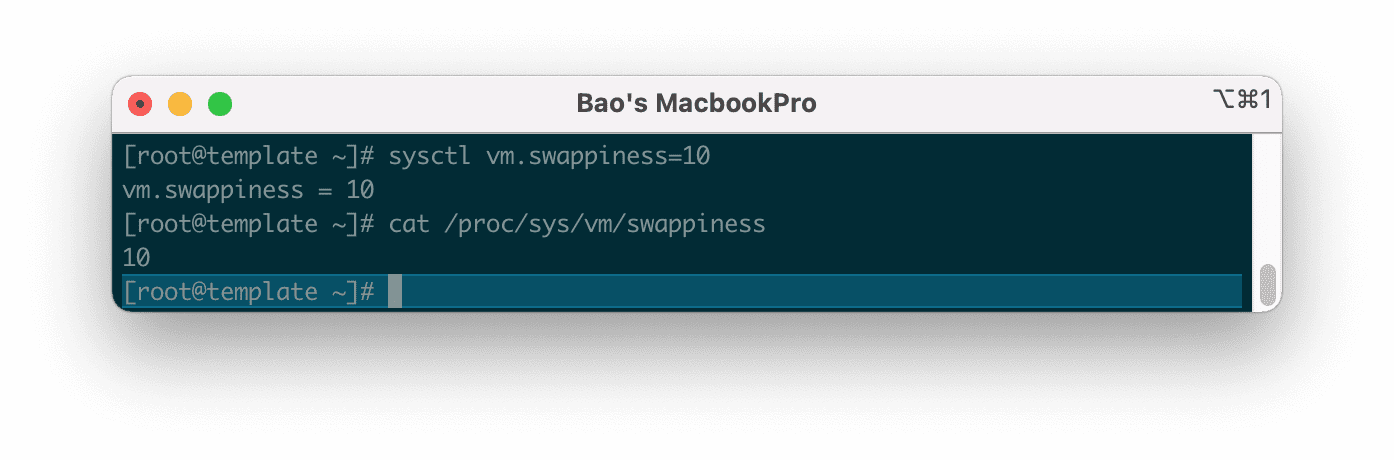
And to change this value to 10, we use the following command:
sysctl vm.swappiness=10
Then check again with the test command you can see that the number Swappiness has been changed.
However, using this command is only a temporary configuration. And after restarting the server the parameters will be back to default.
To make sure this parameter stays the same every time you restart the server, you need to adjust the parametervm.swappiness at the end of the /etc/sysctl.conf file, in case your server does not have this line, please add it manually.
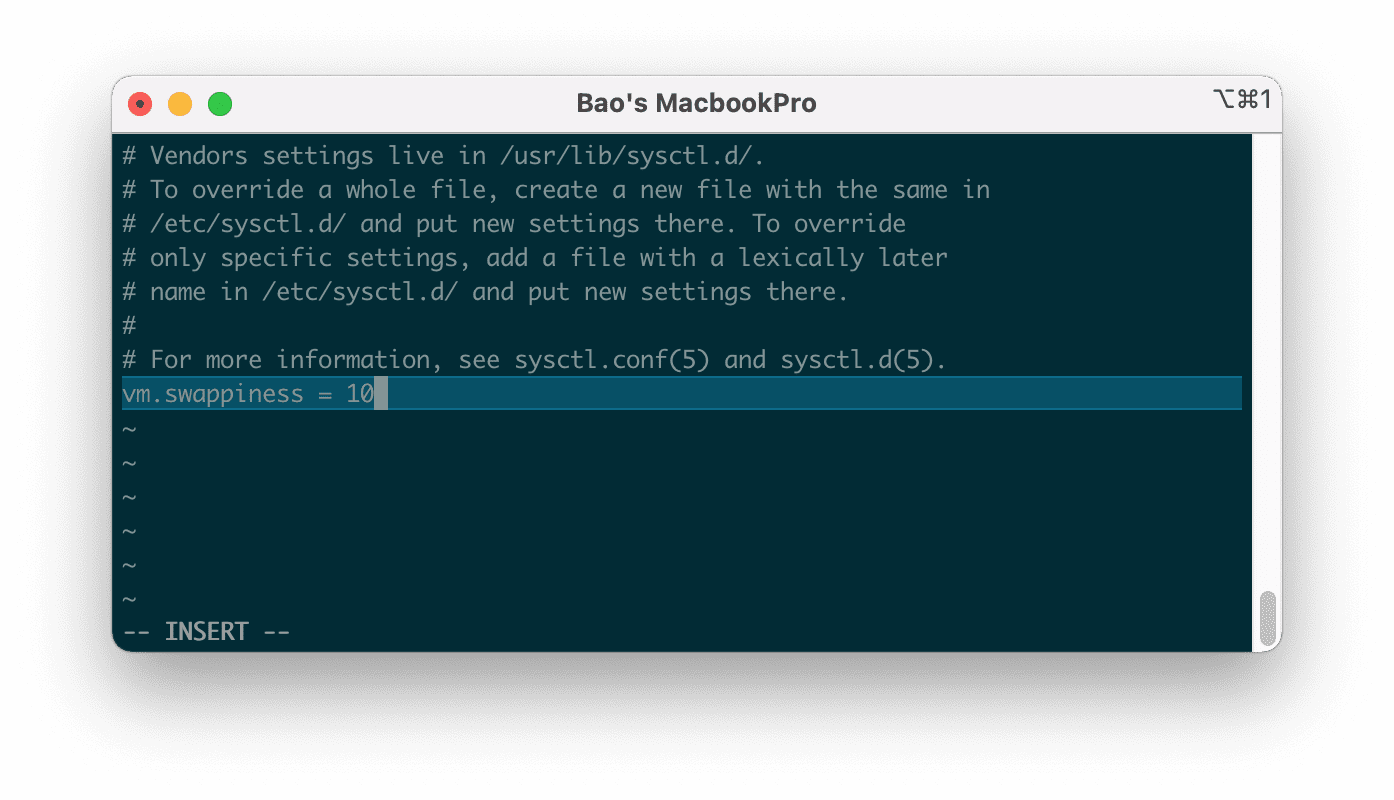
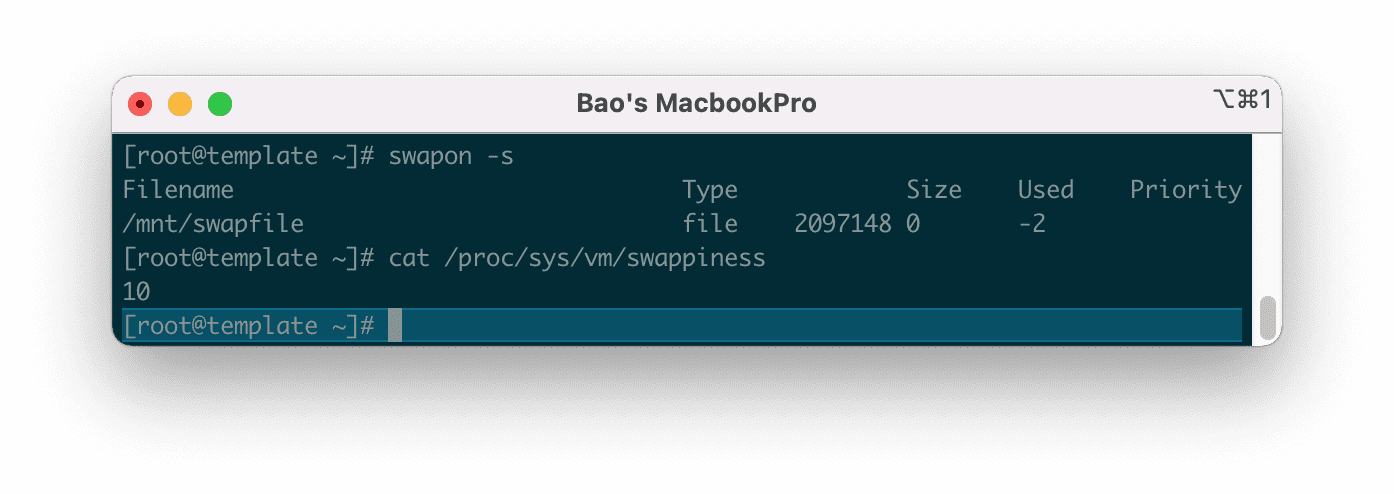
Then save this file and restart your server to get the new parameters. Please wait a moment for the server to restart, you can check again with the following commands.
swapon -s
cat /proc/sys/vm/swappiness
Below is the result after I restart the server.
In some cases CentOS 7 server even if you change the parameters vm.swappiness at the end of the /etc/sysctl.conf file also doesn’t work after restarting the server, maybe that server has a tune profile that will automatically overwrite the parameters vm.swappiness every time it reboots.
To check which profile is overriding, use the following command:
grep vm.swappiness /usr/lib/tuned/*/tuned.conf
The results will be as follows:
According to the result, please edit the parametersvm.swappiness in the /usr/lib/tuned/virtual-guest/tuned.conf file to 10 at your disposal. And finally, restart the server.
VI. Summary
Enabling Swap on Linux will greatly reduce the risk of your server running out of physical memory (RAM). However, we should not abuse Swap too much because it will cause server slowdown as well as make the hard disk read/write continuously, causing memory degradation.
Hope this article will be of help to you. Wishing you success! See more useful articles about Linux VPS at the following link:
If you need assistance, you can contact support in the ways below:
- Hotline 247: 028 888 24768 (Ext 0)
- Ticket/Email: You use the email to register for the service and send it directly to: support@azdigi.com .
You might also like
- Disable Swap in Linux
- Instructions for analyzing and explaining the TOP command in Linux
- Jitsi Meet - online solution for businesses
- Một số cách liệt kê đĩa (Disk) trên Linux
- Commands to check large files/directories in Linux
- Fix the error: xfs_quota: cannot set limits: Function not implemented Directadmin
About the author

Thạch Phạm
Đồng sáng lập và Giám đốc điều hành của AZDIGI. Có hơn 15 năm kinh nghiệm trong phổ biến kiến thức liên quan đến WordPress tại thachpham.com, phát triển website và phát triển hệ thống.