
Use File Manager on CentOS Web Panel efficiently and securely with AZDIGI.
I. Overview
File Manager is a powerful and handy File/Folder management tool. With File Manager, you only need to perform all simple operations with just a few clicks. File Manager has become almost indispensable in today’s popular Control Panels. With controls such as cPanel, DirectAdmin, CyberPanel, aaPanel, HestiaCP having built-in File Manager, they will have different management interfaces and operations.
And in addition to the control panels I have mentioned above, another control also has a built-in File Manager with an extremely easy-to-use and intuitive interface and operation, CentOS Web Panel. Specifically, how is the interface and how to manage data on File Manager, please take a look at the tutorial article below.
You can refer to more information and how to install Centos Web Panel at the link below:
II. How to use File Manager on Centos Web Panel
To effectively use File Manager on CWP, you can go through the following steps:
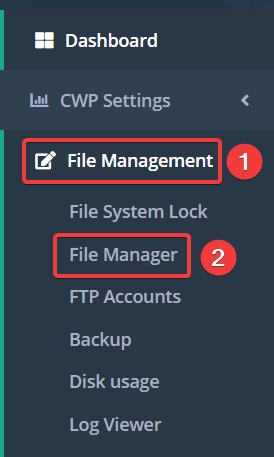
Step 1: Access the File Manger
To access the File Manager, you first need to access the User rights with the following path: https://45.252.249.104:2083/, use user information to log in. After successful login, you will access the File Manager as shown below:
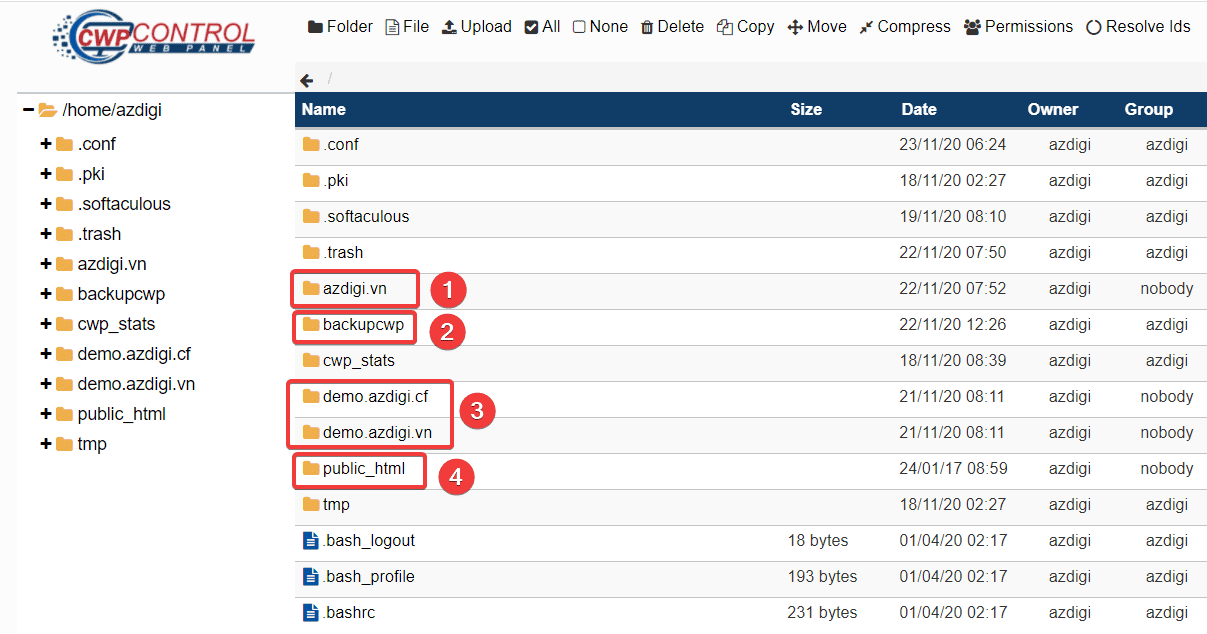
You should note and only manipulate files/folders listed in the form below to avoid mistakenly manipulating system files that cause errors. Depending on each VPS, the files will be displayed differently, but you should only manipulate files/folders with the same format as below:
In there:
- 1 – This is the Addon domain added to the host
- 2 – Folder containing backup files (if any)
- 3 – These are the subdomains added to the host
- 4 – This is the folder containing the source code of the main domain (that is, the domain you enter when creating with the User)
Step 2: Operations on File Manager
With operations on File Manager, you need to determine where to manipulate and go to the right path and start using the following operations:
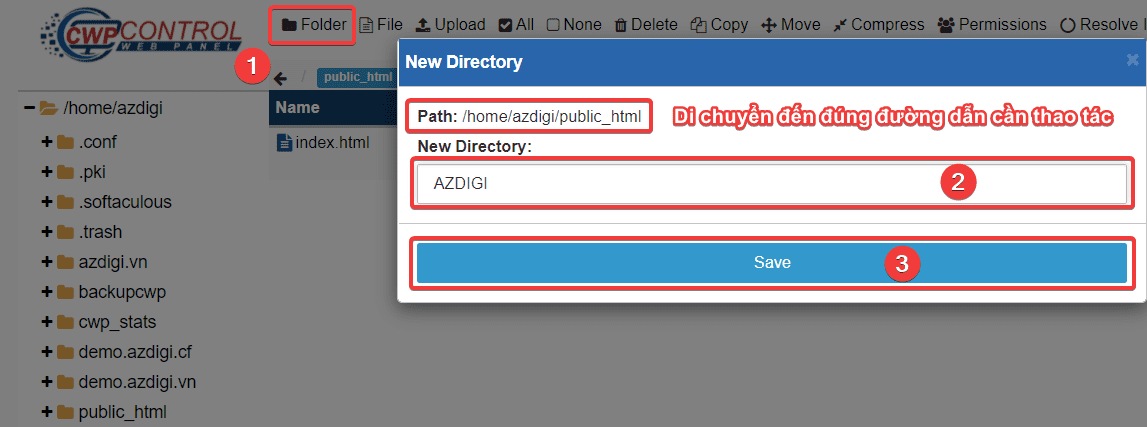
1.Create a Folder on CWP
You go to the right path to create a folder, select Folder (1) => Đặt tên Folder (2) => Save (3).
2.Create a file on CWP
You go to the right path to create a file, select File (1) => Đặt tên FIle (2) => Save (3).
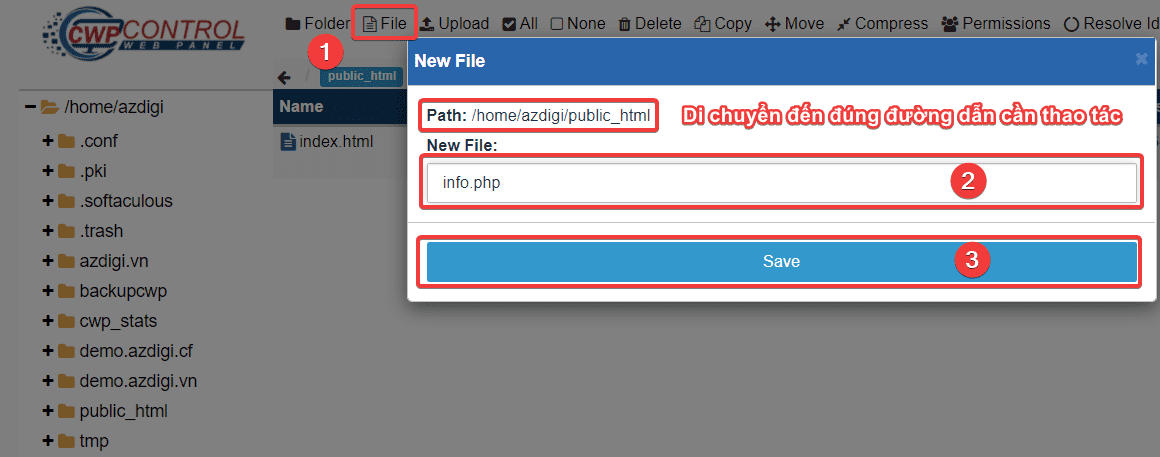
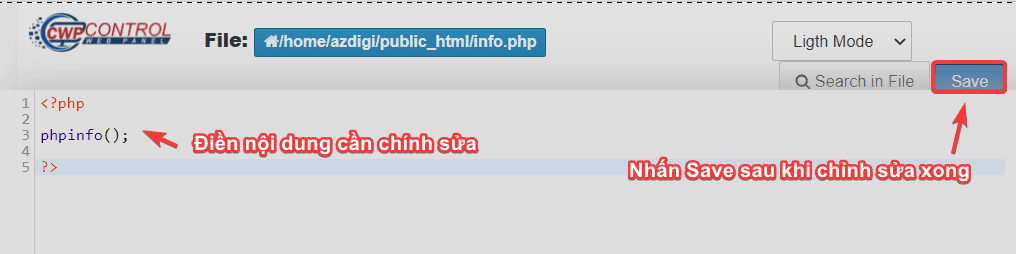
With File, you can edit the file by right-clicking on the newly created file => select Edit Content. => enter the content to edit => click Save.
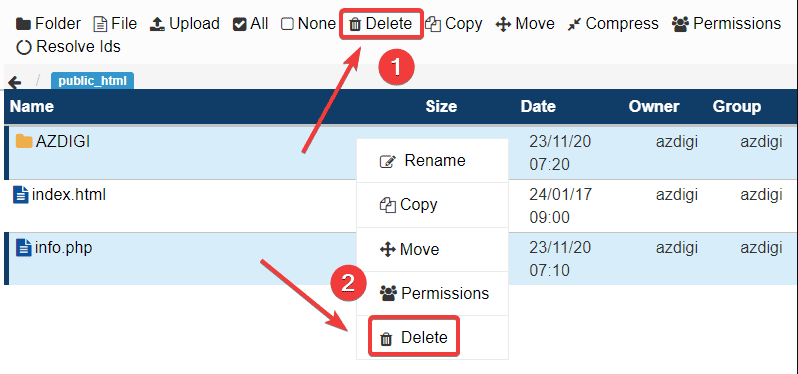
3.Delete File/Folder on CWP
To delete a File Folder on CWP, you can do it in 2 ways:
- 1 – Click on the File/Folder to delete and press Delete in the menu bar of CWP.
- 2 – Right-click on the File/Folder to be deleted and select Delete.
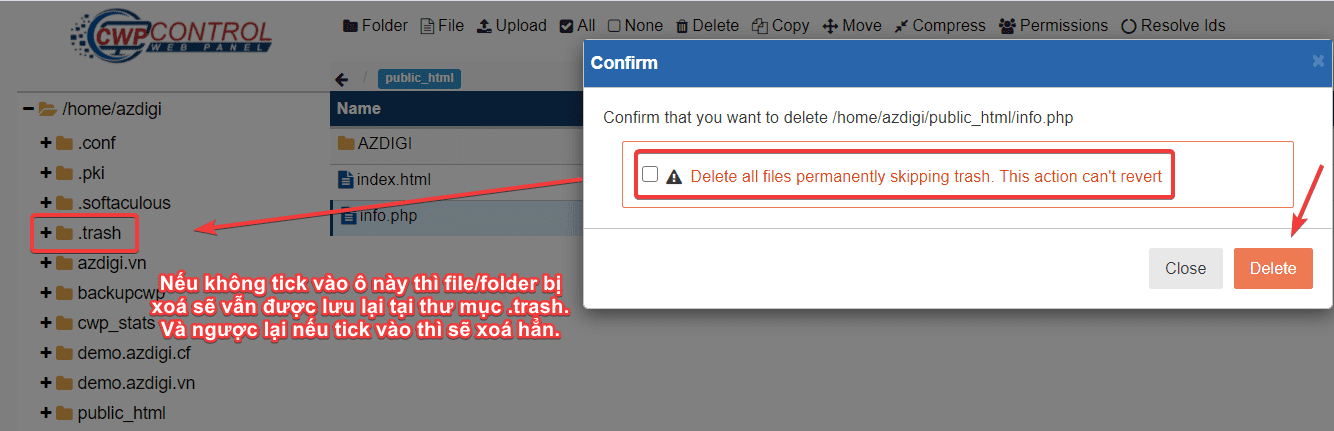
Next, you need to confirm one more time before performing the deletion.
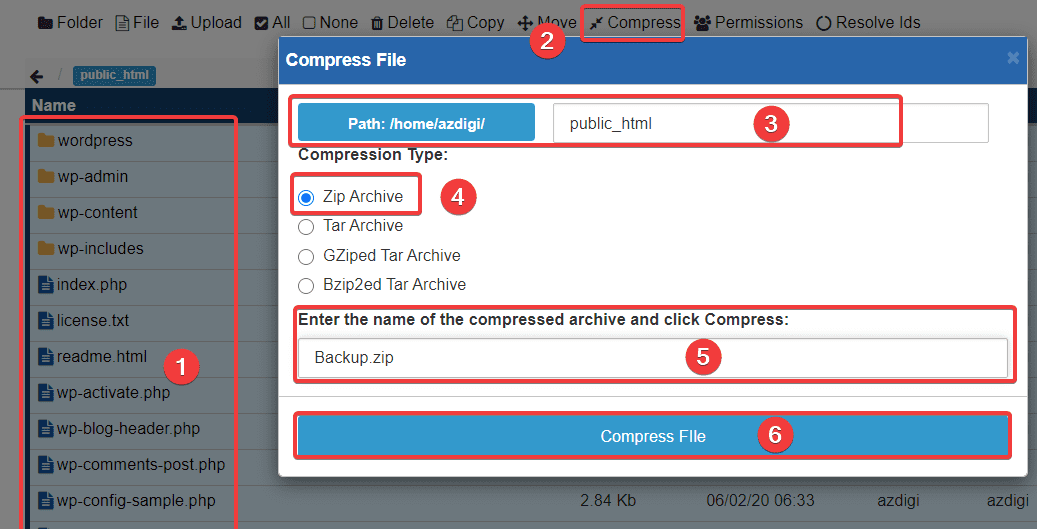
4. Compress File/Folder on CWP
For example, if you need to back up the website source code to download to your computer, then you tick the file to compress or choose to compress all by clicking All and doing the following in turn:
- 1 – Select File/Folder to compress.
- 2 – Select Compress to compress.
- 3 – Select the path to save the compressed file.
- 4 – Choose the compressed file format, you should choose Zip Archive.
- 5 – Name the compressed file.
- 6 – Click Compress File to start the compression.
5.Decompress File/Folder on CWP
To decompress File on CWP, you can decompress in 2 ways:
- 1 – At the File to be decompressed, click on the 2 arrows icon to decompress.
- 2 – At File to decompress, right-click and select Decompress.

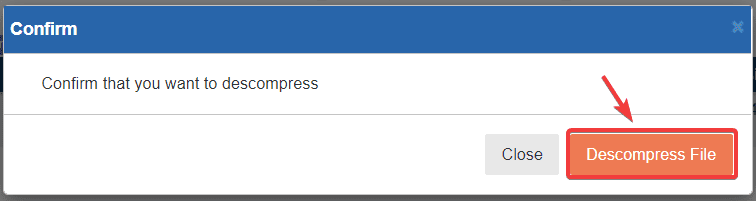
Next, click Descompress File.
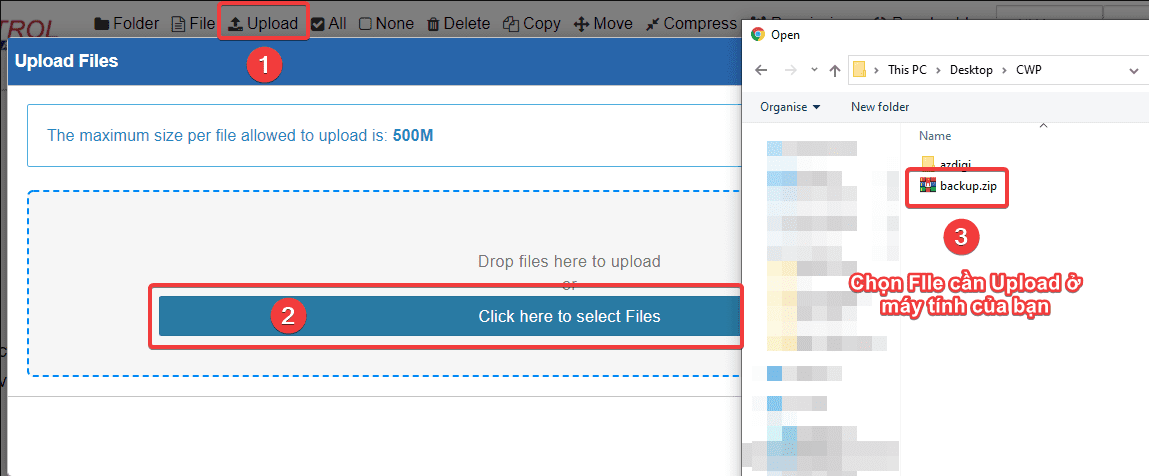
6. Upload Files on CWP
To upload files to CWP, do the following:
- 1 – Select Upload at the File Manager interface
- 2 – Click here to select Files
- 3 – Select the File to upload on your computer (local)
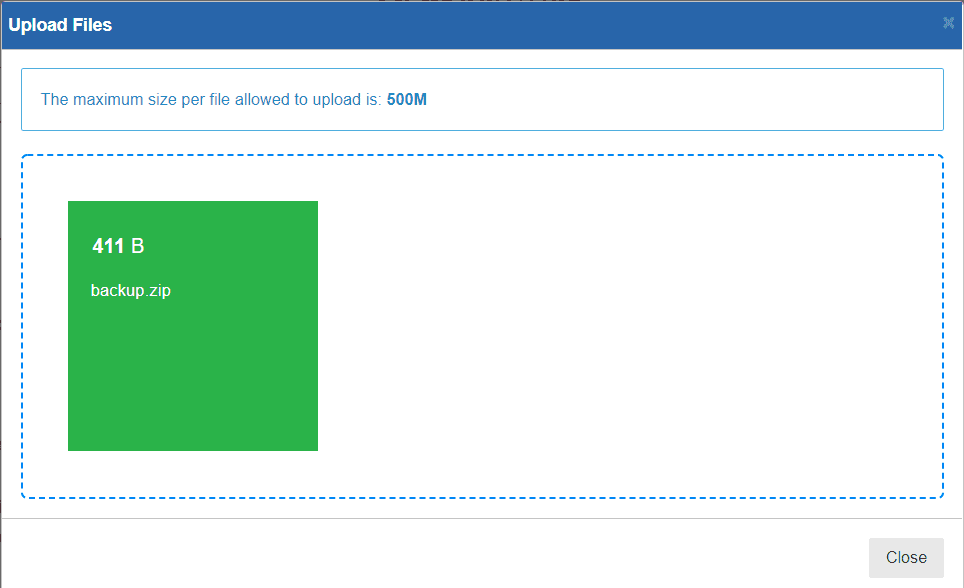
As shown below, you have successfully uploaded, the upload process is fast or long depending on the size of your file.
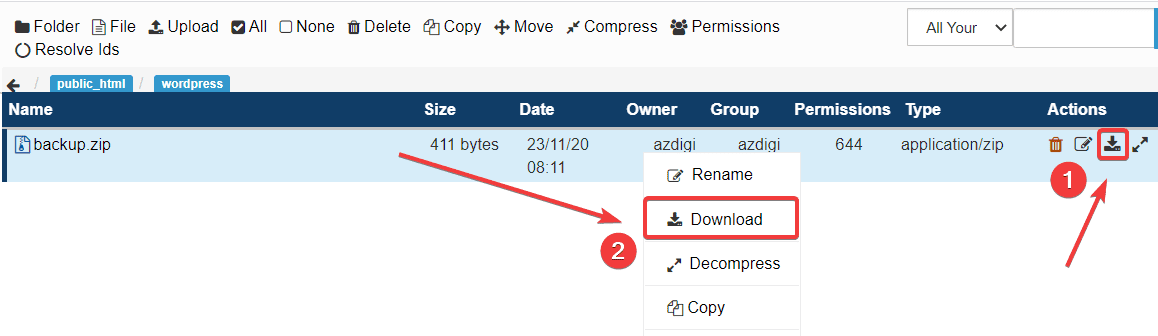
7. Downloadthe file on CWP
To download files on CWP, you can do it in 2 ways:
- 1 – At the File to download, click on the arrow icon to download.
- 2 – At the File to download, right-click and select Download.
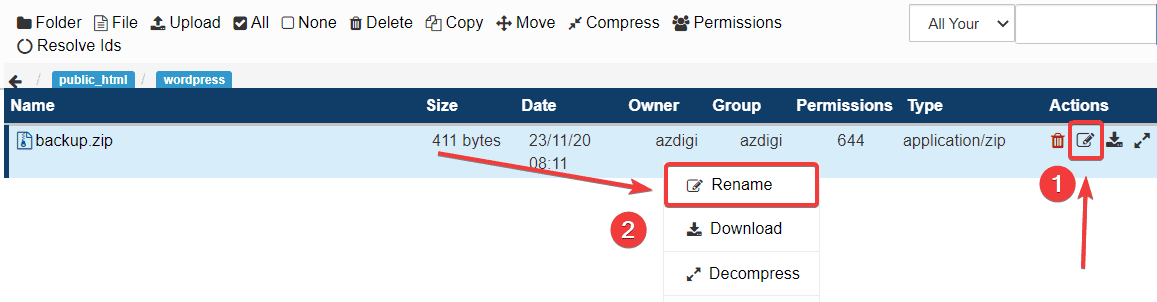
8. Rename File/Folder on CWP
To rename a File/Folder on CWP, you can do it in 2 ways:
- 1 – At the File to be renamed, click on the pen icon to rename it.
- 2 – At the File to be renamed, right-click and select Rename.
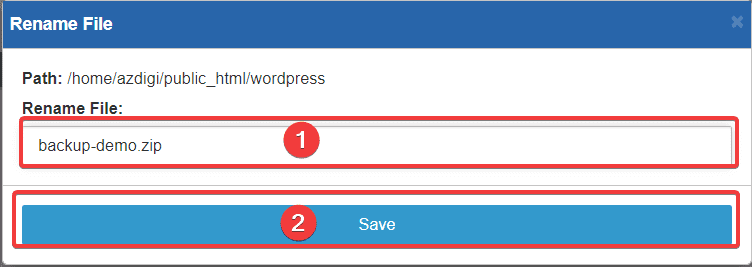
Next, you enter the new name to change (1) => Save (2).
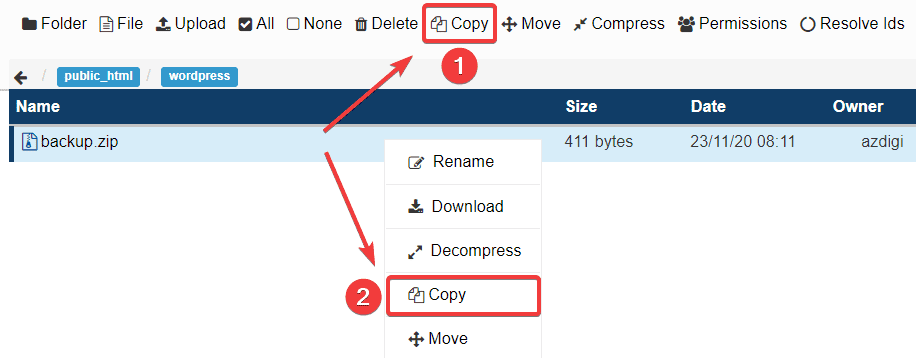
9. Copy File/Folder on CWP
To Copy a File/Folder on CWP, you can do it in 2 ways:
- 1 – At the File to copy, click Copy in the File Manager menu bar.
- 2 – At the File to copy, right-click and select Copy.
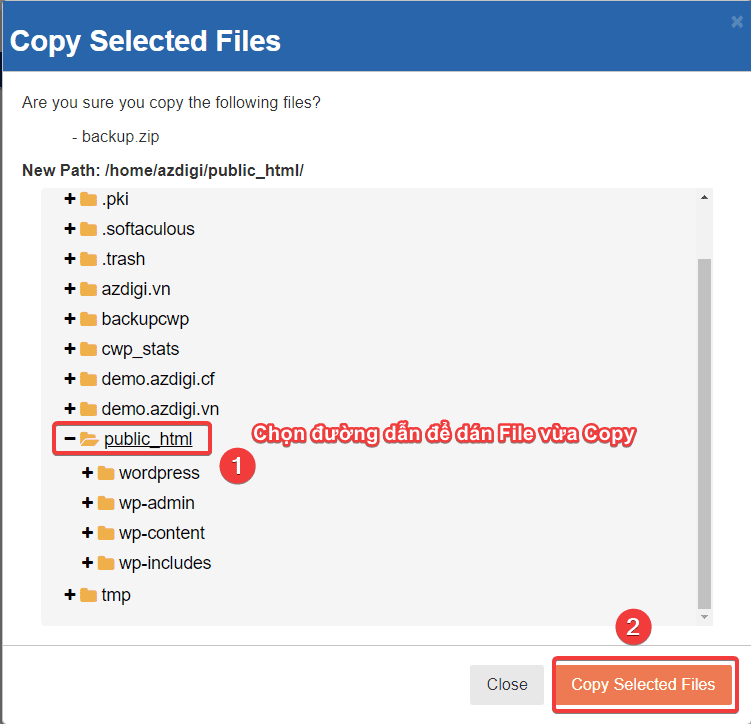
Next, you need to select the path to paste the file/folder you just copied (To expand the Folders, click “+”) I choose to paste the file into the path /home/azdigi/public_html (1) => Copy Selected Files (2).
And here is the result when the copy is complete:

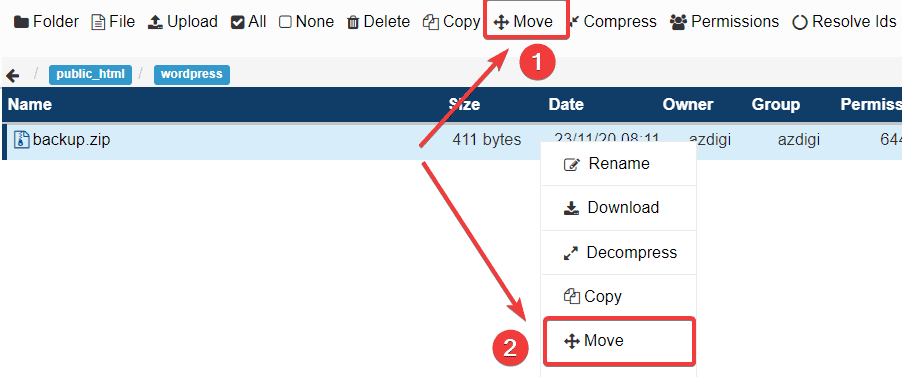
10. Move File/Folder on CWP
To move File/Folder on CWP, you can do it in 2 ways:
- 1 – At the File to be moved, click Move in the File Manager menu bar.
- 2 – At the File to be moved, right-click and select Move.
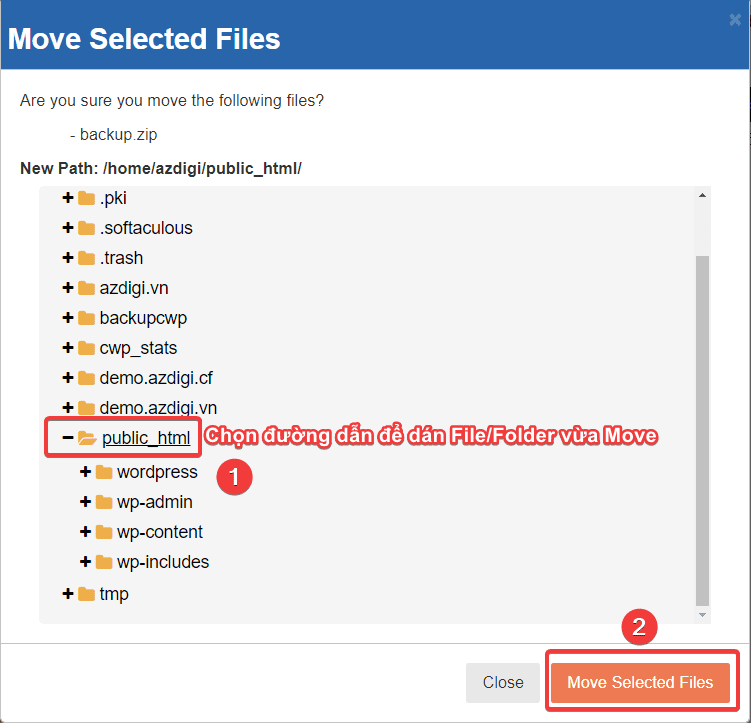
Next, you need to select the path to paste the file/folder that you just moved (To expand the Folders, click “+”). I choose to paste the file into the path /home/azdigi/public_html (1) => Move Selected Files (2).
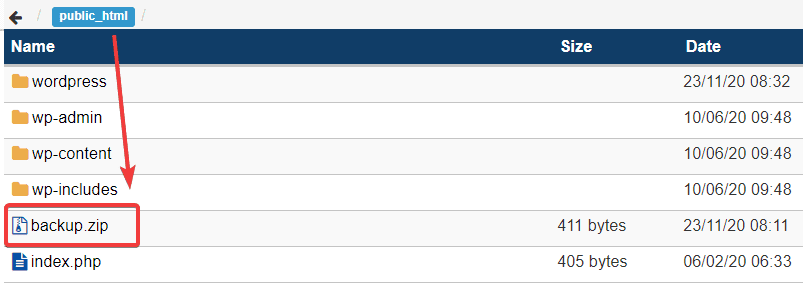
Below is the result when the move is complete:
III. Summary
So AZDIGI has guided you to use File Manager on Centos Web Panel in the most detailed and specific way. Hopefully, this tutorial will help you manipulate and manage your data more simply and safely. If you find the article helpful, please share it widely!
You can refer to other articles about CWP at the link below:
If you need assistance, you can contact support in the ways below:
- Hotline 247: 028 888 24768 (Ext 0)
- Ticket/Email: You use the email to register for the service and send it directly to: support@azdigi.com
About the author

Thạch Phạm
Đồng sáng lập và Giám đốc điều hành của AZDIGI. Có hơn 15 năm kinh nghiệm trong phổ biến kiến thức liên quan đến WordPress tại thachpham.com, phát triển website và phát triển hệ thống.