In this article, AZDIGI will show you create an email account on cPanel and how to log in to webmail. Let’s follow the steps below.
Note: To be able to send and receive email required domain, you must perform a full update of DNS records as follows:
- Record MX: domain => webmail.domain (priority 10)
- Record A: webmail => IP hosting
In addition, you need to update the DKIM and SPF records to increase the credibility of the email.
On the other hand, if you use the Nameserver pair at AZDIGI as ns3.azdigi.com & ns4.azdigi.com, then you don’t need to perform DNS pointing manually anymore because when using this Nameserver pair, the system will automatically recognize all the DNS and IP records.
1. How to create an account
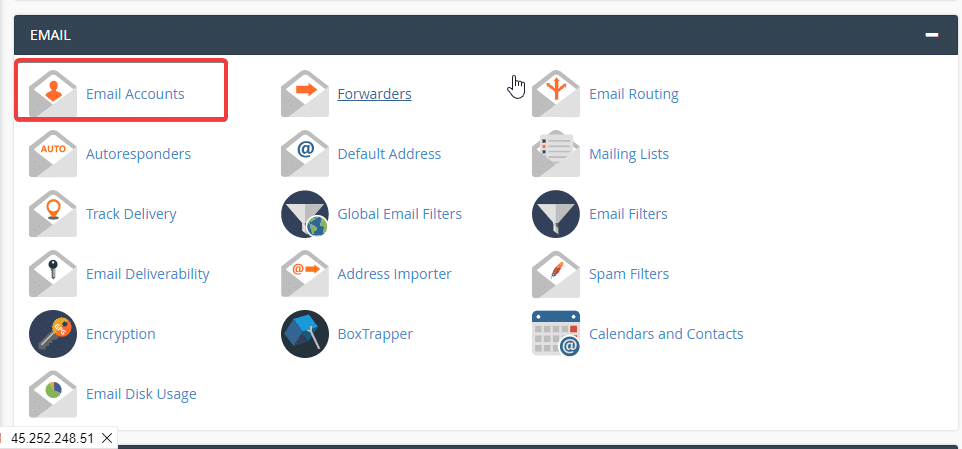
You log in to cPanel and select Email Accounts to enter the account creation interface
At the interface below, click Create to start creating.

You choose the domain name to create for that email and enter the email account and password.
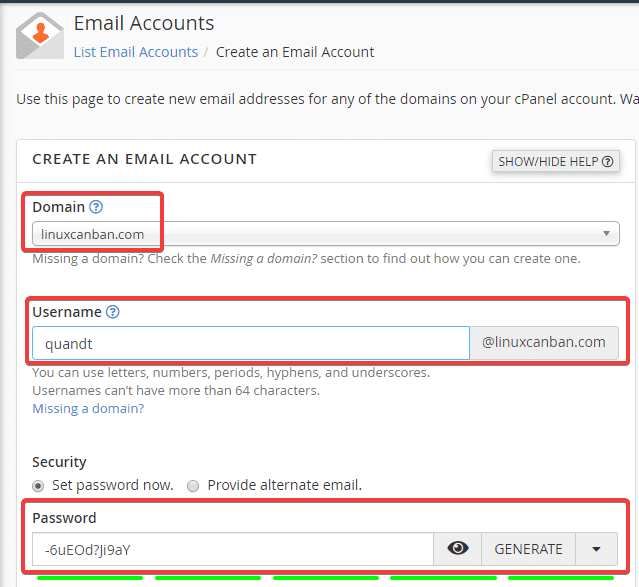
After entering all the information for the email account and the Storage Space item is the allowed space on the account, the default will be 1GB and you can set a custom capacity for that account => Create

After successful creation, the system will display all the accounts as shown below:

2. How to login email
Method 1: Login from cPanel
You can log in to email directly from cPanel’s email interface. Click CHECK EMAIL
Next, click Open to open the mail interface.
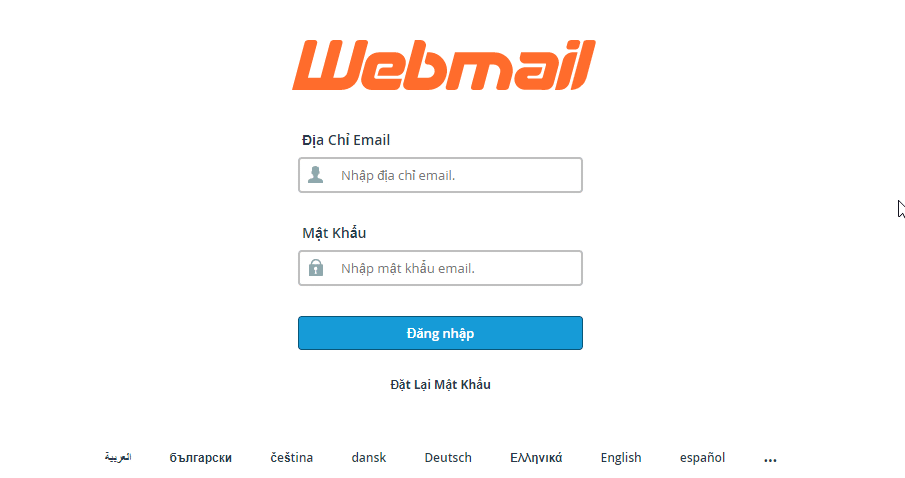
Method 2: Login via the link
After fully updating the records, you can access the following link to log in:
- Link: webmail.domain:2096
- VD: https://webmail.linuxcanban.com:2096
- Hotline 247: 028 888 24768 (Ext 0)
- Ticket/Email: You can use your email to register for the service and send it directly to: support@azdigi.com
About the author

Thạch Phạm
Đồng sáng lập và Giám đốc điều hành của AZDIGI. Có hơn 15 năm kinh nghiệm trong phổ biến kiến thức liên quan đến WordPress tại thachpham.com, phát triển website và phát triển hệ thống.