
In this article, AZDIGI will show you how to install Django on cPanel. If you need any support, please contact AZDIGI via the hotline at 028 888 24768 or email support@azdigi.com
Django is one of the most popular frameworks for developing web applications using Python. With cPanel, installing Django has become easier than ever. In this article, AZDIGI will guide you on how to install Django on the cPanel interface.
Step 1: Login to cPanel
Access the cPanel administration page and log in with your administrator account. Then, we will navigate to the “Software” section and select “Setup Python App”.

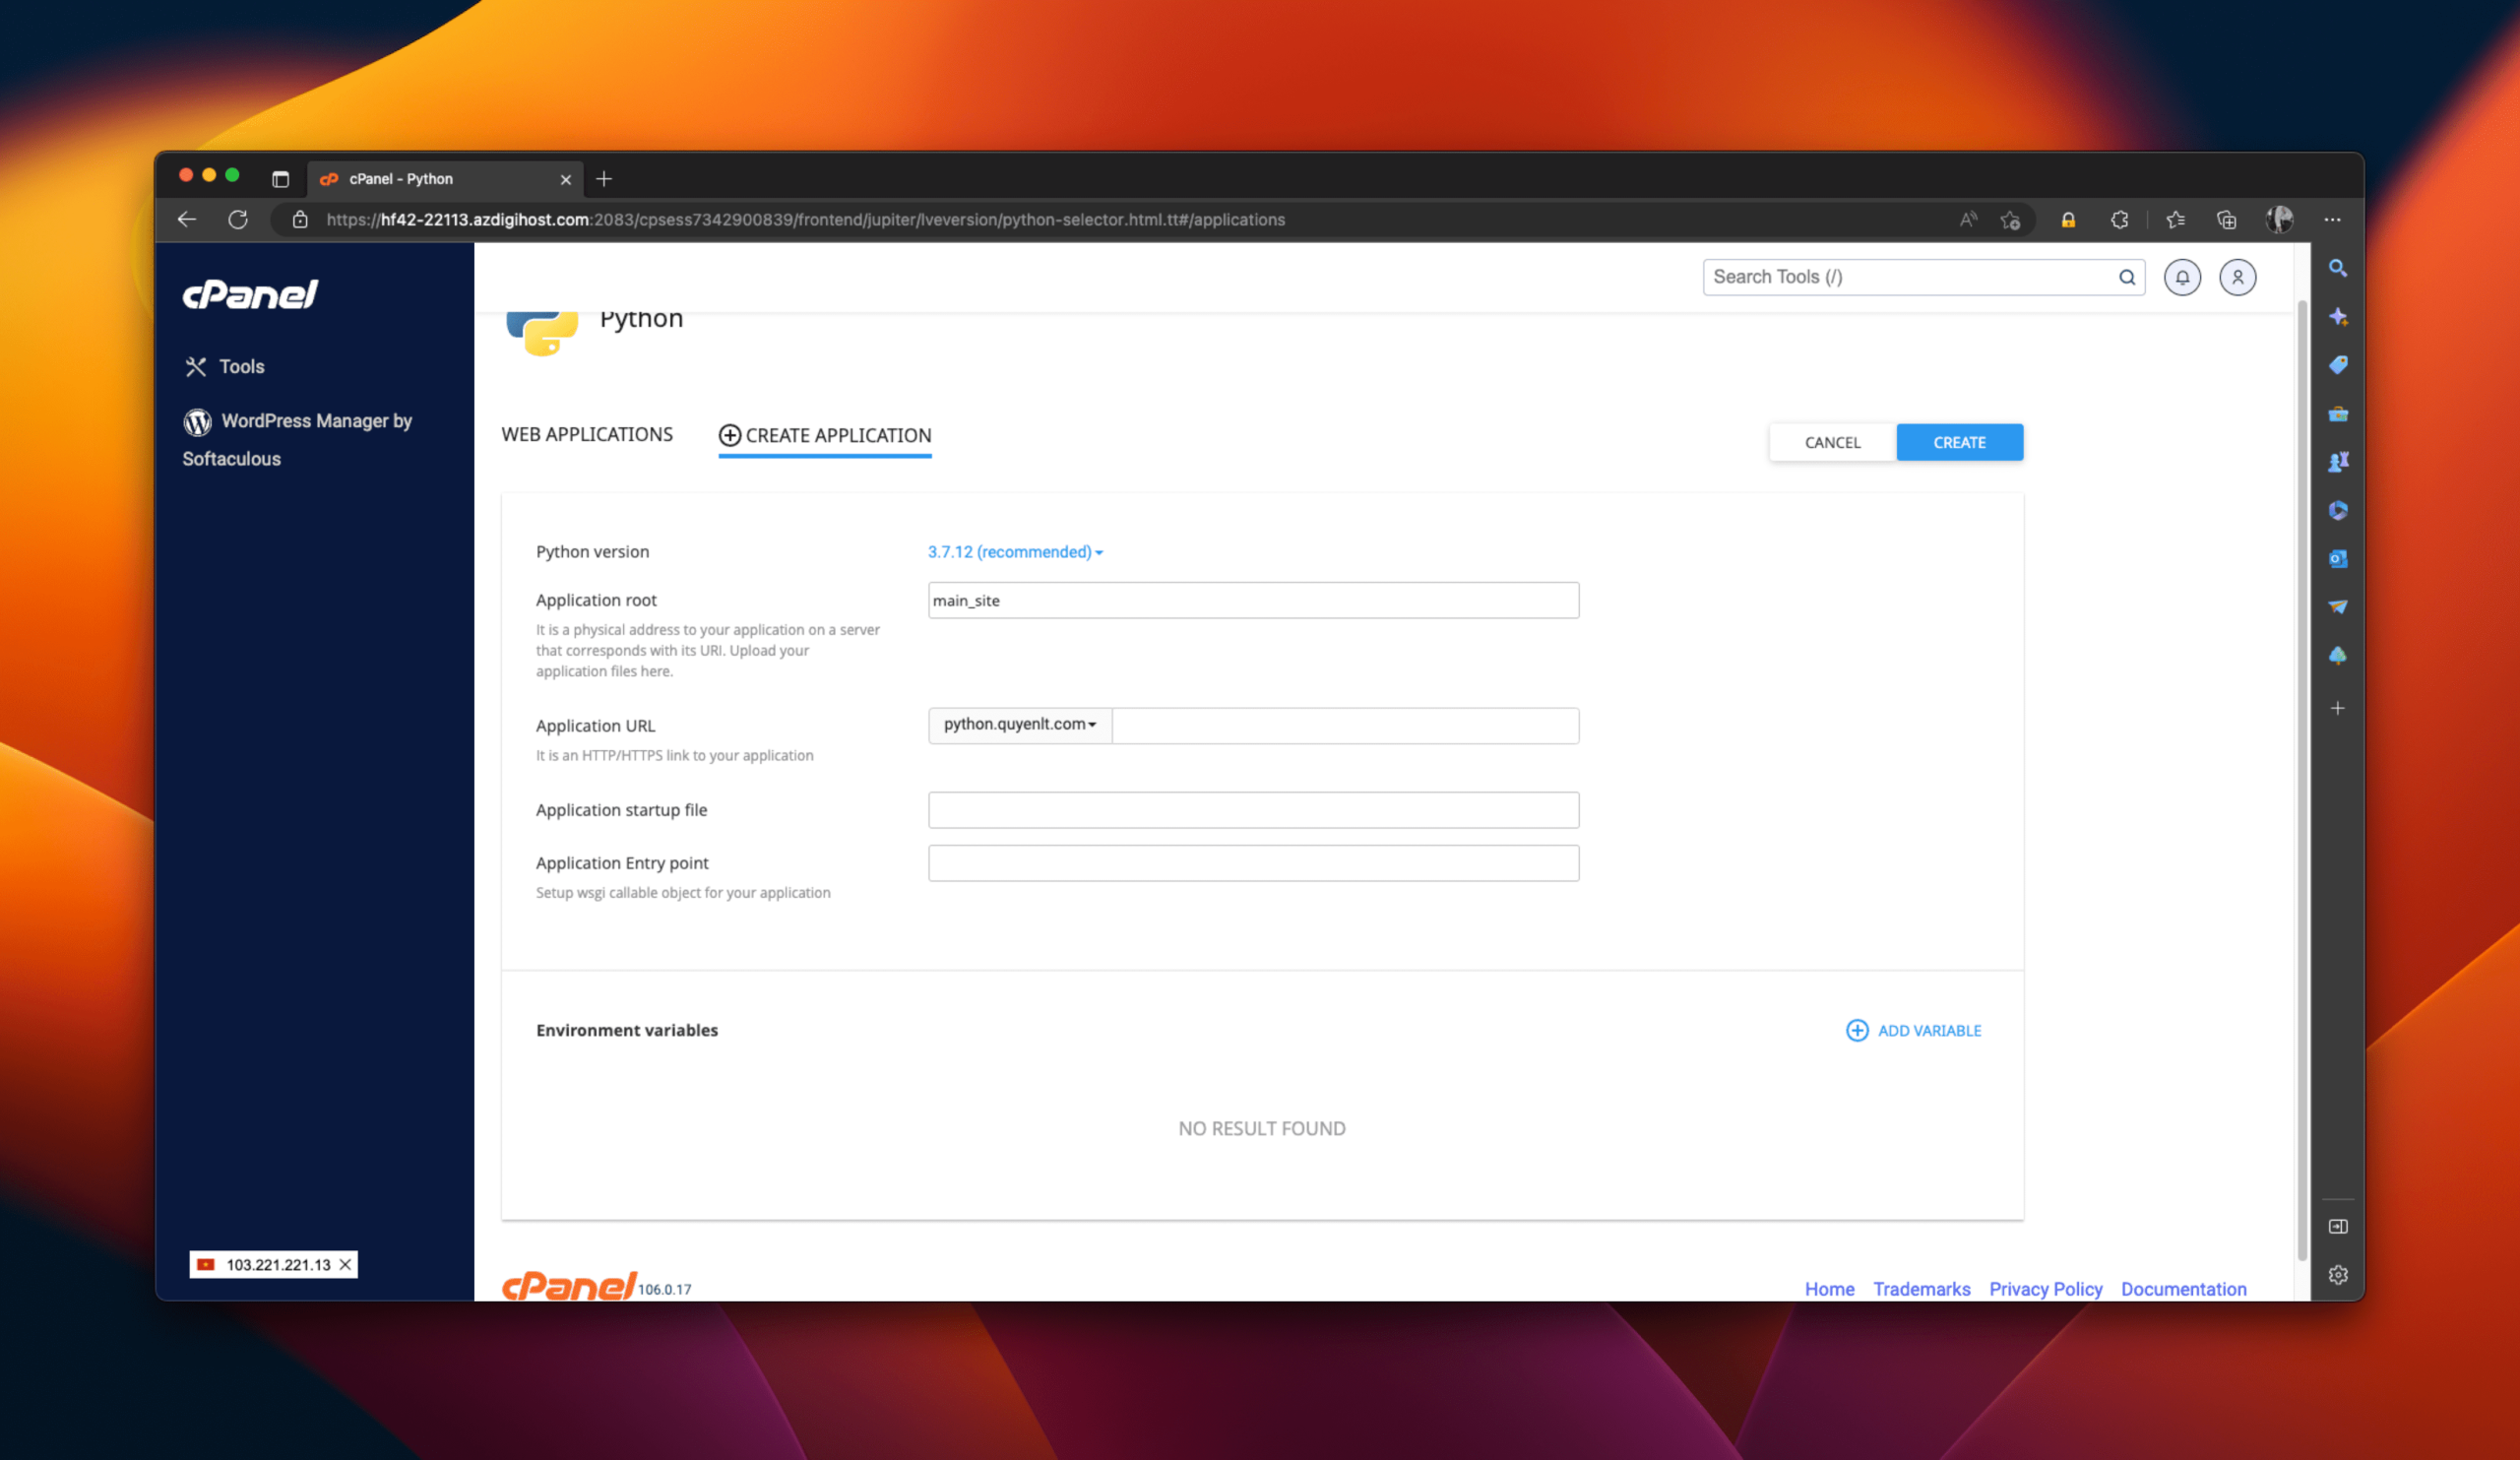
Step 2: Create a Python application
Next, we will create a new Python application. You need to fill in the required parameters as follows:
- Application root: the path to the directory containing the Django application.
- Application URL: the URL address of the application.
- Application startup file: the path to the “wsgi.py” file in the Django application.
- Application Entry Point: “wsgi”.
After filling in all the information, click the “Create” button.
Step 3: Install Django
- Copy the command to access the virtual environment created for the Python app and execute the command through the SSH interface on cPanel.
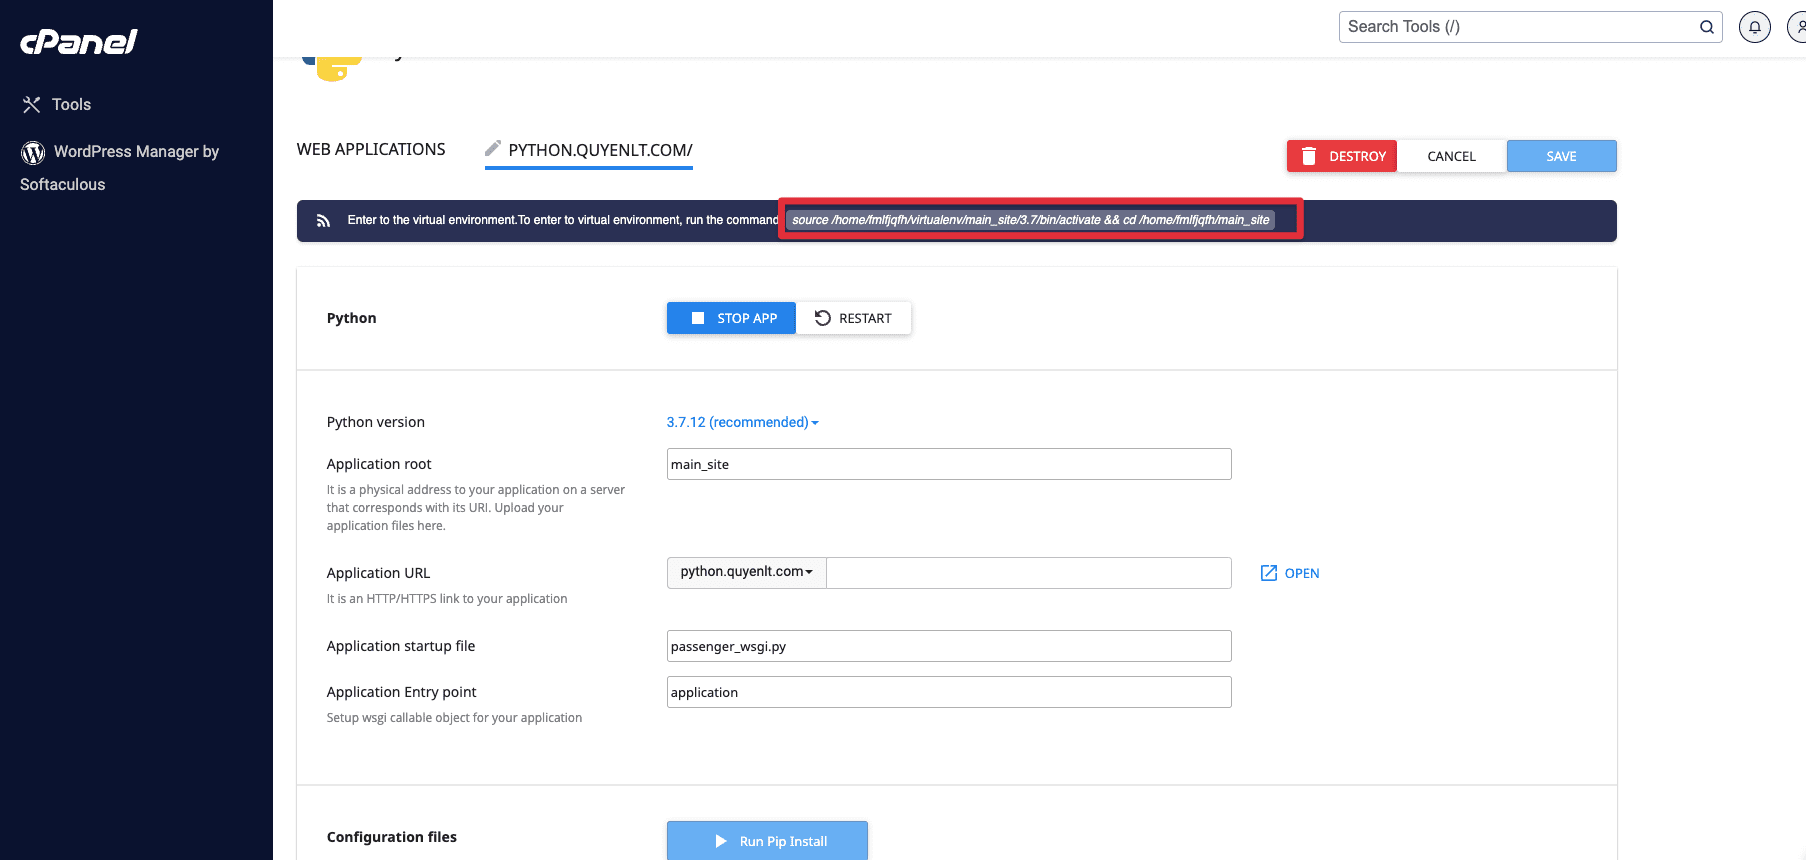
- Once the Python application is created, we will install Django using the Terminal. We will access the Terminal through the cPanel administration page and run the following commands:
pip install --upgrade pip
pip install django
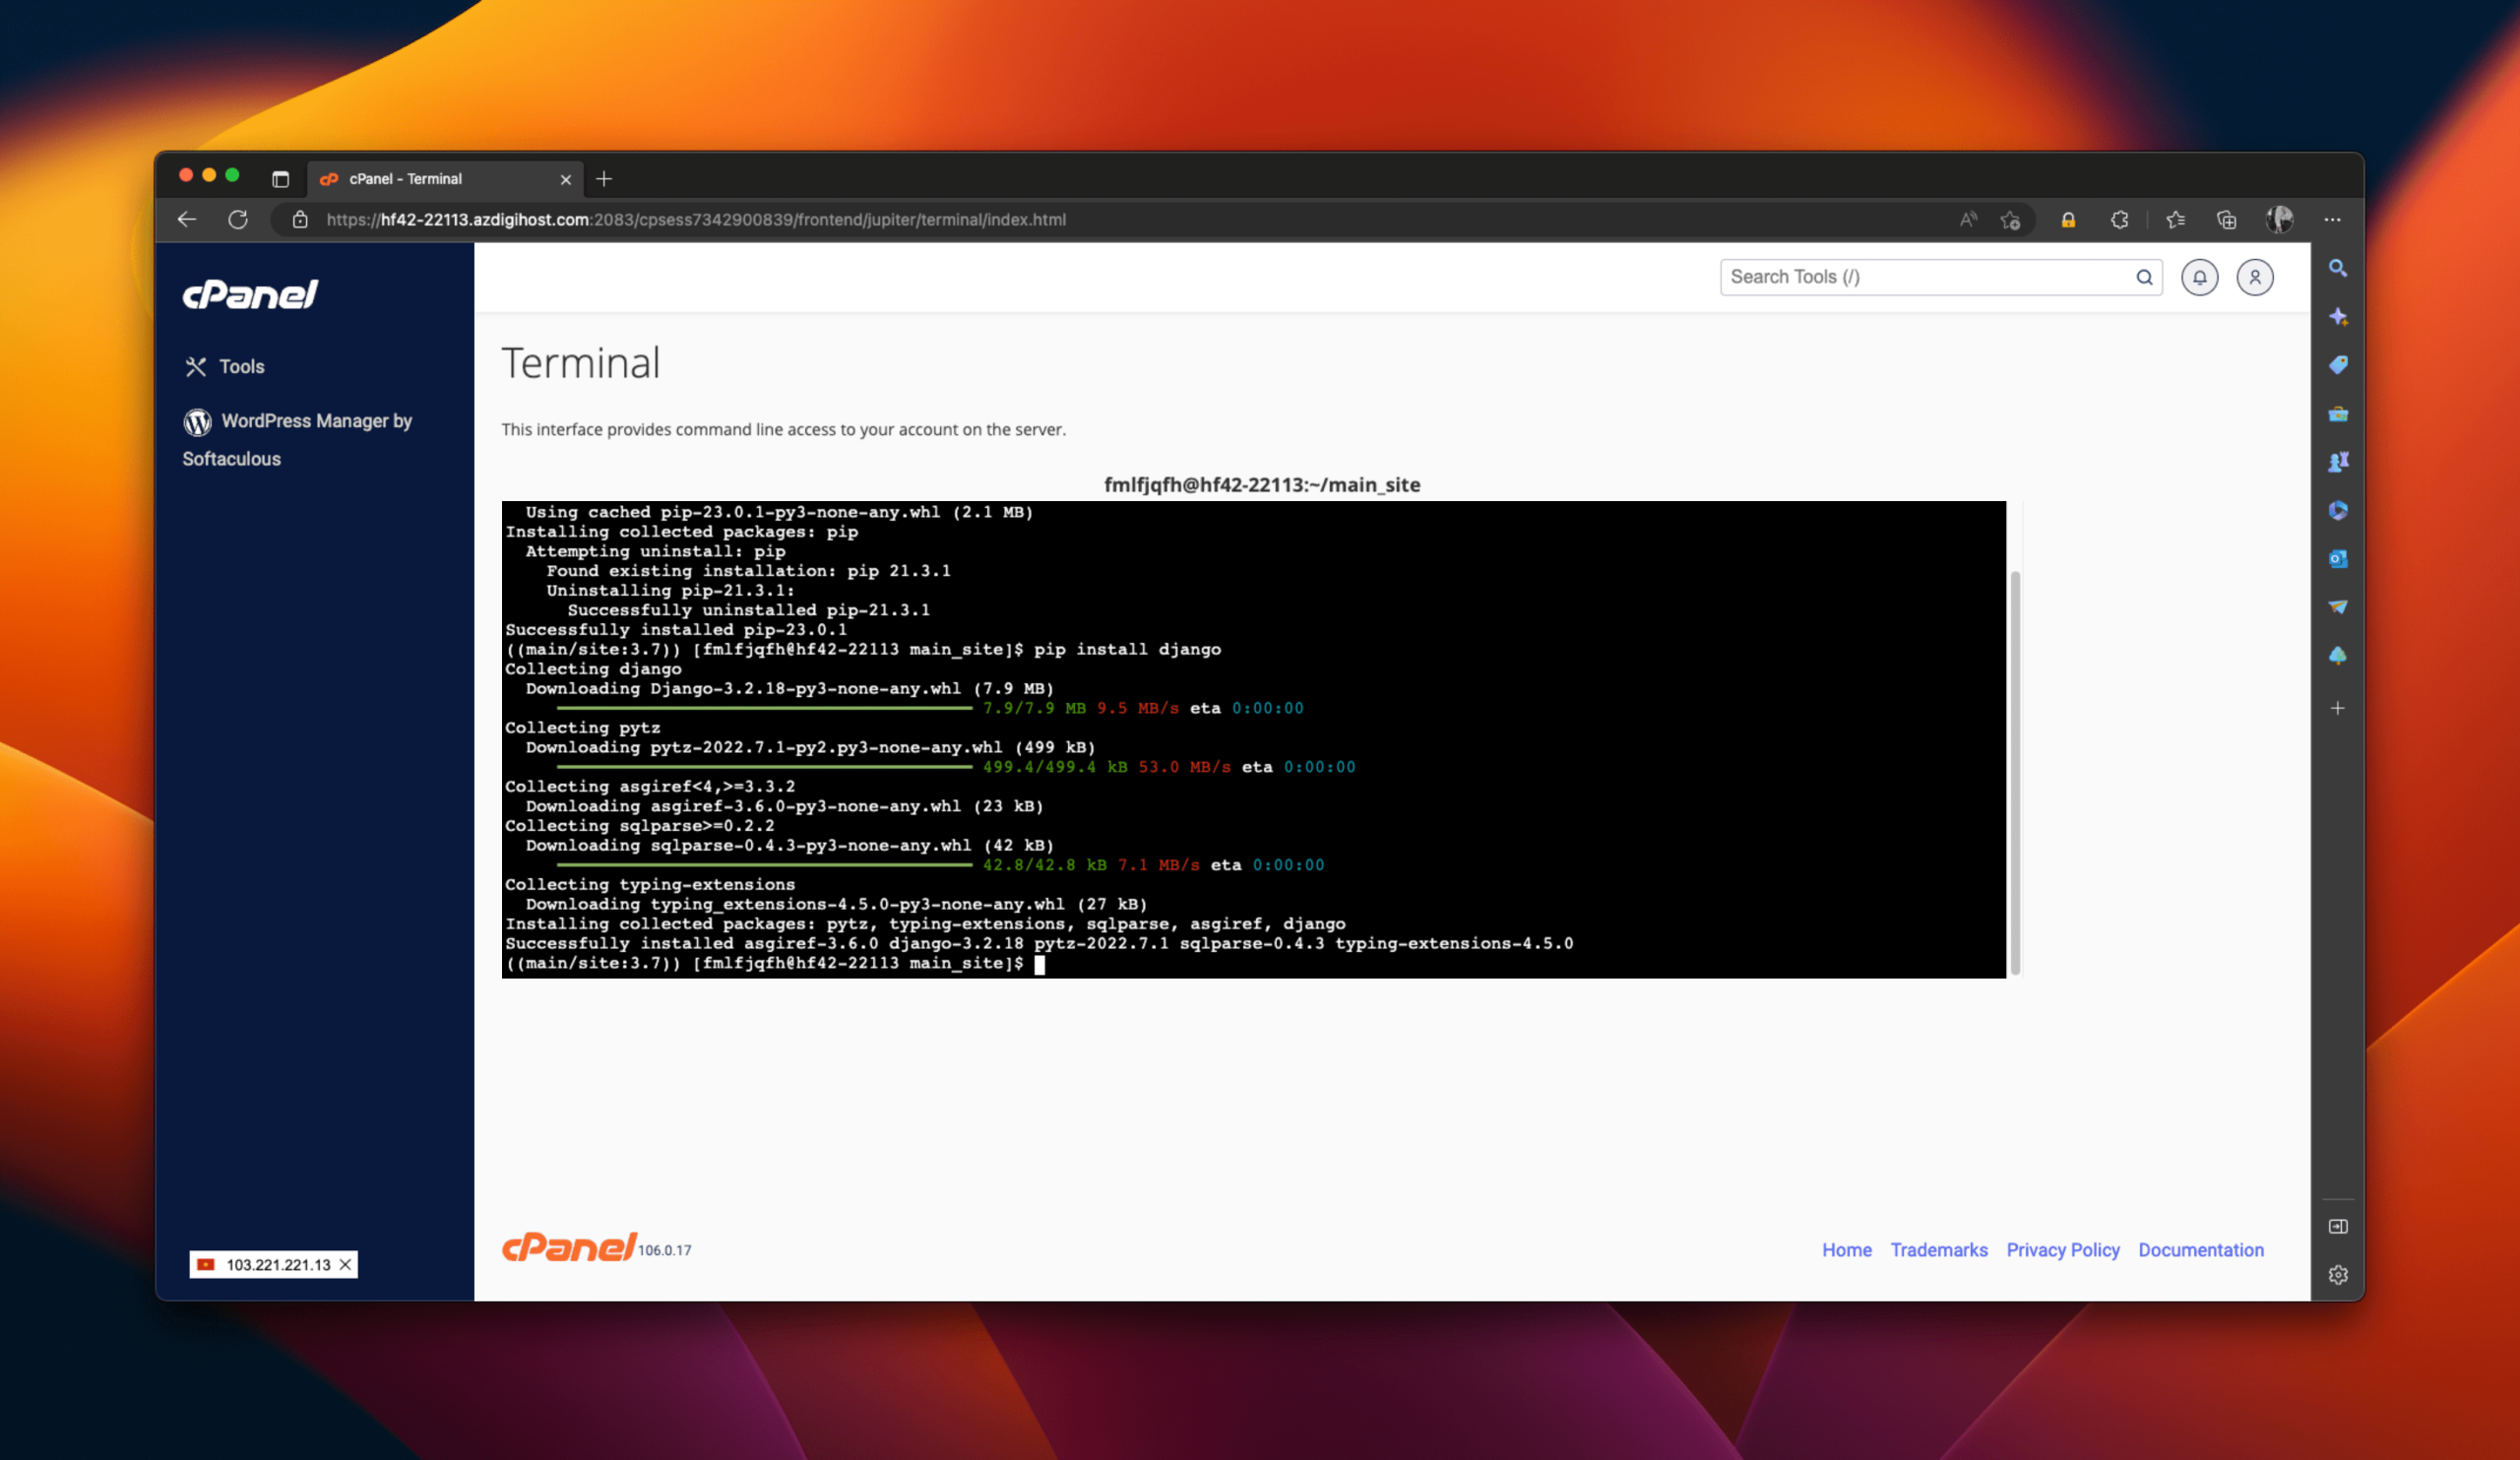
- These commands will install Django on our server. After the installation is complete, we will double-check it by running the following command:
python -m django --version
- If the Django version is displayed, it means we have successfully installed Django.
- Create a Django project in the main directory (in this example, the main directory is “main_site” and the project name is “demo_project”) using the command:
django-admin startproject demo_project .
- Note: The command has a dot at the end.
- After creating the project, the existing files in the root directory will look as follows:

- Perform the configuration edits for these files accordingly, delete the content of the “passenger_wsgi.py” file, and replace it with the following line:
from demo_project.wsgi import application
- Perform the following steps with the commands:
echo > passenger_wsgi.py && echo "from demo_project.wsgi import application" > passenger_wsgi.py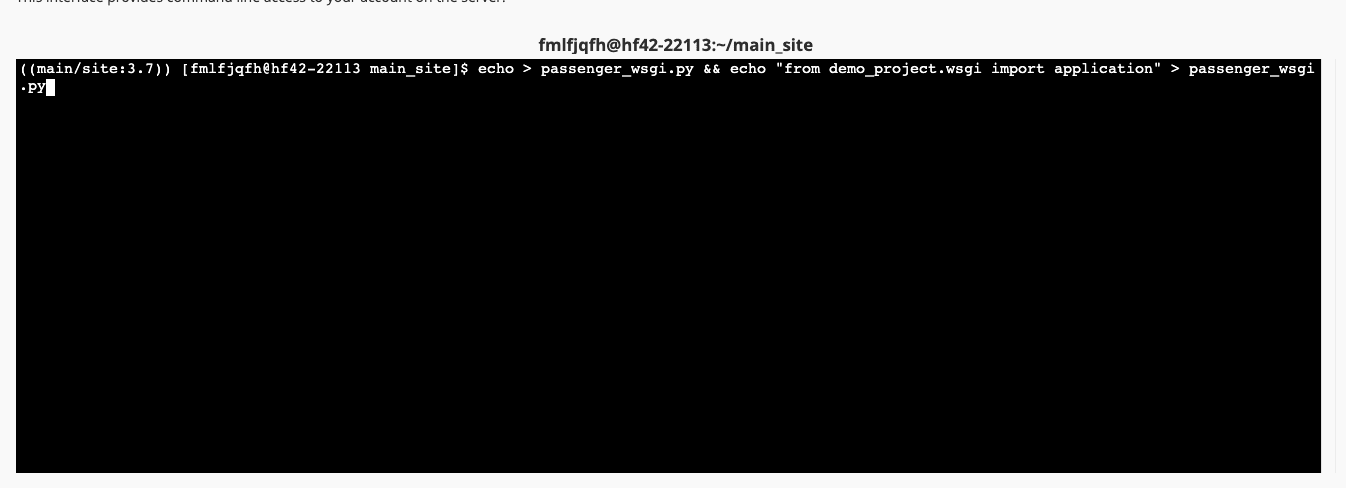
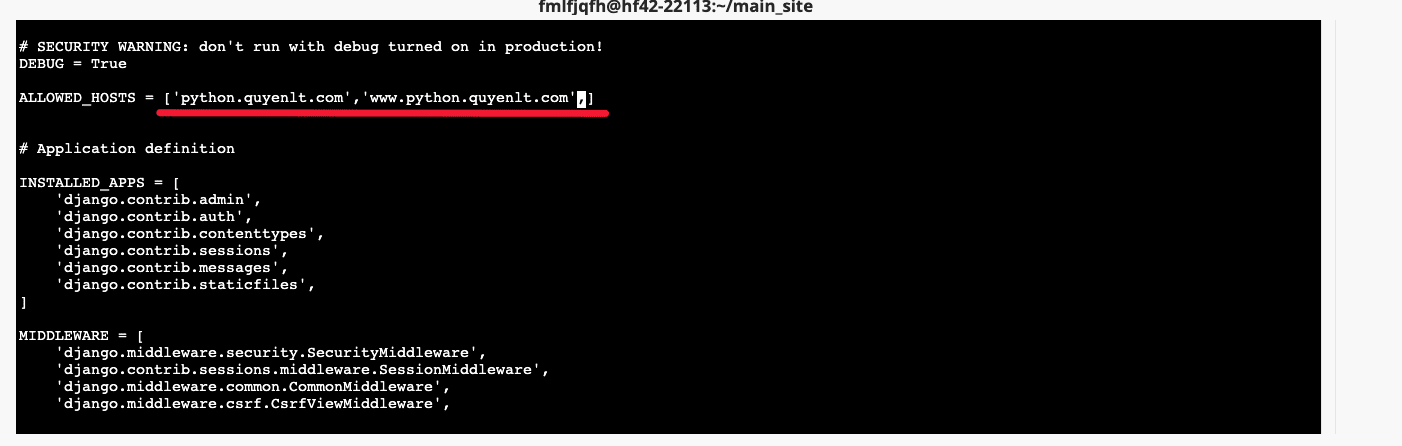
- Edit the “demo_project/settings.py” file
- Add the desired domain name to the “ALLOWED_HOSTS” line.
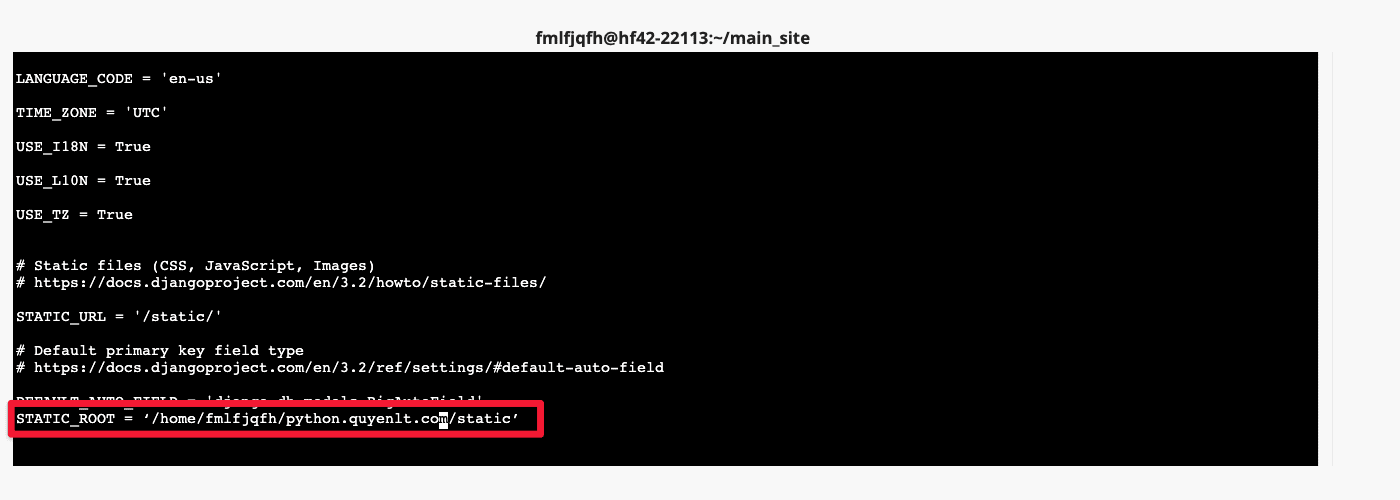
- Move to the end of the file and add the following line:
STATIC_ROOT = '<đường dẫn đến public_html>/static'
- Save and quit
- Add execute permission to the “manage.py” file:
chmod +x manage.py
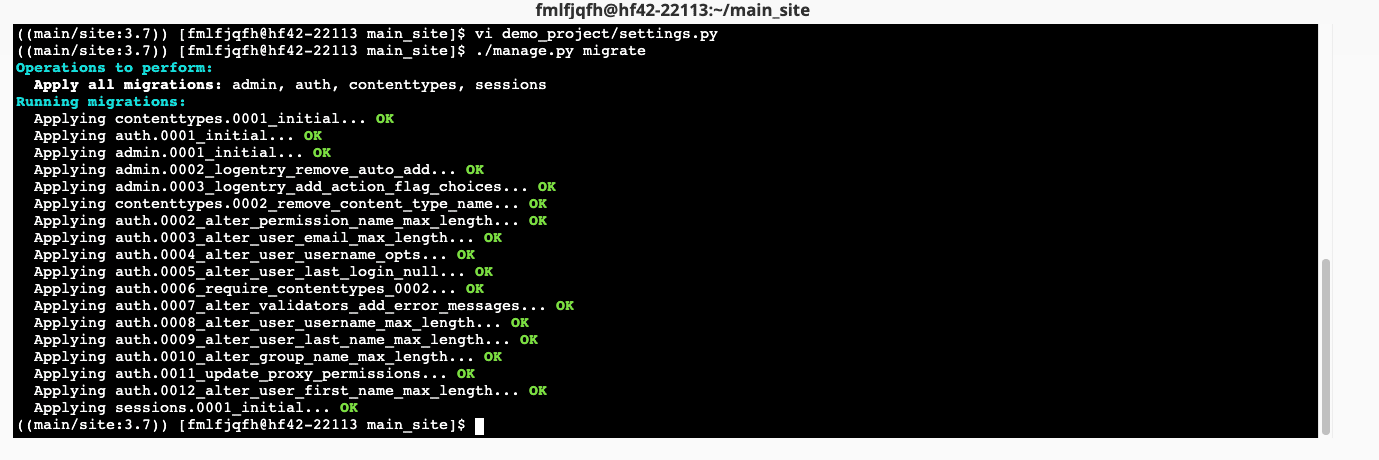
- Apply the new configuration changes:
./manage.py migrate
- If the configuration file is correct, it should display as follows:
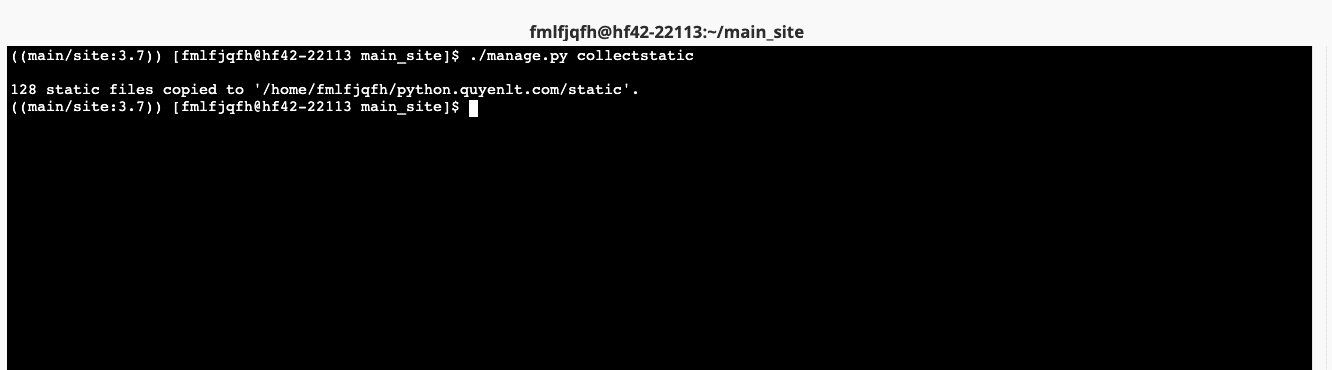
- Update the content of CSS and JS related to “static_root”:
./manage.py collectstatic
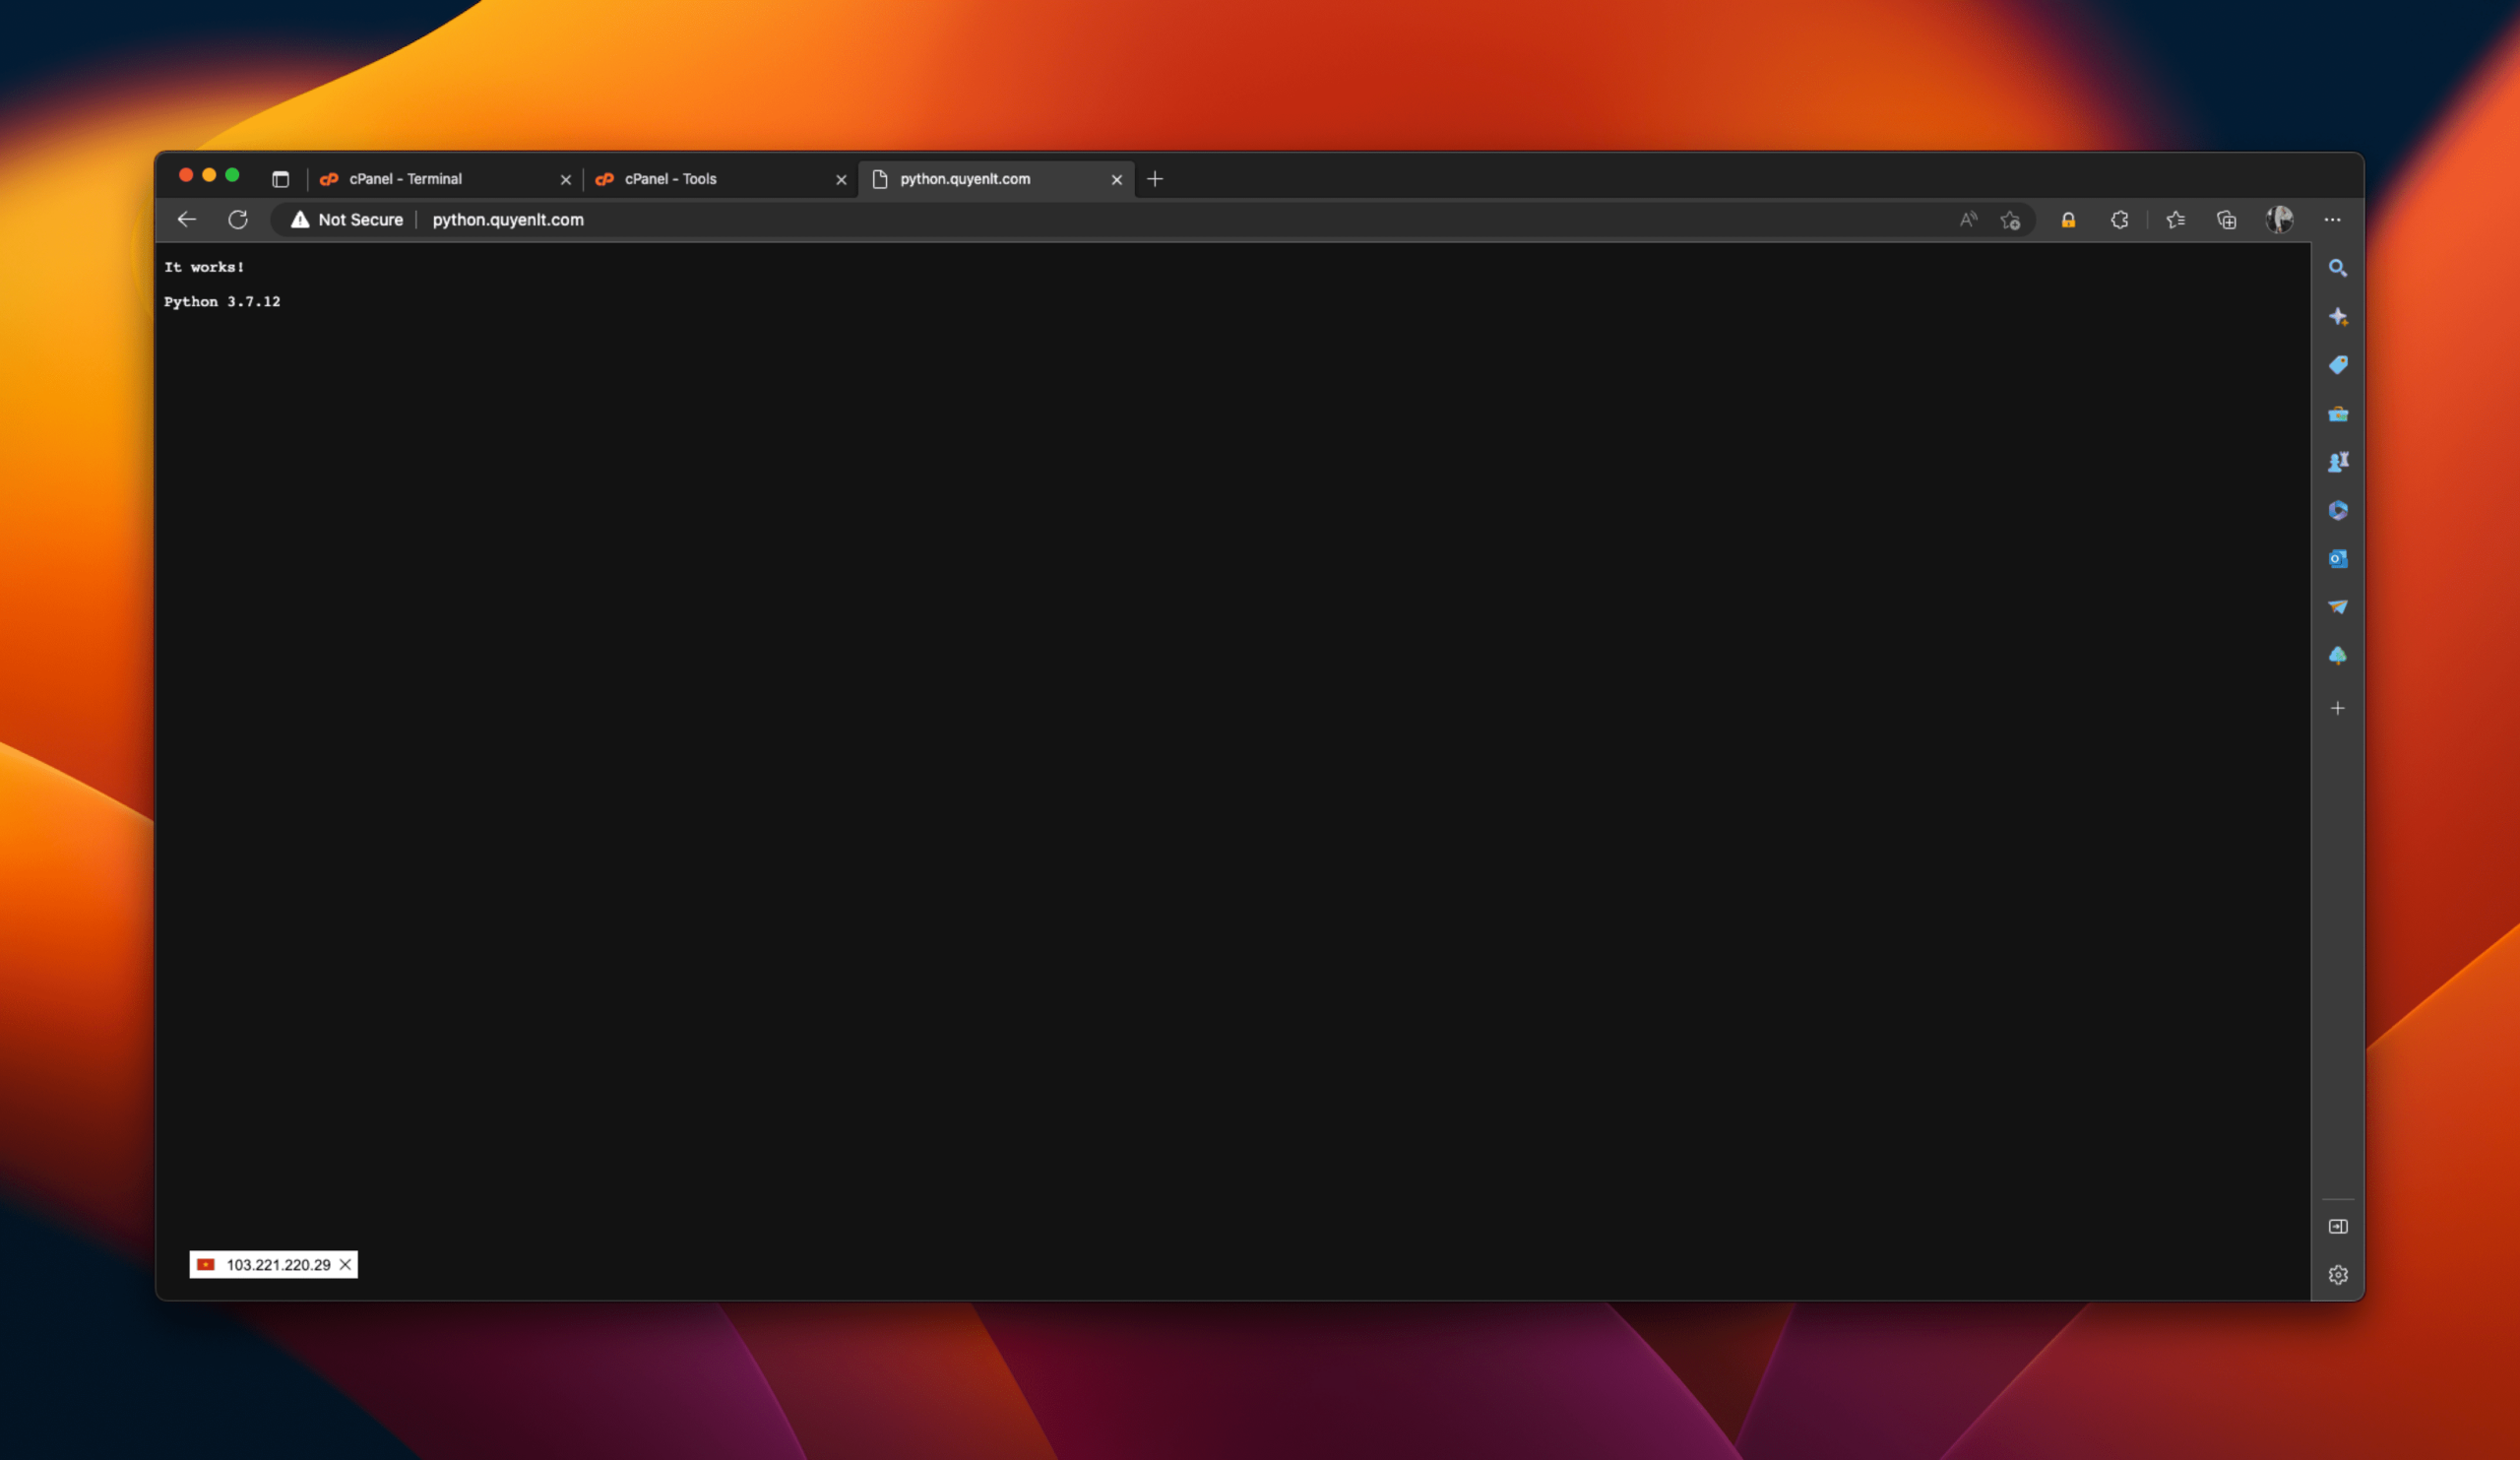
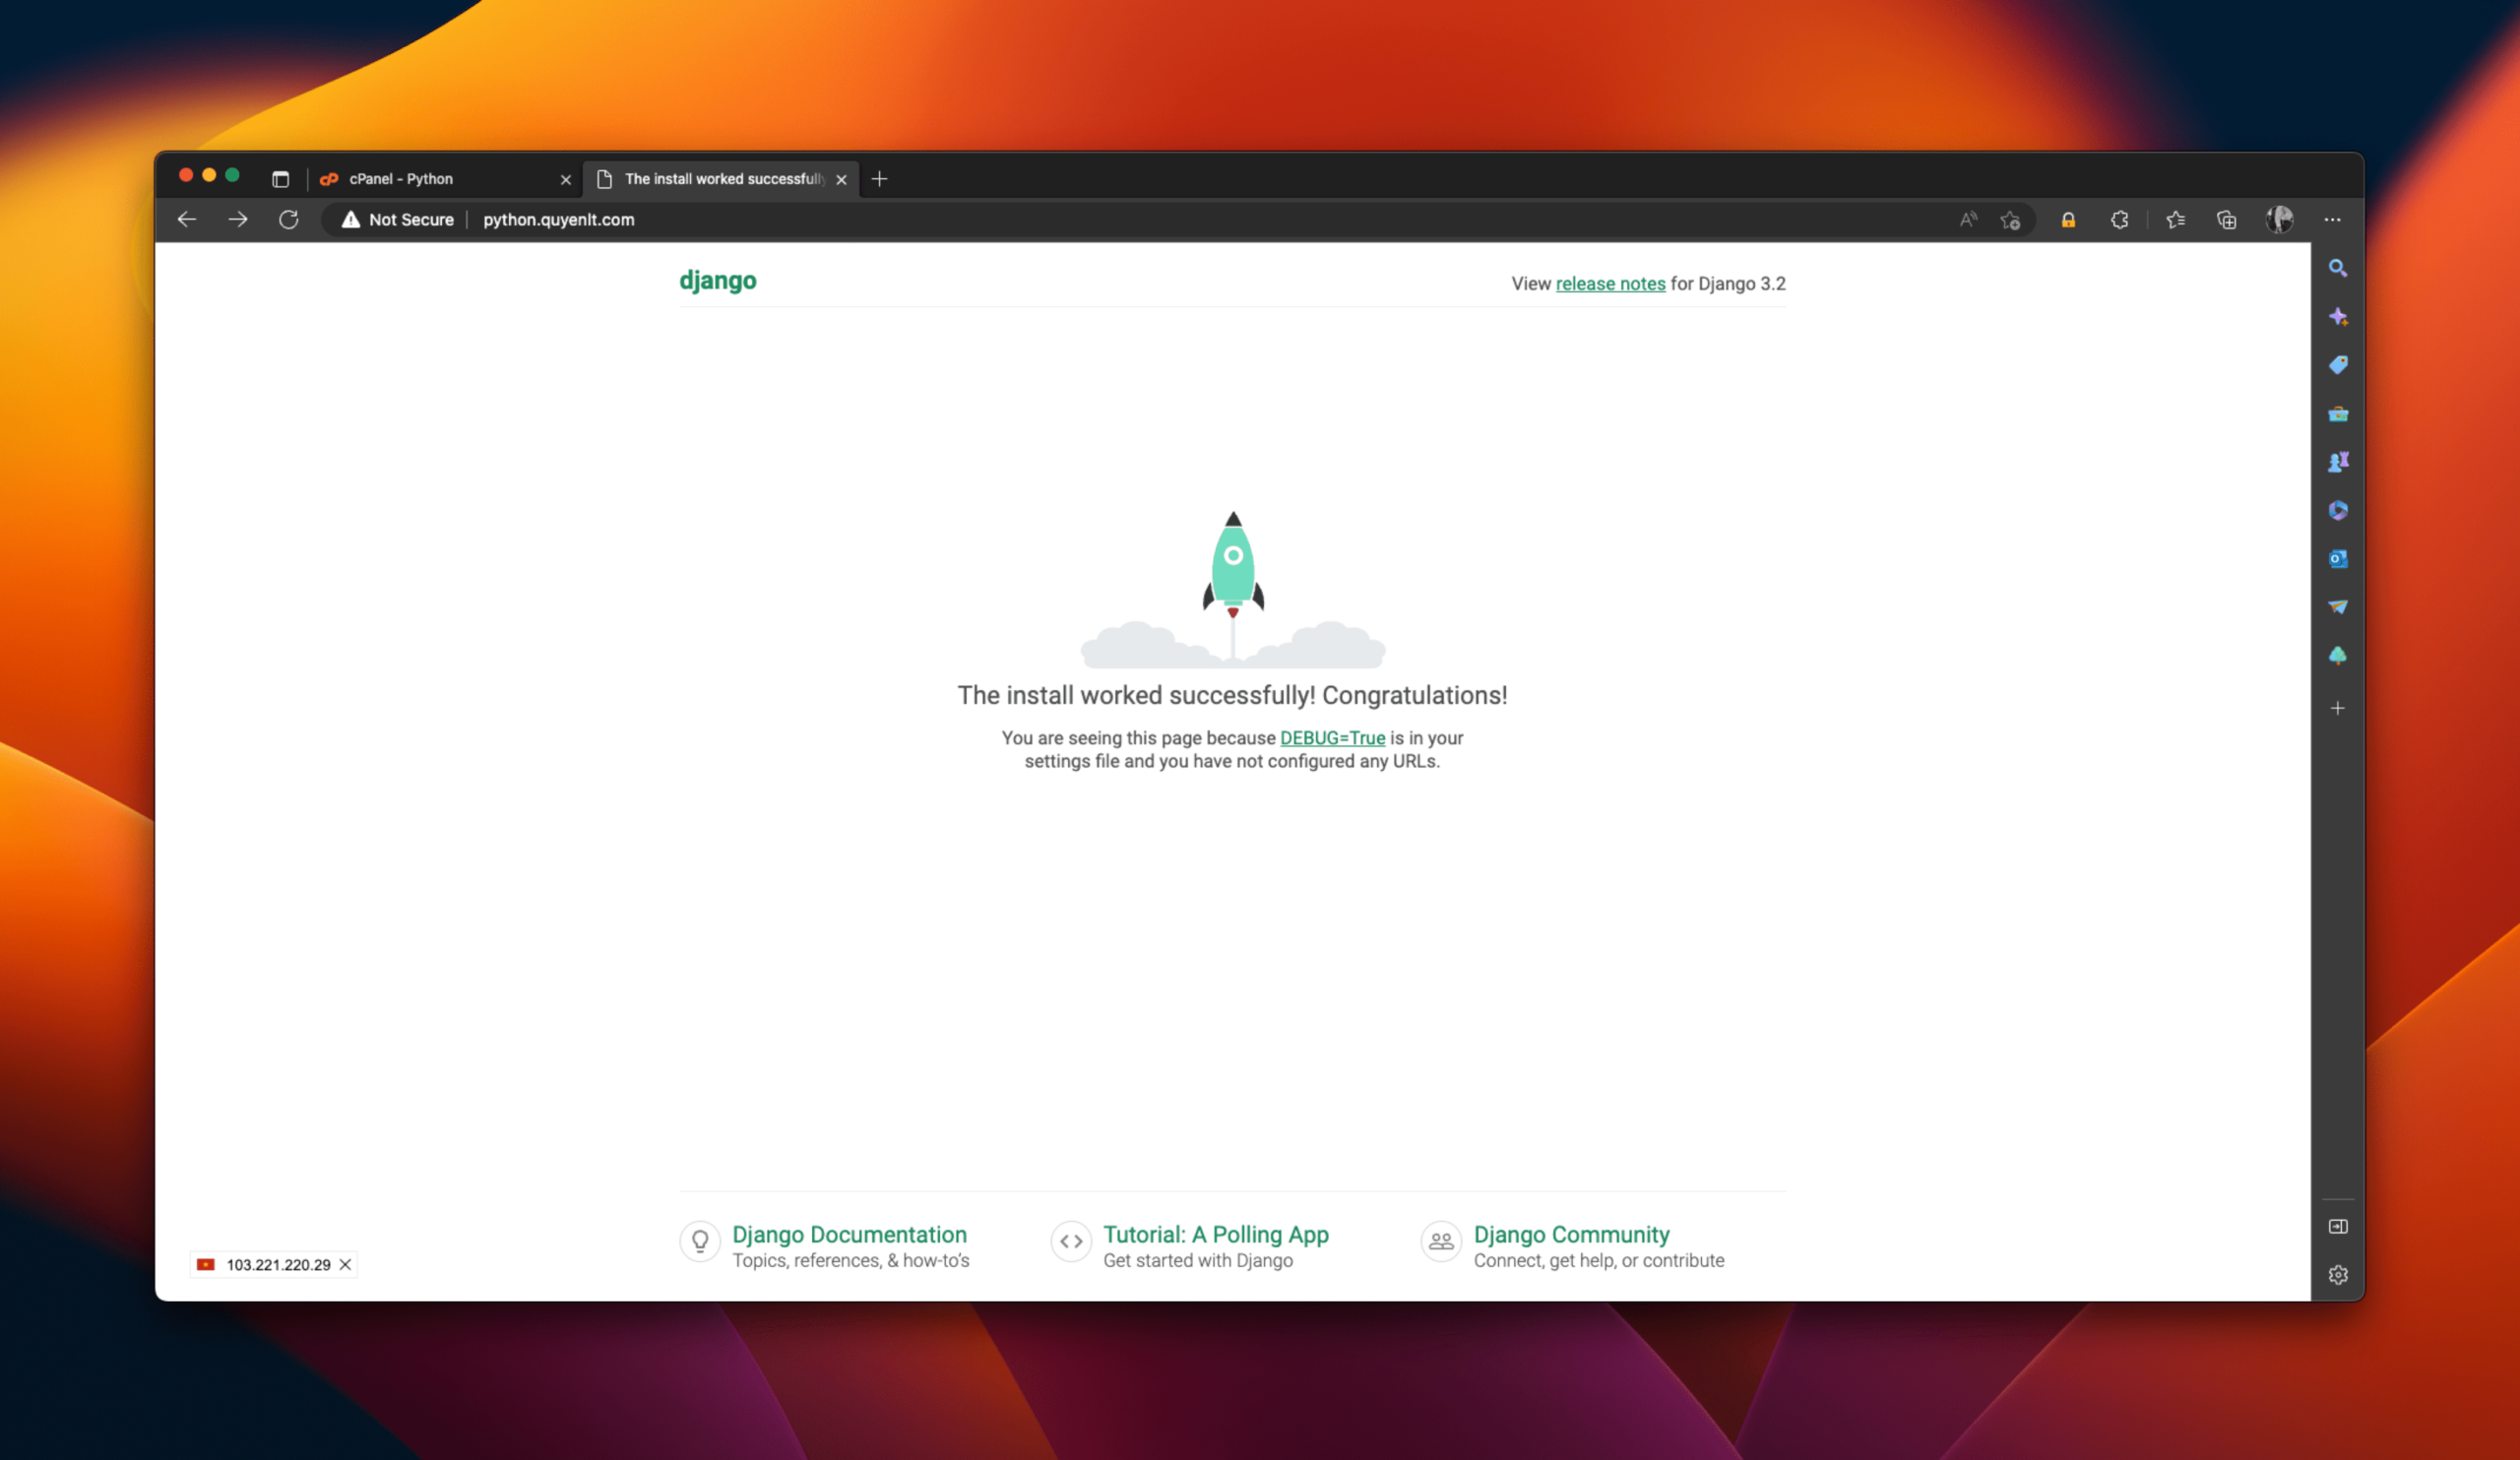
- Restart the Python app and try accessing the website.

- Try accessing the website:
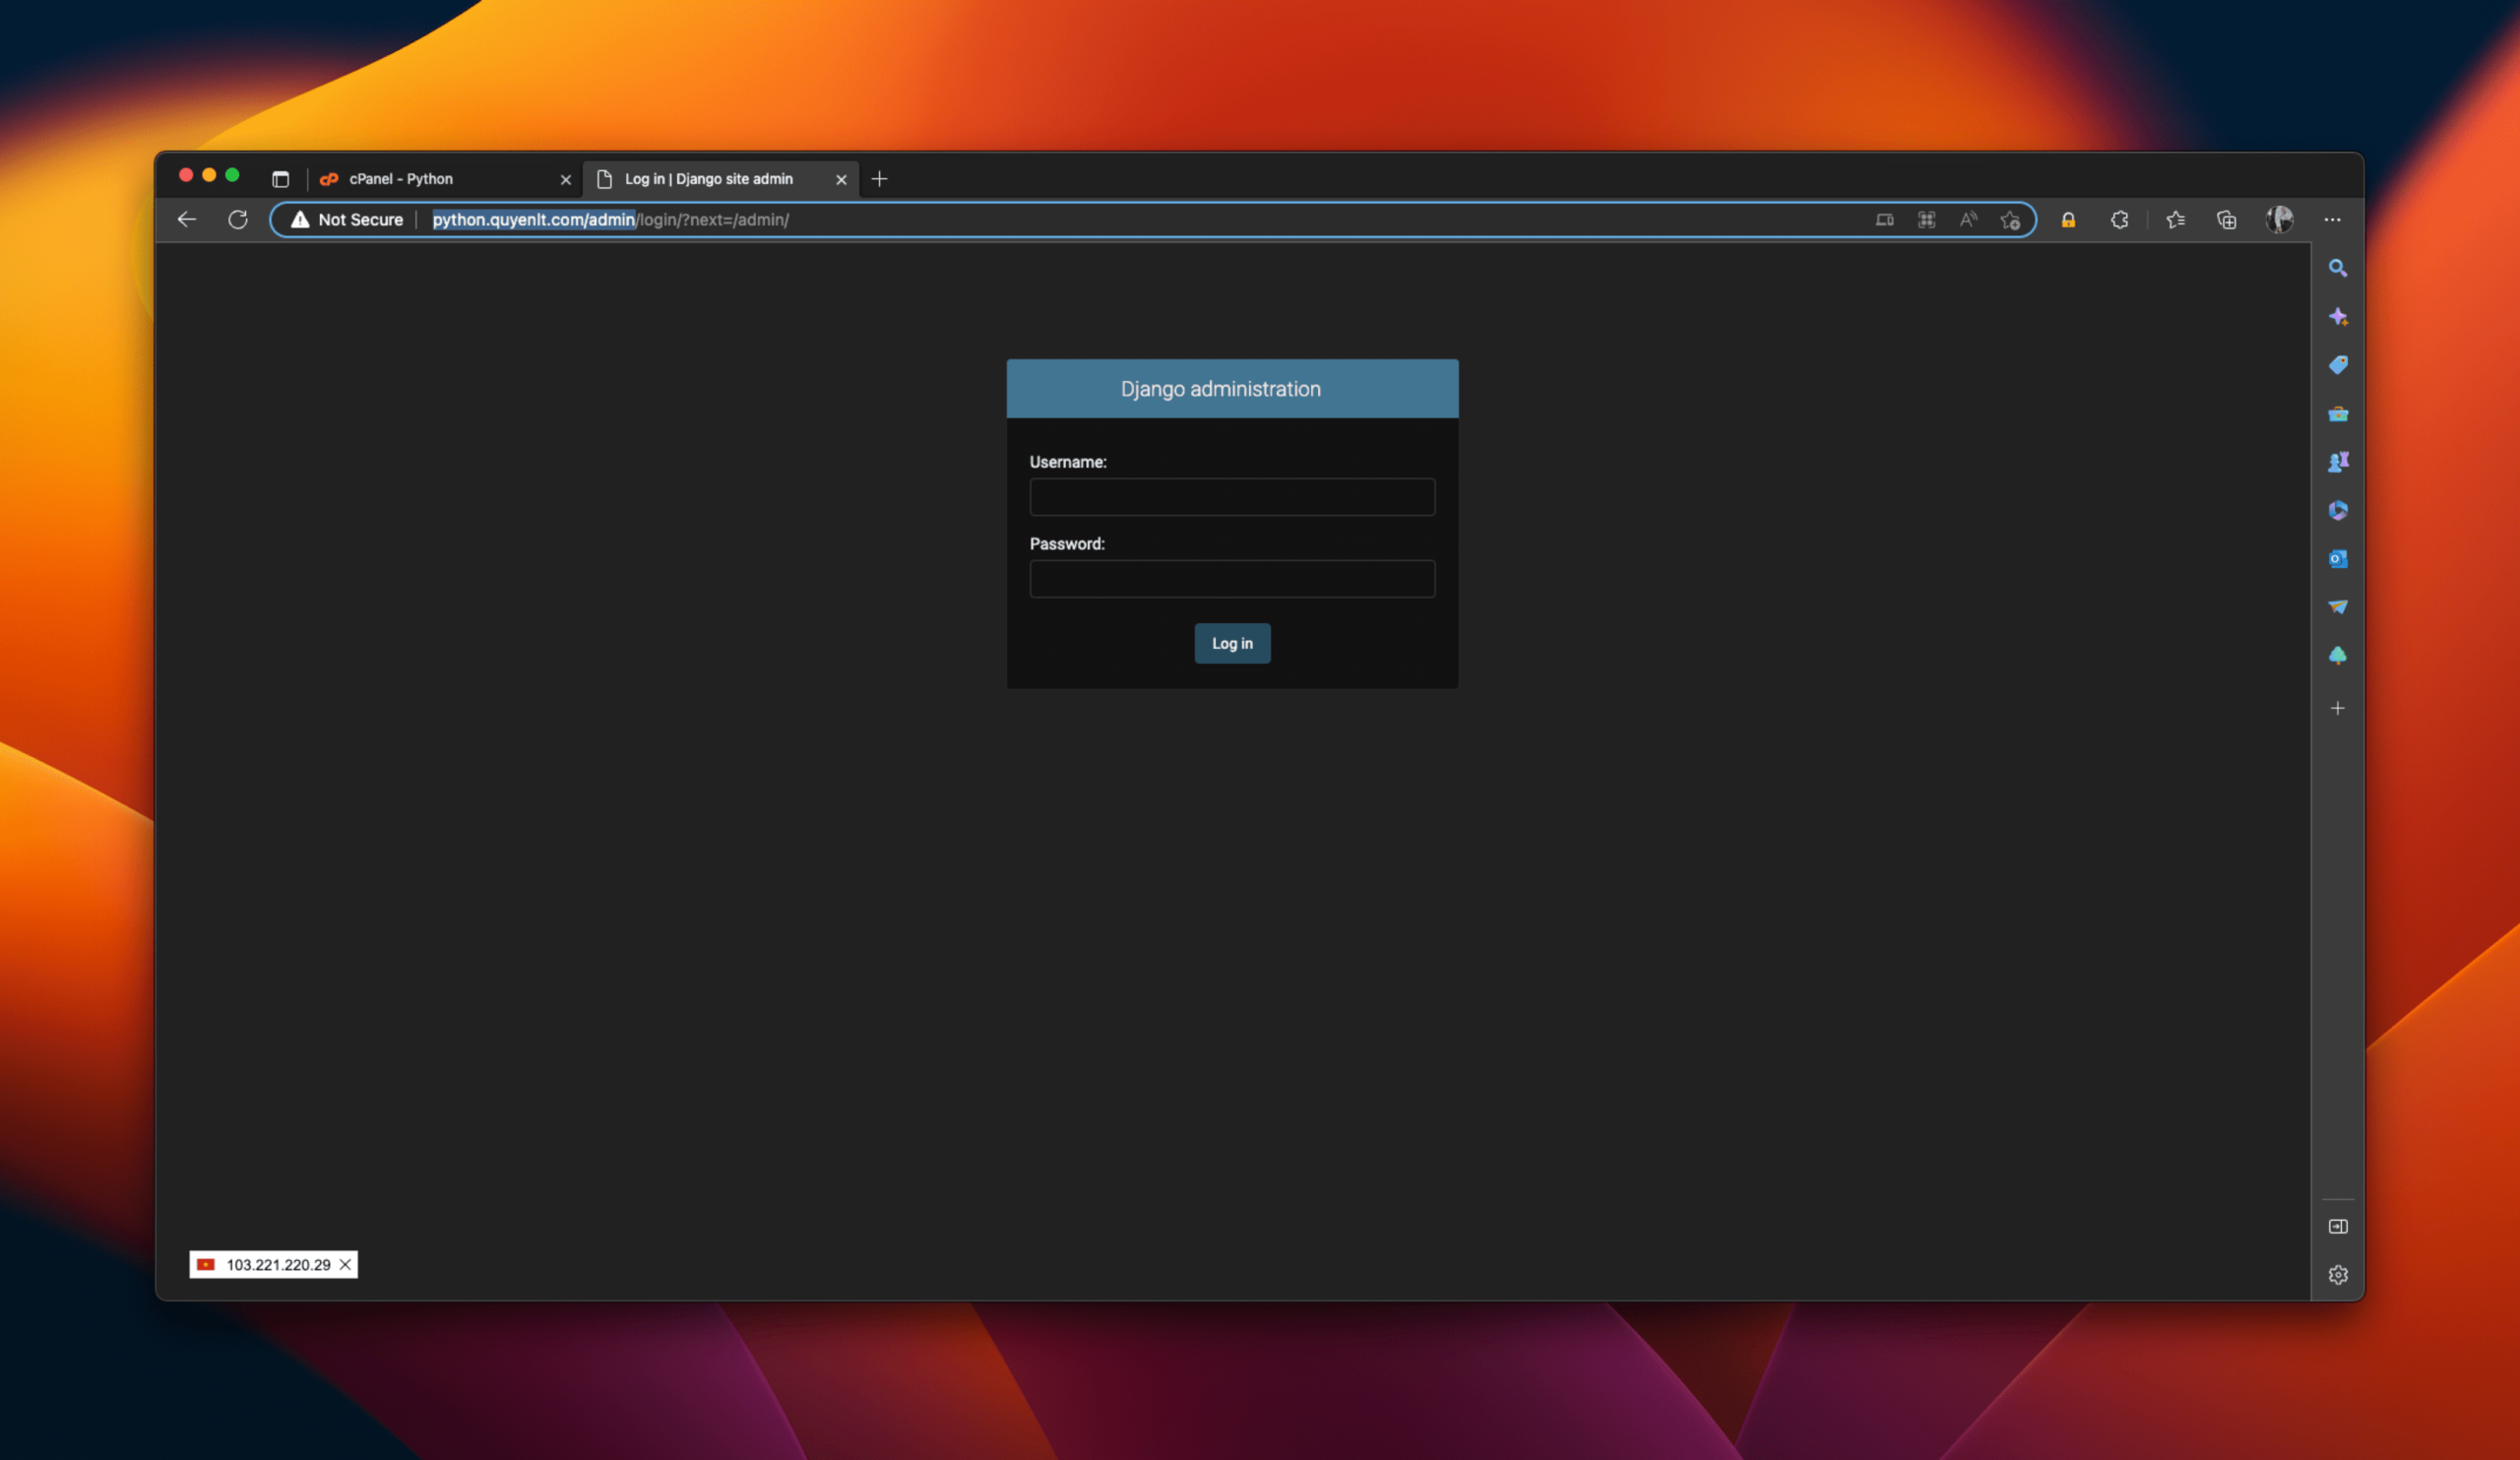
**The admin access link will be: http://python.quyenlt.com/admin
- Create an admin account to manage the website:
./manage.py createsuperuser

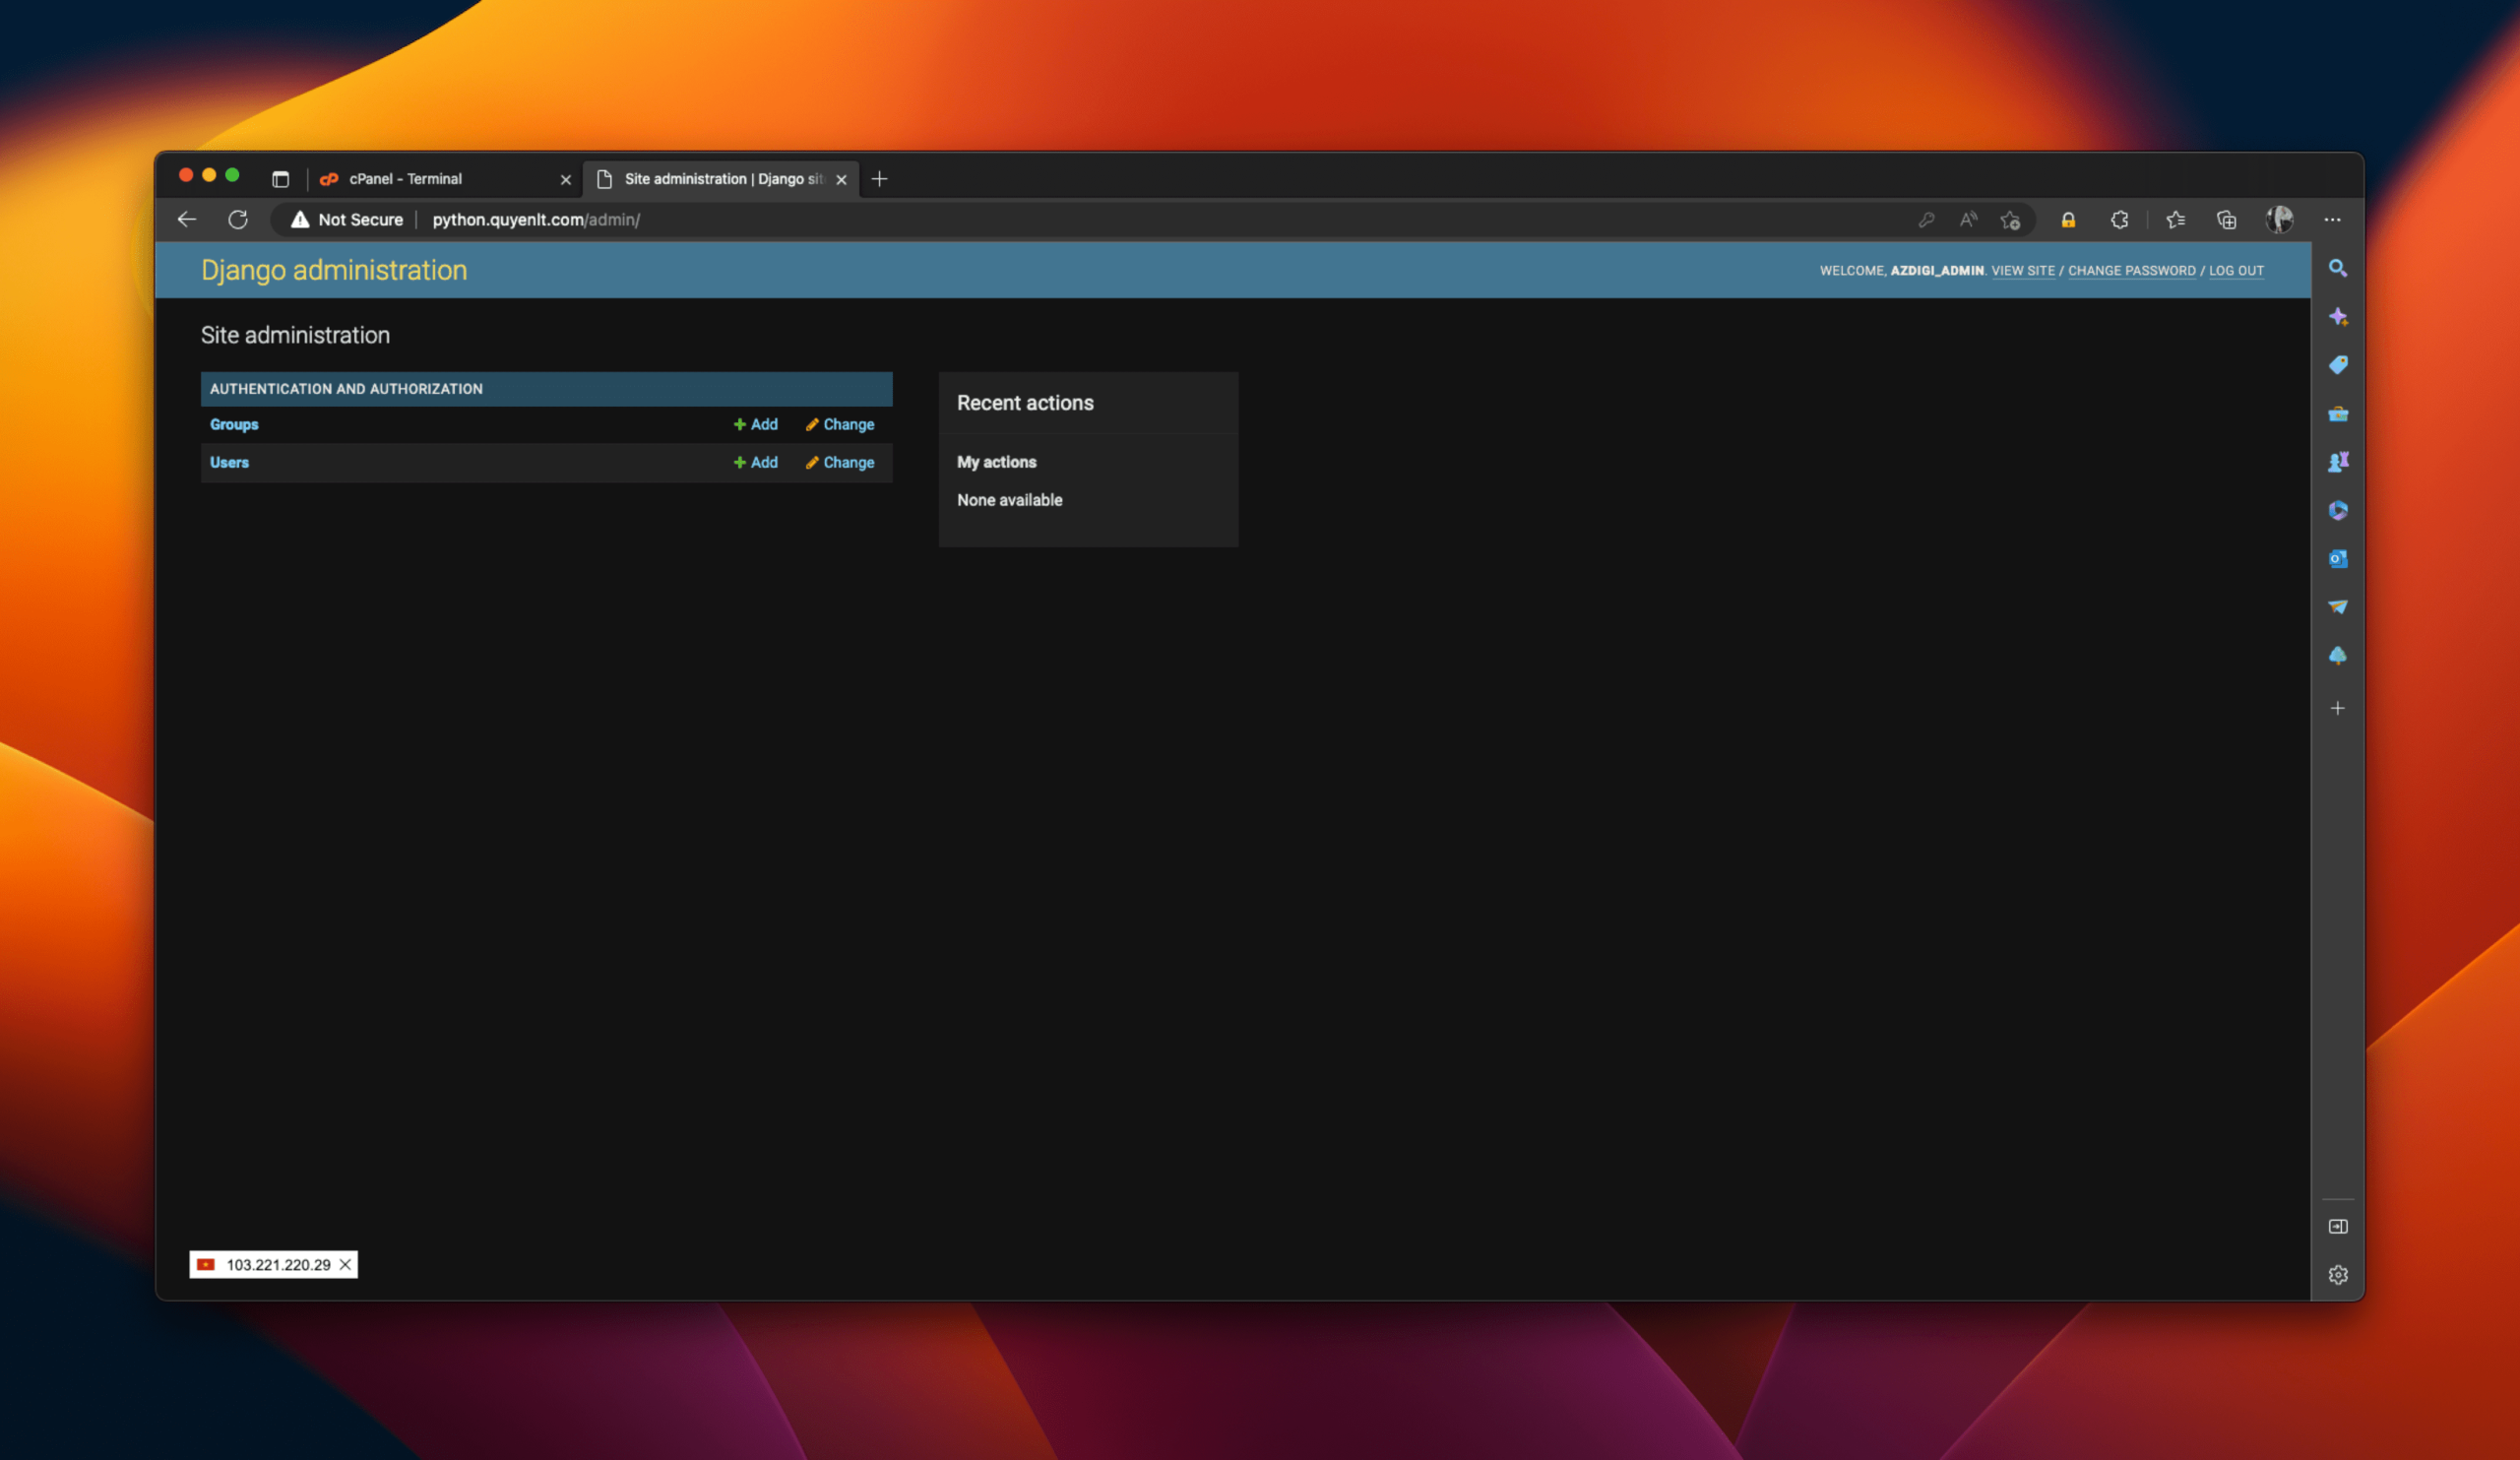
- Try logging in to the admin panel:
How to install Django on cPanel using MySQL Database
By default, when installing Django on the cPanel Python app, the website will use the SQLite Database. However, we can create a MySQL database and configure Django to use this MySQL Database. Note that the database switch process will result in data loss in the current database.
Step 1: Create a database

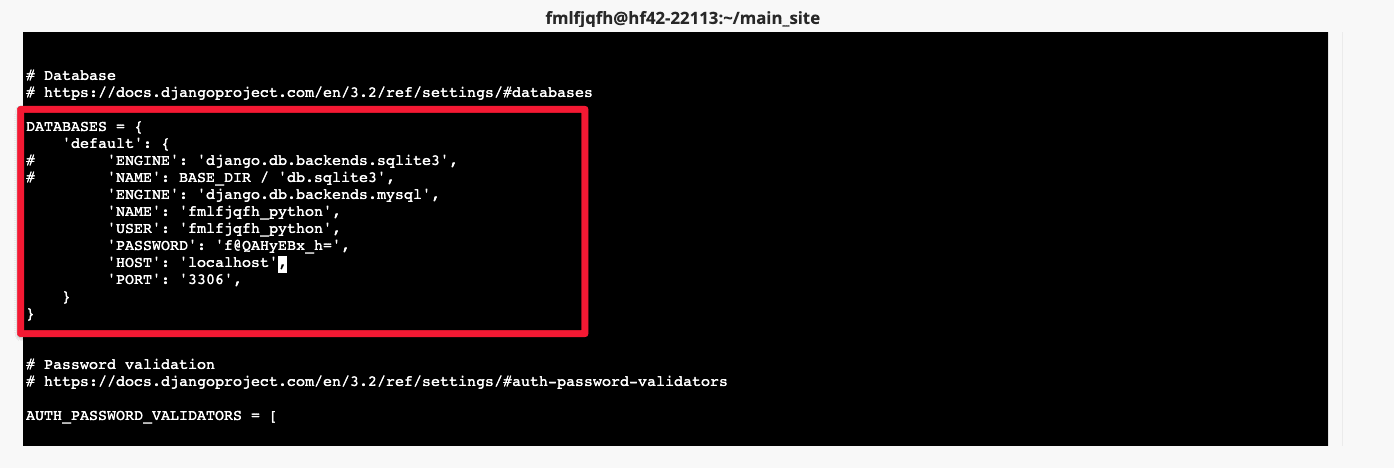
Step 2: Using the Terminal, access the Python app virtual environment and edit the database information in the settings file:<project name>/settings.py
         'ENGINE': 'django.db.backends.mysql',
         'NAME': 'fmlfjqfh_python',
         'USER': 'fmlfjqfh_python',
         'PASSWORD': 'f@QAHyEBx_h=',
         'HOST': 'localhost',
         'PORT': '3306',
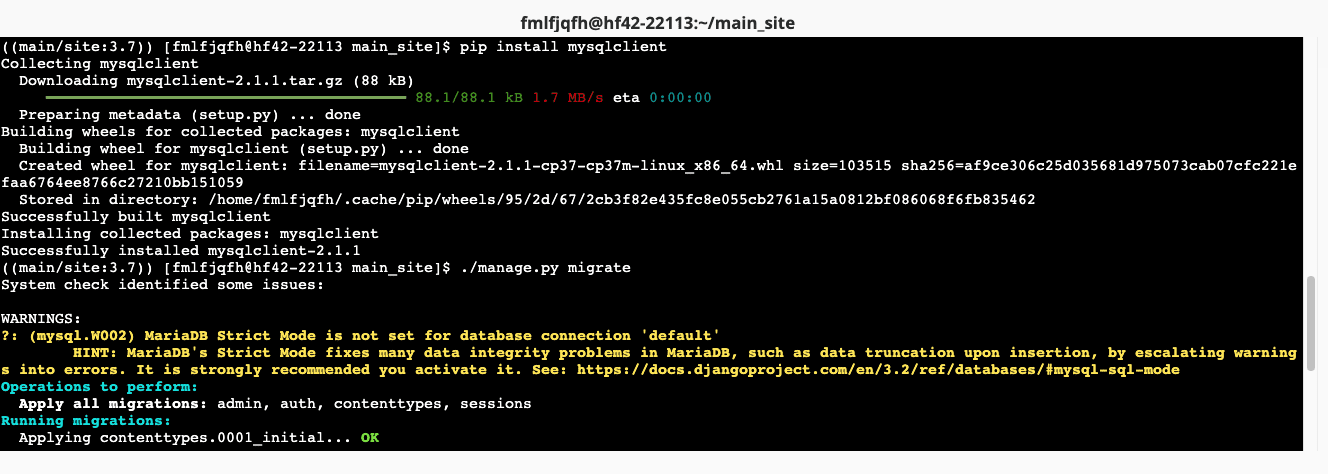
Then, install the mysqlclient library and re-run the command to save the configuration:
pip install mysqlclient
./manage.py migrate
Step 4: Reset the Python app and try accessing the website again
Conclusion
In this way, we have learned how to install Django on the cPanel interface. This will make web application development easier with Django. Hopefully, this article will be helpful to you in the process of developing your applications.
You might also like
- [Git trên cPanel] Sync Git repository on cPanel with computer
- Deploy Node.js, Python, PHP on Coolify
- How to get the website's database on cPanel hosting
- How to install CloudLinux on VPS using WHM/cPanel
- Import database by command with Terminal
- How to Deploy Laravel to Coolify from Local to Server with Basic CI/CD
About the author

Thạch Phạm
Đồng sáng lập và Giám đốc điều hành của AZDIGI. Có hơn 15 năm kinh nghiệm trong phổ biến kiến thức liên quan đến WordPress tại thachpham.com, phát triển website và phát triển hệ thống.