Nội dung
I. Overview
In today’s article, AZDIGI will guide you to use the Address Importer function on cPanel, Address Importer can be used to create multiple email addresses or use as a Forwarder in your account.
For example, if you have 100 employees in your office and you want each employee to have an email address, then if you have a list of employees’ email addresses, and if you use the manual way, Create Account then enter Name, User, Pass it will take a lot of your time. Address Importer on cPanel will help you import existing files in csv, xls formats. To do this, follow the steps below.
II. How to use Address Importer on cPanel
To use Address Importer on cPanel, follow the steps below.
Step 1: Create a sample file to use Address Importer on cPanel
The function of importing emails from files is available.
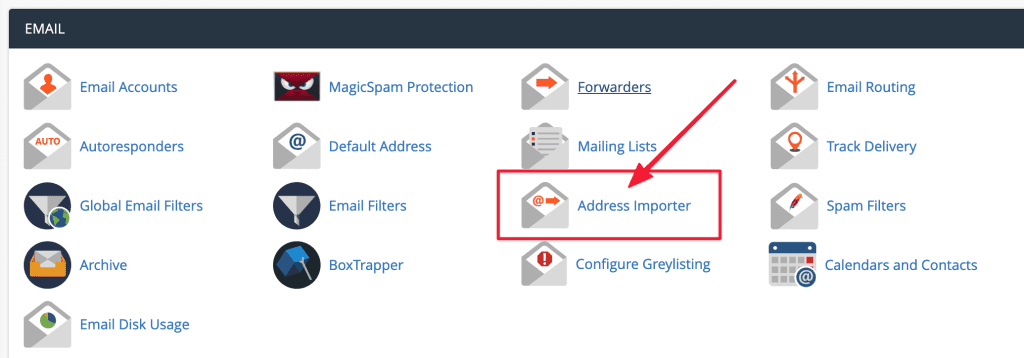
You log in to the cPanel mail service and select Address Importer.
If you do not have a sample .csv, xls file, please click as shown below:
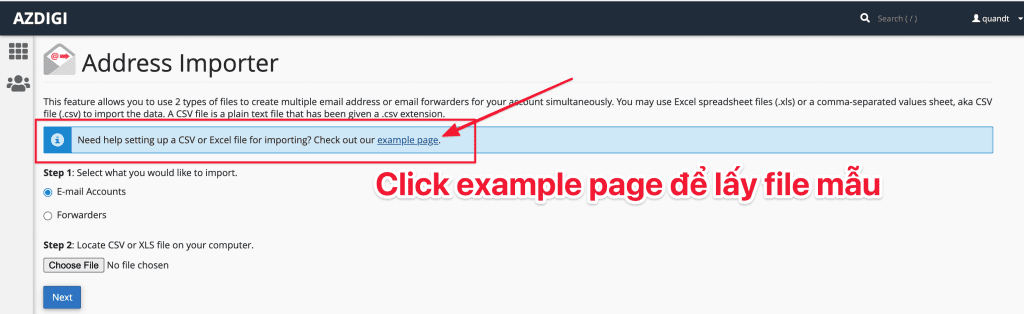
Please download the sample files if you don’t have them, and enter the data into this sample file.
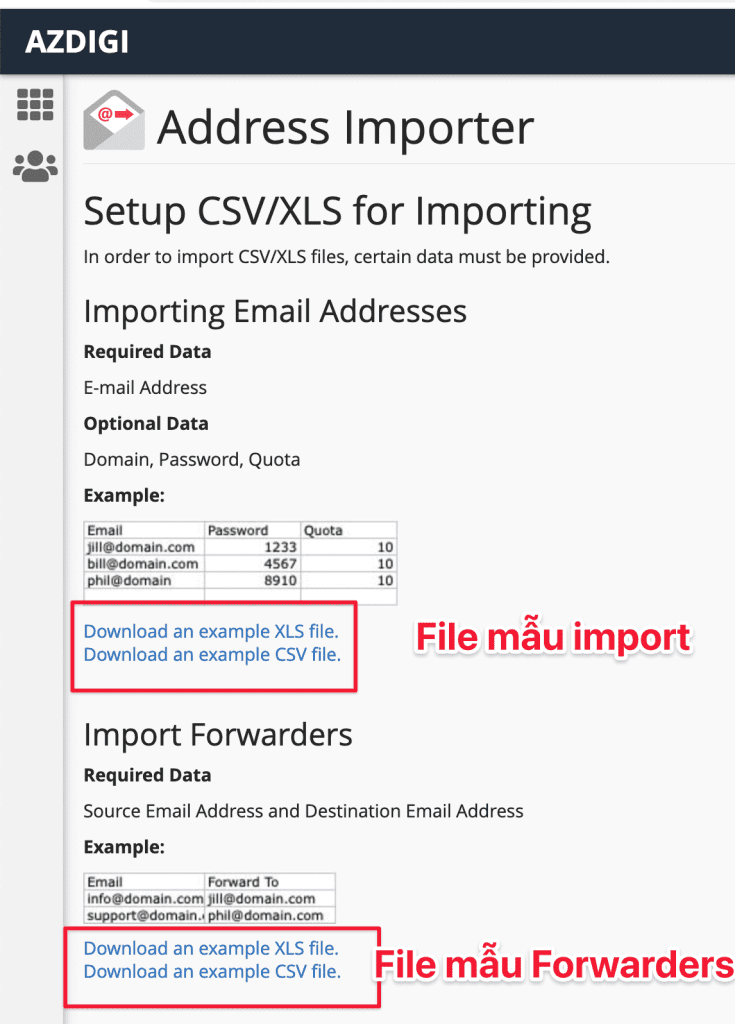
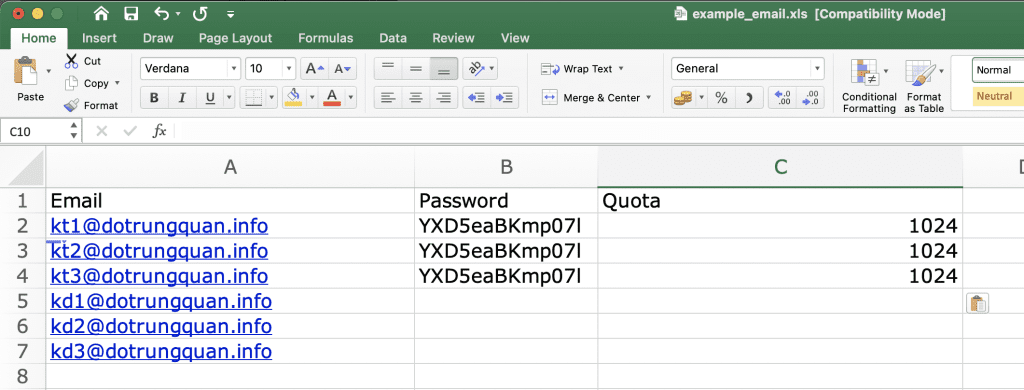
Below is my sample file includes 3 columns as follows:
- Email: Email list to create.
- Password: The password of the email account.
- Quota: The storage capacity of each account is in MB.
Step 2: Importing Email Addresses
After the data file is ready, you can enter the data:
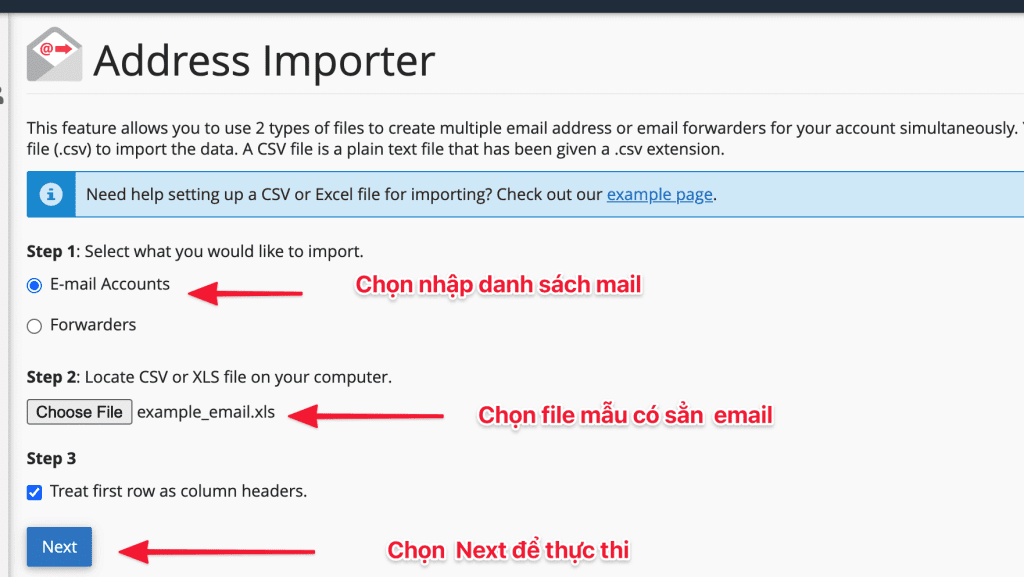
- Step 1: You choose E-mail Accounts
- Step 2: You choose the csv or xls data file on your computer
- Step 3: Select Next to upload.
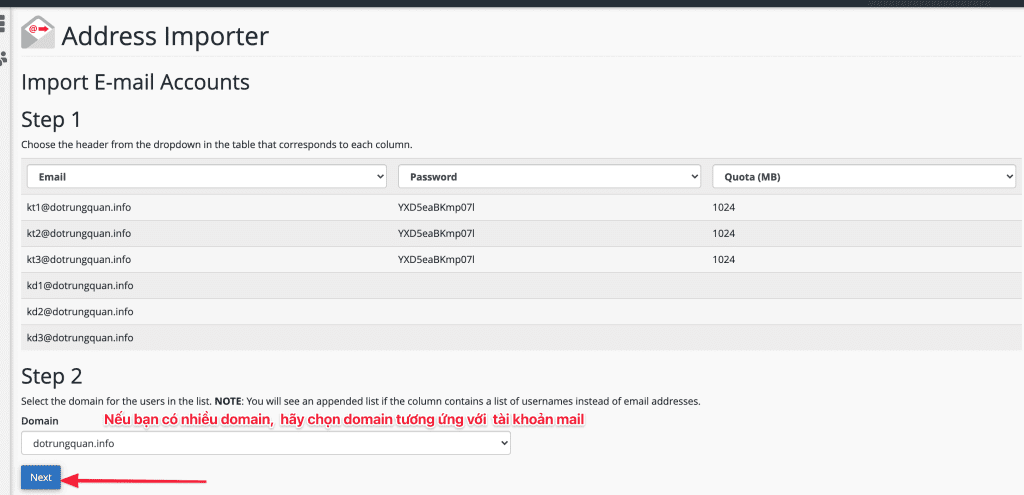
At the interface below, you rearrange the columns Email, Password, Quota if set incorrectly. If correct, select the domain corresponding to the mail account in Step 2 and select Next.
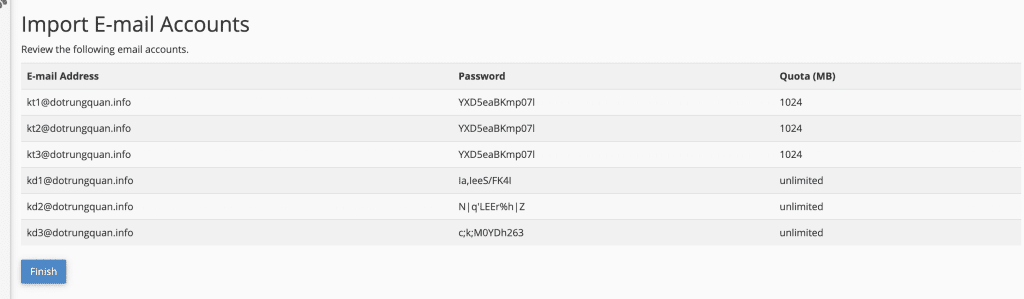
Then click Finish to complete the input process.
Please wait a few minutes for the process to execute. And if the screen displays the results below, it is successful.
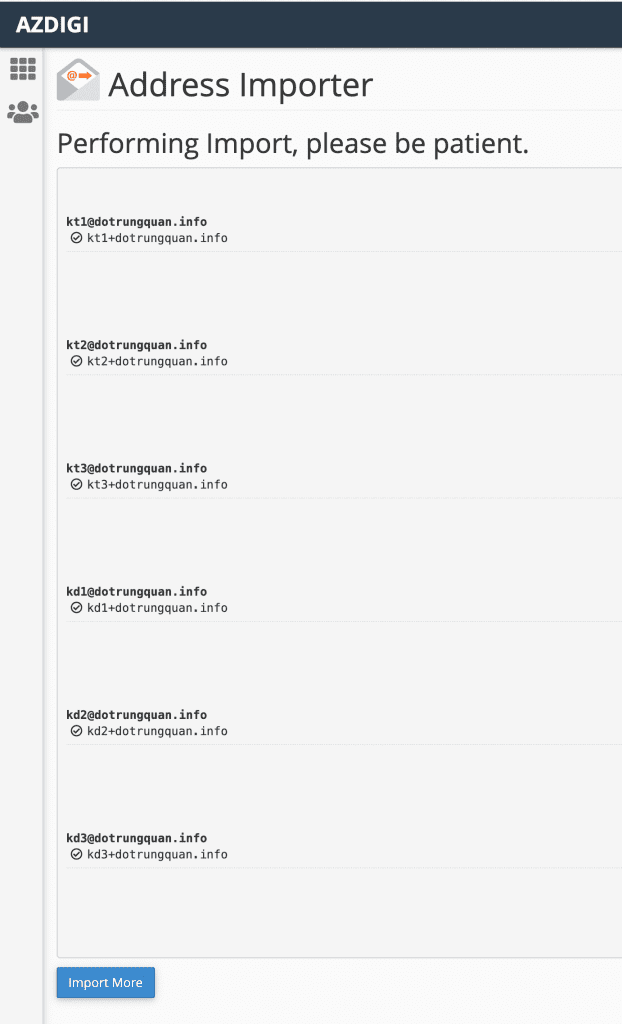
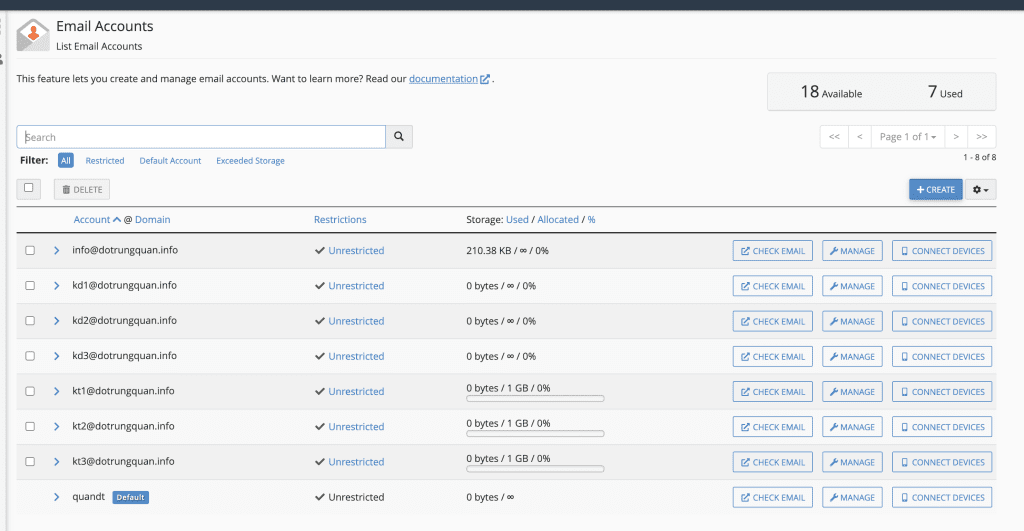
Now open your Email Account to check the accounts.
So you have completed all the steps to use Address Importer on cPanel.
III. Summary
Hopefully, this article will bring you experience and save time in creating each account on cPanel. Only with the available template file have you automatically imported safely. You can control the number of accounts from that sample file and understand each account’s Password and Capacity.
- Hotline 247: 028 888 24768 (Ext 0)
- Ticket/Email: You can use your email to register for the service and send it directly to: support@azdigi.com