Sometimes, you need to upload/download data from your personal computer to VPS/Hosting or vice versa, if the data file is large, FTP will help you solve this problem.
In addition, if you want to share the right to manage a website or a certain directory on the VPS/host for another person, you don’t want to give all the host information to them because of related other data. You can use FTP to authorize directory access and provide an FTP account for this user, then you can rest assured that that person to use it without fear of affecting other data on the VPS/Hosting.
In this article, AZDIGI will show you how to create an FTP account on CyberPanel and connect FTP with FileZilla.
Implementation guide
Step 1: Create/delete/list FTP accounts on CyberPanel
Create an FTP account.
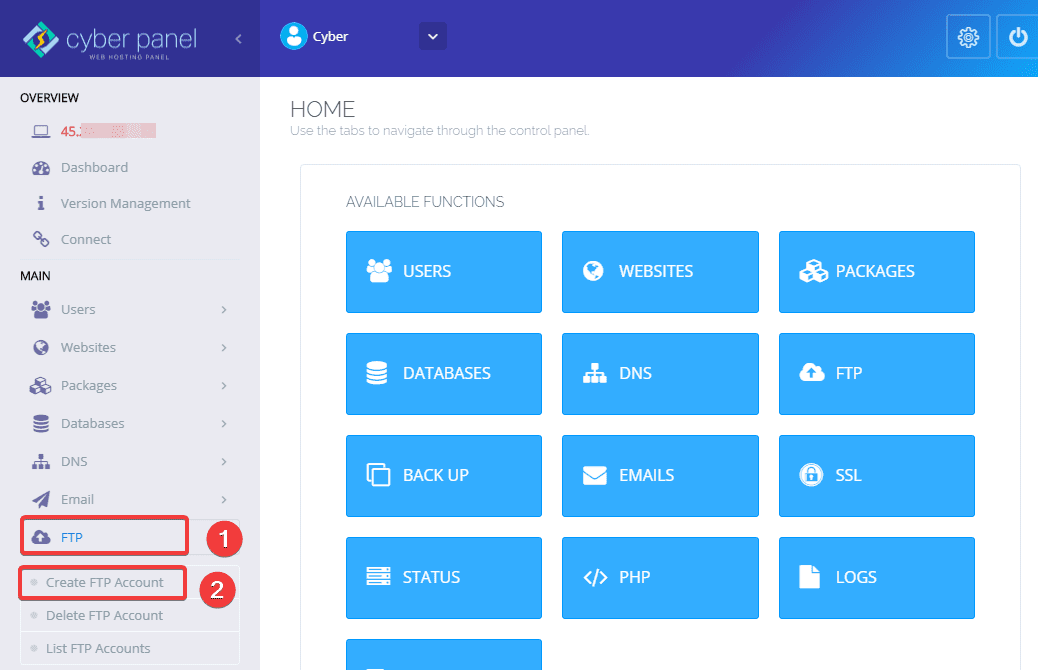
First, log in to the CyberPanel admin interface, go to FTP (1) => Create FTP Account (2).

At the next interface, you fill in the information in part (1) as follows:
In there:
- Select Website: Select the website to create an FTP account.
- User Name: Enter the FTP user name.
- FTP Password: Enter the password of the FTP user.
- Path: The path the FTP account will access (this part you leave blank, the default path will be the directory of the domain, e.g.,/home/azdigi.cf).
Fill in the information in part (1) and click Create FTP (2) to proceed with creating an FTP account.

If you receive the message below, you have successfully created it.

List created FPT accounts .
To review the FTP accounts created on CyberPanel, at the Cyber Panel admin interface, select FTP (1) => List FTP Accounts (2) => Select domain (3) => Here will display the accounts FTP corresponding to that domain (4).

Delete FTP account .
To delete the FTP accounts created on CyberPanel, at the Cyber Panel admin interface, select FTP (1) => Delete FTP Accounts (2) => Select the corresponding domain and FTP account (3) => Delete FTP Account (4) => Are you sure (5).

If you receive the message below, you have successfully deleted it.

Step 2: Connect FTP with FileZilla
You can download FileZilla here.
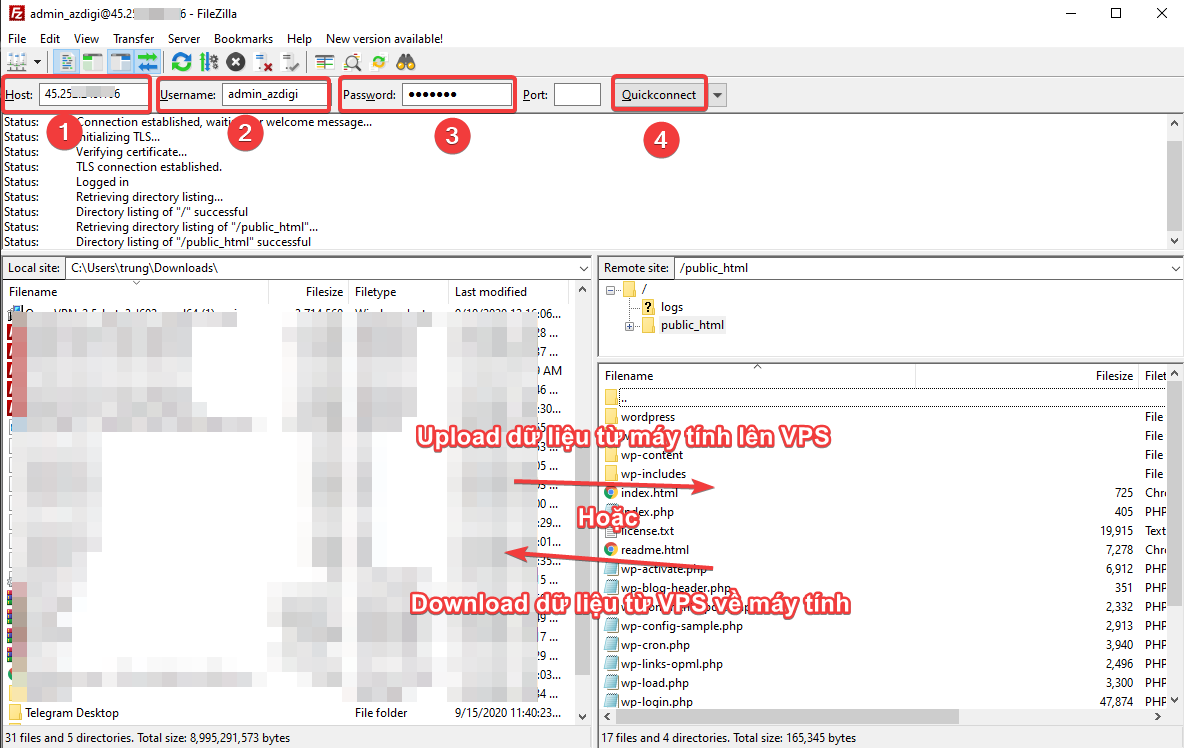
After successfully downloading and installing, you need to open FileZilla and process to connect with the FTP account as follows:
In there:
- Host (1): Enter the IP of the VPS.
- Username (2): Enter the FTP user.
- Password (3): Enter the password of the FTP user.
- Port: You can leave it blank or fill in 21.
- Quickconnect (4): Make a connection to the server.
If you receive the successful message, the connection is successful.
So, in this article, AZDIGI has shown you to successfully create an FTP account on Cyber Panel and connect FTP through FileZilla. Using FTP will help you when you need to move data from your computer to host/VPS and vice versa in the easiest way. If you find this helpful article, please share it widely.
About the author

Thạch Phạm
Đồng sáng lập và Giám đốc điều hành của AZDIGI. Có hơn 15 năm kinh nghiệm trong phổ biến kiến thức liên quan đến WordPress tại thachpham.com, phát triển website và phát triển hệ thống.