Nội dung
In today’s article, AZDIGI will guide you to use File Manager DirectAdmin in the new version, version 1.61.4.
I. Introduction
At DirectAdmin version 1.61.4, we have a completely new File Manager v2 interface. It supports keyboard shortcuts Ctrl, Ctrl + shift, shift (cmd on a mac instead of Ctrl like on Windows), drag and drops directly to upload, drag and drop inside, right-click, etc.
It will be more like a File Manager on a regular operating system than a website and much more intuitive.
II. How to use File Manager on DirectAdmin
To use File Manager DirectAdmin, we need to do the following 2 steps:
Step 1: Login to DirectAdmin
To login to DirectAdmin, you access the following path:
http://IP:2222
Remember to replace the IP with your DirectAdmin server IP address.
Below is my DirectAdmin interface:
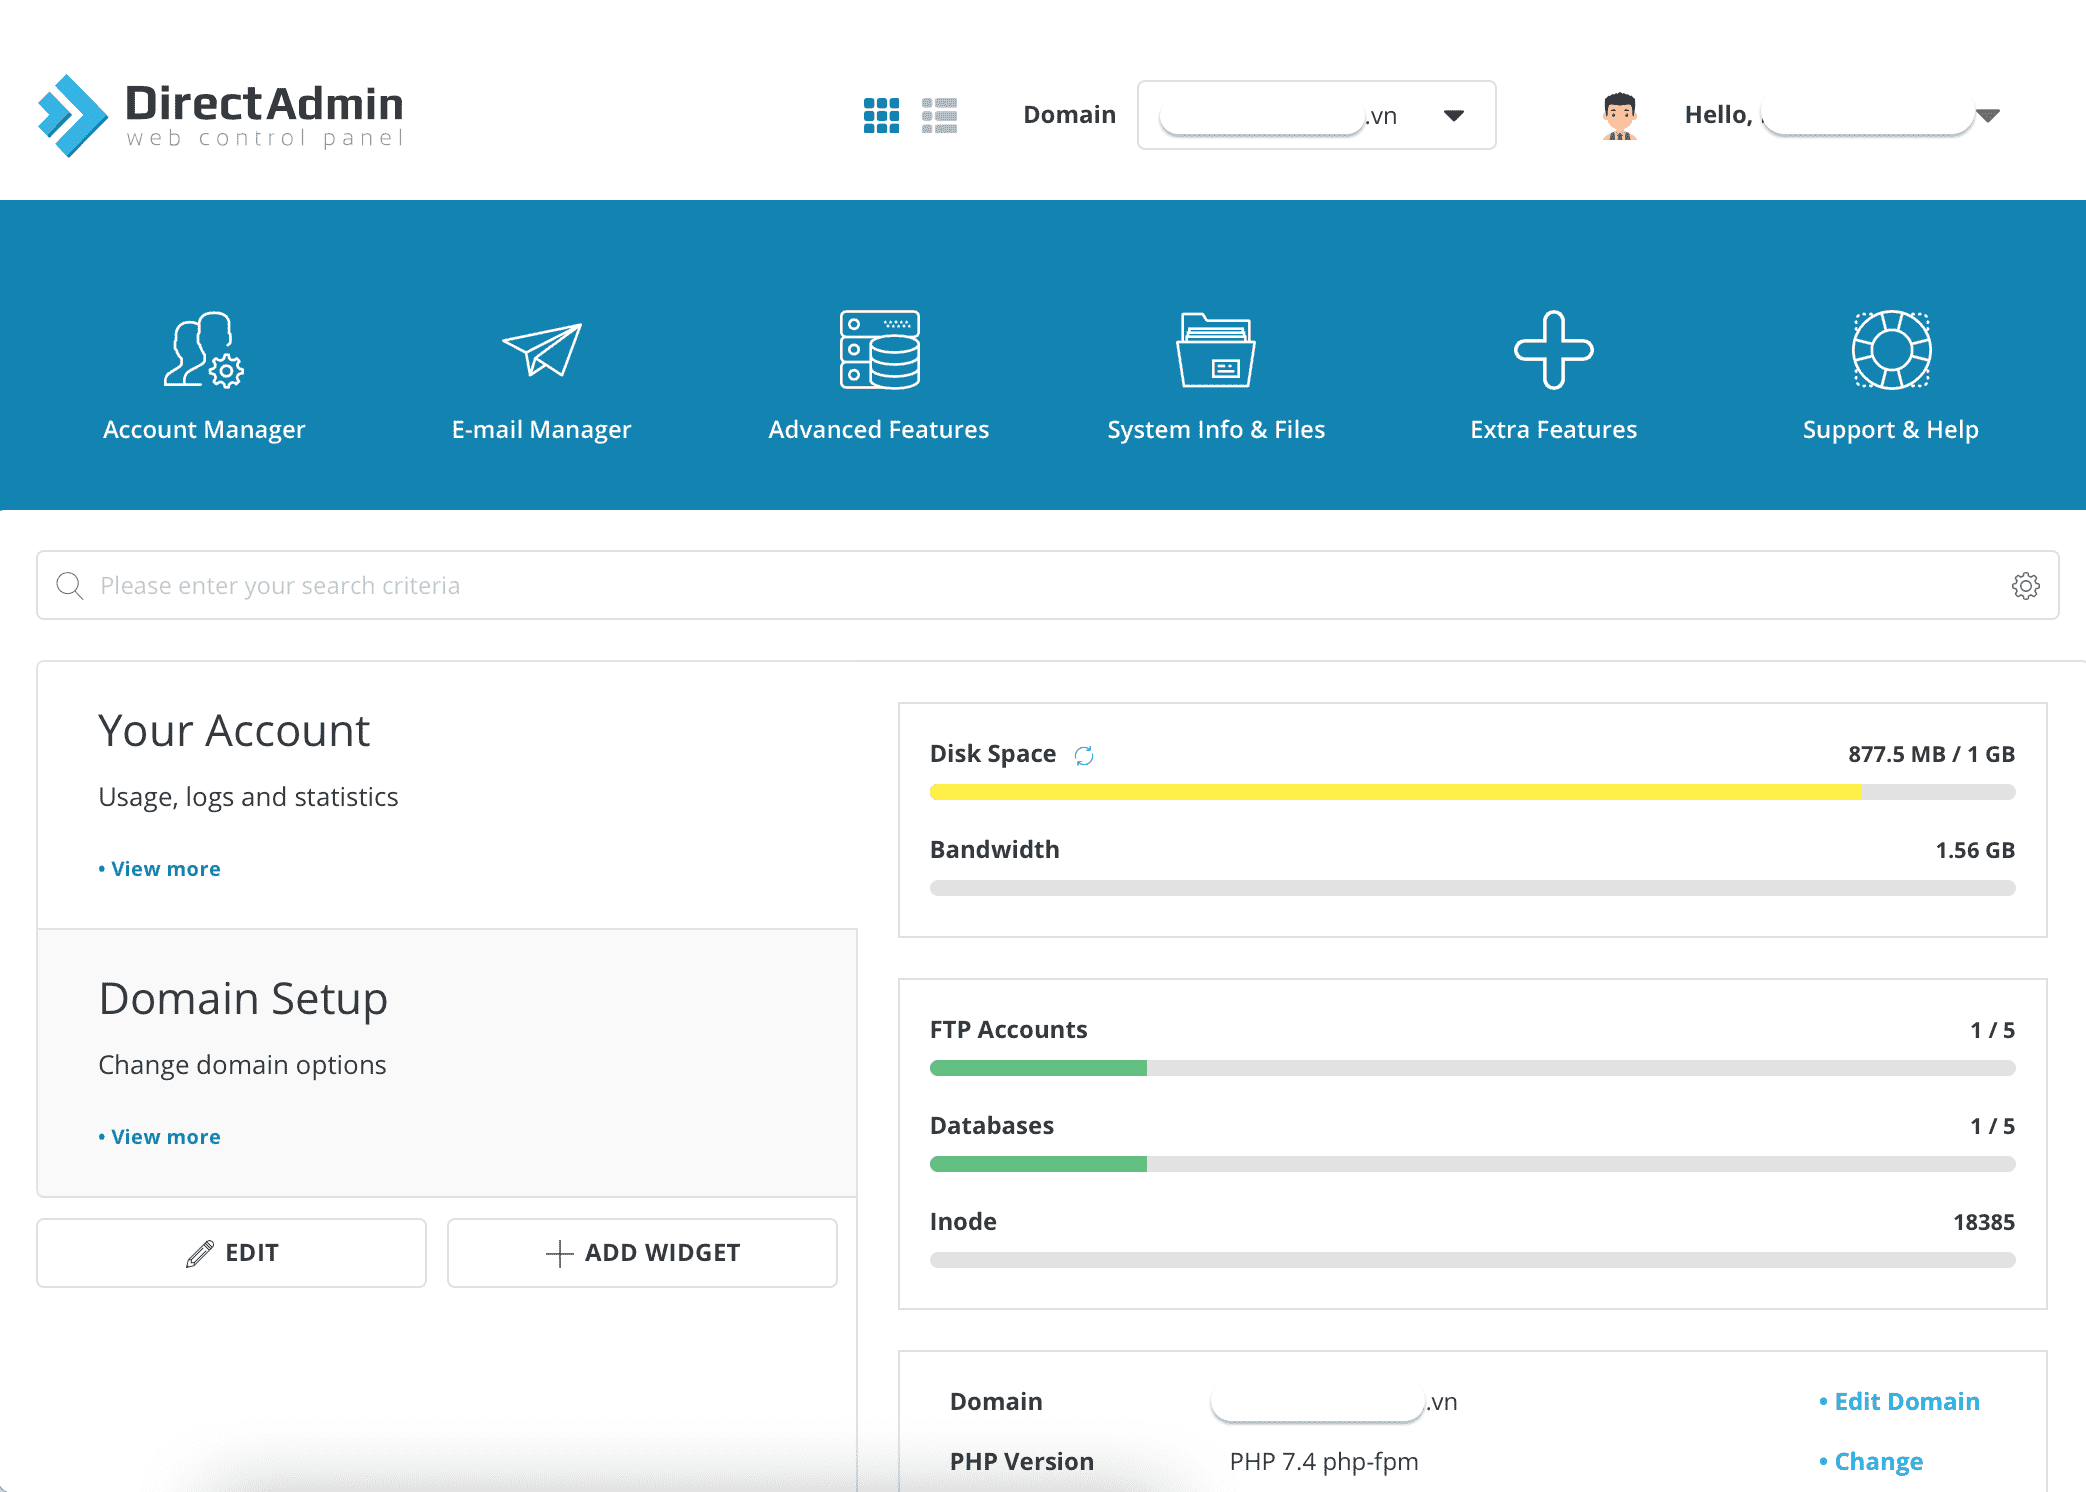
We continue to step 2 to see the features and how to use File Manager DirectAdmin v2.
Step 2: Introduce features and how to use File Manager DirectAdmin
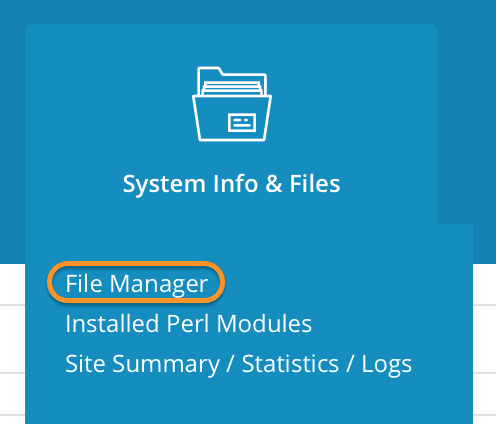
First, we access the System Info & Files feature => select File Manager to access this feature.
Below is the File Manager v2 interface on DirectAdmin.
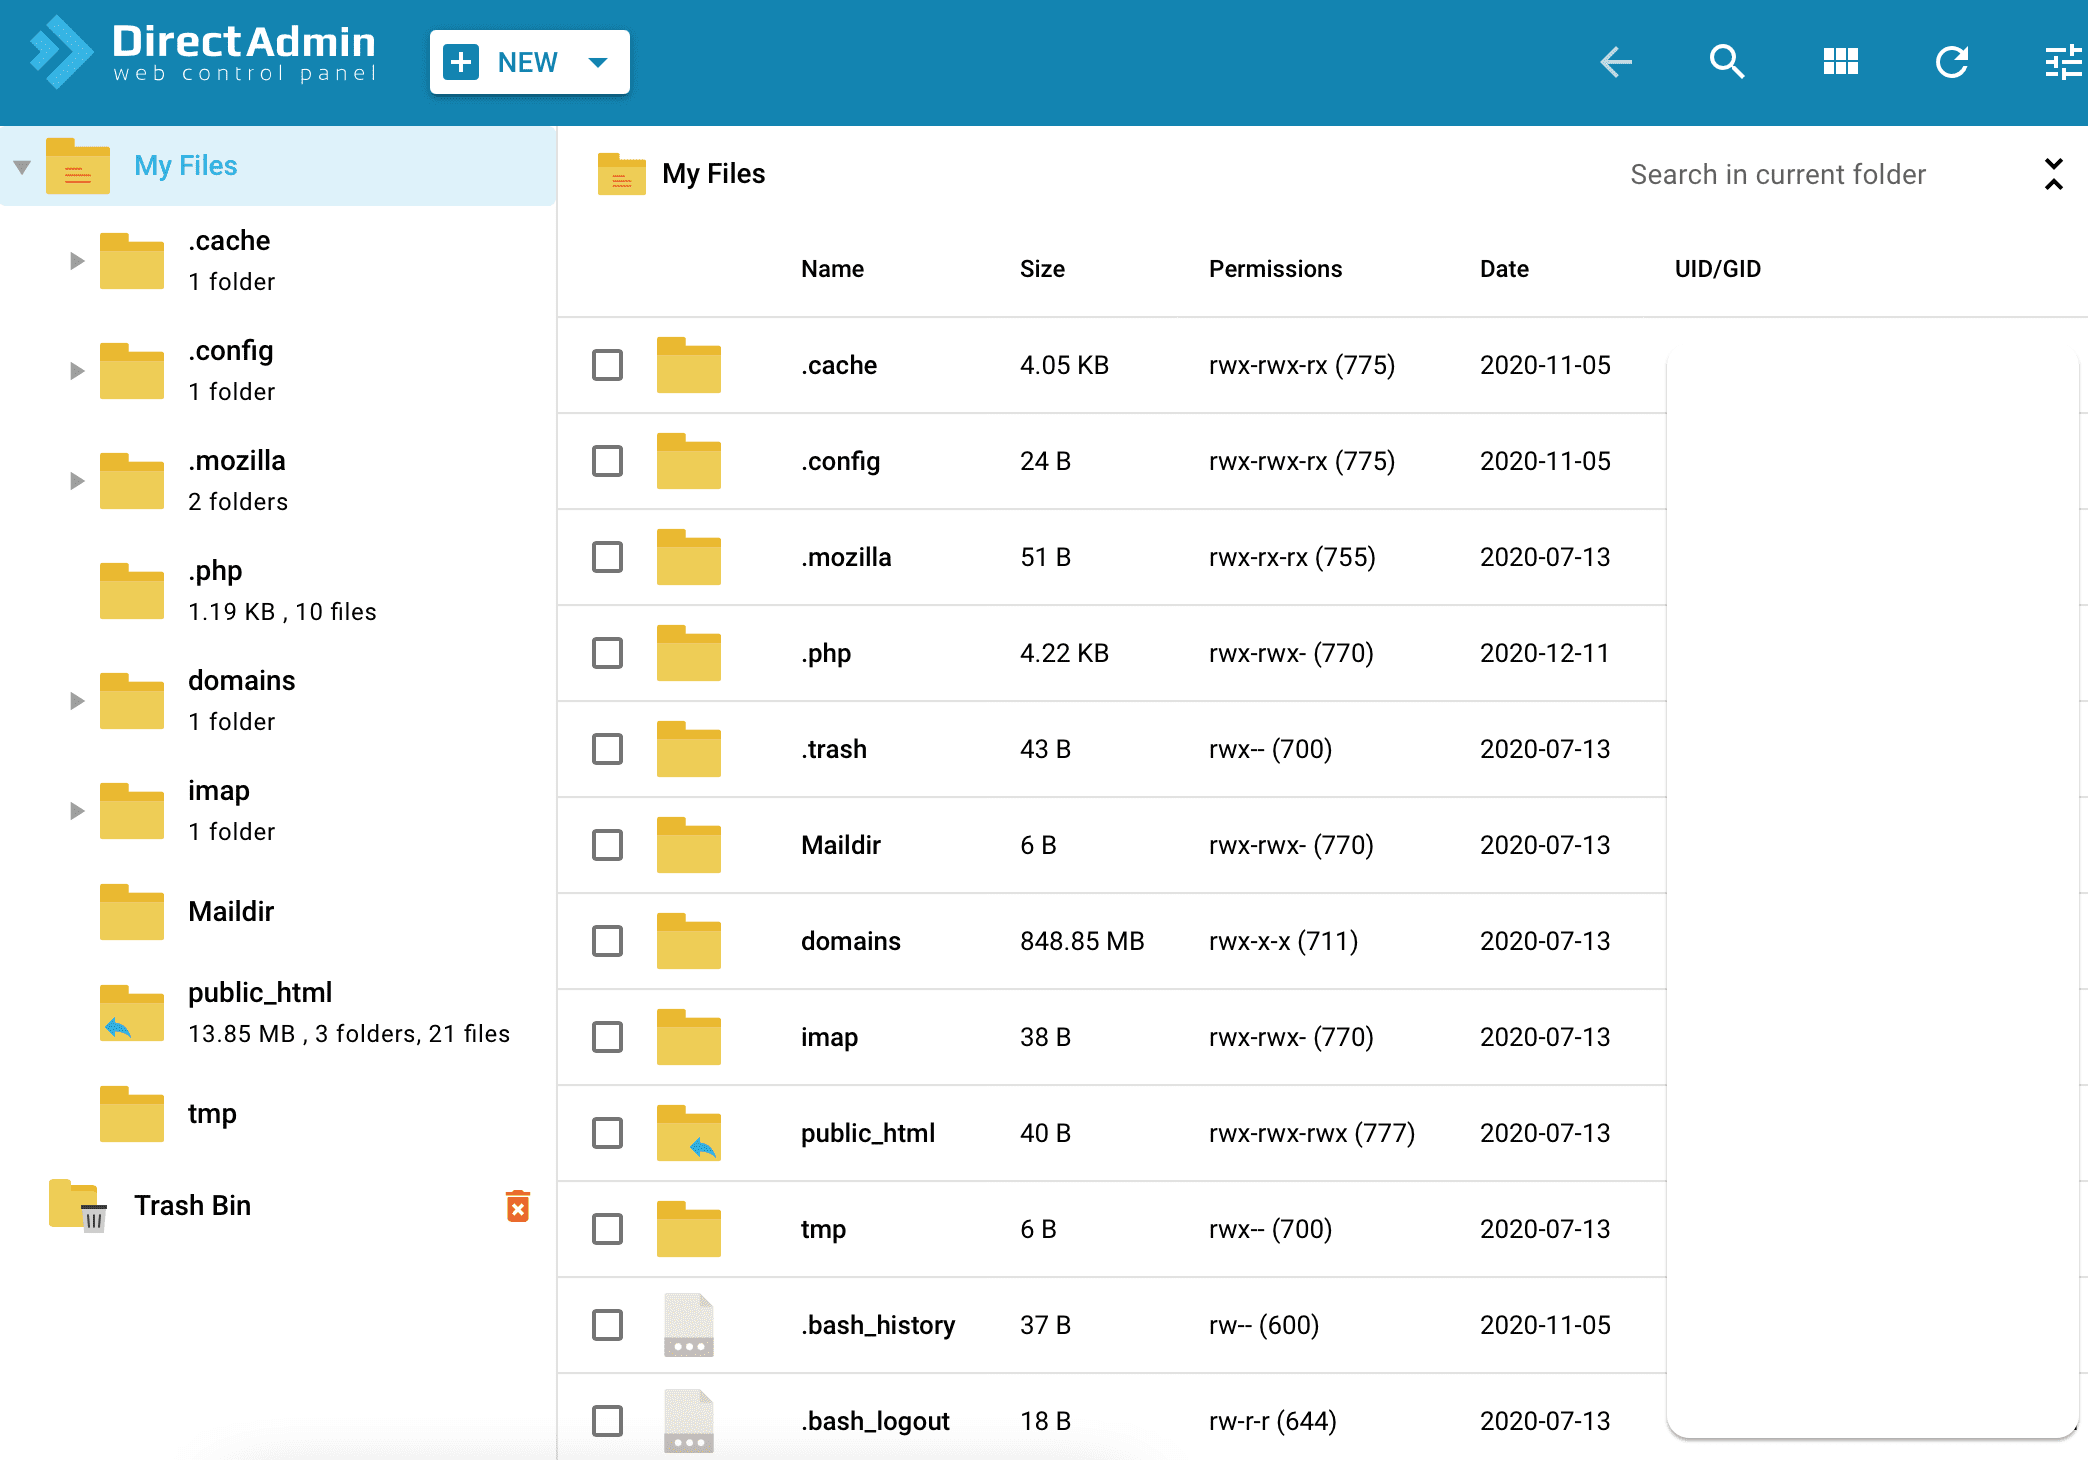
Before going into details on how to use it, let’s look at the features you can use with DirectAdmin‘s File Manager.
For folder:
- Open: Open the folder
- Rename: Rename the folder
- Copy/Move: Copy or move the folder to a new location
- Set Permissions: Set folder permissions.
- Add to archive: Perform folder compression
- Compress and download: Compress the folder and download, but the compressed file will not be saved on the Hosting.
- Remove: Remove the folder
In addition, only system folders like .php will have Reset Owner and Reset Owner Recursive operations to restore permissions and folder owners.
For file:
- Edit: Directly edit.
- Edit in new tab: Edit with a new browser tab.
- Extract
- Download
- Rename
- Copy/Move: Copy or move the file to a new location.
- Set Permissions
- Add to archive: Perform file compression.
- Remove
So I have briefly summarized the operations that can be performed on folders and files. Now let’s go into each feature in detail.
1. For folder:
Let’s get acquainted with the features of the folder first. To operate with a folder, you can right-click directly or select the tick in the folder and select three dots as shown below:
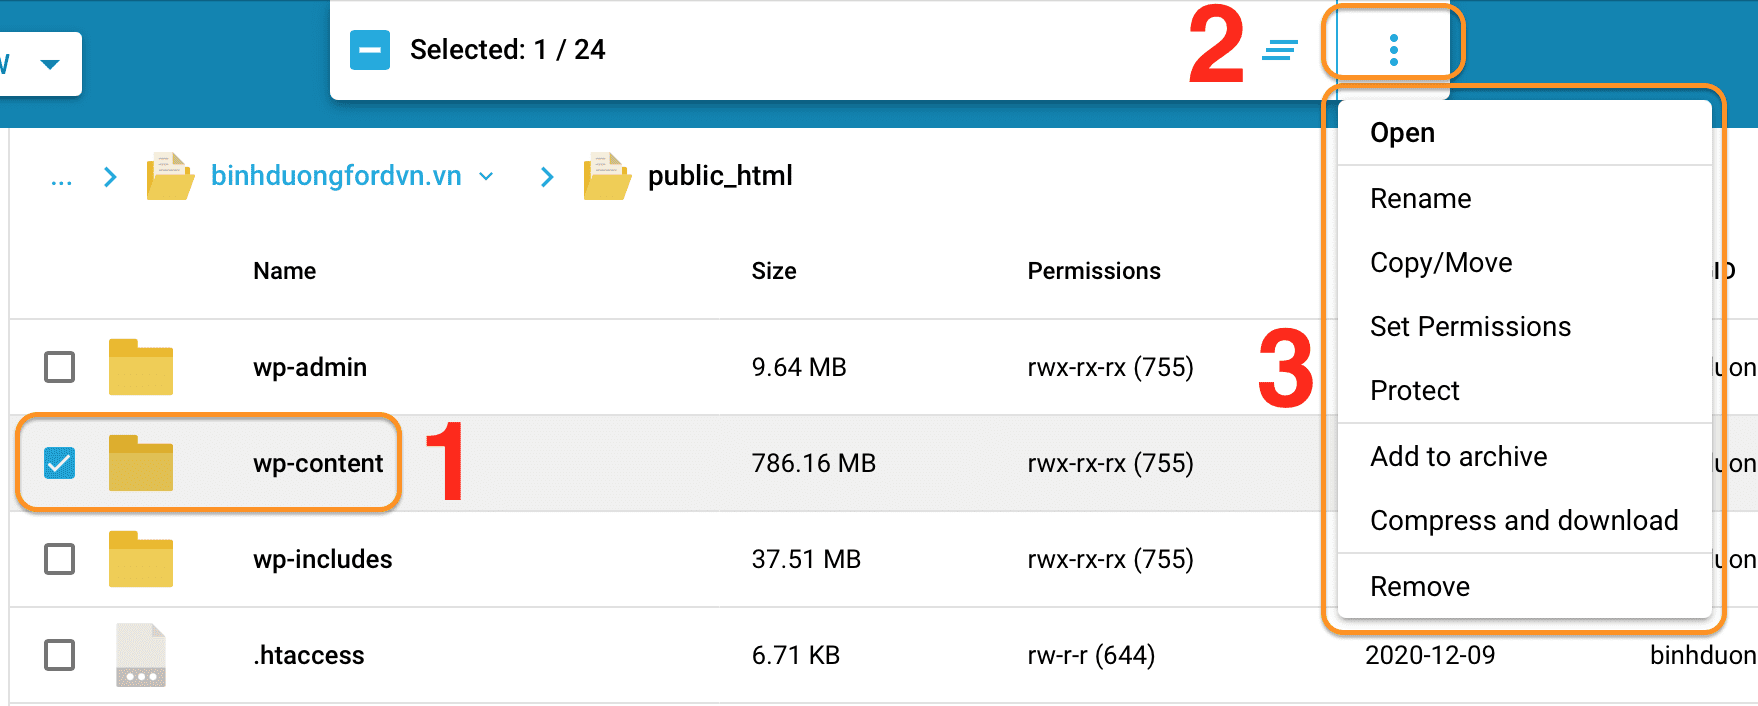
The Open, Rename and Remove features it’s too simple, so I’ll skip and guide the rest of the features.
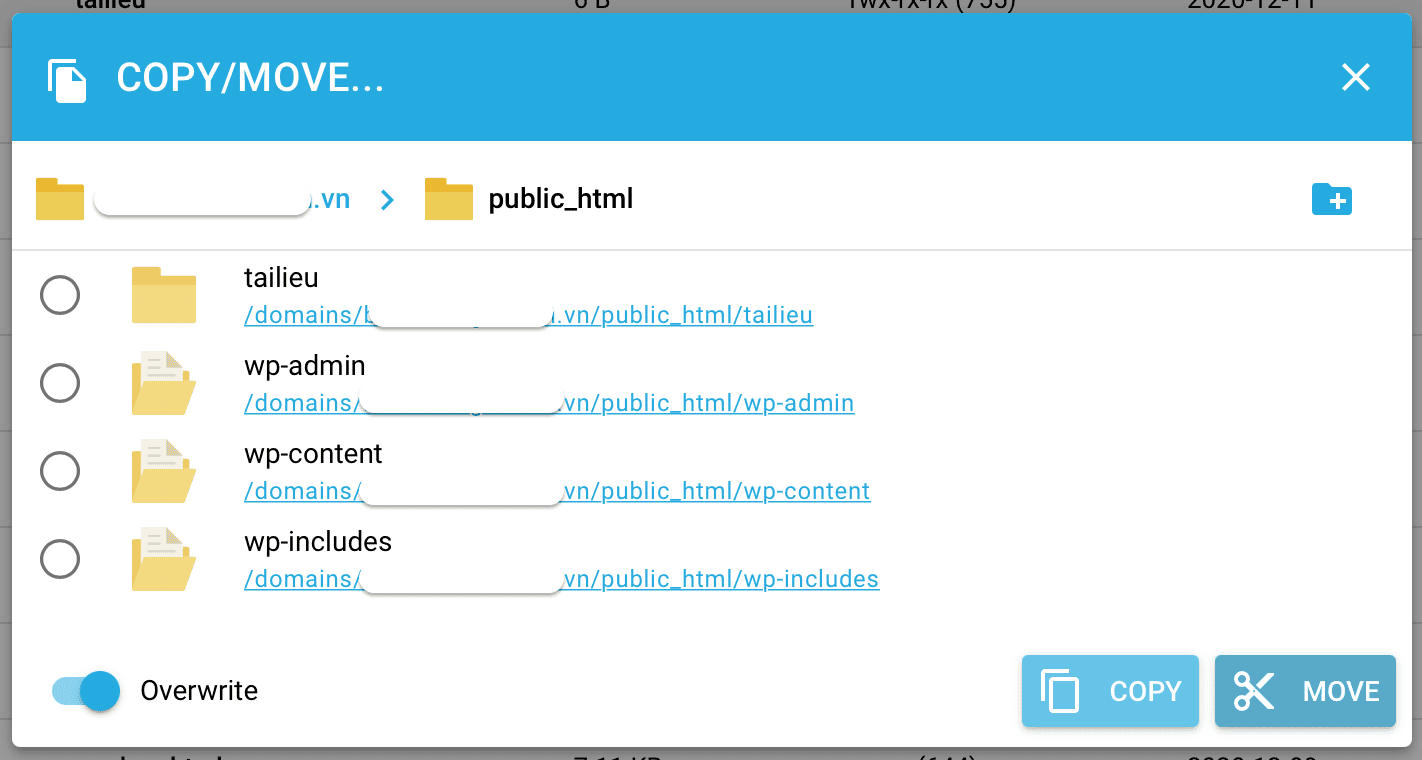
a. Copy/Move: copy or move the folder to a new location
Copy/Move: copy or move the file to a new location With this feature, when you choose, you will have a location table for you to choose from. Then, you select the corresponding button depending on the need to Copy or Move.
If the target location already exists in a folder with the same name and you want to overwrite it, turn on the Overwrite feature in the lower-left corner.
b. Set Permissions
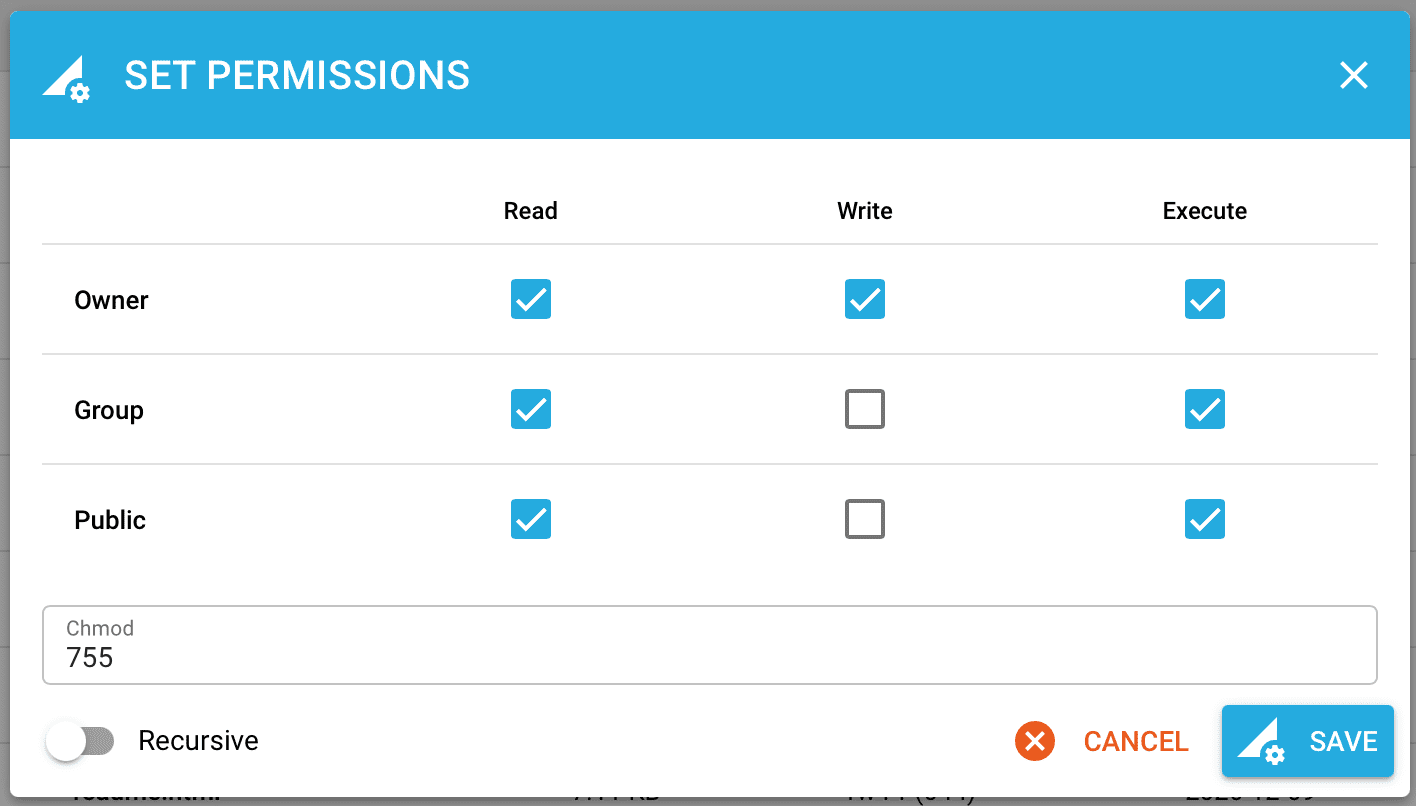
If you need folder permissions, you can choose this feature. Default permissions of the folder when created will be 755.
After you have assigned permissions according to your needs, select Save. Otherwise, you can click Cancel to cancel the authorization.
c. Add to archive: Perform folder compression
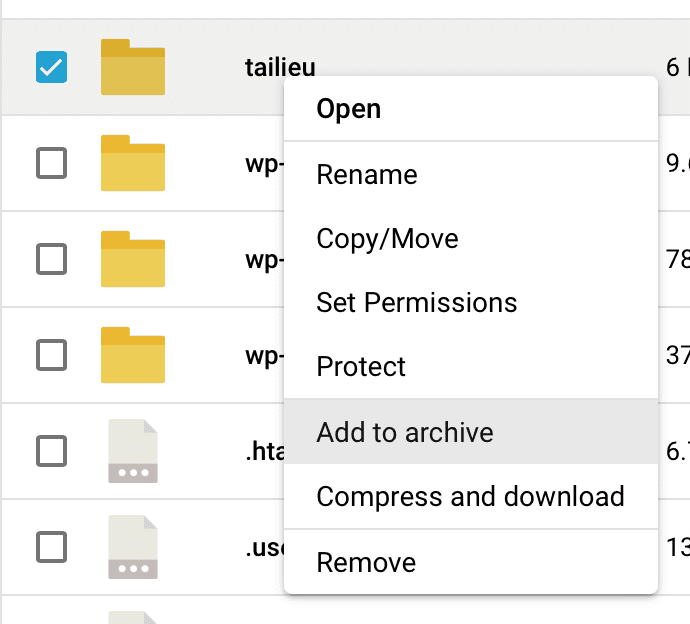
This is a feature that we probably use quite often. You can compress one or more folders by holding Shift on the keyboard and selecting the folders you need. Or you can choose an area as shown below:

Then to perform compression, we just need to right-click and select Add to archive.
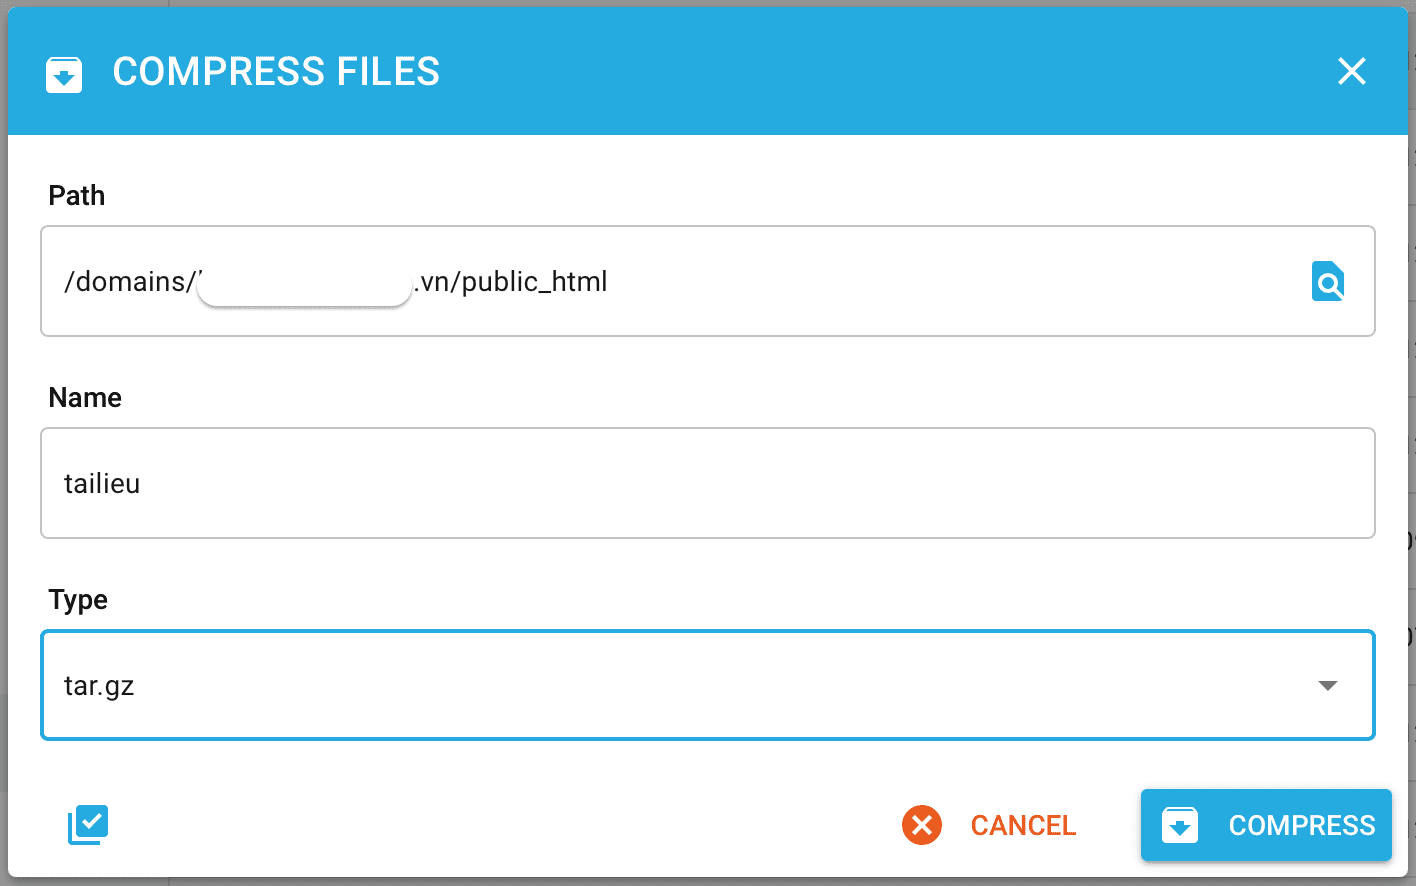
There will be an information panel displayed so you can choose the folder to save the file after compression, the file name and the format you will compress (tar.gz or zip). And after selecting the appropriate configuration, we choose COMPRESS for executing the compression process.
d. Compress and download: Compress the folder and download, but the compressed file will not be saved on the hosting
This feature is similar to Add to archive: Compress a folder, but the difference is that after the file is finished compressing, it will ask where to save it on your computer, and even when you finish downloading, the file will not be saved on DirectAdmin.
2. For file:
Similar to folders, we also use the right mouse button to perform a certain operation with a file.
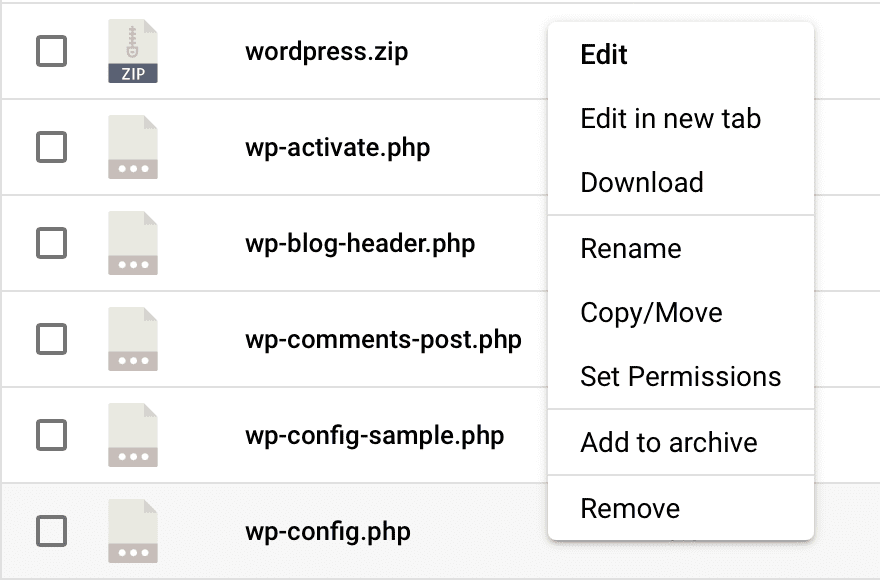
With features: Edit, Edit in new tab, Download, Rename, Remove, it’s too simple, so I’ll skip and guide the rest of the features.
a. Extract the file
Compression will be supported for files with formats such as zip, tar.gz, and gz. However, as for the Rar format that we often use on Windows, it will not be supported.
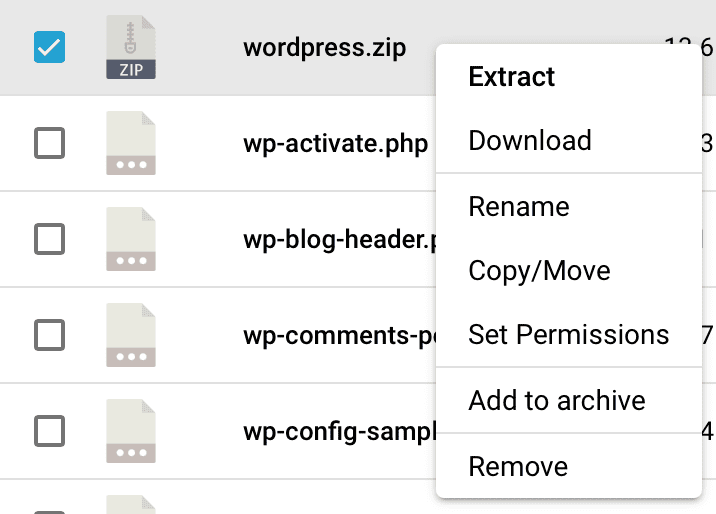
When you select Extract to decompress, you will be asked where to save the extracted files. After selecting, we click EXTRACT to start decompression.
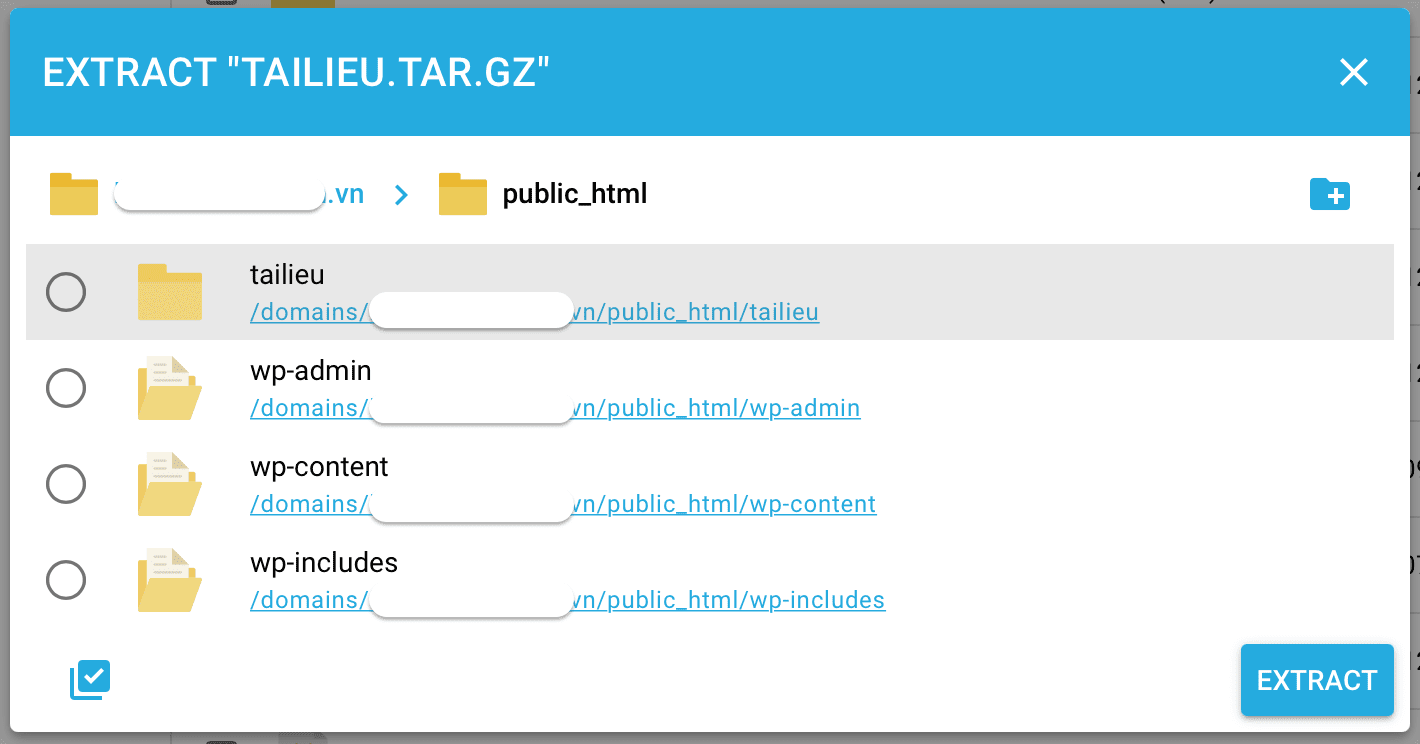
b. Copy/Move the file to a new location
Copy/Move: copy or move the file to a new location With this feature, when you choose, you will have a location table for you to choose from. Then, you select the corresponding button depending on the need to Copy or Move.
If the target location already exists in a folder with the same name and you want to overwrite it, turn on the Overwrite feature in the lower-left corner.

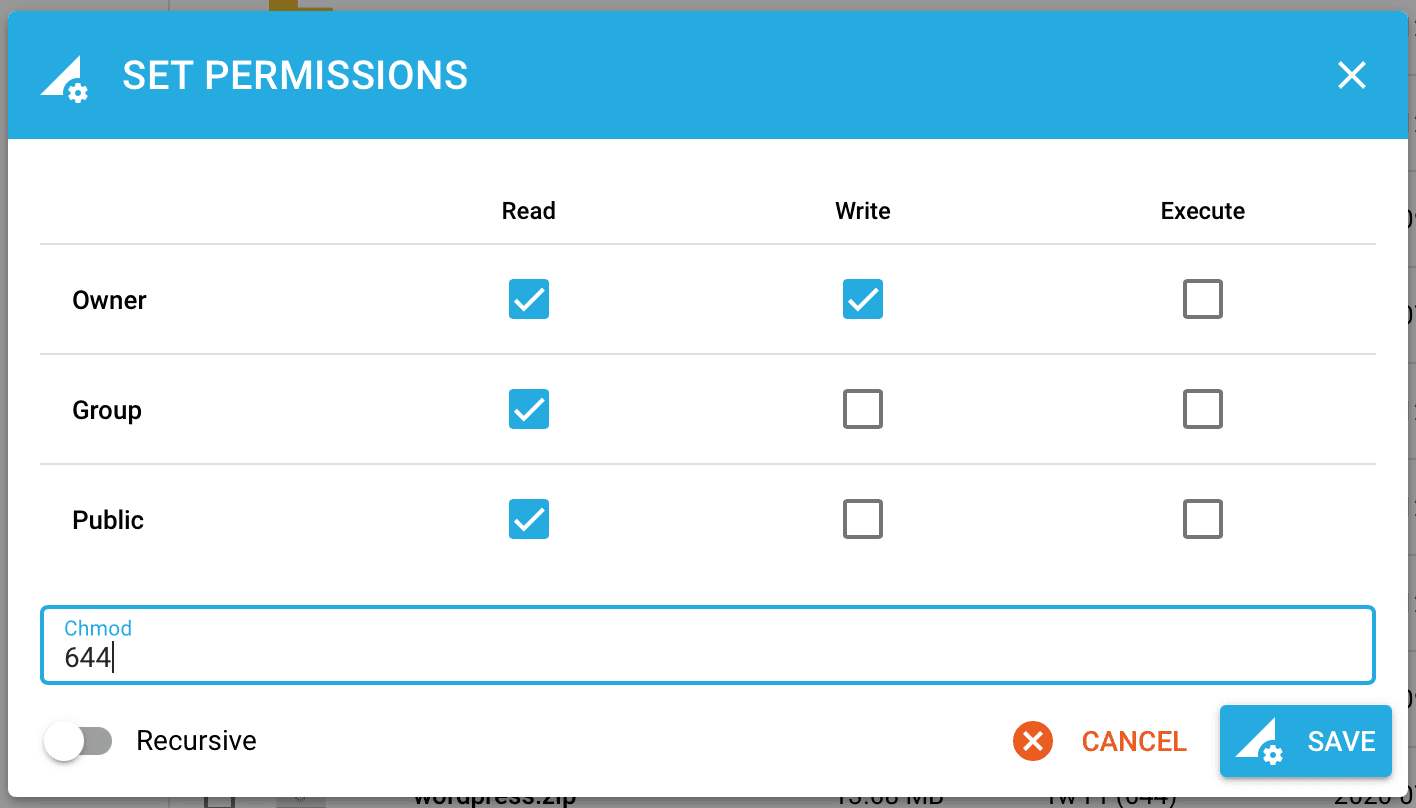
c. Set Permissions
If you need file permissions, you can choose this feature. Default permissions of the folder when created will be 644.
After you have assigned permissions according to your needs, select Save. Otherwise, you can click Cancel to cancel the authorization.
d. Add to archive: Perform file compression
This is a feature that we probably use quite often. You can compress one or more files by holding Shift on the keyboard and selecting the files you need. Or you can choose an area as shown below:

Then to perform compression, we just need to right-click and select Add to archive.

There will be an information panel displayed so you can choose the folder to save the file after compression, the file name and the format you will compress (tar.gz or zip). And after selecting the appropriate configuration, we choose COMPRESS for executing the compression process.

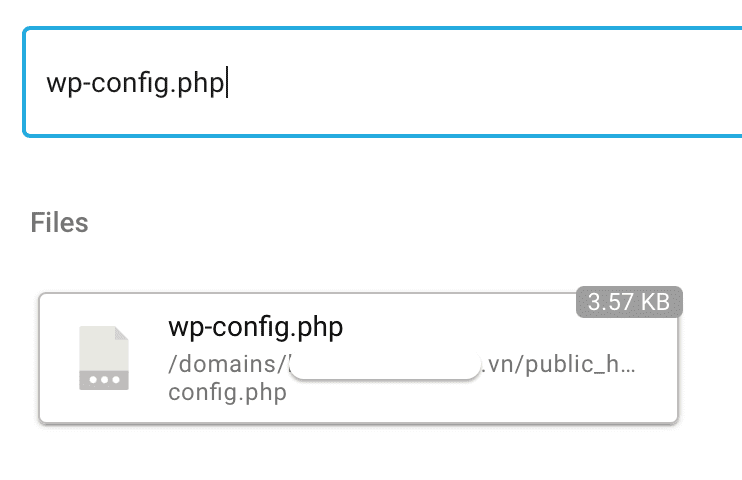
In addition, it has an extremely outstanding feature which is search.

Below is the result when I try to search wp-config.php, you can see information like the path and file size.
So we have gone through most of the operations using File Manager v2 on DirectAdmin.
III. Summary
Hopefully, this article will understand more about the functions of File Managerv2 on DirectAdmin and help you use it most conveniently and effectively.
Hope this article will be of help to you. Wishing you success!
See more useful articles about DirectAdmin at the following link:
If you need assistance, you can contact support in the ways below:
- Hotline 247: 028 888 24768 (Ext 0)
- Ticket/Email: You use the email to register for the service and send it directly to: support@azdigi.com .

