How to configure SSL on FASTPANEL
I. Overview
For a website that works on the Internet and needs to rank on Google, it is essential and indispensable to issue an SSL certificate for the website.
A website without SSL will lose points in front of visitors and leading search engines like Google because, since July 2018, Google has required websites running Google ads to have SSL. Similarly, websites with SSL will be favored by Google for higher rankings than websites without SSL certificates.
In today’s article, AZDIGI will guide you through importing an SSL certificate to FASTPANEL, please follow along.
II. Configure SSL on FASTPANEL
To import an SSL certificate, follow these 3 steps:
Step 1: Prepare SSL certificate files
After registering for SSL, verifying and being issued SSL, you will have 3 files as below. These are the 3 necessary files that are linked together. If you have not verified the SSL certificate, you will not have those 3 files and you can refer to the following article to verify the certificate.
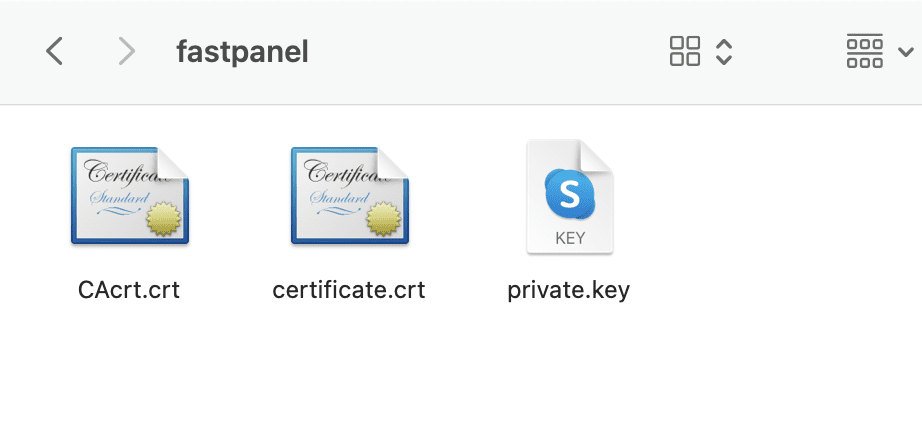
3 important certificate files:
- Certificate: *.crt (Once verified, the company will issue it)
- Private Key: *.key (This key is generated when you generate the CSR)
- CACertificate *.crt (Once verified, the company will issue)

After the 3 files are ready, let’s start configuring SSL on FASTPANEL.
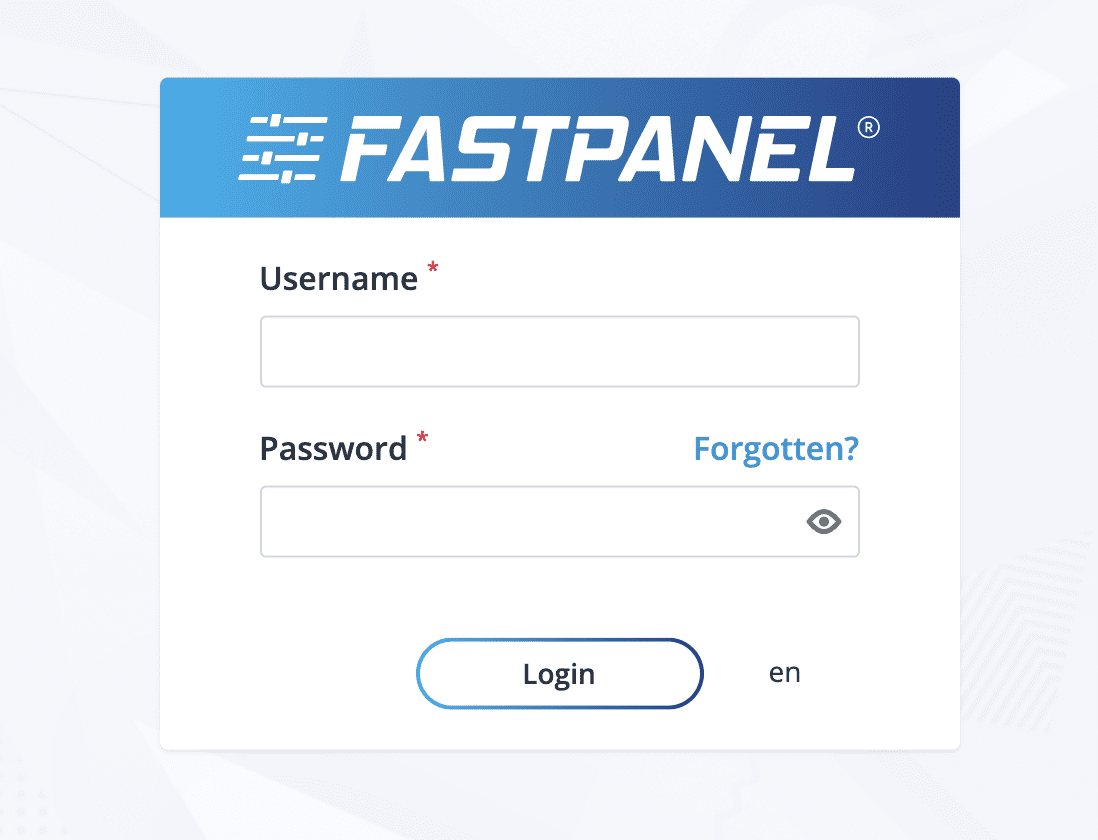
Step 2: Log in to the FASTPANEL control
To access the FASTPANEL interface, go to the link in the form https://IP:8888 on your browser, change the IP to your VPS/FASTPANEL server IP.
Step 3: Import SSL certificate to FASTPANEL
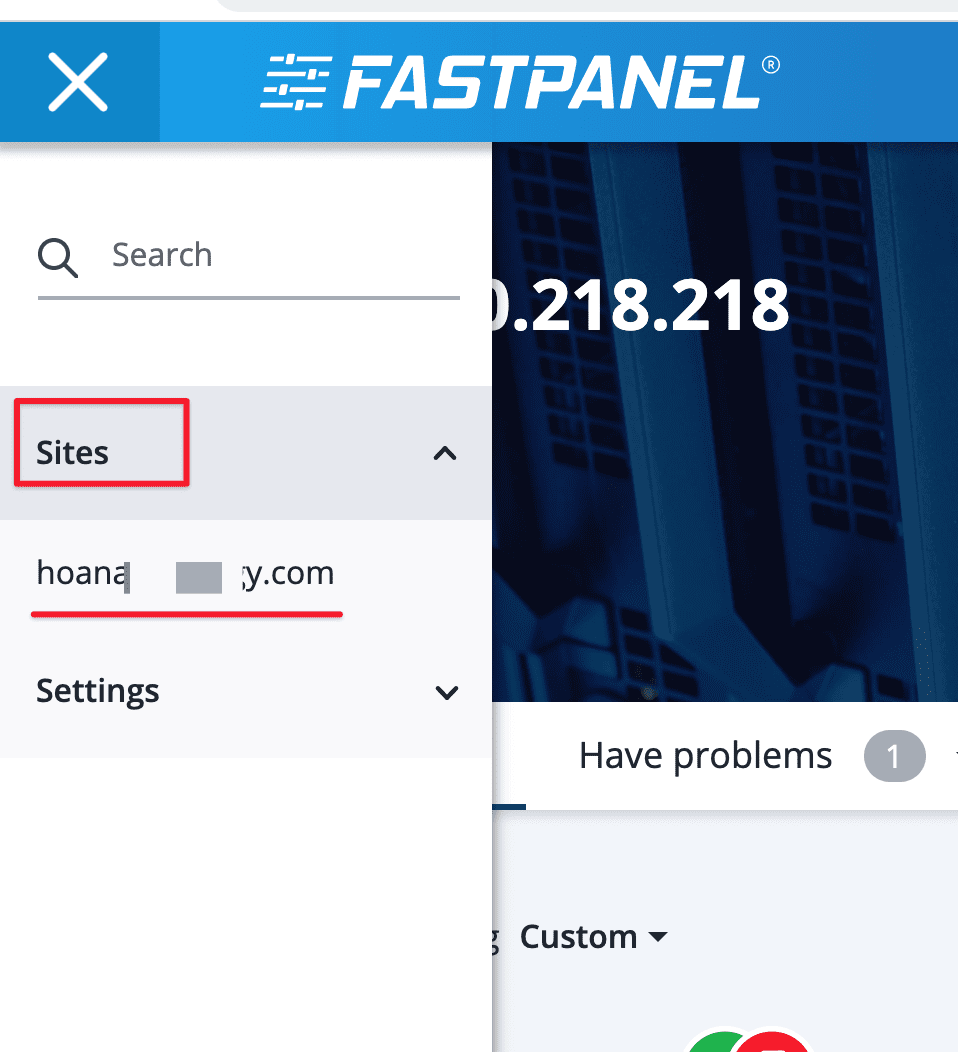
After successfully logging in to the admin page, click on the ... đứng icon as shown below => then click Site and select the website to install the certificate. Below is my illustration.
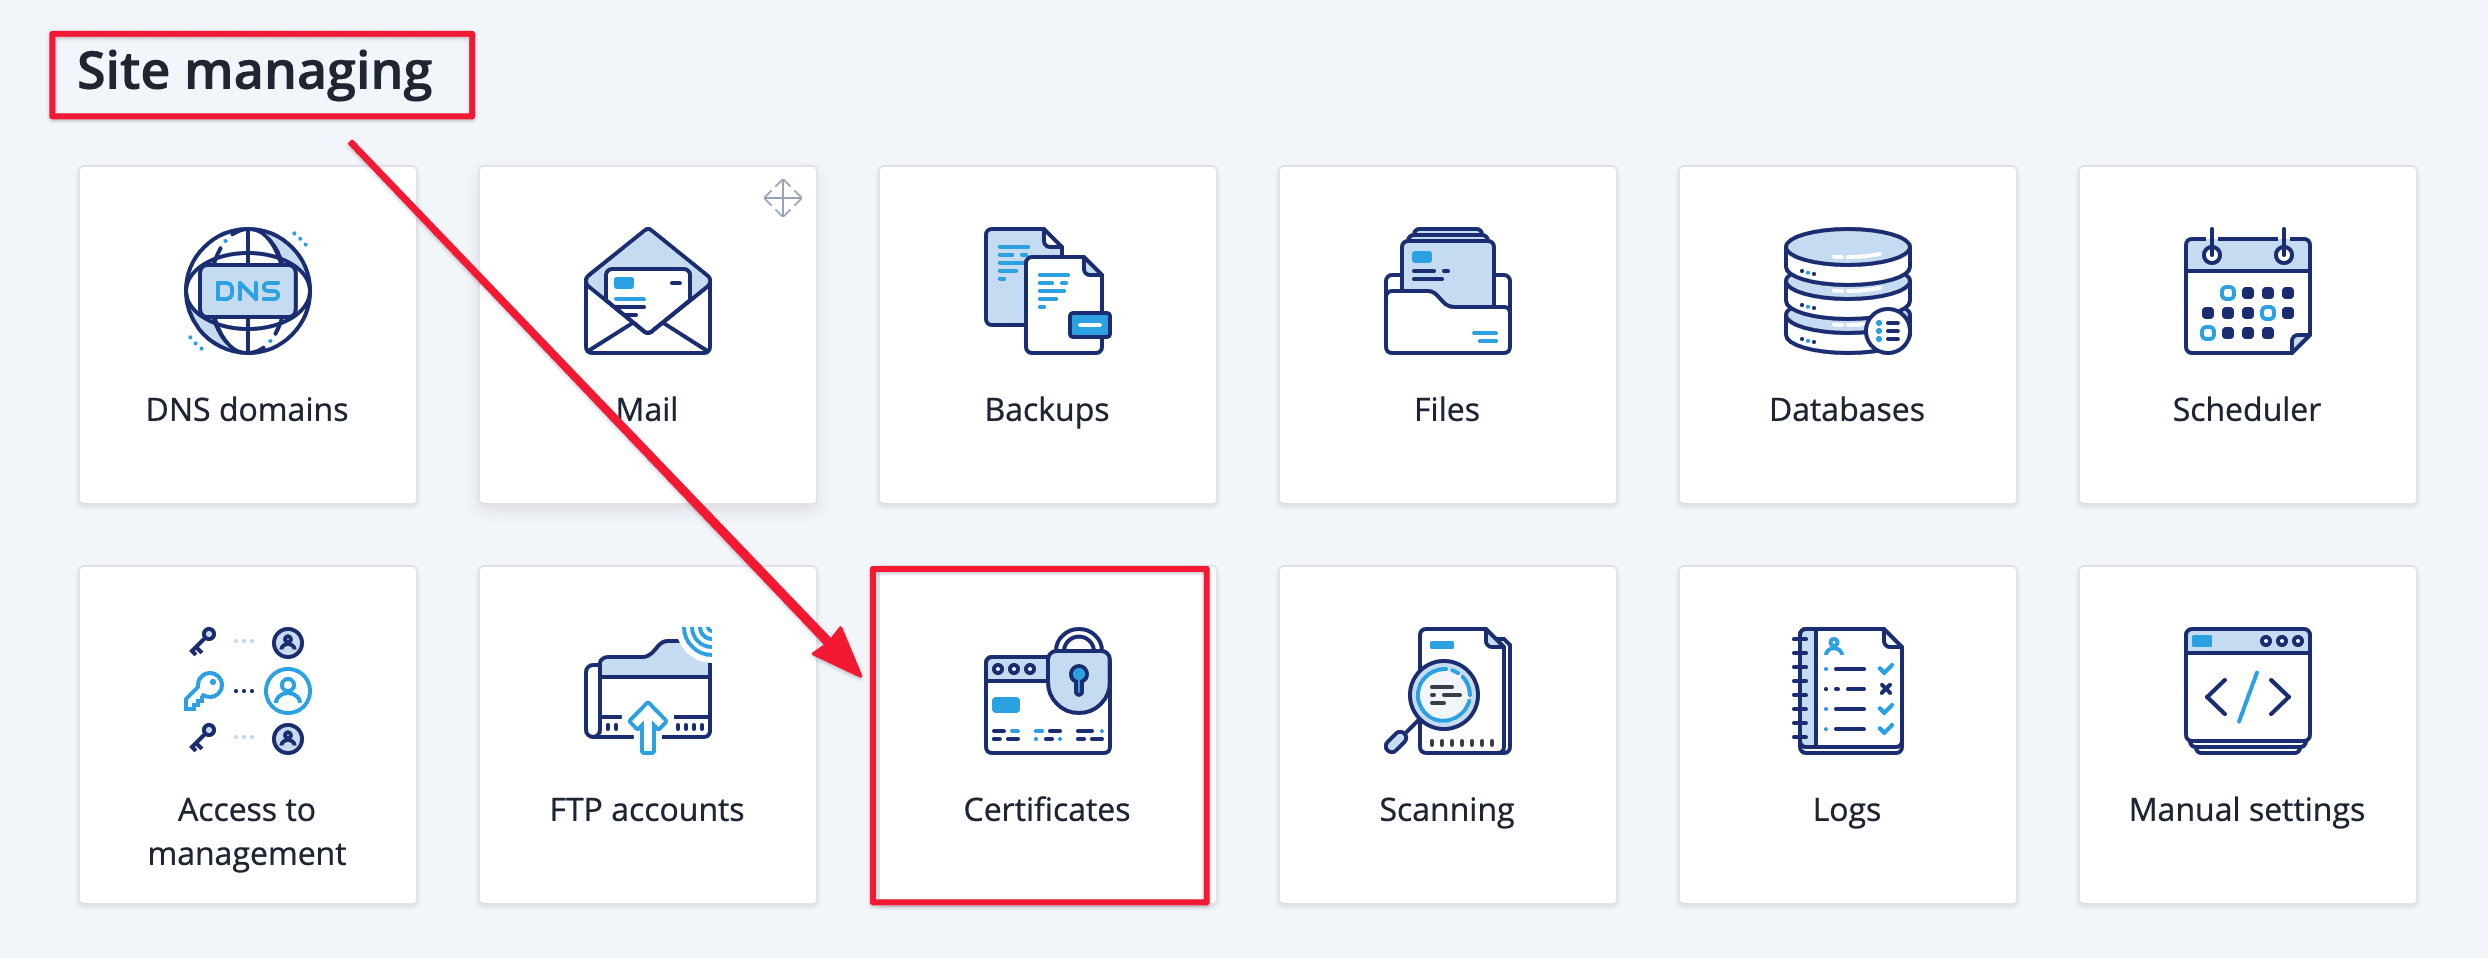
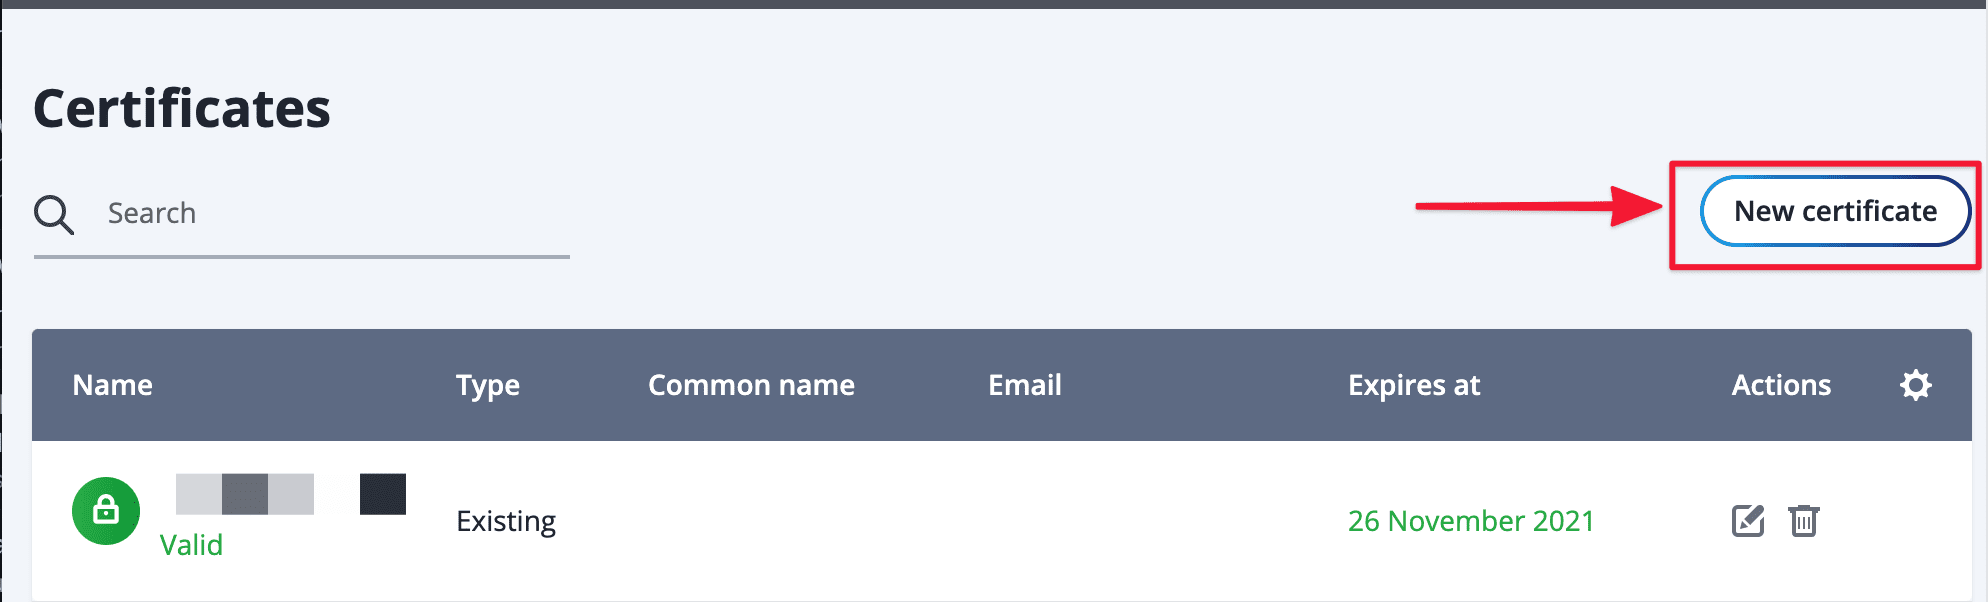
After entering the web’s administration, go to the Site managing category => select Certificates to import the SSL certificate.
In the Certificate interface, you will see all the existing SSL certificates of this domain. If it’s the free version or the certificates have expired, click on the sọt rác icon and delete it. And click New certificate to import the new certificate.
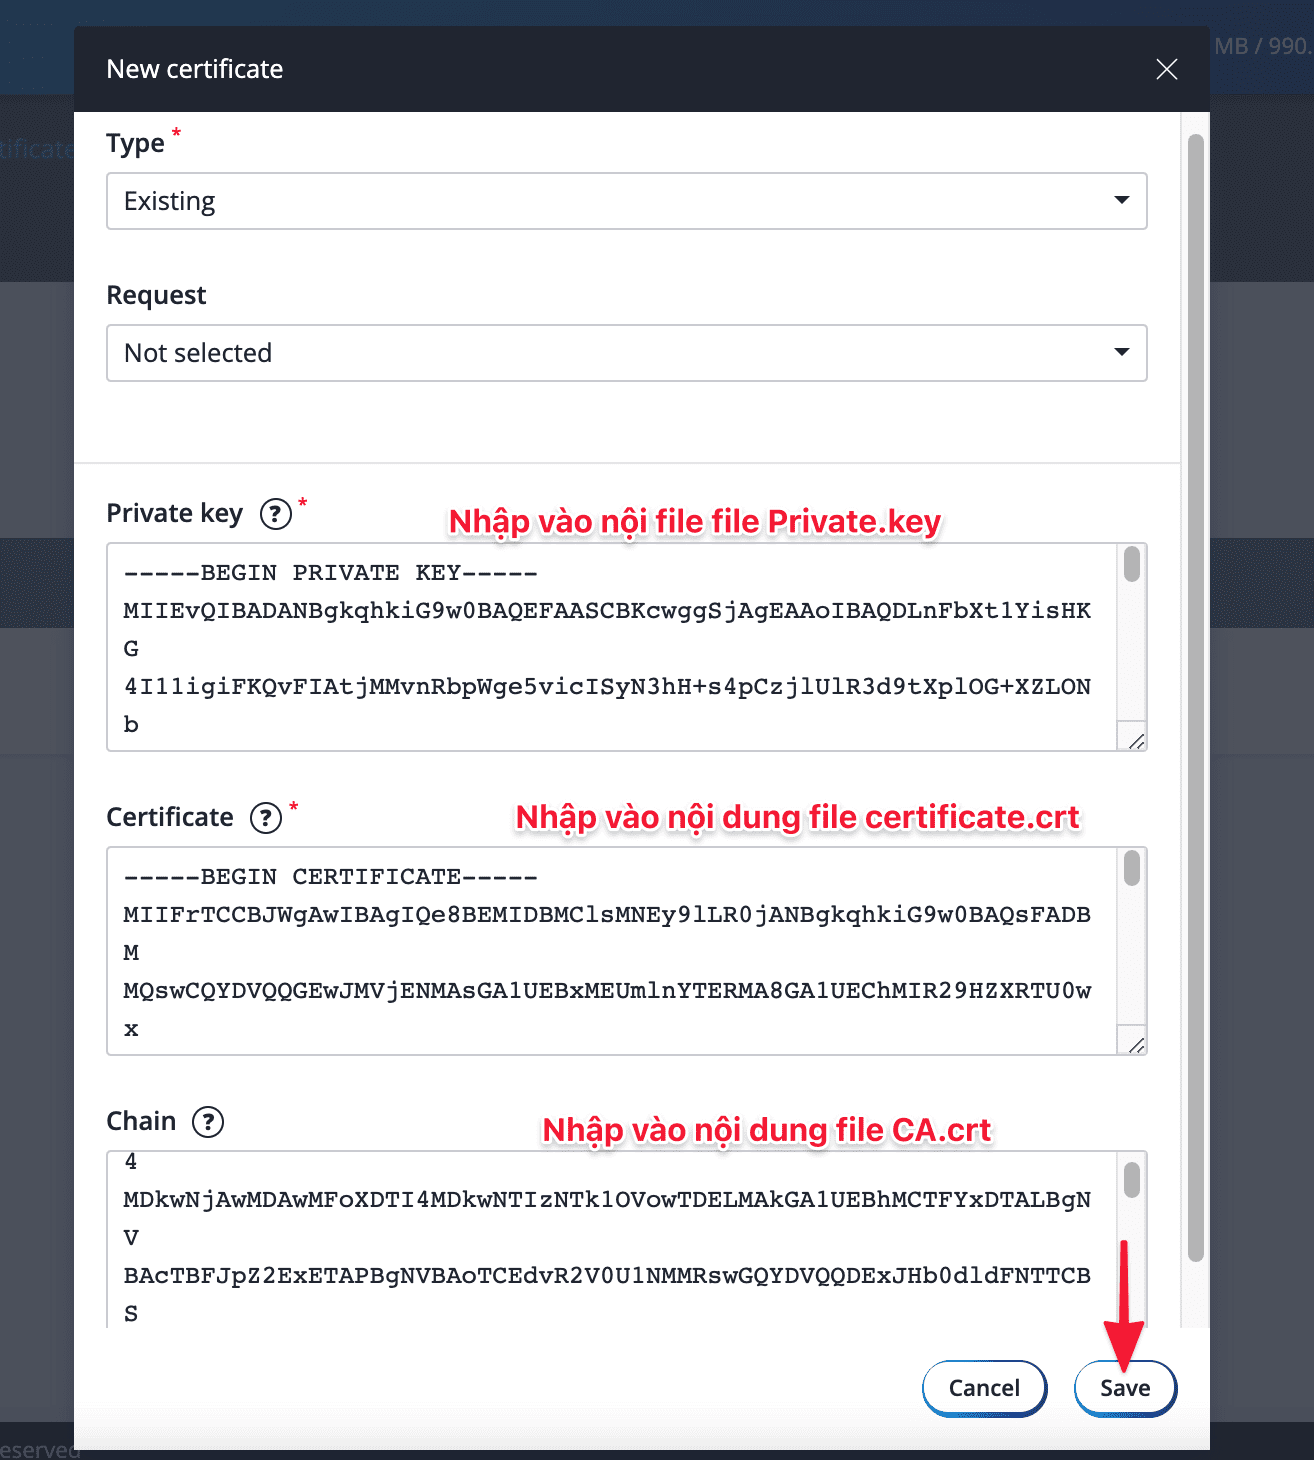
Next, the screen will display the certificate information import interface. Please note and enter the following:
- Type: The default
- Request: Leave as the default
- Private Key: You enter your key information. As described, this key will be generated when generating the CSR, and this key will match the CRT.
- Certificate: This is the certificate that the company gives you, you open the crt file, copy and enter the code.
- Chain: You enter the code of the CA.crt file. This intermediate certificate authenticates all currently used browsers (Chrome, Firefox, Safari…)
After entering all, click Save to save the information.
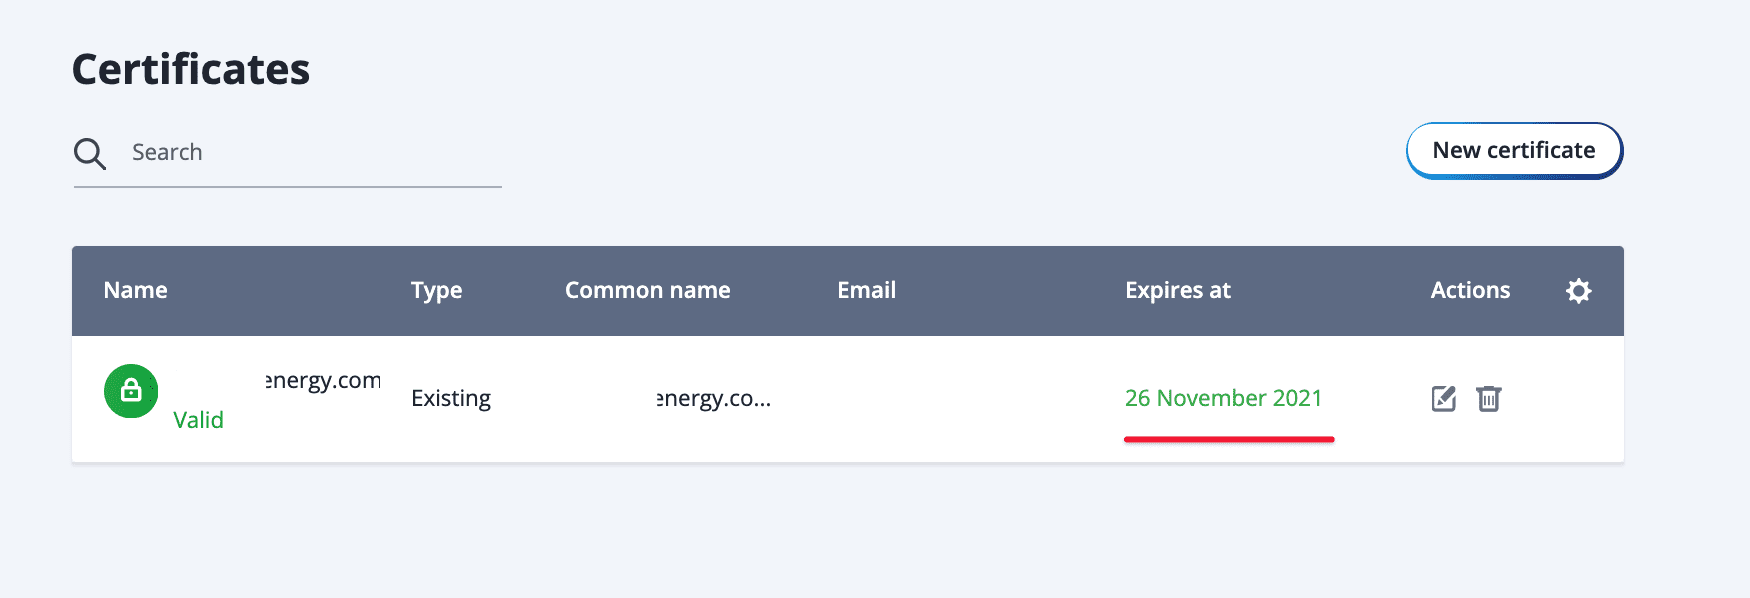
After saving successfully, you will see the message below with the website name and SSL term of that website.
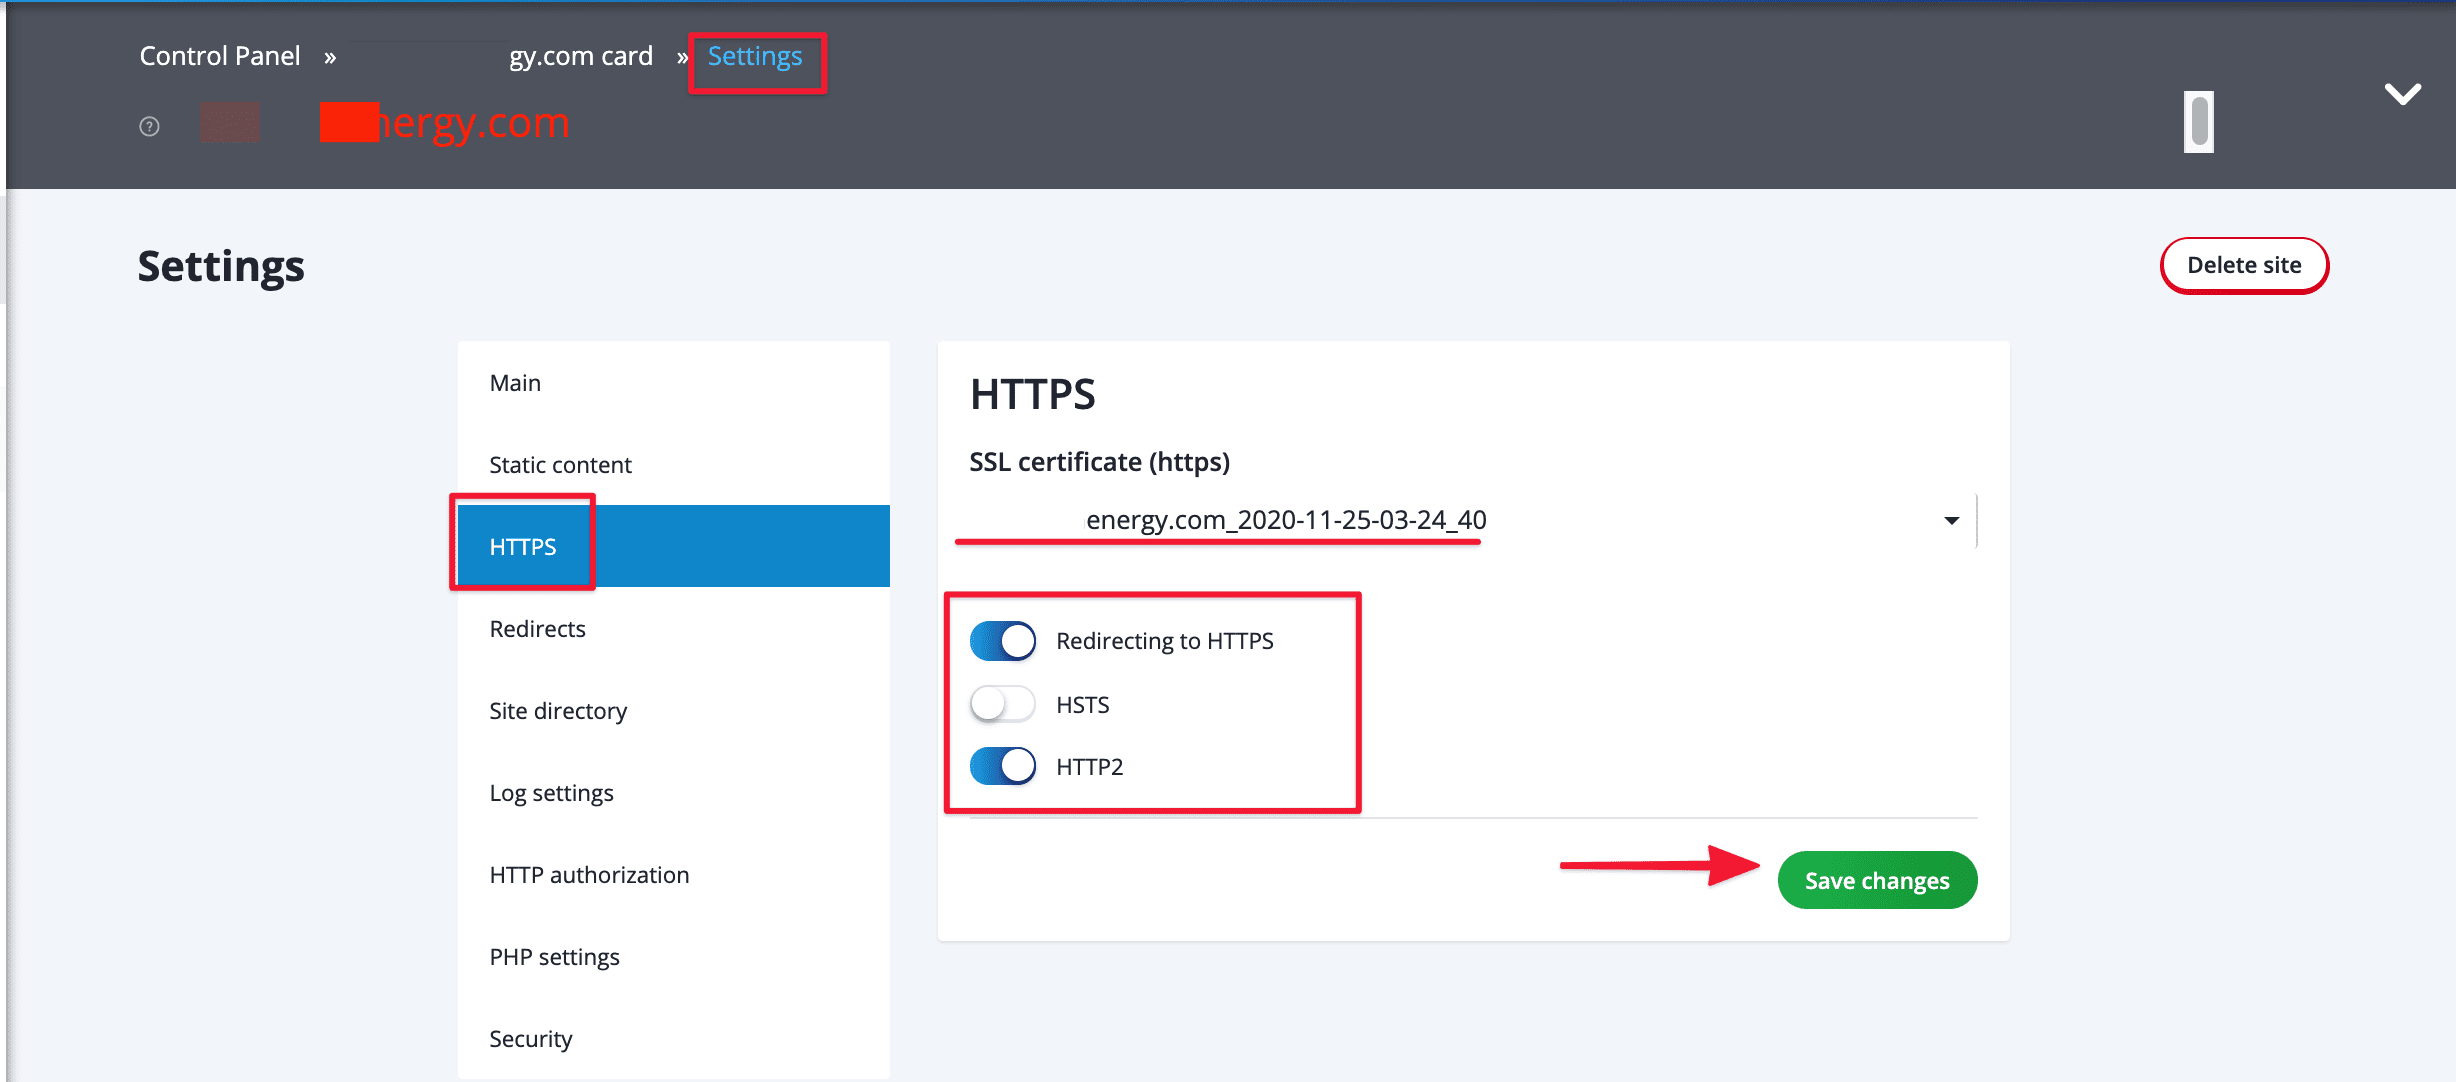
Another pretty important step is to configure http to https redirect. Because FASTPANEL already supports http to https redirect, I take advantage of the code without configuring .htaccess or installing a supporting plugin.
Go to Settings => HTTPS => turn on the redirecting to redirecting to HTTPS and HTTP2 lines.
So we have completed the SSL FASTPANEL configuration step. Now go to your browser to view the certificate or another way you can use the Online tool to view it. Because in some cases, the device you cached dns will not show but receive old information.
III. Summary
Hopefully, this article can help you configure SSL certificates most securely and effectively. If you find the article useful, please rate it 5 stars.
Wishing you success!
If you need assistance, you can contact support in the ways below:
- Hotline 247: 028 888 24768 (Ext 0)
- Ticket/Email: You use the email to register for the service and send it directly to: support@azdigi.com .
About the author

Thạch Phạm
Đồng sáng lập và Giám đốc điều hành của AZDIGI. Có hơn 15 năm kinh nghiệm trong phổ biến kiến thức liên quan đến WordPress tại thachpham.com, phát triển website và phát triển hệ thống.