Transferring data from the UpdraftPlus Backup file with 5 steps.
Introduction
In this article, AZDIGI will show you how to transfer data from one website to another or move website data from one host to another very simply with the Backup file of UpdraftPlus. Refer to the article below if you do not know how to back up data with the UpdraftPlus plugin.
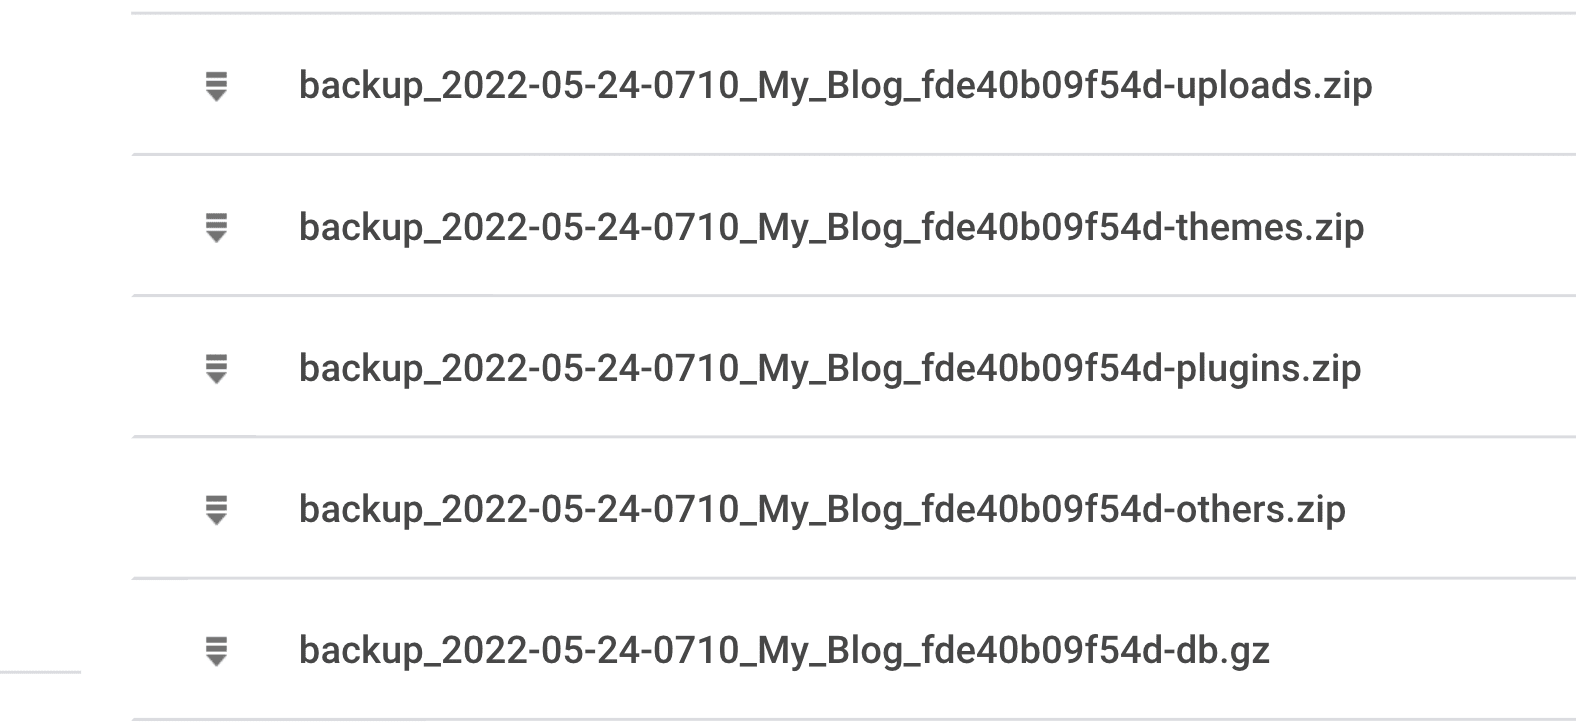
If you use the free UpdraftPlus Plugin, UpdraftPlus only supports the Backup of Database data and data inside the wp-content folder. And after the Backup is complete, you will receive the backup files as below; in addition to the uploads,themes,plugins folders, you will see a folder called others, folders, you will see a folder called wp-content, e.g., cache, languages…

So how can you take these split backups and restore them to a complete WordPress website? If you are wondering and do not know how the following article is the solution for you.
Implementation Guide
Step 1: Install default WordPress
If you use the host at AZDIGI, you can use the Softaculous feature to quickly install the default WordPress according to the instructions below:

After installing the default WordPress, you continue to step 2.
Step 2: Install UpdraftPlus Plugin
You access the newly installed website administrator => select install new plugin => find and install the UpdraftPlus WordPress Backup plugin.
Step 3: Upload the backup file
After installing Plugin UpdraftPlus is complete, go back to your hosting (cPanel) and access the following path: domain.com/wp-content/updraft (updraft directory is generated when installing UpdraftPlus). Next, you upload all 5 backup files (format * .zip) into the updraft folder as below:

Step 4: Restore data from backup
After you have installed UpdraftPlus and uploaded the backup files to the correct folder of UpdraftPlus, you go to the website administration => UpdraftPlus => Backup/Restore, now you will see the backup file as shown below with specific components and the time the backup was created.

To restore this backup, click on it => Restore.
Then you tick all the components and click Next.
At the last interface, you will see a warning line, you don’t need to worry because the plugin is just warning that with the free version, you can only restore website A’s data from one host to another (i.e., keep the website name and only change the host), and in my example, I’m getting site A’s data to restore it to site B, so it warns that this feature is not supported. And if you want to use it, you need to upgrade the plugin to the Premium version.
If you need to use that data to run for another website, click Restore as usual to restore the website content, and I will guide you to change the website name after completing this step.
The restore process will take place quickly or slowly, depending on the backup file’s data. If the restore is successful, you will receive a message as shown: below:

If your need is to move the website from one host to another, follow this step to complete. If you use site A’s backup file, you will need to do step 5 below to restore to site B.
Step 5: Edit the URL for the new website
After successfully recovering the data, you can’t access website B because it will redirect to Site A. So now you need to correct the URL in the database, specifically the 2 tables: siteurl and home to the name of the new website.
- Determine the database of the website
In the website’s Document Root folder, open the wp-config.php file to see the Database name.
- Edit old site URL to the new site
After you have determined the Database name, you go tophpMyAdmin >> => select the correct Database to edit (1) >> => select the table wp_options (2) >> => and edit it to the new website name (3).

Now revisit the new website to check your results. As shown below, I could access the website using the data from the old backup file. Wishing you success!

You can refer to other instructions at the link below:
If you need support, you can contact support in the ways below:
- Hotline 247: 028 888 24768 (Ext 0)
- Ticket/Email: You use the email to register for the service and send it directly to: support@azdigi.com .
You might also like
- Backup/Restore website data with UpdraftPlus
- Backup data to Google Drive with UpdraftPlus
- How to transfer data using Duplicator – WordPress Migration Plugin
- Reset WordPress to factory defaults with a plugin
- How to use WP CLI to Export/Import Post keep content and images
- Migrate WordPress website hosting with All in One WP Migration plugin
About the author

Thạch Phạm
Đồng sáng lập và Giám đốc điều hành của AZDIGI. Có hơn 15 năm kinh nghiệm trong phổ biến kiến thức liên quan đến WordPress tại thachpham.com, phát triển website và phát triển hệ thống.