When you access a website from your computer, the DNS records of that domain name will usually be cached on your computer for a certain time. This can cause a problem that when you change the Nameserver or DNS of the domain name when accessing the computer, the domain name will still point to the old web server even though the domain name has been resolved to the new web server.
So what you need to do to be able to access the website at the new webserver immediately is to clear the DNS cache on your computer.
Check out AZDIGI’s website hosting service at: https://azdigi.com/
How to clear cache on browsers
Google Chrome Browser
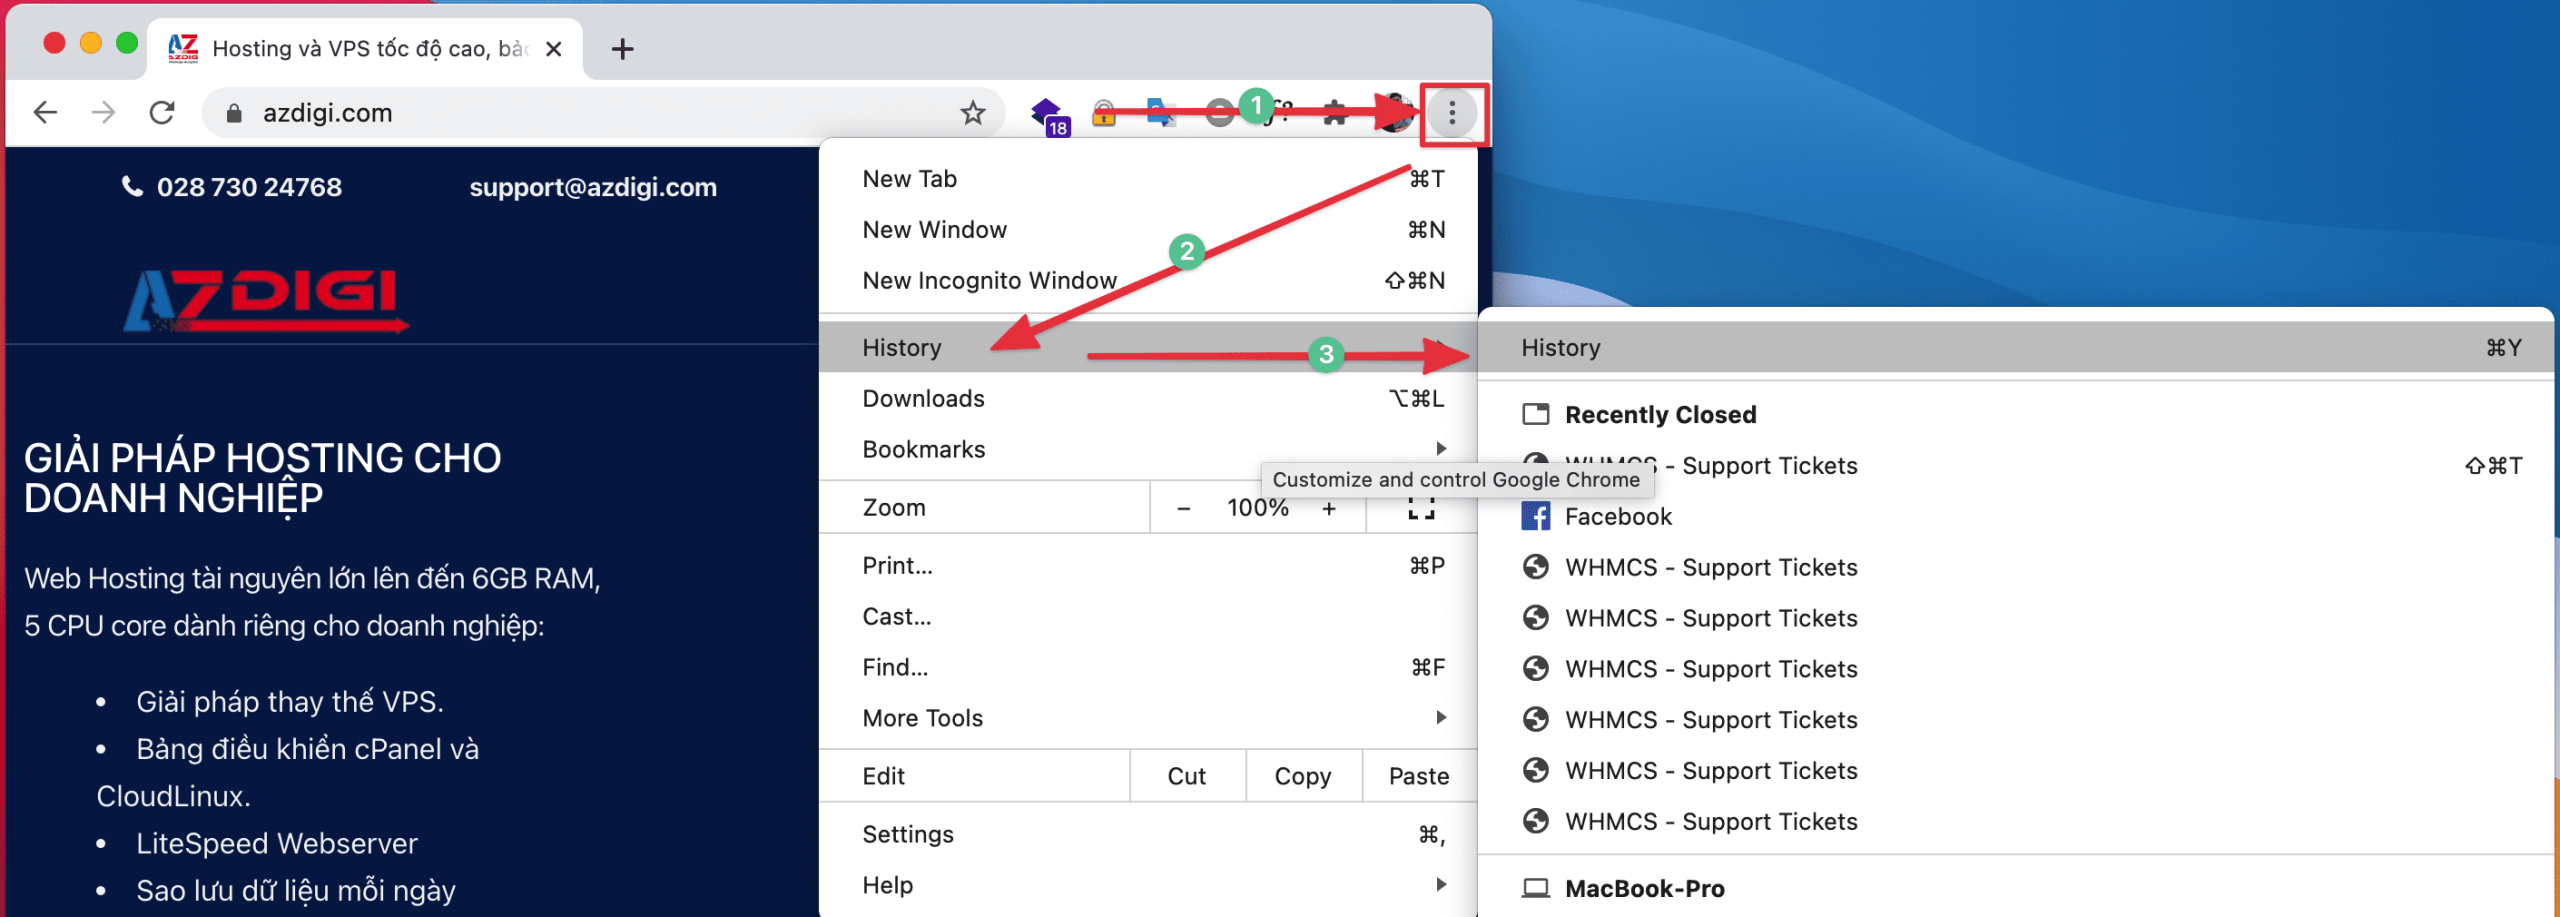
You open the Google Chrome browser and then select the 3-dot icon> History> Clear browsing data> Tick Cookies and site data> Clear data
Firefox Browser
With Firefox browser, select the 3 dashes icon => Library => History => Clear history.
Next, you choose the time period to delete as All time => tick > => select OK
Safari Browser
On the Safari browser, select History in the top bar menu and then select Clear History
Coc Coc Browser
On the Coc Coc browser, click on the Coc Coc icon in the top left corner, then select History => History.
Next, select Clear Browsing data => the screen will open a new window, select Basic All time and tick the parts to be deleted as shown below:
Clear the DNS cache on the computer
For Windows
You access the Command Prompt by pressing the Windows + X key combination (or going to Start => Run) and typing cmd
At the contents of the Command Prompt window, enter the following and press the Enter key:
ipconfig /flushdns
So you have finished clearing the DNS cache on Windows (applies to Windows XP/7/8/10).
For MacOS 10.10.4 and above
Go to Applications => Utilities => Terminal, enter the following command and press Enter.
sudo killall -HUP mDNSResponder
For MacOS 10.10.1, 10.10.2, and 10.10.3
Go to Applications => Utilities => Terminal, enter the following command and press Enter.
sudo discoveryutil mdnsflushcache
For MacOS 10.7, 10.8 and 10.9
Go to Applications => Utilities => Terminal, enter the following command and press Enter.
sudo killall -HUP mDNSResponder
About the author

Thạch Phạm
Đồng sáng lập và Giám đốc điều hành của AZDIGI. Có hơn 15 năm kinh nghiệm trong phổ biến kiến thức liên quan đến WordPress tại thachpham.com, phát triển website và phát triển hệ thống.