By default, the maximum upload file size of phpMyadmin on DirectAdmin systems is only 10 MB. This will not affect you if you do not have to import but the database.sql file is heavier than 10 MB. In this article, AZDIGI will guide you to increase this limit to the higher level you want.
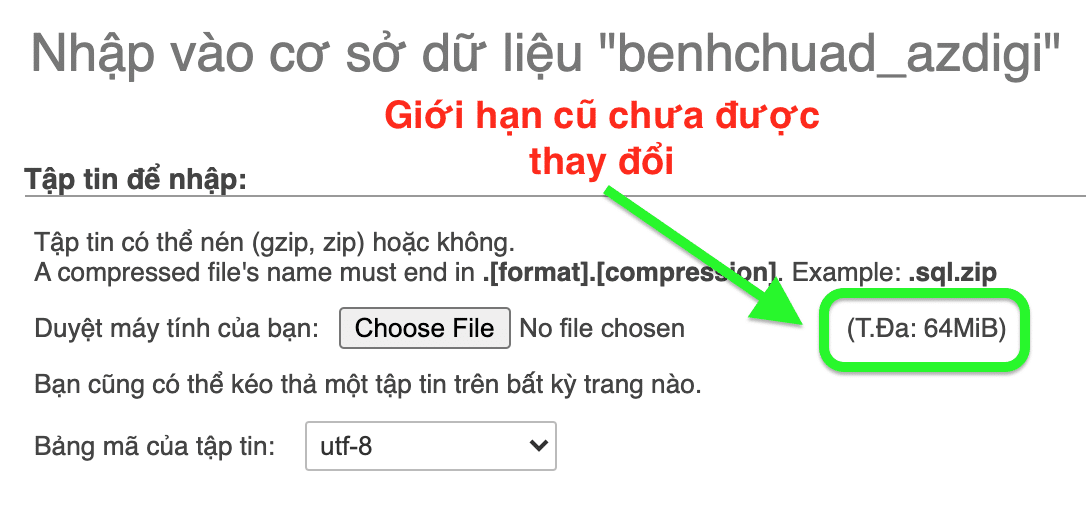
With my VPS, I have previously increased the limit to 64MB, but because the database I need to import currently exceeds this number, I will need to increase it to 256 MB.
Step 1: Find the php.ini file on the VPS
First, you need to SSH into VPS/Server, you can refer to the instructions:
Once you have SSH into your VPS/Server, use the following command to find the php.ini file:
php -i | grep "php.ini"
Below are the results returned on my VPS:
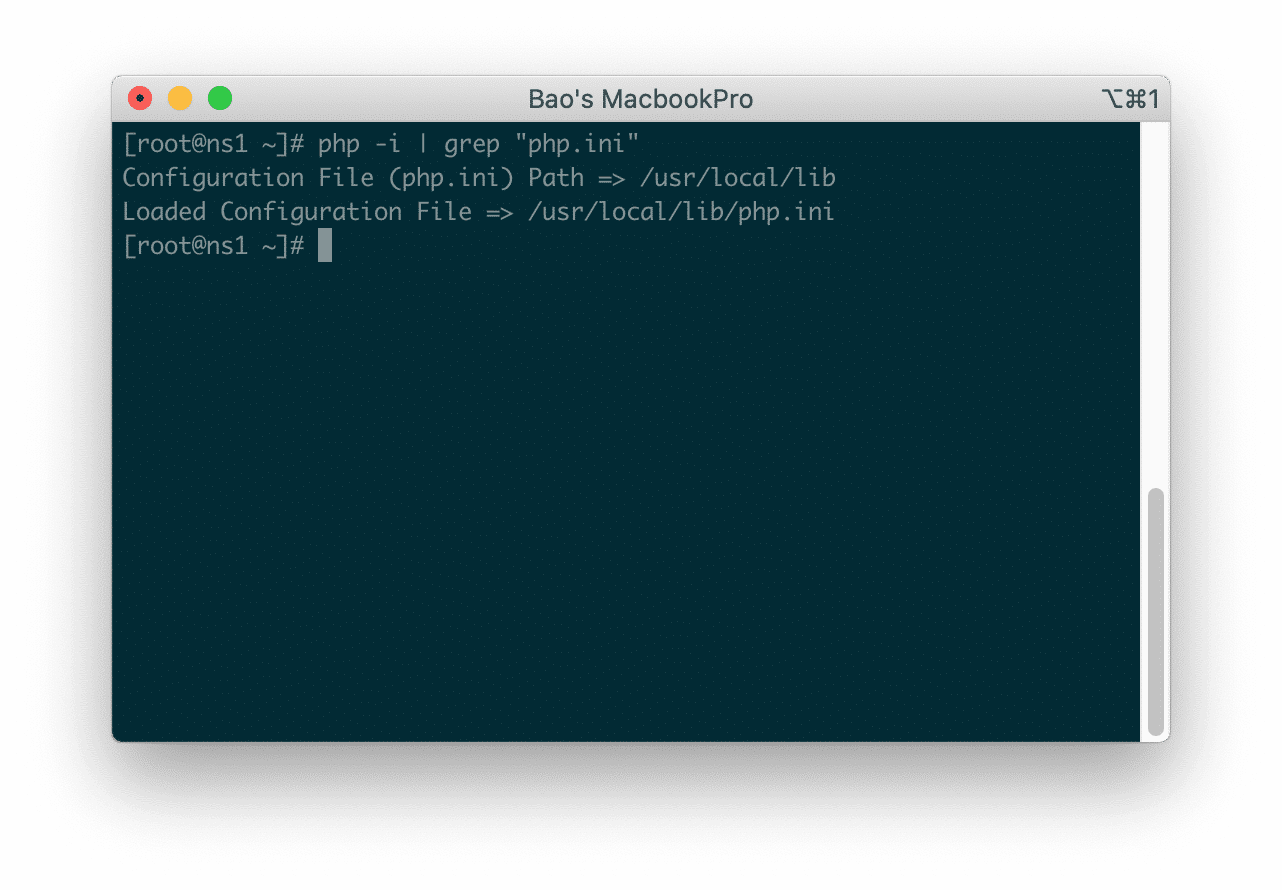
So you have the path to the php.ini file (/usr/local/lib/php.ini) Continue with step 2.
Step 2: Edit php.ini file to increase upload/import limit phpMyadmin DirectAdmin
You will need to edit the php.ini file to increase the upload/import limit parameter on the PHPMyAdmin interface. You use the following command to edit this file:
sudo vi /usr/local/lib/php.ini
After entering the file content, then find the following two lines and change to a new higher capacity level:
- upload_max_filesize
- post_max_size
To find these two configuration lines, use the / key and insert the content after this / sign. For example, when you just used the command sudo vi /usr/local/lib/php.ini, you continue to enter /upload_max_filesize => Enter to find the lines that match the corresponding keywords. Next, press the i key on the keyboard to enable edit mode.
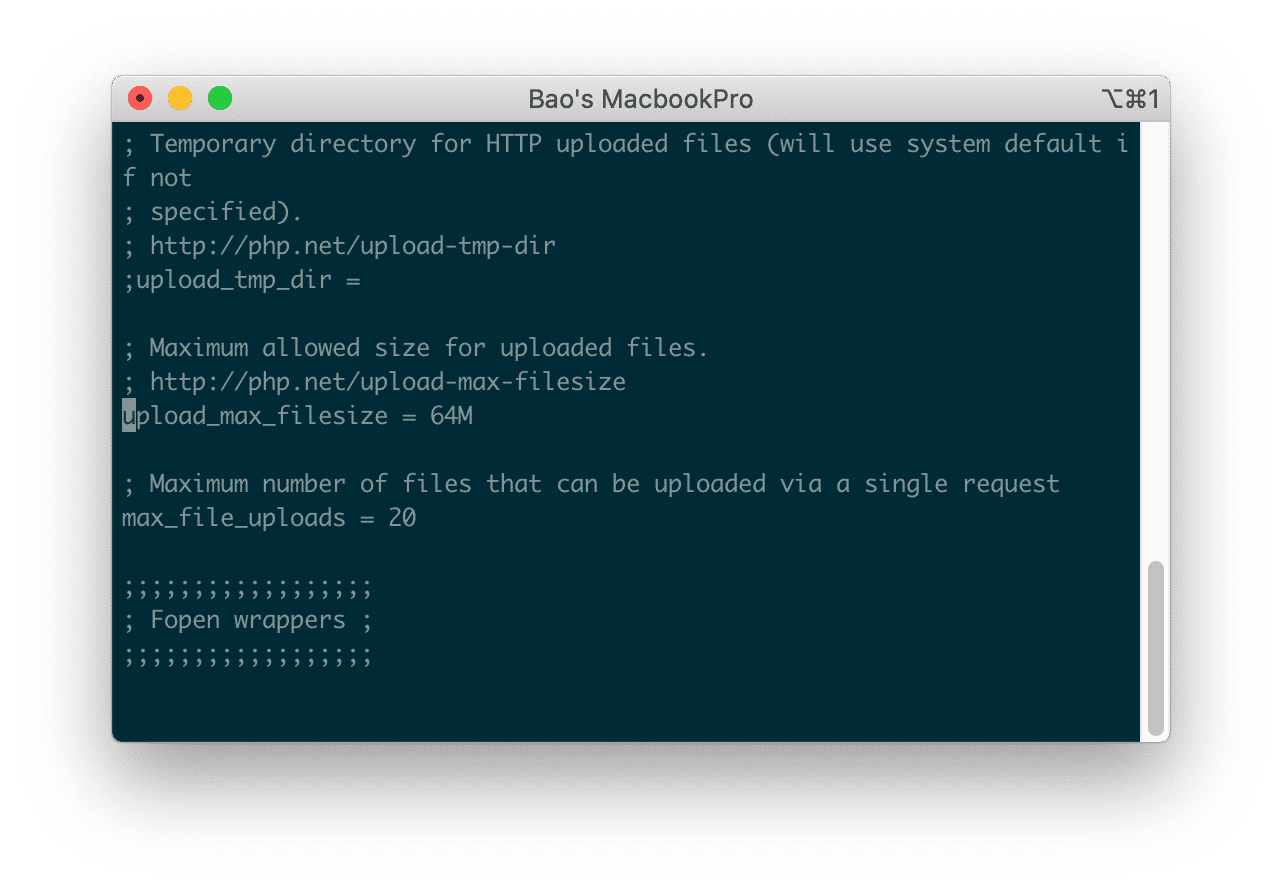
After editing the appropriate parameters, you use the ESC key to exit the editing mode.
With /post_max_size, you do the same thing. Continue to press /post_max_size then Enter to find the lines that match the corresponding keywords. Then press i on the keyboard to enable editing mode.
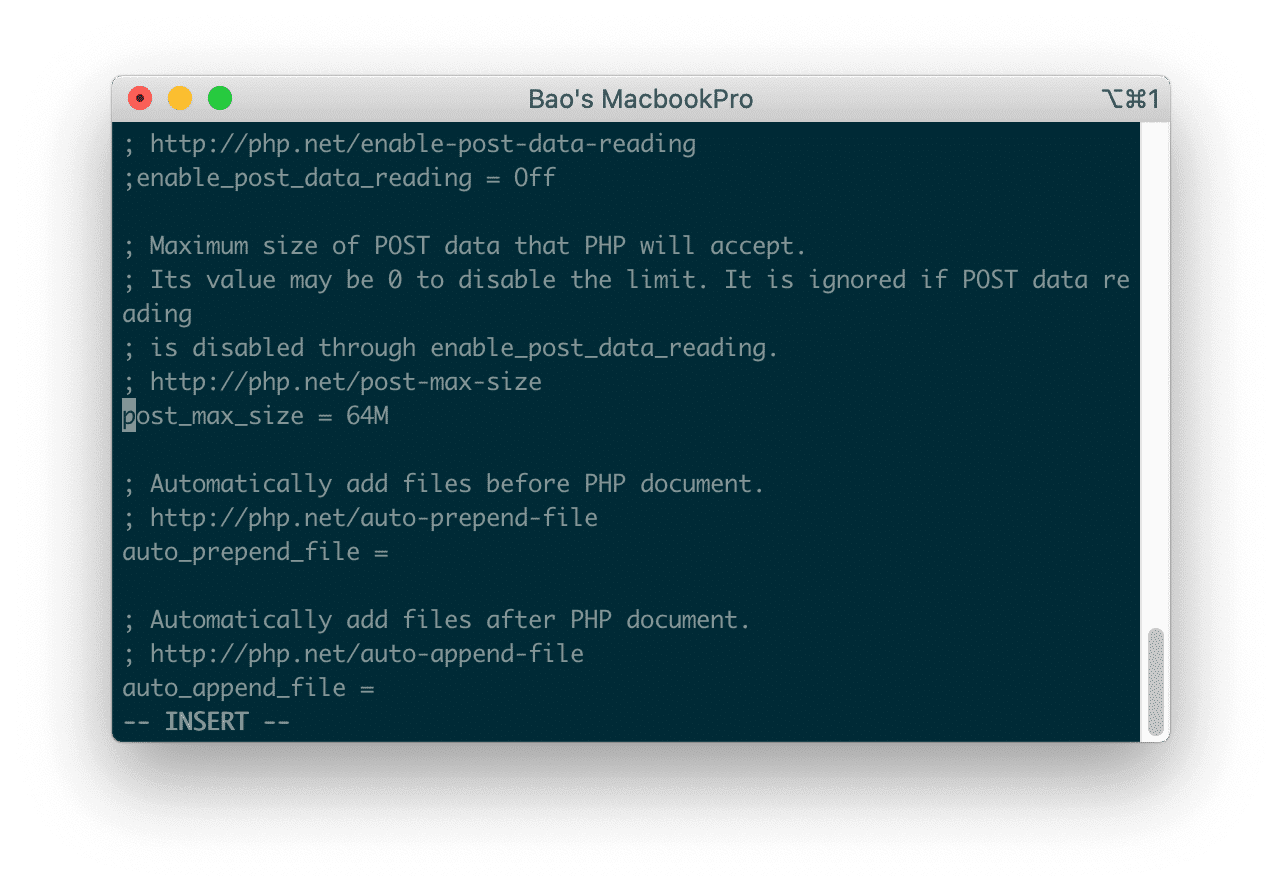
After editing the appropriate parameters, you use the ESC key to exit the editing mode.
After editing the two lines and exiting the editing mode, use the key combination :x and Enter to save the php.ini file. And we continue with step 3.
Step 3: Restart your service
Before doing this step, you need to determine the webserver running on your VPS/Server. Usually, there will be 4 cases as follows:
- apache
- nginx
- nginx_apache
- openlitespeed
To determine which webserver your VPS/Server is using, you use the following command:
cat /usr/local/directadmin/custombuild/options.conf | grep webserver
My VPS running apache will show the results as shown below:

If your VPS/Server is running nginx_apache or just have apache like me, you use the following command to restart your web service:
/sbin/service httpd restart
If your VPS/Server is running nginx, you use the same command but slightly change it.
/sbin/service nginx restart
Same for your VPS/Server running openlitespeed, you also need to change a bit.
/sbin/service openlitespeed restart
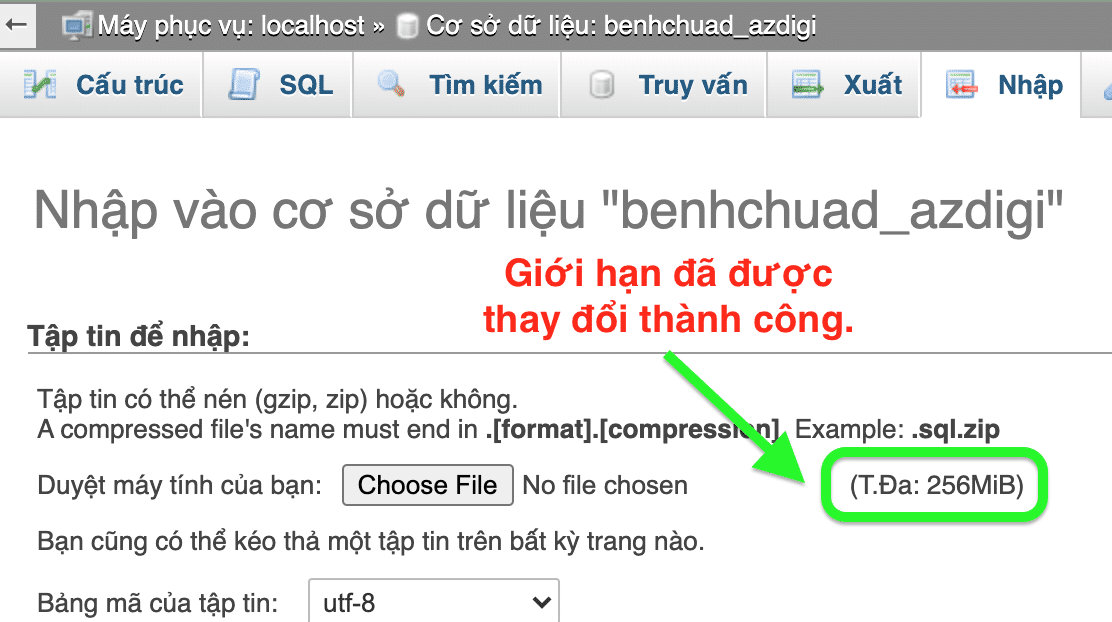
After restarting the webserver on the VPS/Server, log back into phpMyadmin to check the results. And here are my results.
Wishing you success!
Reference articles: Increase the max upload filesize in apache/php
- Hotline 247: 028 888 24768 (Ext 0)
- Ticket/Email: You can use your email to register for the service and send it directly to: support@azdigi.com
You might also like
- Increase database import limit in phpMyAdmin
- Increase phpMyAdmin upload/import limit on CyberPanel
- Increase WordPress upload limit
- Fix the error: can not be uploaded Error message CyberPanel
- Increase the upload file size limit on DirectAdmin's File Manager
- How to change php.ini parameters on OpenLiteSpeed using Docker Compose
About the author

Thạch Phạm
Đồng sáng lập và Giám đốc điều hành của AZDIGI. Có hơn 15 năm kinh nghiệm trong phổ biến kiến thức liên quan đến WordPress tại thachpham.com, phát triển website và phát triển hệ thống.