
In this article, AZDIGI will guide you to use Spam Filters on cPanel to create a mail filter to help you prevent and limit spam. First, let’s learn about Spam Filters on cPanel.

I. OVERVIEW
When you use the mail service, it is impossible not to encounter the case that your mail accounts are SPAM. Every day you have to receive automatic spam emails continuously. Pro Mail Hosting service at AZDIGI can help you prevent that.
Spam Filters are built into cPanel to help you prevent all spam sent to your mail system with simple configuration steps. So let’s do the configuration with AZDIGI!
II. Configure Spam Filters on cPanel
Step 1: Log in to cPanel mail
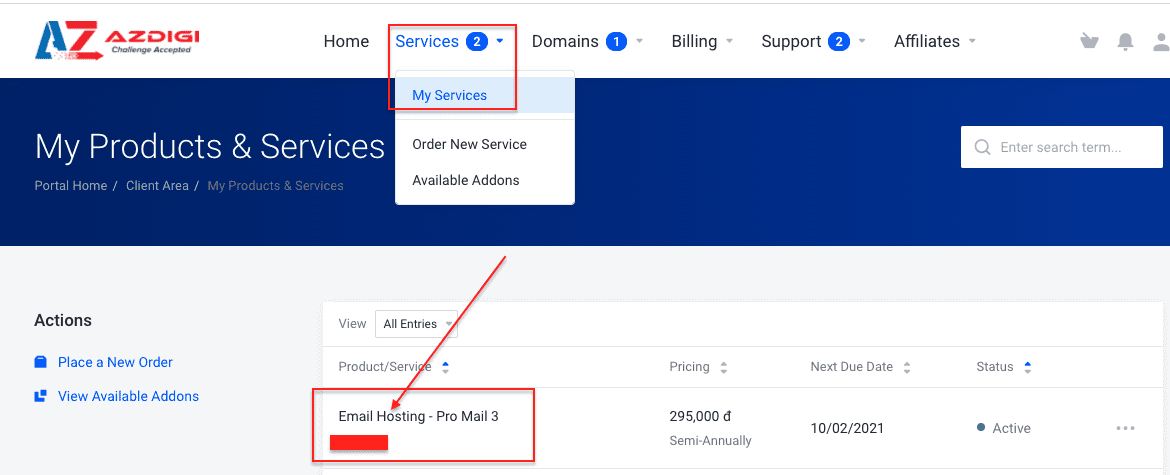
You log in to the service administration in my.azdigi.com
Click Services => My Services => select the corresponding mail service.
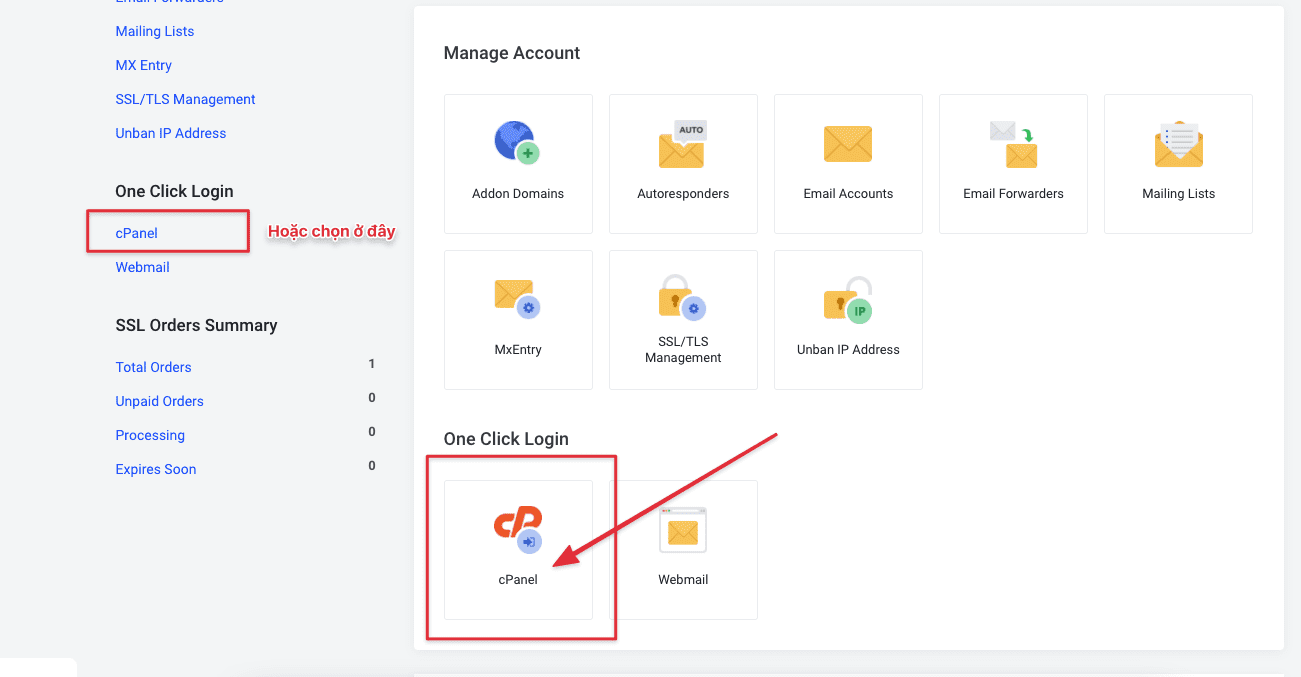
Next, you select the cPanel icon as shown below:
Step 2: Configure Spam Filters on cPanel
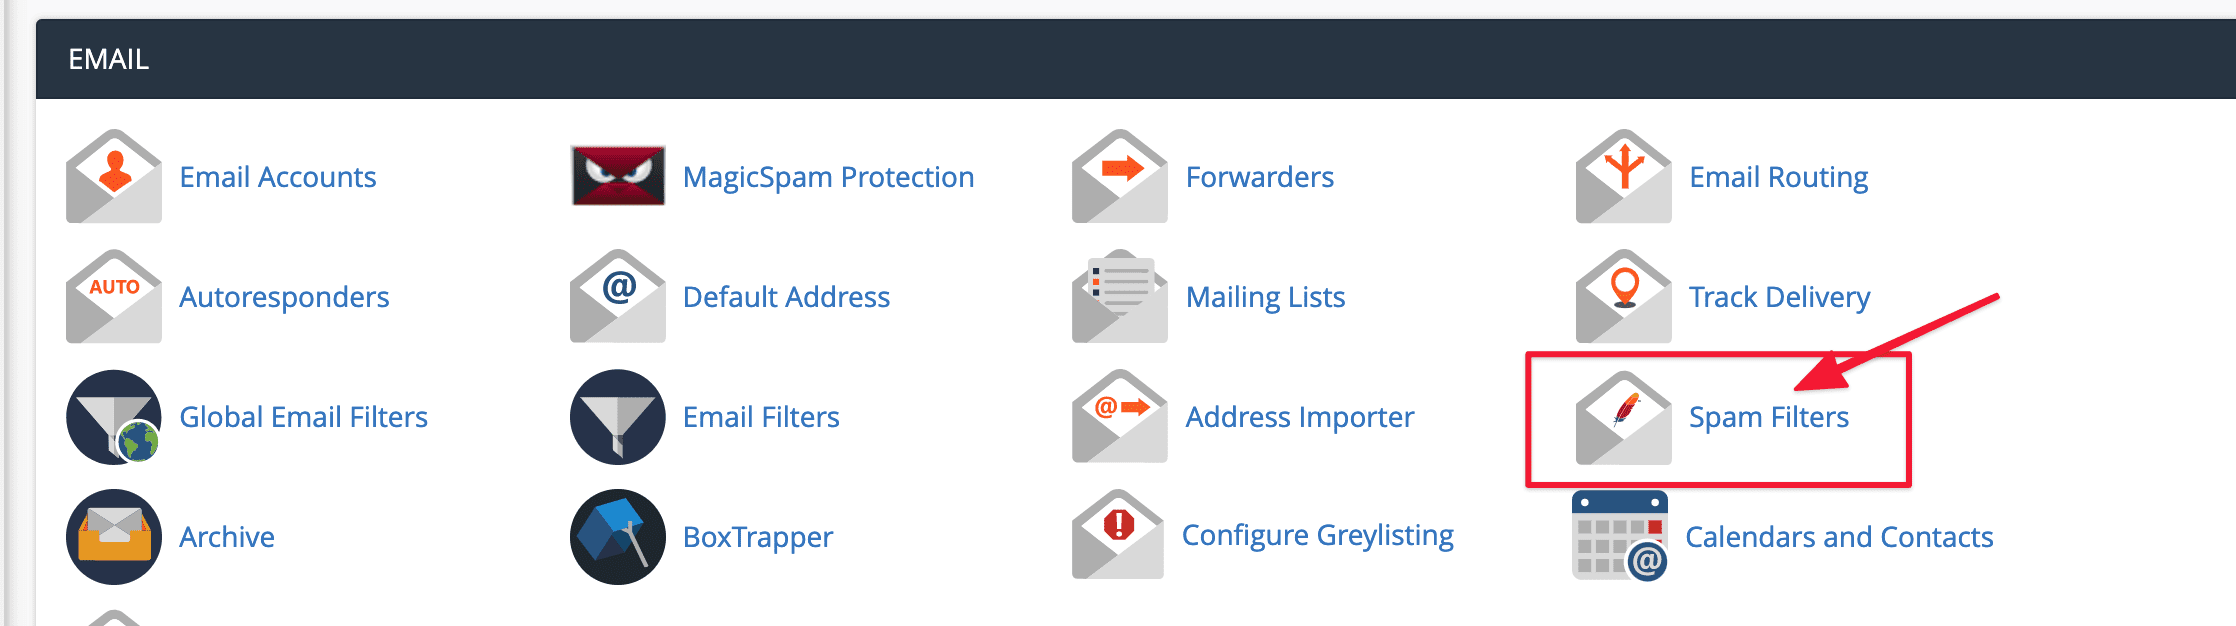
At the interface below, click on Spam Filters.
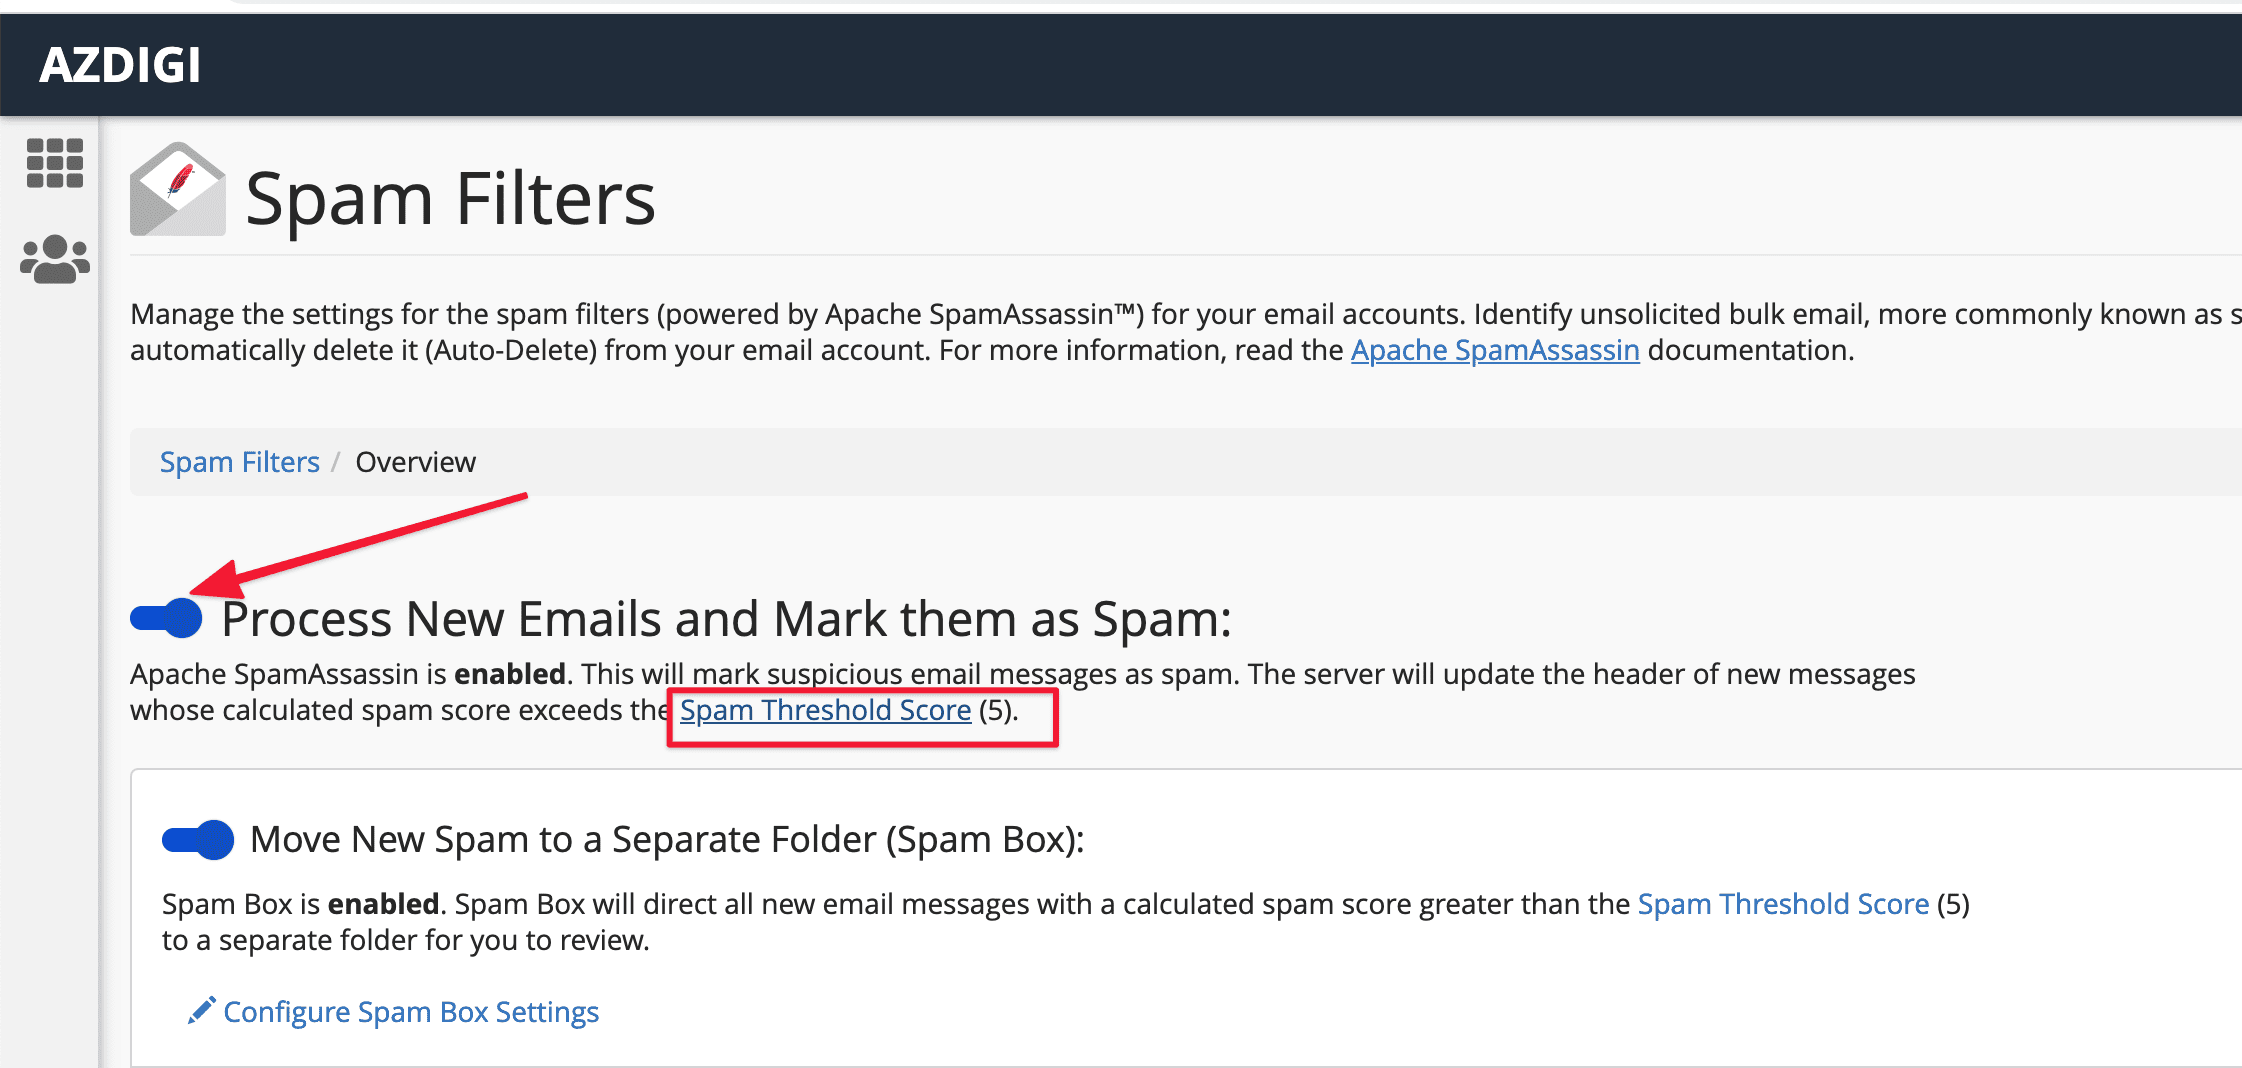
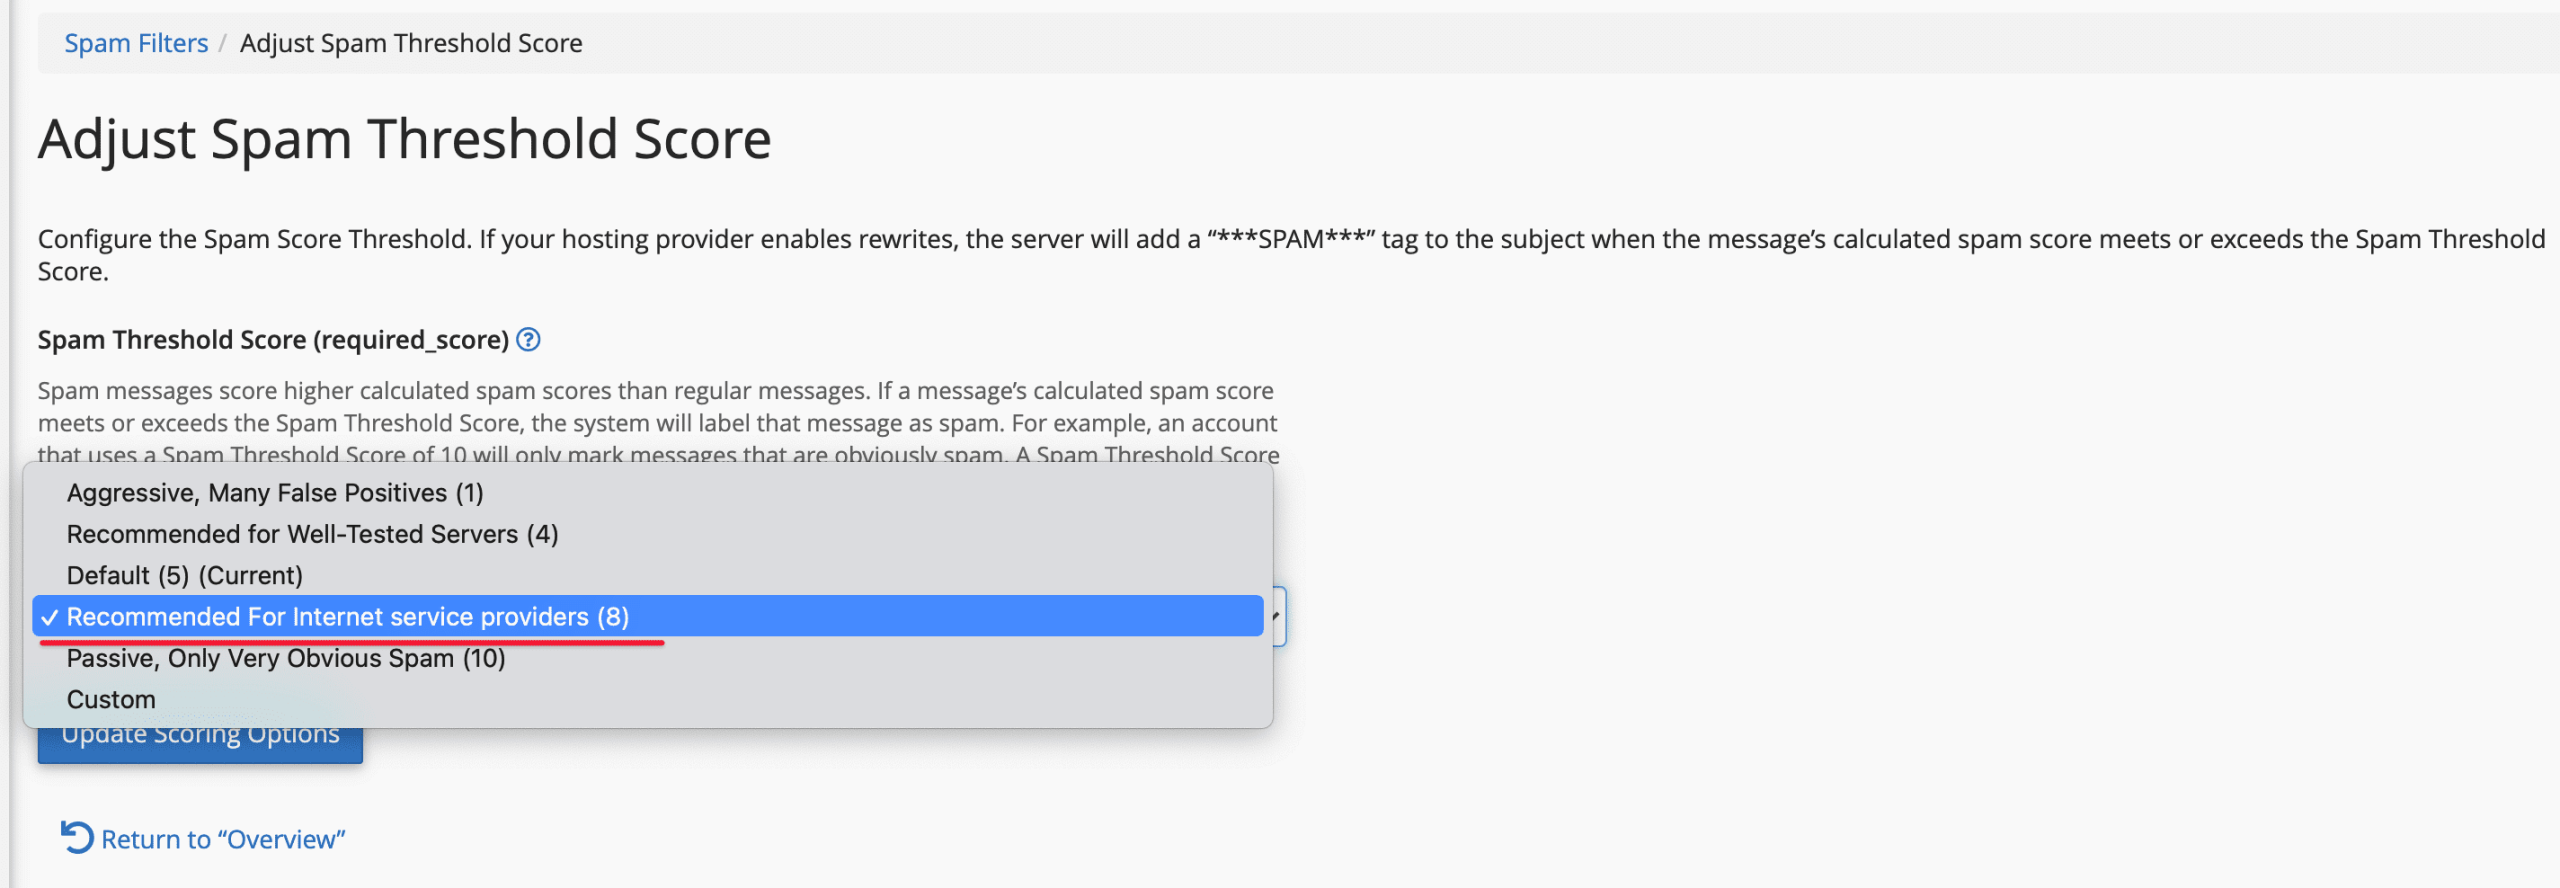
Next, turn on Process New Emails and Mark them as Spam to activate the mail filter. Once enabled, click on Spam Threshold Score (5) to set the SPAM rating of incoming mail.
By default, the system will choose SPAM Score of 5 and recommend as 8, in the picture below, I will choose 8. However, please choose according to your personal preferences, to choose a custom, you click on the Custom item and enter the score.
After selecting, click Update Scoring Options to update.
After clicking Update Scoring Options, your system will activate the mail filter. This filter will prevent spam emails and protect your mail system.
But what should you do when using some special mail you want to receive accidentally filtered by the Spam Filters tool? Then you can use the Spam Whitelist function to add special emails to the safe list, bypassing the above filter.
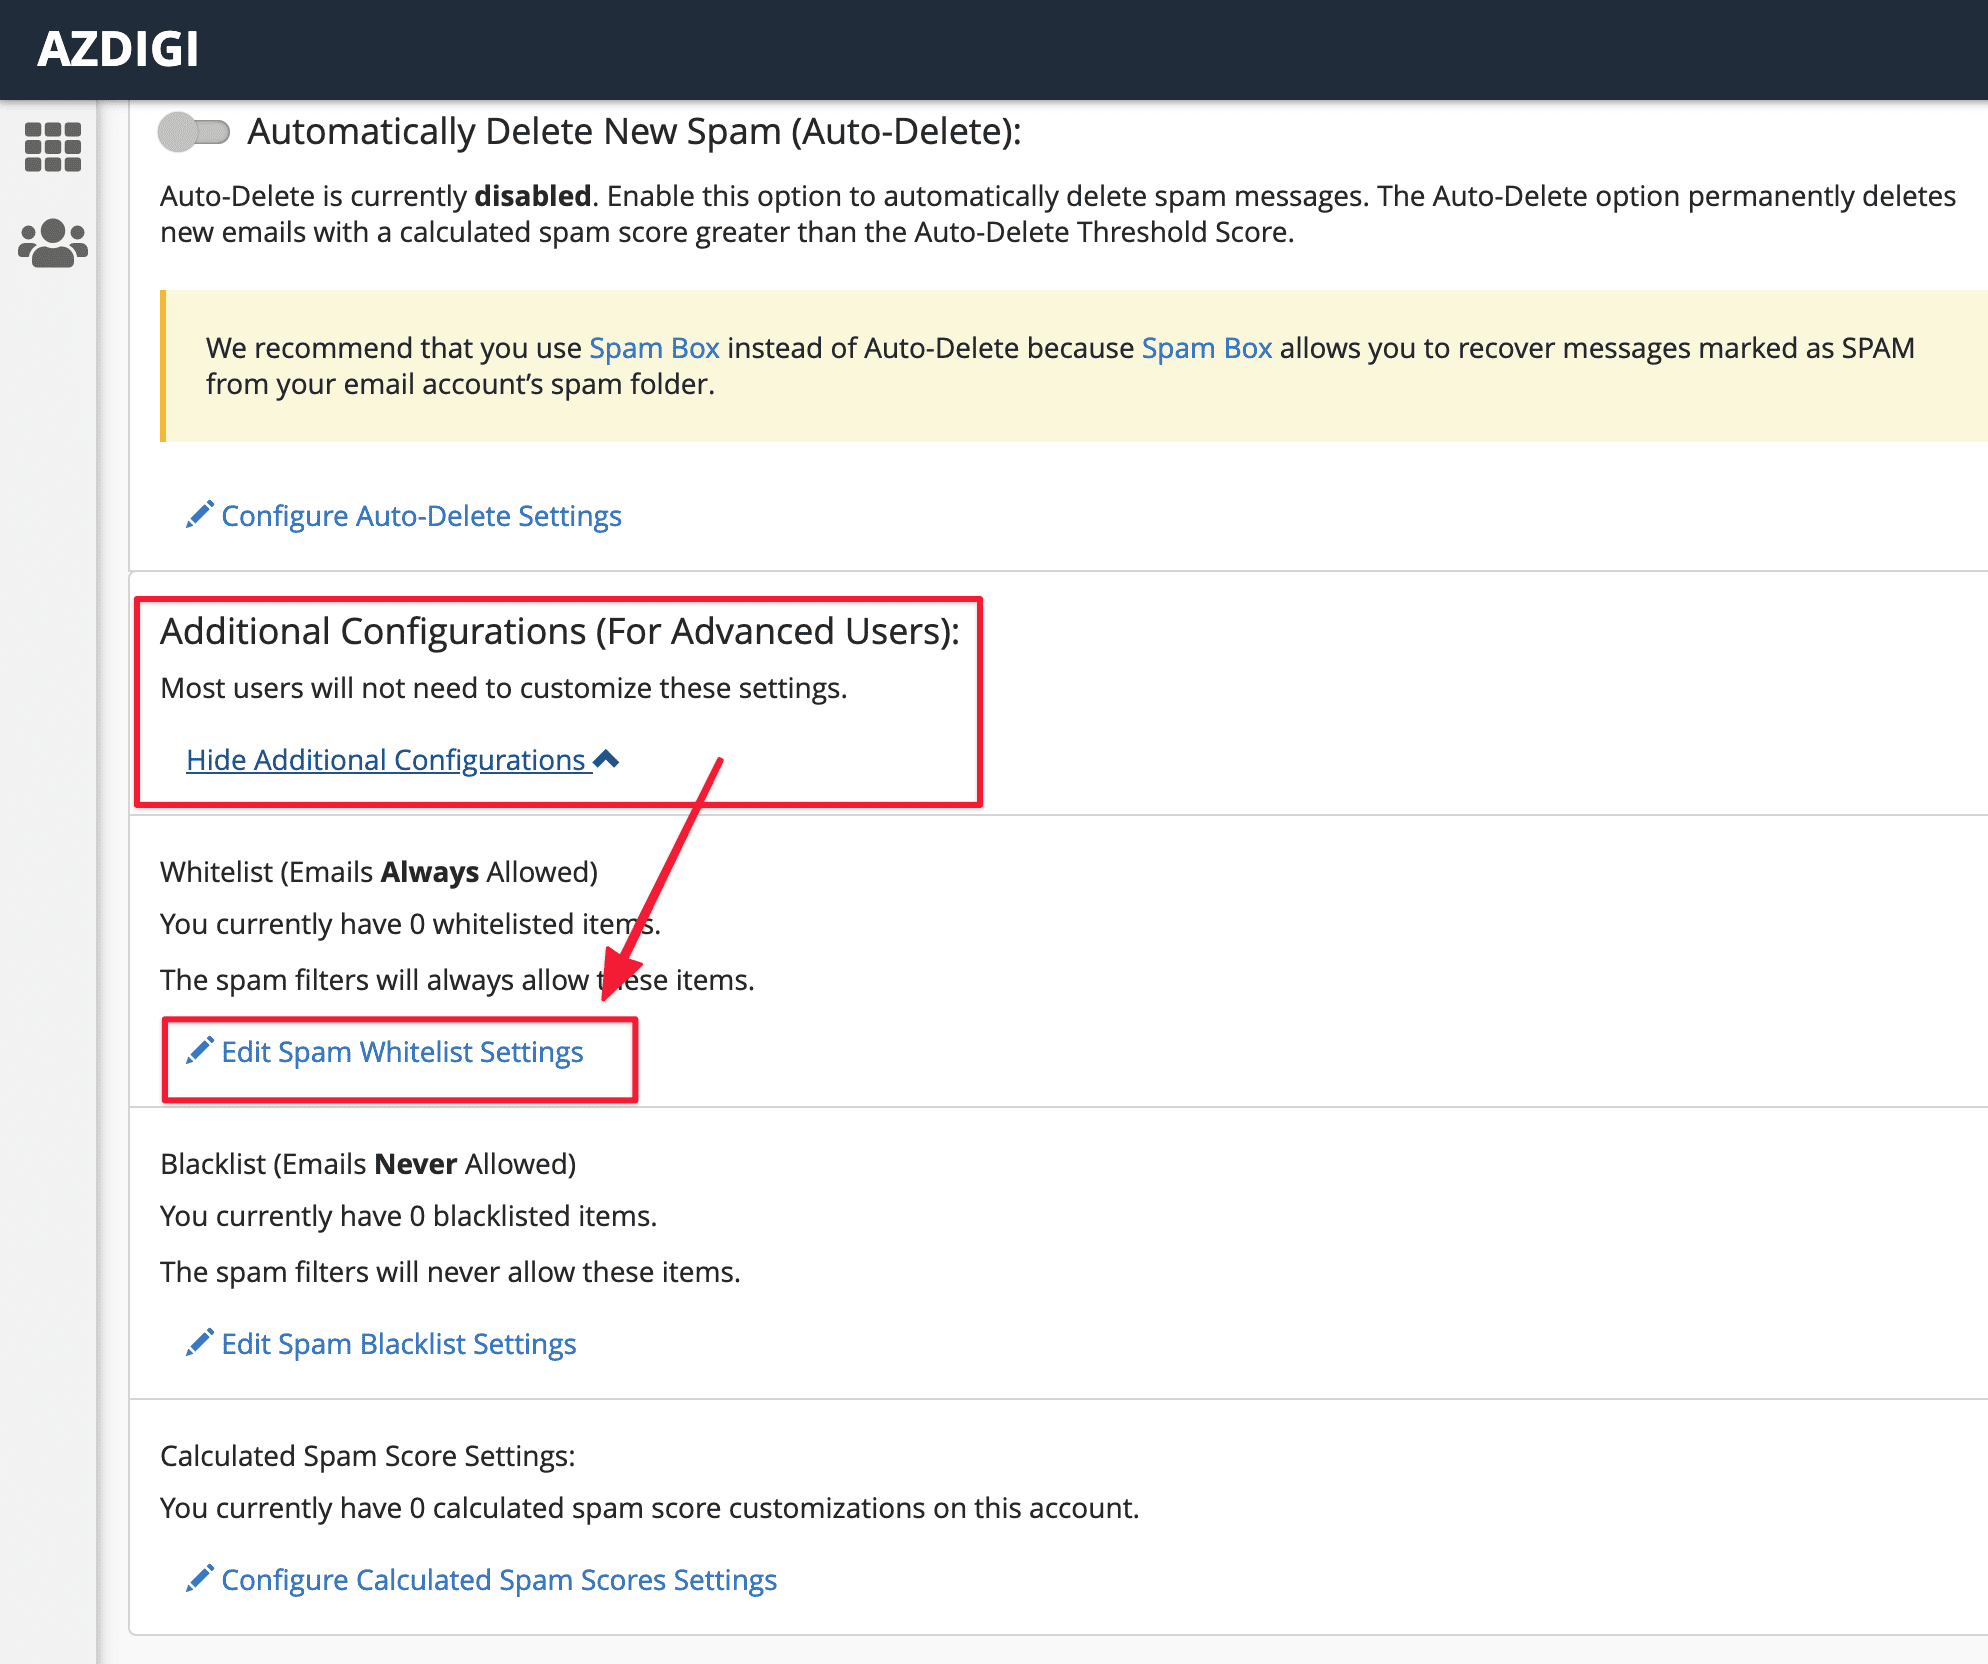
At the Spam Filters interface, select the Show Additional Configurations => the Edit Spam Whitelist Settings as shown below:
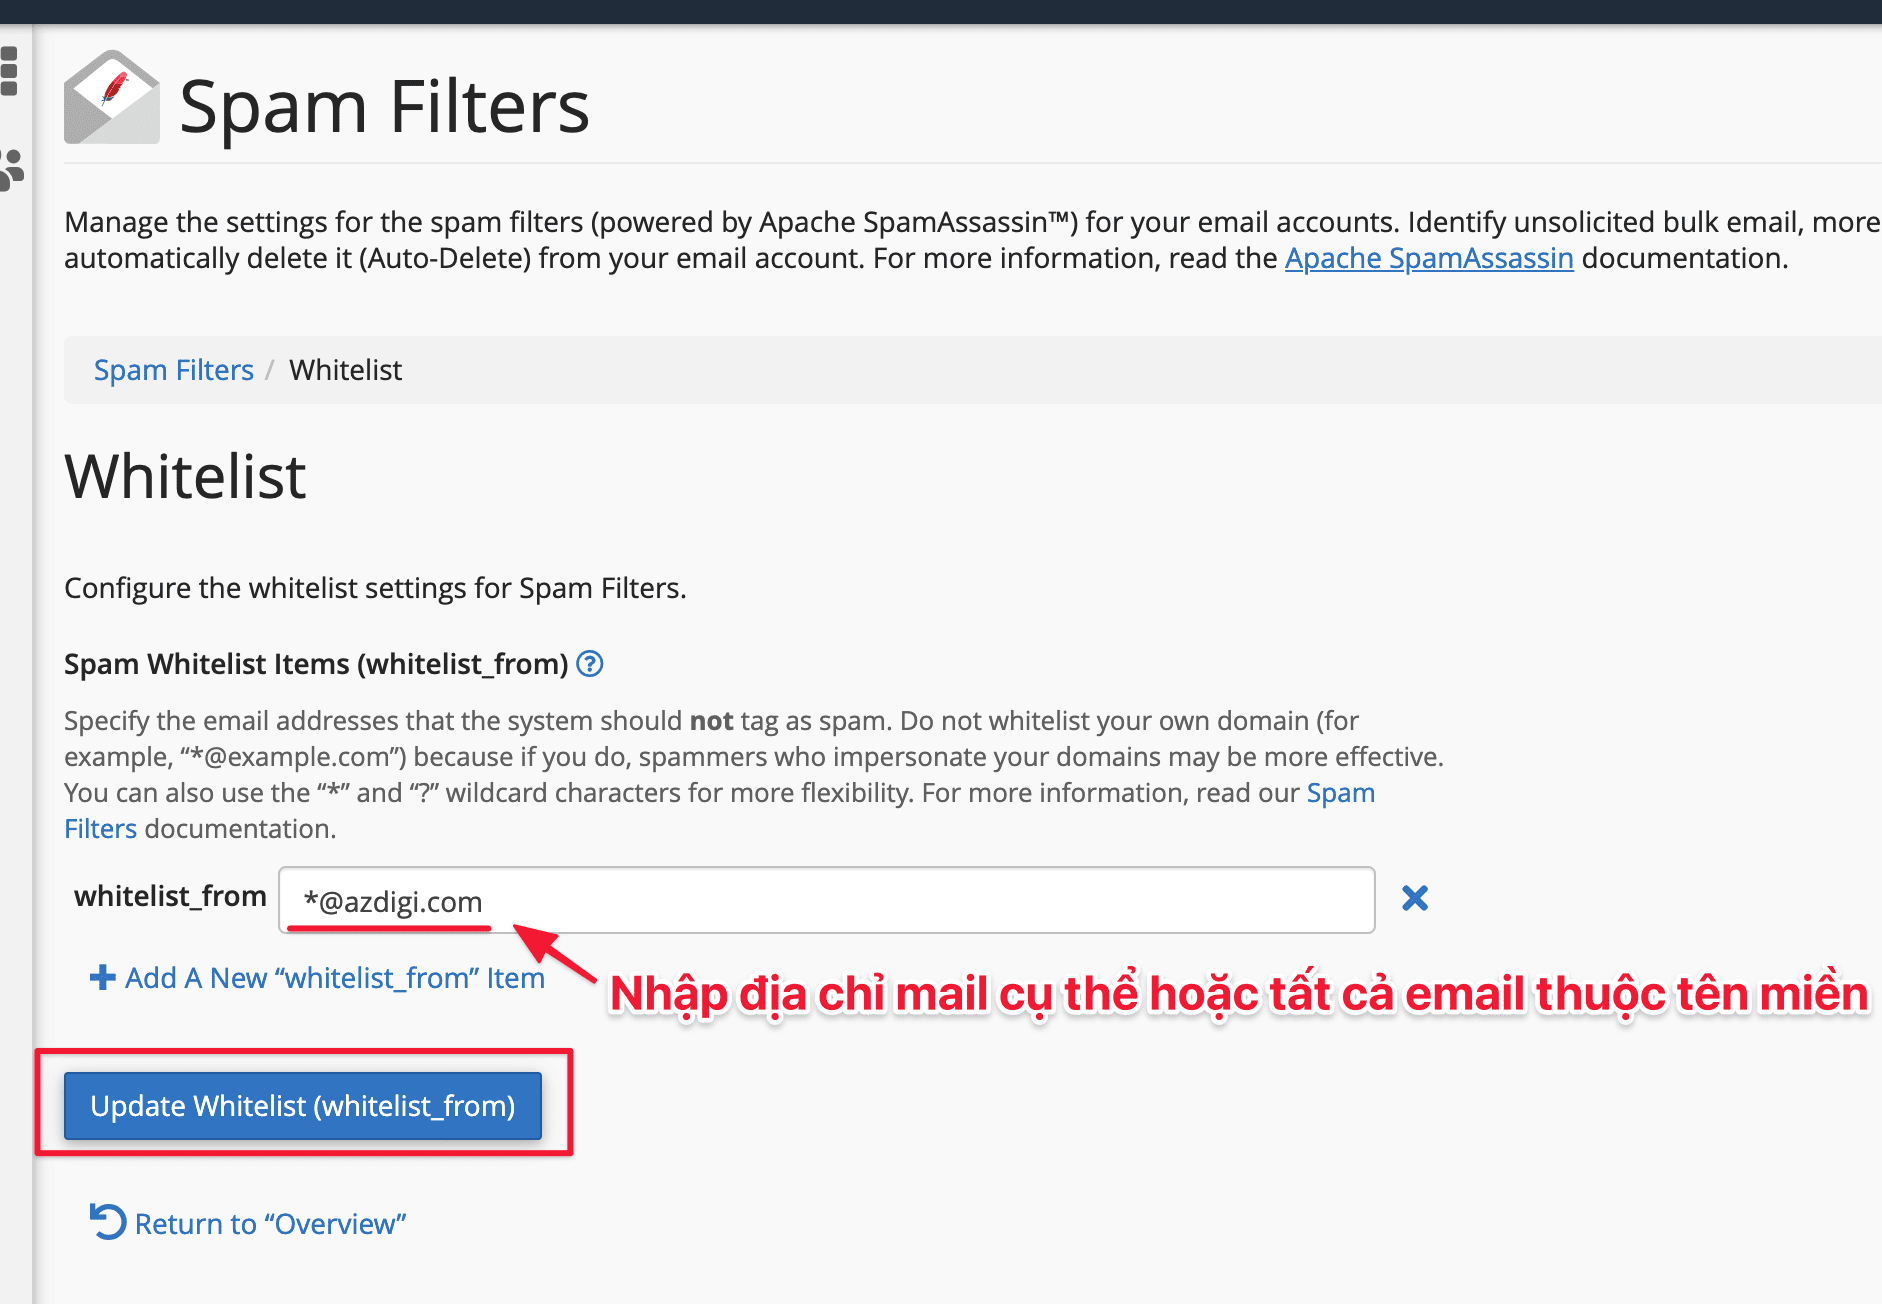
At this interface, click Add A New “whitelist_from” Item to add mail to the white list.

In the whitelist_from box, enter your mail. Here you have the following option:
- Add an address: To add an address, you enter it (e.g., support@azdigi.com)
- Add by domain name: To add all emails by the domain name, you enter the following *@domain (Example: *@azdigi.com, all emails ending in @azdigi.com will be whitelisted, bypassing the spam filter)
Once added, select Update Whitelist (whitelist_from) to update.
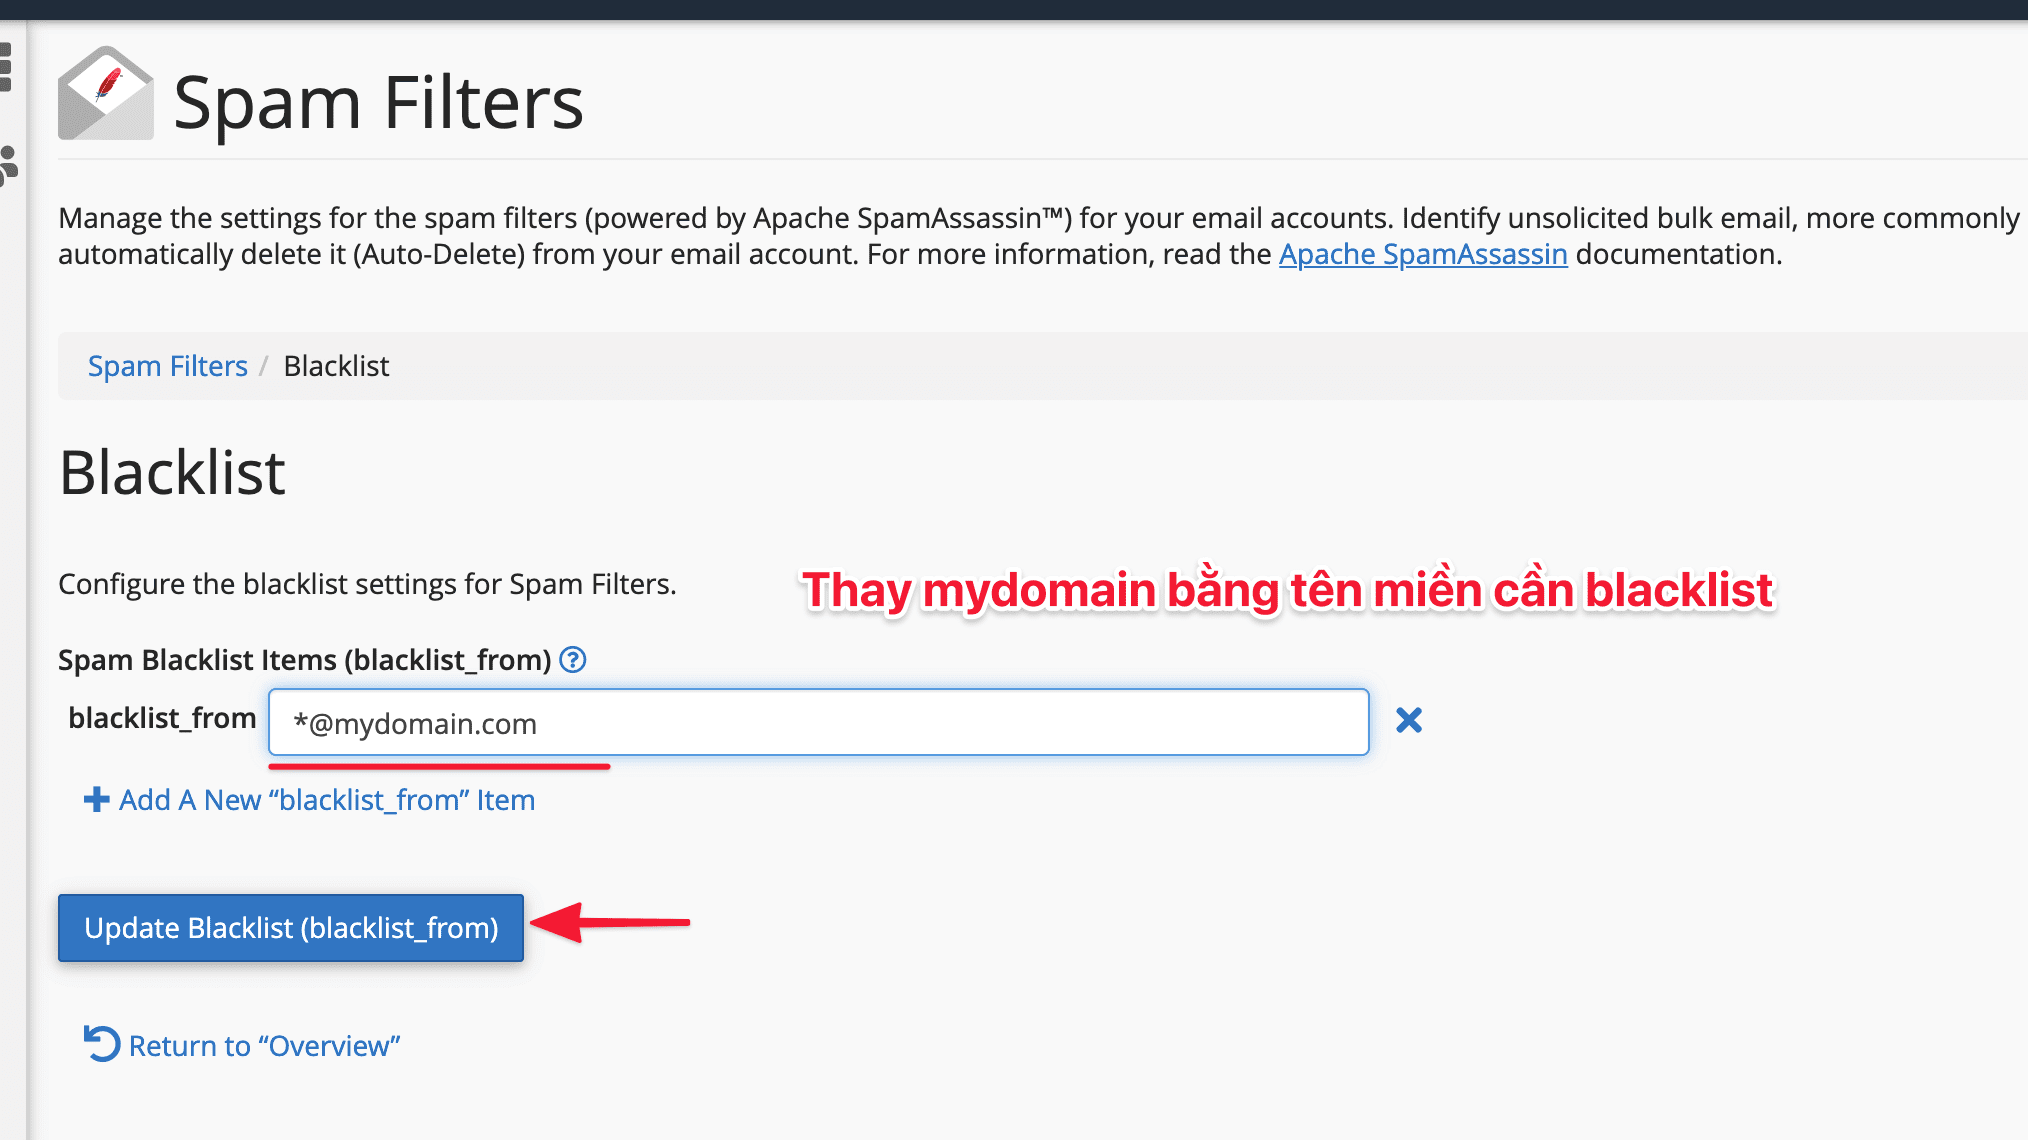
With the function Spam Blacklist Items (blacklist_from), you do the same as above.
In the blacklist_from box, enter your mail. Here you have the following option:
- Add an address: To add an address, you enter it (e.g., support@azdigi.com)
- Add by domain: To add all emails by the domain name, you enter the following *@domain (Example: *@azdigi.com, all emails ending in @azdigi.com will be blacklisted)
Once added, select Update Blacklist (blacklist_from) to update.
Thus, AZDIGI has completed the steps of the Spam Filters on cPanel. Hopefully, this article will help you to log in and manage your email successfully.
To refer to the documentation for using mail, you can access the Pro Mail Hosting Guide at the link below:
You might also like
About the author

Thạch Phạm
Đồng sáng lập và Giám đốc điều hành của AZDIGI. Có hơn 15 năm kinh nghiệm trong phổ biến kiến thức liên quan đến WordPress tại thachpham.com, phát triển website và phát triển hệ thống.