Nội dung
How to use File Manager on CyberPanel efficiently and securely with AZDIGI.
I. Overview
File Manager is a powerful and handy File/Folder management tool. With File Manager, you only need to perform all simple operations with just a few clicks. File Manager has become almost indispensable in today’s popular Control Panels. Today’s popular controls like cPanel, DirectAdmin, aaPanel, and HestiaCP, all have built-in File Manager, but they will have different management interfaces and operations.
And in addition to the common control panels I mentioned above, there is another control that also has a built-in File Manager with an extremely easy and intuitive interface and operation that is controlled. CyberPanel. Specifically, how is the interface and how to manage data on File Manager, please take a look at the tutorial article below.
You can refer to more information and how to install Cyber Panel with the link below:
II. Use File Manager on CyberPanel
To effectively use File Manager on CyberPanel, you can follow the steps below.
Step 1: Access the File Manger
To access the File Manager, you first need to access the website to be manipulated and do the following (With User Admin or other users, the operation is the same)
Go to Websites => List Websites.
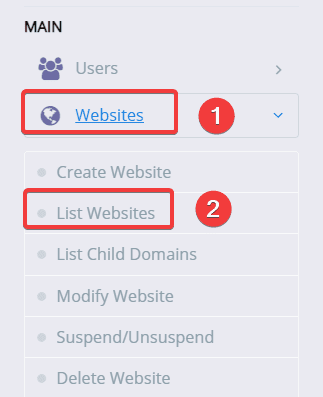
Next, at LIST WEBSITES, you choose the website you need to manipulate and to access the File Manager, you have 2 ways:
In there:
- 1 – Direct access to the File Manager of the website.
- 2 – Click Manage.

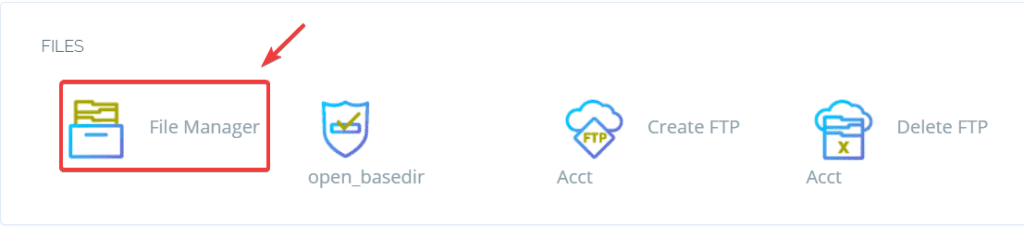
With method 2, after clicking Manage, you continue to select File Manager as shown below:
Step 2: Operations on File Manager
With operations on File Manager, you need to determine where to manipulate and go to the right path and start using the following operations:
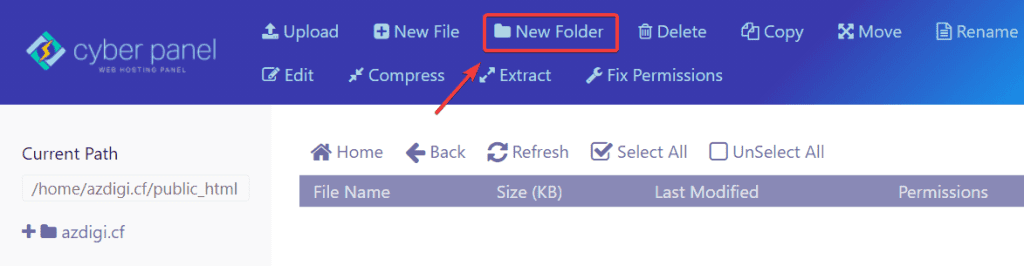
1. Create a Folder on CyberPanel
You move to the right path to create a Folder, select New Folder.
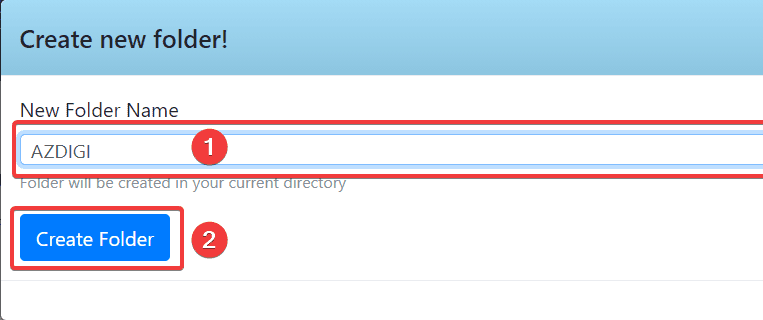
Next, enter the folder name (1) => Create Folder (2) to start creating.
2. Create a File on CyberPanel
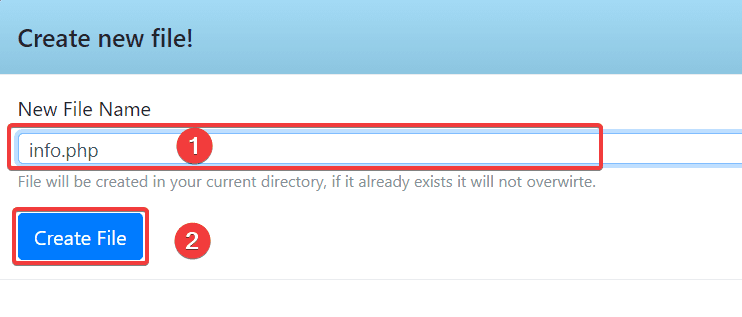
Go to the right path to create the file, select New File.
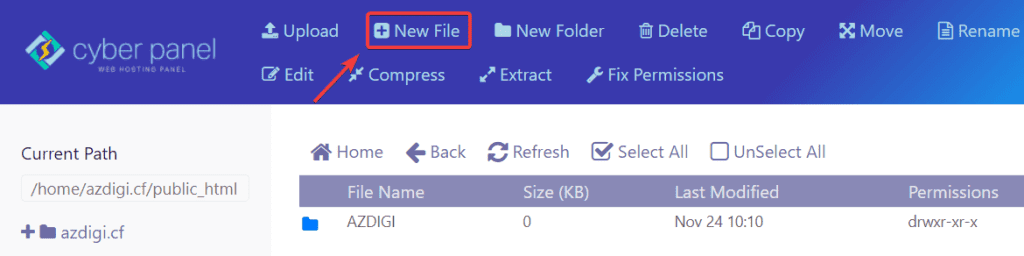
Next, enter the File name (1) => Create File (2) to start creating.
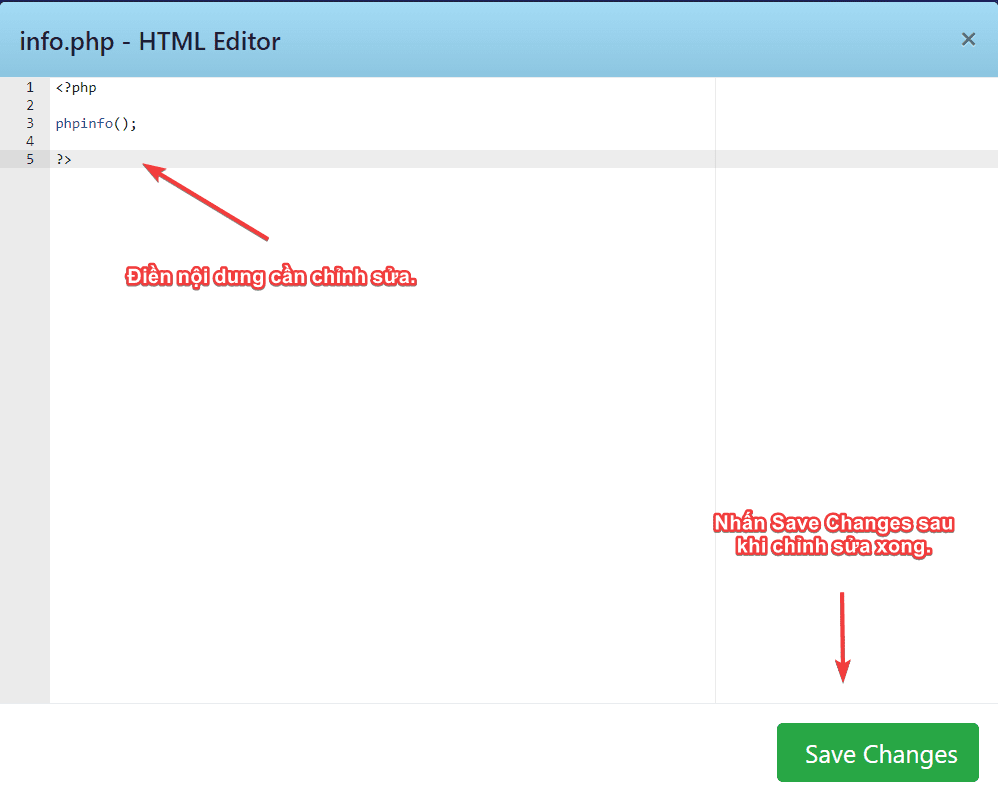
With file, you have an additional operation that is to edit File, you edit by right-clicking on the newly created File and selecting Edit . Enter the content to edit and click Save Changes.
3. Delete the File/Folder on CyberPanel.
To delete a File Folder on CyberPanel, you can delete it in two ways:
1 – Click on the File/Folder to delete and press Delete in the menu bar of CyberPanel.
2 – Right-click the File/Folder to be deleted and select Delete.

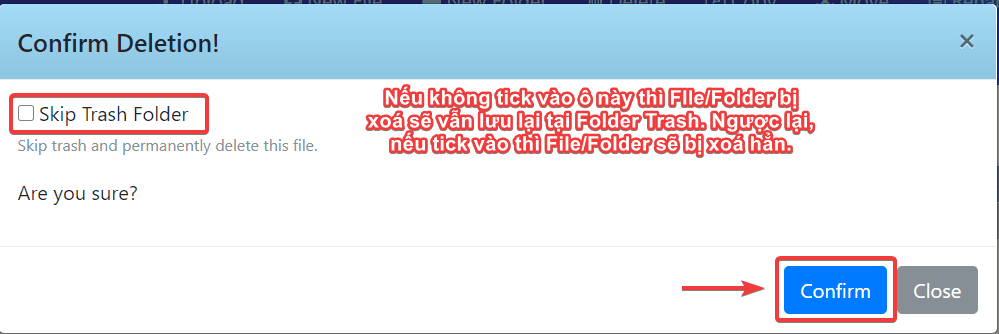
Next, you need to click Confirm to confirm the deletion.
4. Compress File/Folder on CyberPanel
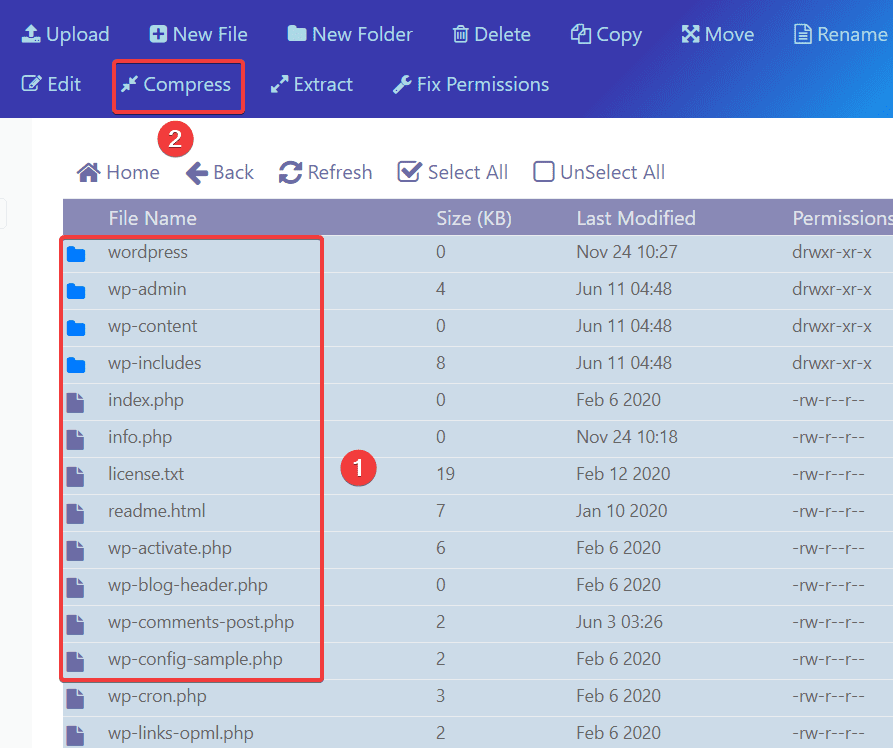
For example, you need to back up the website source code to download it to your computer, then you tick the file to compress or choose to compress all by clicking Select All. You can do the following:
In there:
- 1 – Tick the files/folders to compress, if you need to select all, click Select All.
- 2 – Click Compress to compress the File/Folder.
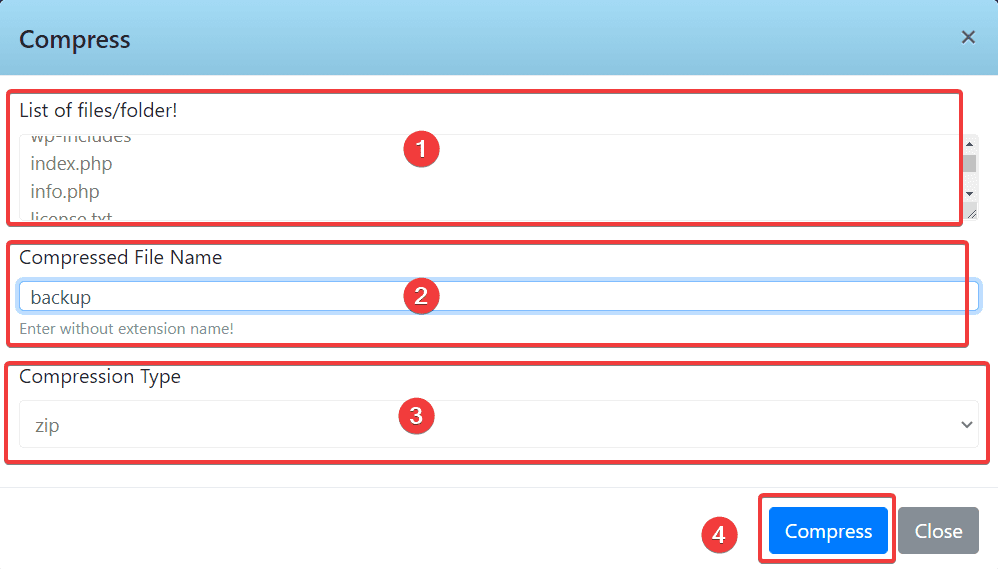
Next, in the Compress section, do the following:
In there:
- 1 – The list of the files/folders you have selected, you check to see if they are enough or redundant.
- 2 – Name the Compressed File
- 3 – Select Compression format, here you should choose .zip format.
5. Extract File/Folder on CyberPanel
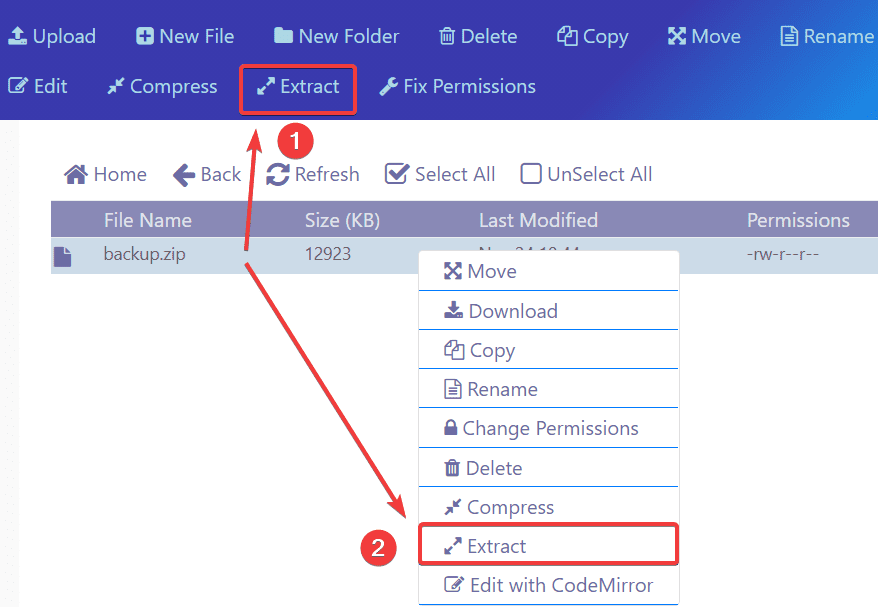
To extract files on CyberPanel, you can decompress in two ways:
- 1 – Tick the File to be extracted, and click on the word Extract in the Menu bar.
- 2 – Tick the File to be extracted, and right-click and select Extract.
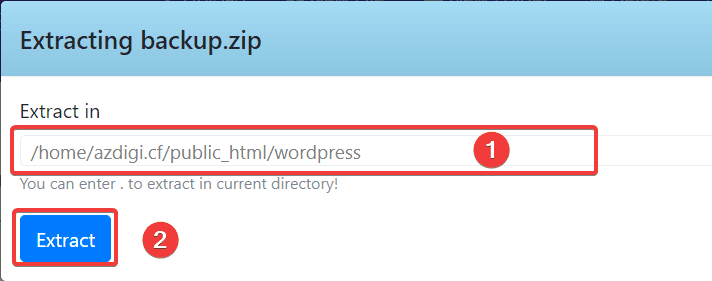
Next, you need to choose the path to extract the File (1) => and press Extract (2) to start extracting.
6. Upload Files on CyberPanel
To upload a file to CyberPanel, you can do the following:
In the Menu bar, select Upload.

Next, at the Upload interface, you do as shown below:
In there:
- 1 – Click Choose Files to select the File to upload on your computer (local)
- 2 – Click Upload all to start uploading.
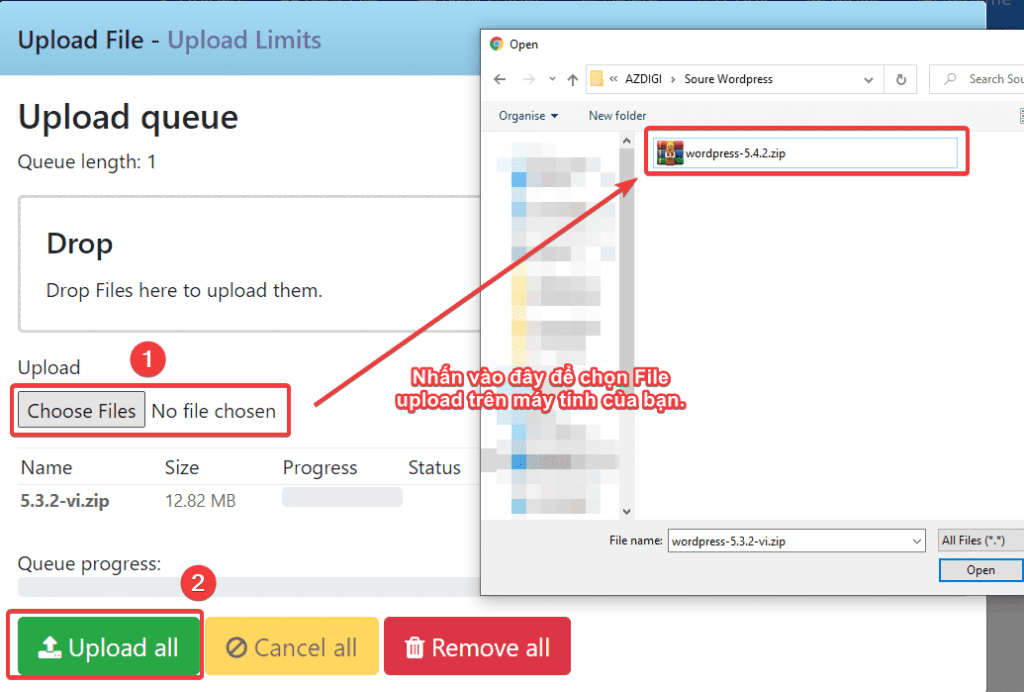
In this Upload section, if you upload the File with an error and receive a message that can’t be uploaded, Error message: as shown below, then don’t worry because you just need to follow the instructions below:

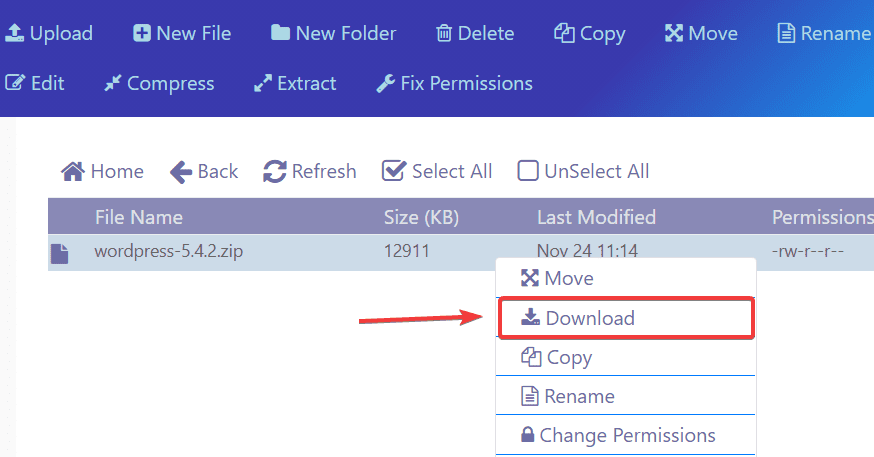
7. Download File on CyberPanel
To download a file on CyberPanel, you do it by right-clicking on the file and selecting Download .
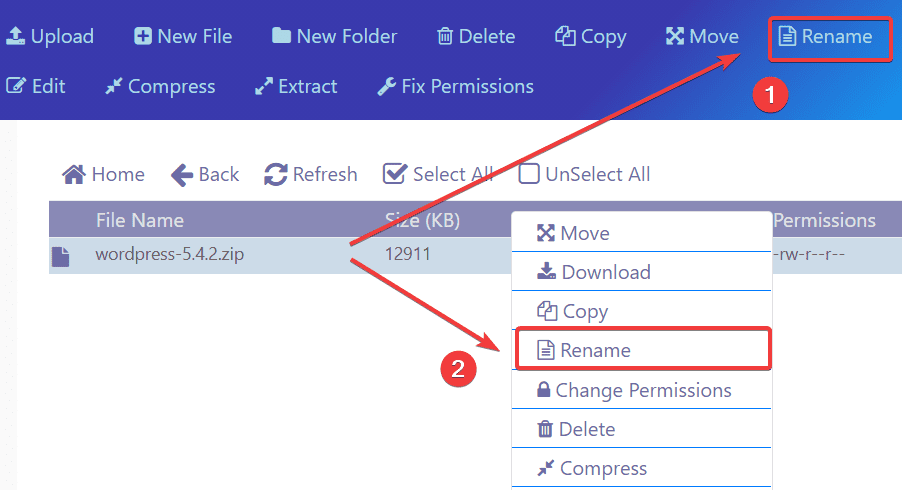
8. Rename File/Folder on CyberPanel
To rename a file/folder on CyberPanel, you can do it in 2 ways:
- 1 – You tick the File to be renamed, and click Rename in the Menu bar.
- 2 – You tick the File to be renamed, and right-click and select Rename.
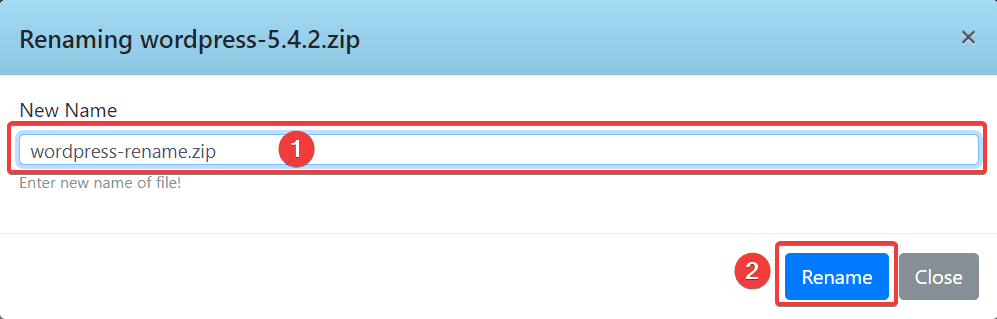
Next, you enter the new name to change (1) => Press Rename (2).
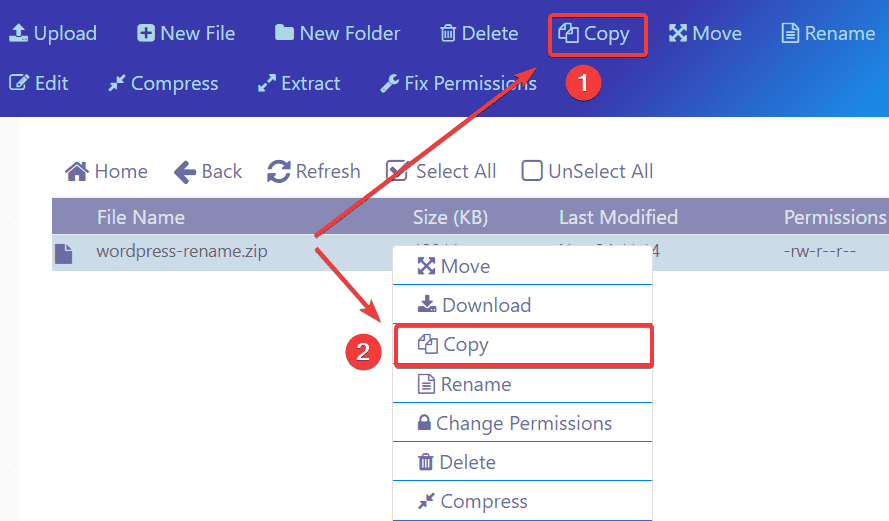
9. Copy File/Folder on CyberPanel
To copy a File/Folder on CyberPanel, you can do it in 2 ways:
- 1 – You tick the File to copy, and click Copy in the Menu bar.
- 2 – You tick the File to copy, and right-click and select Copy.
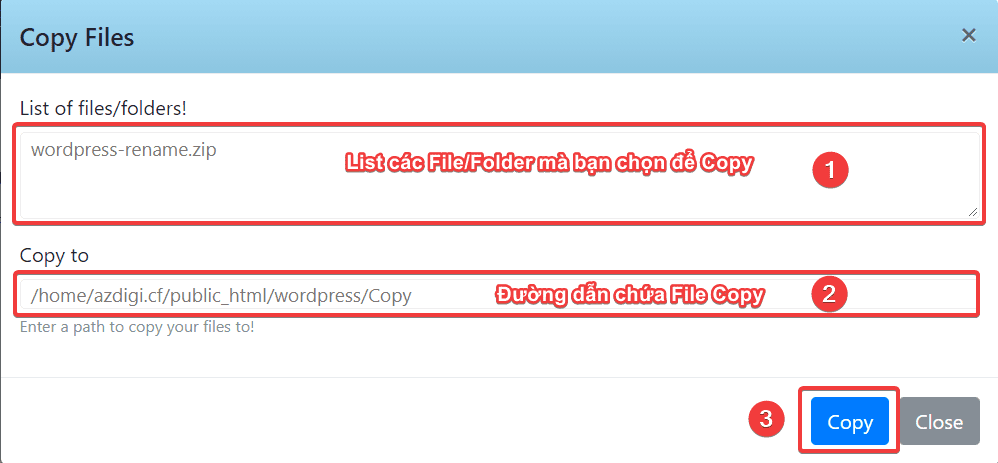
Next, in the Copy Files section, do the following:
In there:
- 1 – The list of Files/Folder you have selected to Copy, you check whether it is enough or redundant or not.
- 2 – The path contains the copy file.
- 3 – Click Copy to start execution.
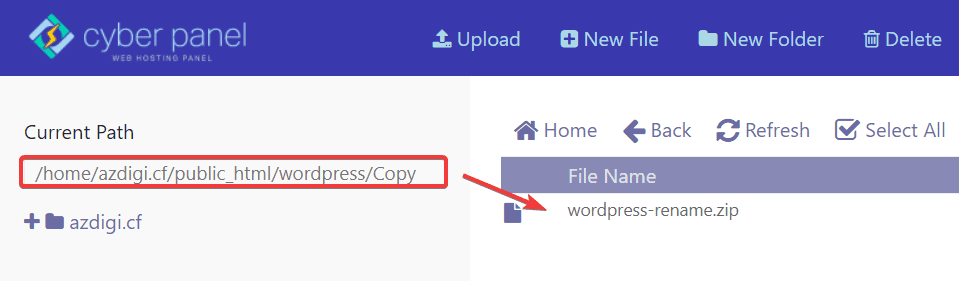
And here is the result when the copy is complete:
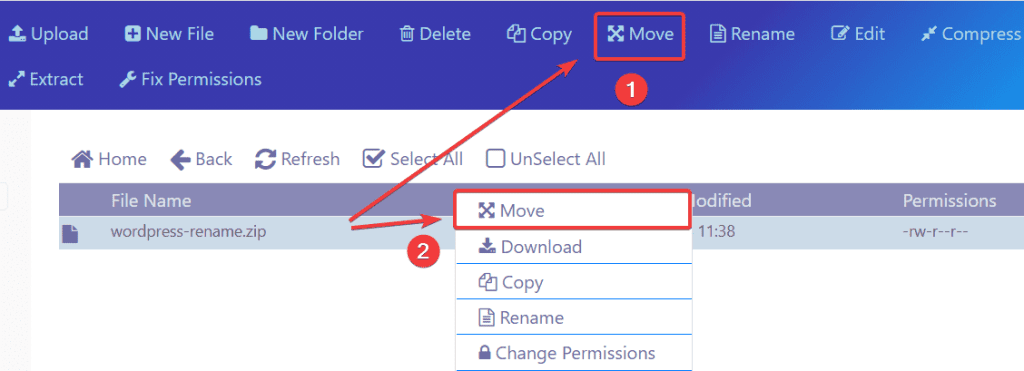
10. Move File/Folder on CyberPanel
To move the File/Folder on CyberPanel, you can do in 2 ways:
- 1 – You tick the File to move, you click Move in the Menu bar.
- 2 – You tick the File to be moved, right-click and select Move.
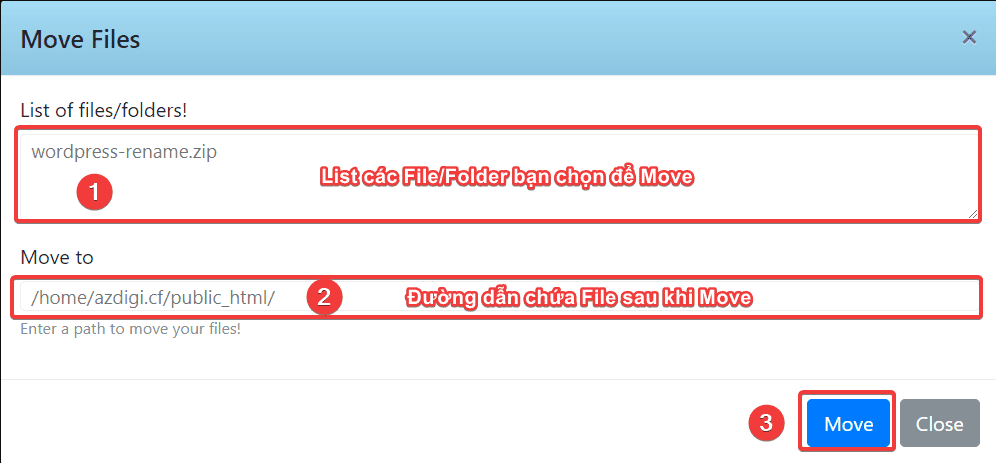
In there:
- 1 – The list of Files/Folder you have selected to move, you check if it is enough or redundant or not.
- 2 – Path containing file after the move.
- 3 – Click Move to start execution.
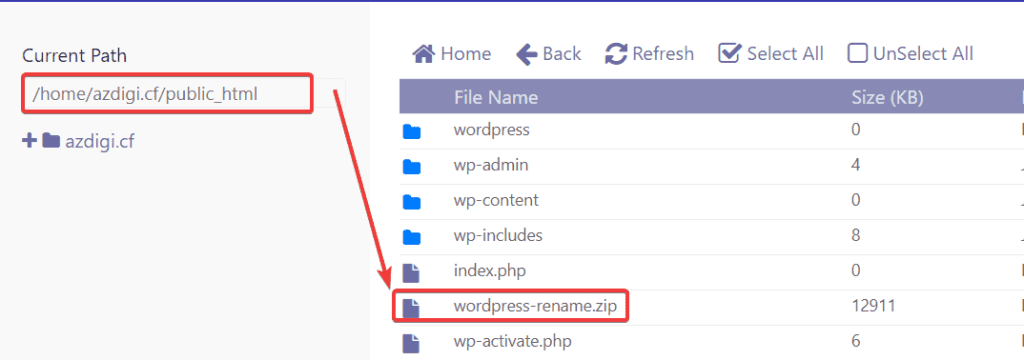
Below is the result when the move is complete:
III. Summary
So in this article, AZDIGI has shown you how to use File Manager on CyberPanel in the most detailed and specific way. Hopefully, this tutorial will help you manipulate and manage your data more simply and safely. If you find the article helpful, please share it widely!
In addition, you can check out some other articles about CyberPanel at the link below.
If you need assistance, you can contact support in the ways below:
- Hotline 247: 028 888 24768 (Ext 0)
- Ticket/Email: You use the email to register for the service and send it directly to: support@azdigi.com