How to add the website to OpenLiteSpeed WebAdmin GUI with simple steps. Let’s follow along.
I. Introduction
Continuing with the articles about OpenLiteSpeed, in the previous post, we performed the complete installation steps of OpenLiteSpeed WebAdmin GUI on the server. Then continue in this article, AZDIGI will guide you on how to add a website to OpenLiteSpeed WebAdmin completely. If you have not seen the previous tutorial, you can go to the link below:
In addition, you can learn more about the WebAdmin Console interface at the link below:
Now, let’s take a look at the article to do it together with AZDIGI.
II. Implementation Guide
To add a website to the OpenLiteSpeed WebAdmin GUI, you need to perform the following steps in turn:
Step 1: Add a Virtual Host for your website in OpenLiteSpeed
To add a Virtual Host, you first need to access the OpenLiteSpeed WebAdmin GUI at the following path: https://45.252.249.104:7080/. and you use admin credentials to log in. If you forget this information, you can reset your password by following the instructions below:
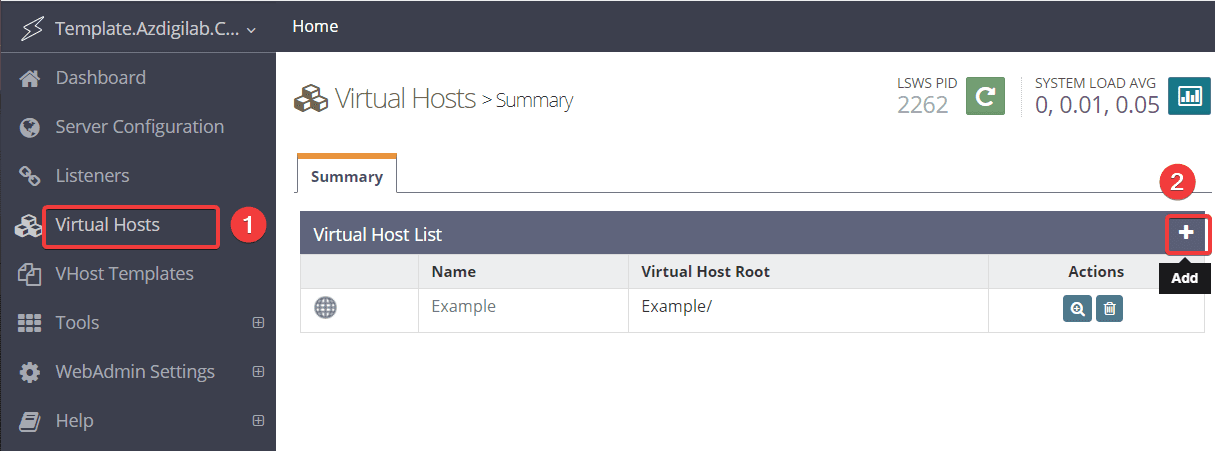
After successfully logging in, you access Virtual Host (1) => Add (2)

In the next interface, you need to declare the same information as follows: (remember to replace azdigi.cf with your website name)
Virtual Host Name: azdigi.cf
Virtual Host Root: $SERVER_ROOT/azdigi.cf/
Config File: $SERVER_ROOT/conf/vhosts/$VH_NAME/azdigi.cf.conf
Follow Symbolic Link: Yes
Enable Scripts/ExtApps: Yes
Max Keep-Alive Requests: 1000
Restrained: Yes
ExtApp Set UID Mode: Server UID
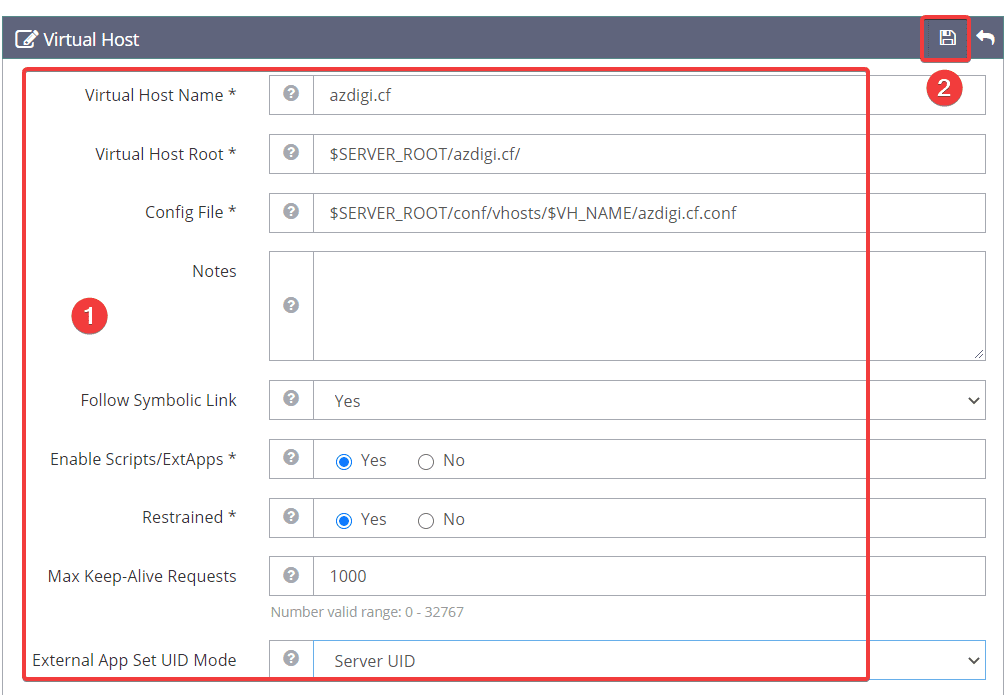
After filling in the information in part (1), click Save (2) to save the configuration.
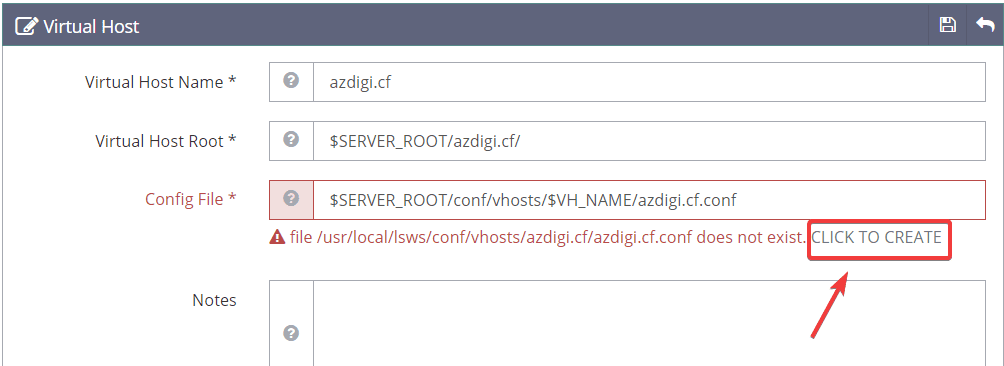
Next, you will see that color warning line displayed, click CLICK TO CREATE as shown below:
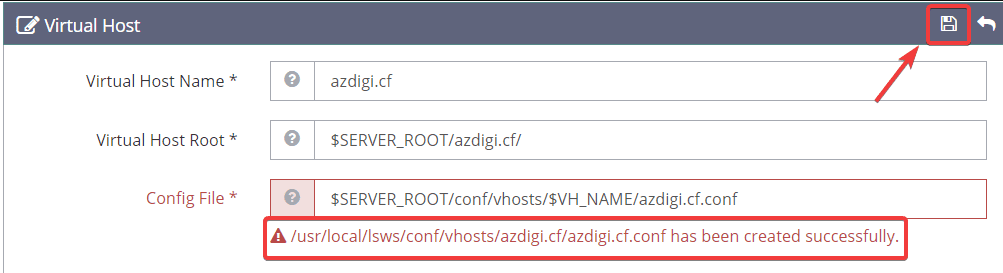
After clicking and receiving the message that has been created successfully, click Save to save the configuration again.
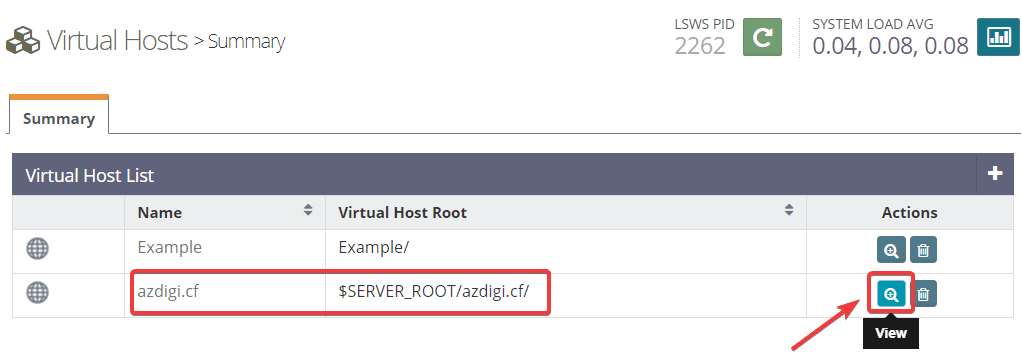
Step 2: Customize Virtual Host
After creating a Virtual Host for the website in step 1, you will see the website you just created in the Virtual Host section. Then, please click on the corresponding View section of the website to customize some components in Virtual Host.
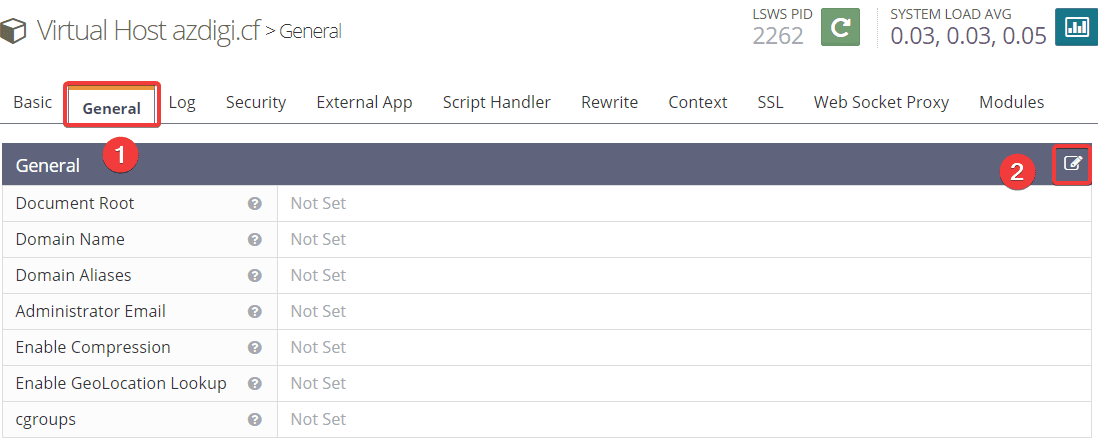
A -Settings at the General tab
In the General (1) section, click Edit (2) to change the information as follows:
You fill in the same information in the General tab (1) and click Save (2). (remember to replace azdigi.cf with your website name)
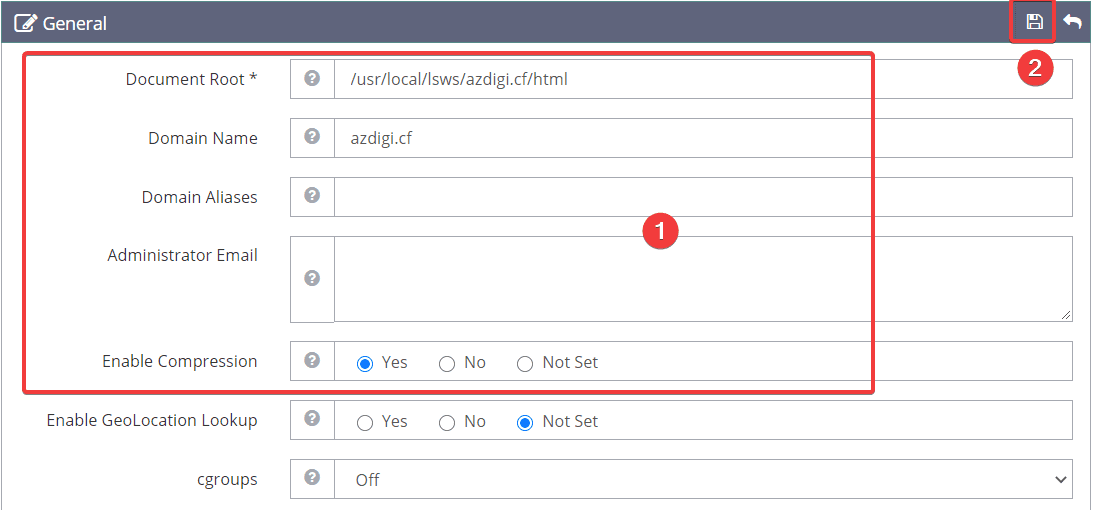
Document Root: /usr/local/lsws/azdigi.cf/html
Domain Name: azdigi.cf
Enable Compression: YES
In the Index Files (1) section, click Edit (2) to change the information:

You fill in the same information in (1) and click Save (2).
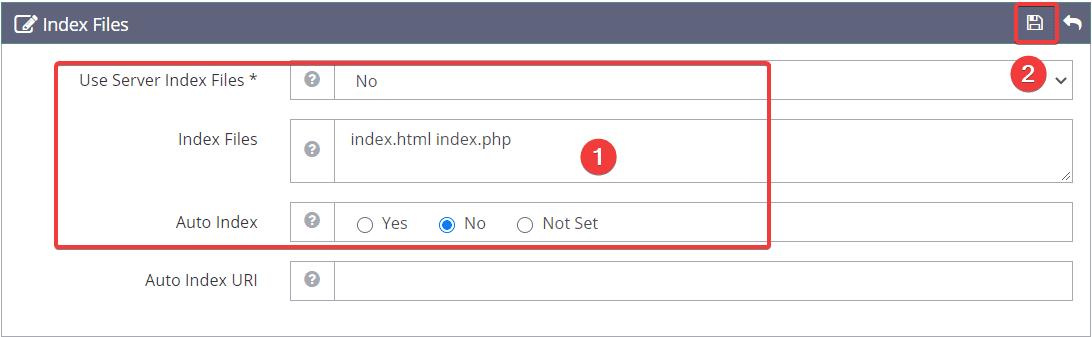
Use Server Index Files: No
Index Files: index.html index.php
Auto Index: No
In the Expires Settings section (1), click Edit (2) to change the information:

You fill in the same information in (1) and click Save (2).
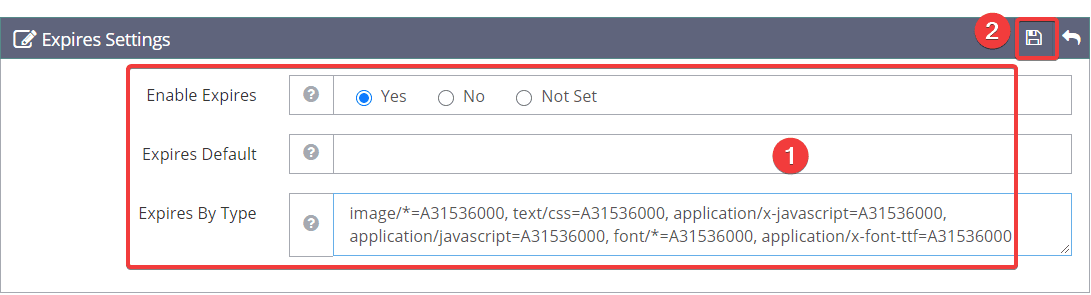
Enable Expires: Yes
Expires By Type: image/=A31536000, text/css=A31536000, application/x-javascript=A31536000, application/javascript=A31536000, font/=A31536000, application/x-font-ttf=A31536000
B – Set up at the Log tab
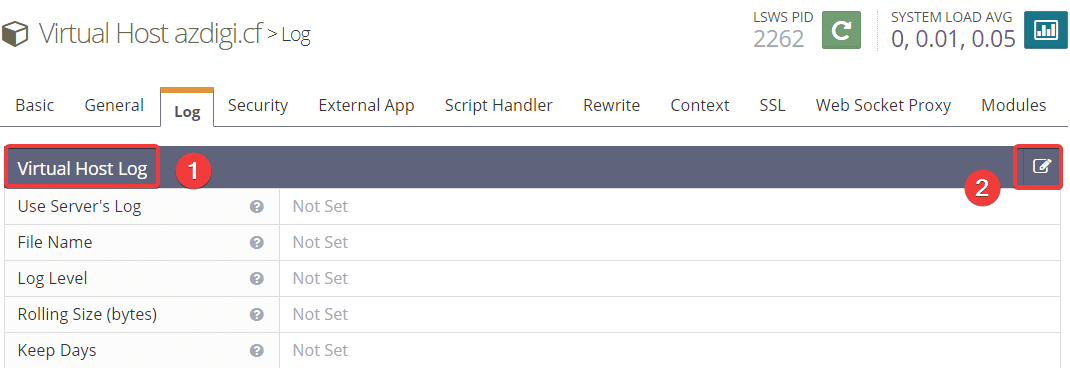
In the Virtual Host Log section (1), click Edit (2) to change the information as follows:
You fill in the same information in (1) and click Save (2).
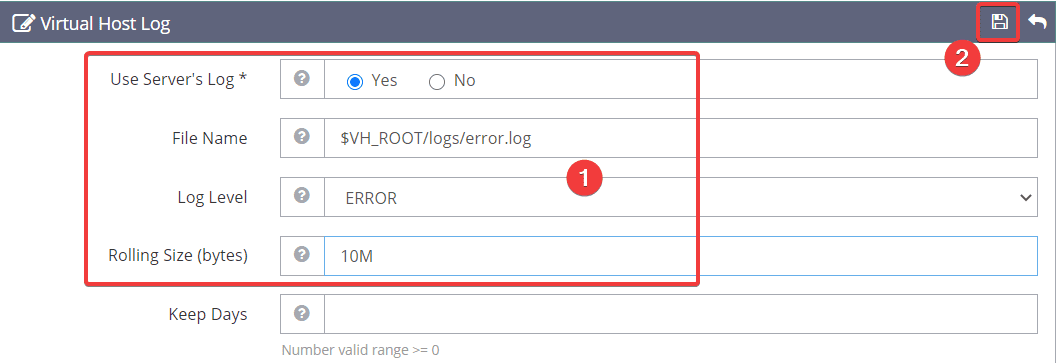
Use Servers Log: Yes
File Name: $VH_ROOT/logs/error.log
Log Level: ERROR
Rolling Size (bytes): 10M
In Access Log (1), click on Add (2) to change information:

You fill in the same information in (1) and click Save (2).
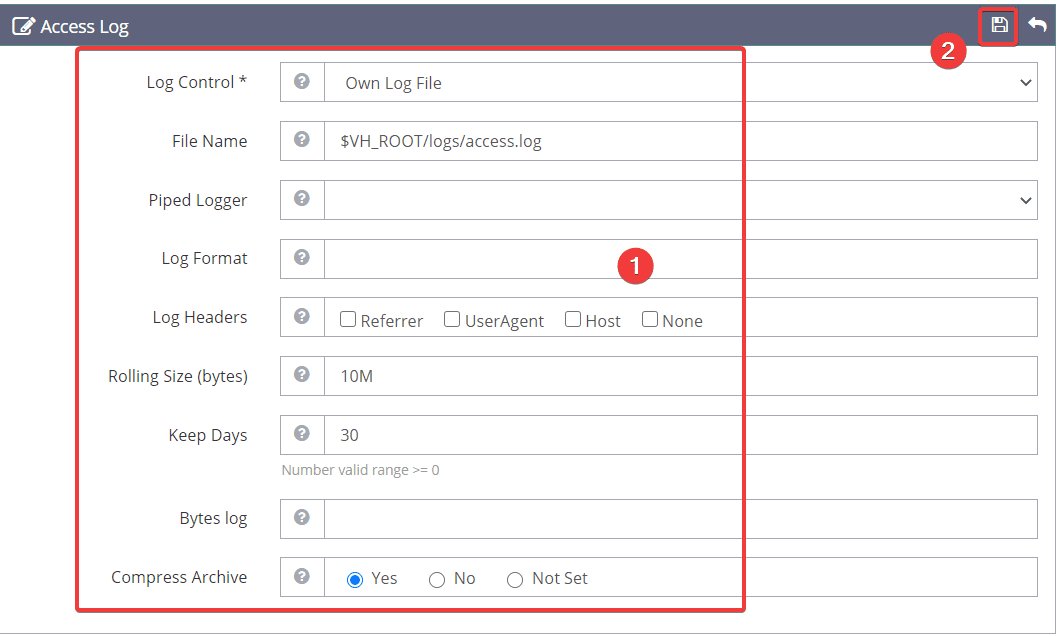
Log Control: Own Log File
File Name: $VH_ROOT/logs/access.log
Rolling Size (bytes): 10M
Keep Days: 30
Compress Archive: Yes
C – Setup at Security
In Access Control (1), click Edit (2) to change the information as follows:
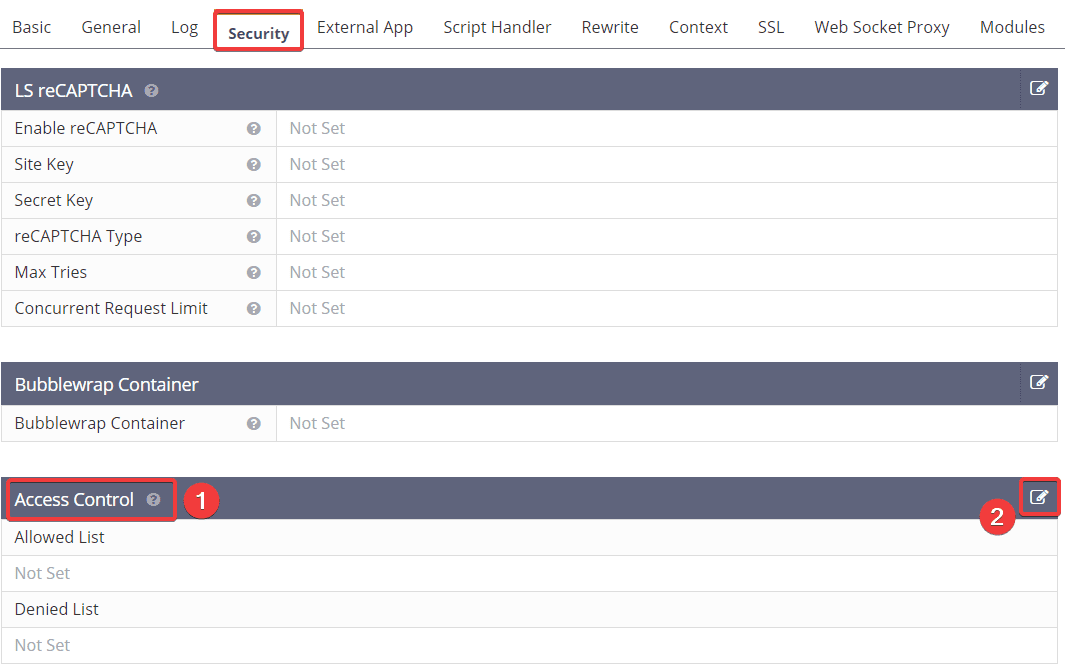
You fill in the same information in (1) and click Save (2).
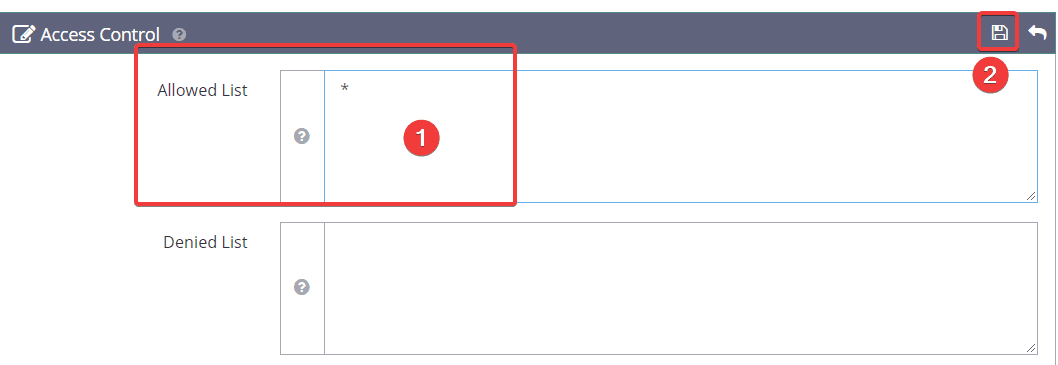
Allowed List: * (Meaning all confidential)
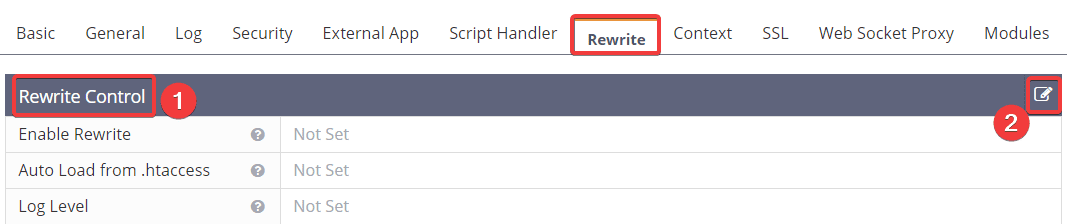
D – Set at Rewrite
In the Rewrite Control (1) section, click Edit (2) to change the information:
You fill in the same information in (1) and click Save (2).
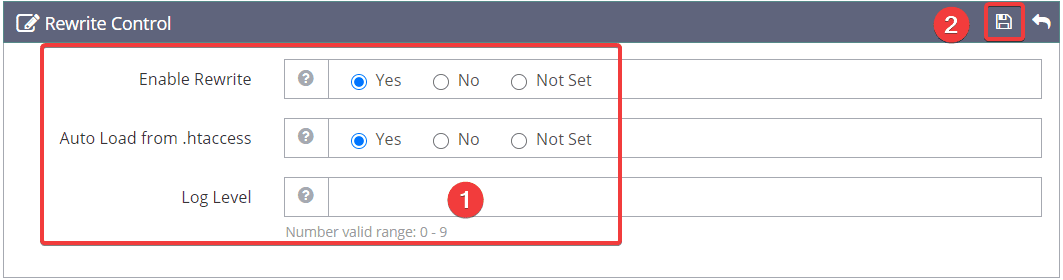
Enable Rewrite: Yes
Auto Load from .htaccess: Yes
In the Rewrite Rules (1) section, click Edit (2) to change the information:

You fill in the same information in (1) and click Save (2). (remember to replace azdigi.cf with your website name)

Rewrite Rules: rewriteFiler /usr/local/lsws/azdigi.cf/html/.htaccess
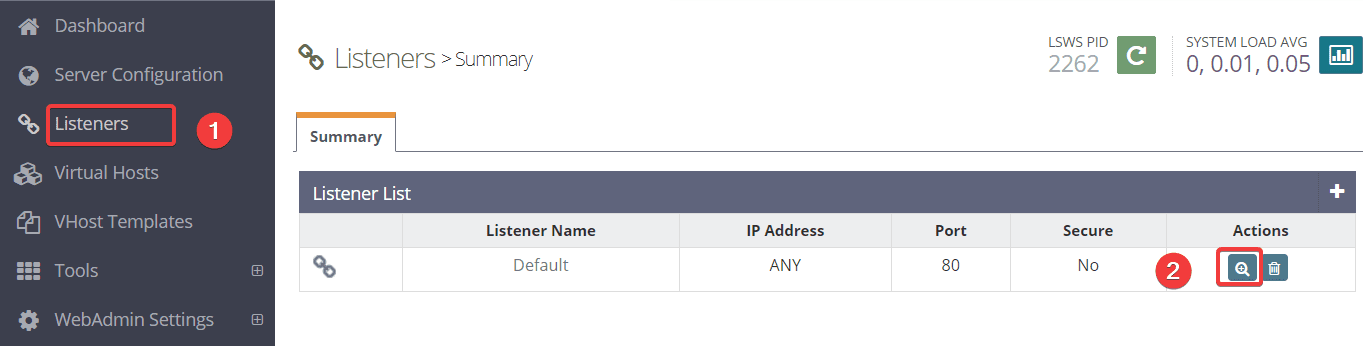
Step 3: Connect Vhost to 80 port
You access Listeners (1) => click on the magnifying glass as shown below (2).
Next, in the Virtual Host Mappings section (1), click on Edit (2) to change the information:
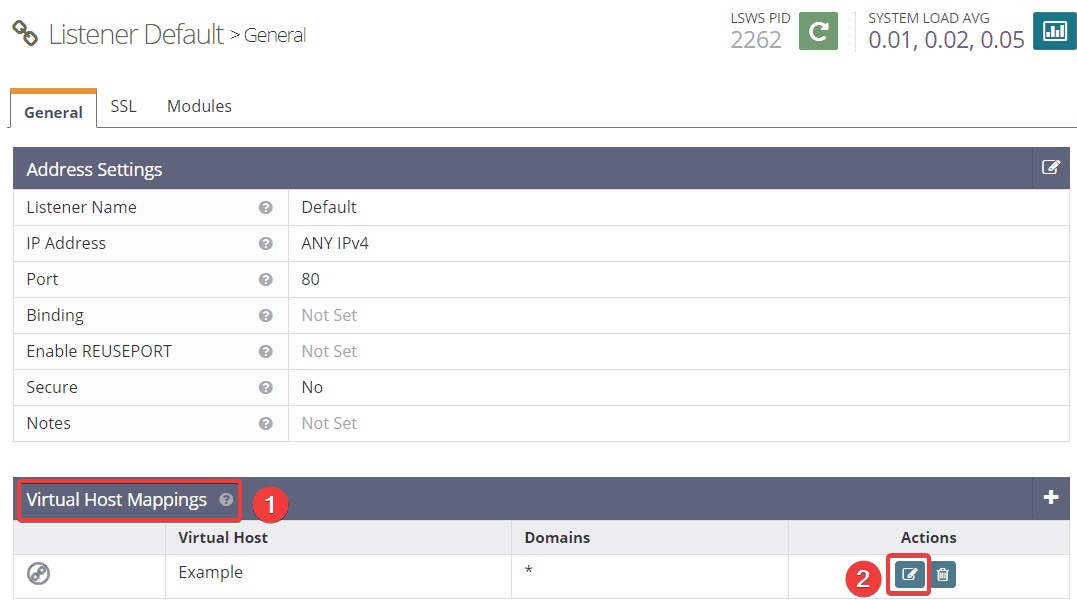
You fill in the same information in (1) and click Save (2). (remember to replace azdigi.cf with your website name)

Virtual Host: azdigi.cf
Domains: azdigi.cf
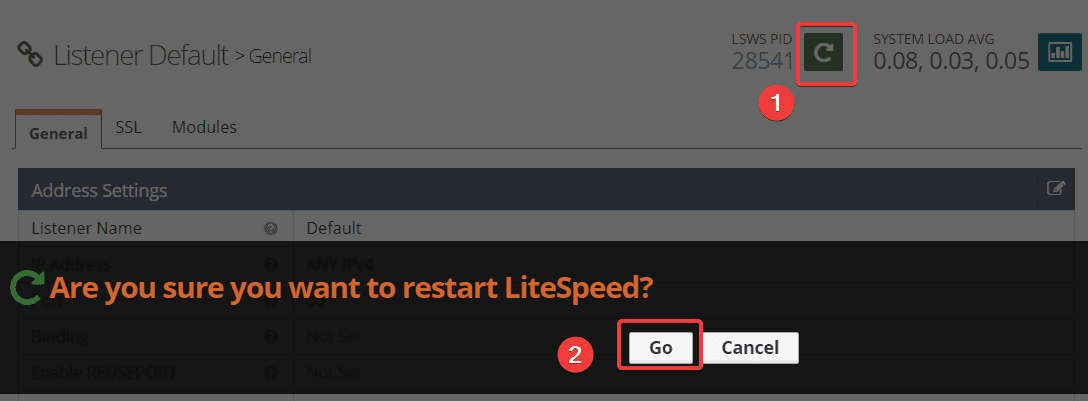
After editing, click on the arrow icon as shown to restart Litespeed.
Step 4: Create a website directory on the server
You SSH into the server as root to create the necessary folders for your website. If you do not know how to SSH, you can refer to the instructions below:
After successful SSH, run the following commands to create the necessary folder for the website:
mkdir /usr/local/lsws/azdigi.cf/
mkdir /usr/local/lsws/azdigi.cf/{html,logs}
Command annotation:
- Command 1: Create a website folder at /usr/local/lsws/
- Lệnh 2: Tạo Folder html & logs tại đường dẫn /usr/local/lsws/azdigi.cf/
- html: It is the place where the website’s source code is stored
- logs: It is a place to store logs related to the website
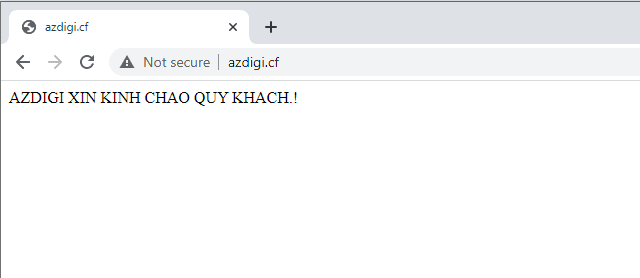
Step 5: Check the operation of the website
After creating the necessary folders in step 4, to check if the website you just added works or not, try creating an index.html file at the path /usr/local/lsws/azdigi.cf/html and enter the content in it. You can create files and quickly import content with the command below:
echo 'AZDIGI XIN KINH CHAO QUY KHACH' > /usr/local/lsws/azdigi.cf/html/index.html
III. Summary
Thus, AZDIGI has detailed how to add a website to OpenLiteSpeed WebAdmin . After the setup is complete, the operation of your website will be markedly different from using other control panels.
If you find the article interesting and useful, don’t forget to share it widely. Wishing you success!
If you need assistance, you can contact support in the ways below:
- Hotline 247: 028 888 24768 (Ext 0)
- Ticket/Email: You use the email to register for the service and send it directly to: support@azdigi.com .
About the author

Thạch Phạm
Đồng sáng lập và Giám đốc điều hành của AZDIGI. Có hơn 15 năm kinh nghiệm trong phổ biến kiến thức liên quan đến WordPress tại thachpham.com, phát triển website và phát triển hệ thống.