Adding the website to LOMP Stack on Ubuntu 20.04 with 4 steps.
Introduction
Continuing with the series about LOMP Stack, AZDIGI will show you how to add a new website to the LOMP Stack on Ubuntu 20.04.
Conditions to be met:
- Ubuntu Server 20.04
- Use Root rights and install LOMP Stack
- The domain to be configured has been pointed to the server IP.
Implementation guide
Step 1: SSH into the server
To upgrade the ProFTPD version on DirectAdmin, we first need to SSH or access your VPS/server with root privileges. If you don’t know how to SSH into your VPS/Server, you can refer to the following tutorial:
Step 2: Create a folder to save the website
For example, in this article, I will do a demo with the website lomp.azdigi.space, the structure will be as follows:
Note: Remember to change lomp.azdigi.space to your website.
- Create a folder to save website data
mkdir /usr/local/lsws/lomp.azdigi.space
sudo chmod -R 755 /usr/local/lsws/lomp.azdigi.space
- Create content for the website
I will quickly create an index.html file for the website.
sudo nano /usr/local/lsws/lomp.azdigi.space/index.html
Enter the content below and save.
<html>
  <head>
    <title>Welcome to LOMP Stack</title>
  </head>
  <body>
    <h1>Success! lomp.azdigi.space virtual host is working!</h1>
  </body>
</html>
Step 3: Create a Virtual Host for the new website
To create a Virtual Host for a new website, you need to log in to the Admin Panel with the link http://IP-Server:7080/.
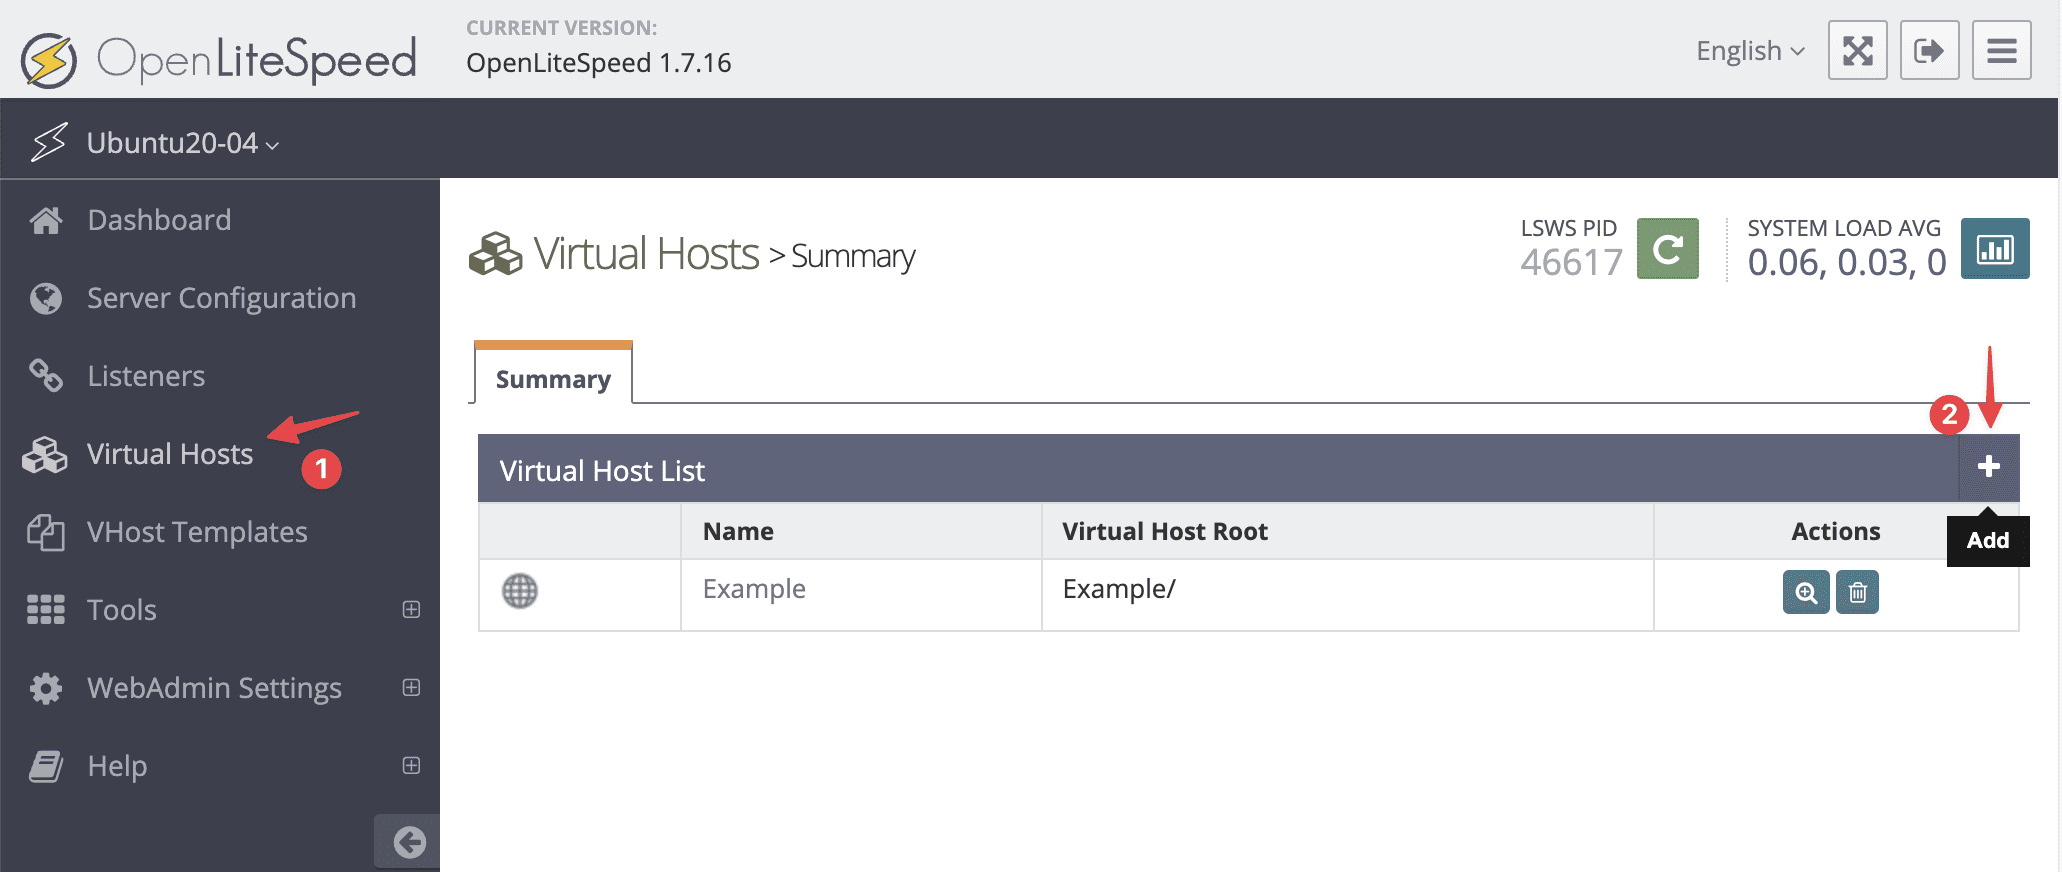
- Create Virtual Hosts
At the GUI interface, you access Virtual Hosts >> click the + button to add a new Virtual Host.

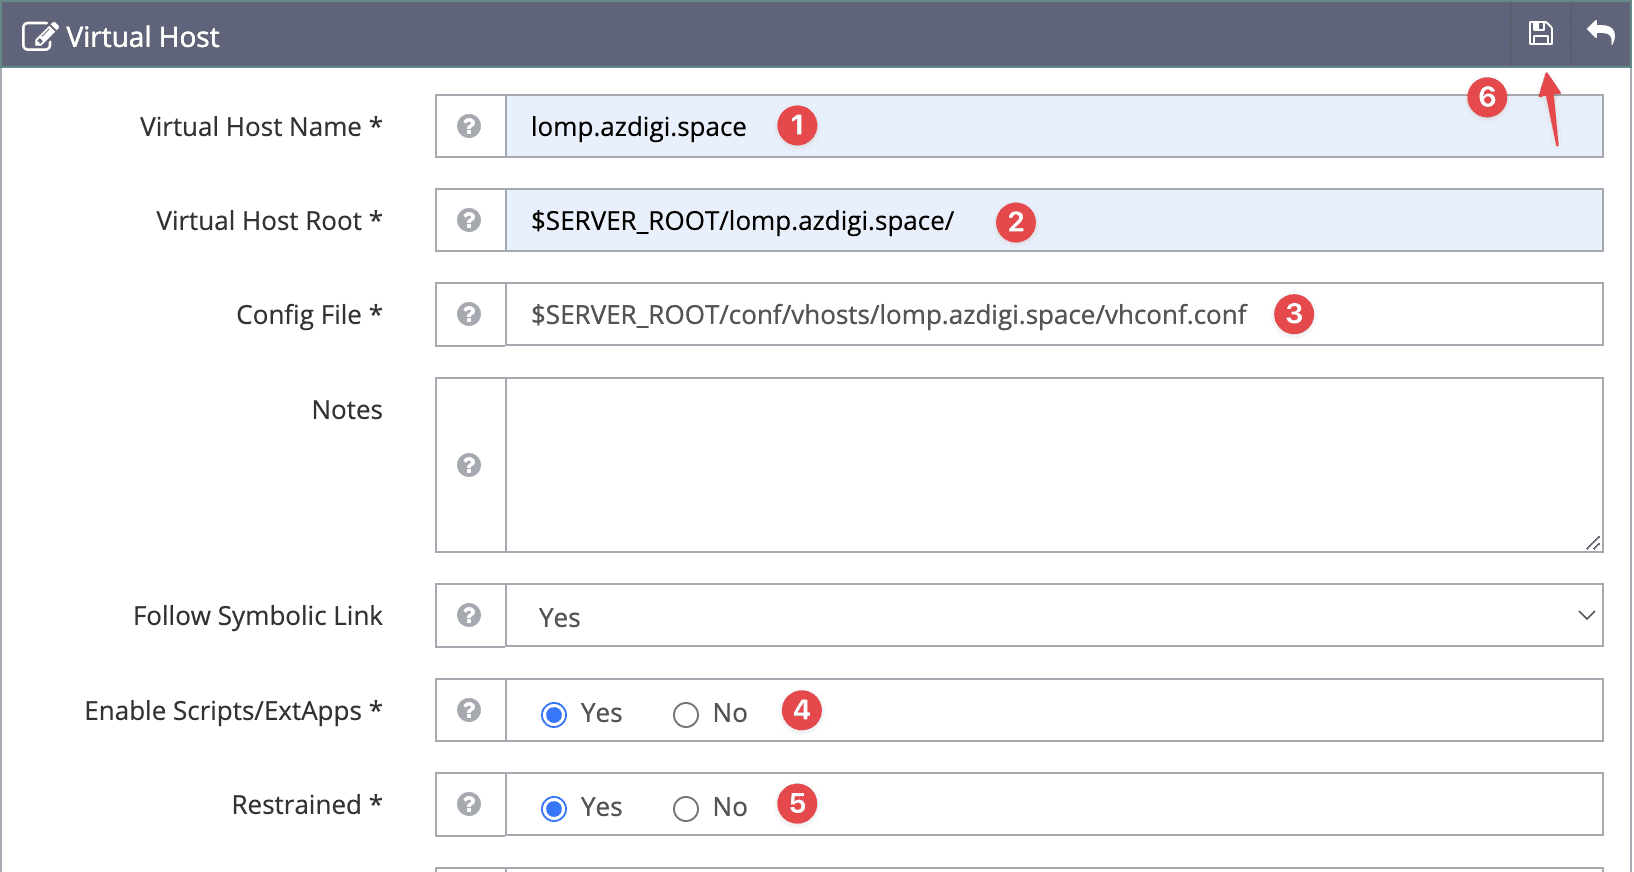
In the next interface, you need to fill in the following details:
- Virtual Host Name:
Tên website của bạn. - Virtual Host Root:
$SERVER_ROOT/websitecuaban - Config File:
$SERVER_ROOT/conf/vhosts/websitecuaban/vhconf.conf - Enable Scripts/ExtApps:
Yes - Restrained:
Yes
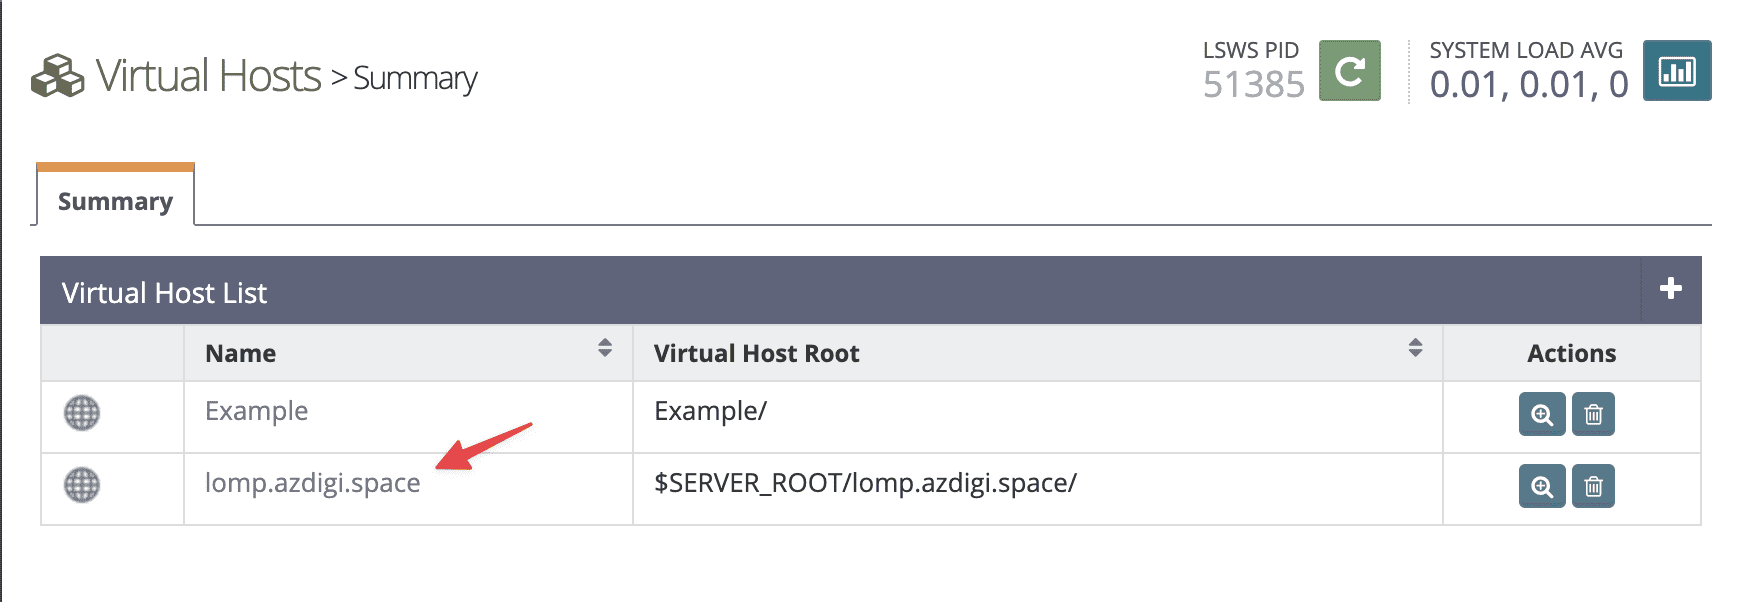
Next, you need to restart Openlitespeed to get the new configuration.

If the addition is successful, you will see the new Virtual Host as follows:
- Set the Document root path for the website

Select the General tab => click the edit icon.
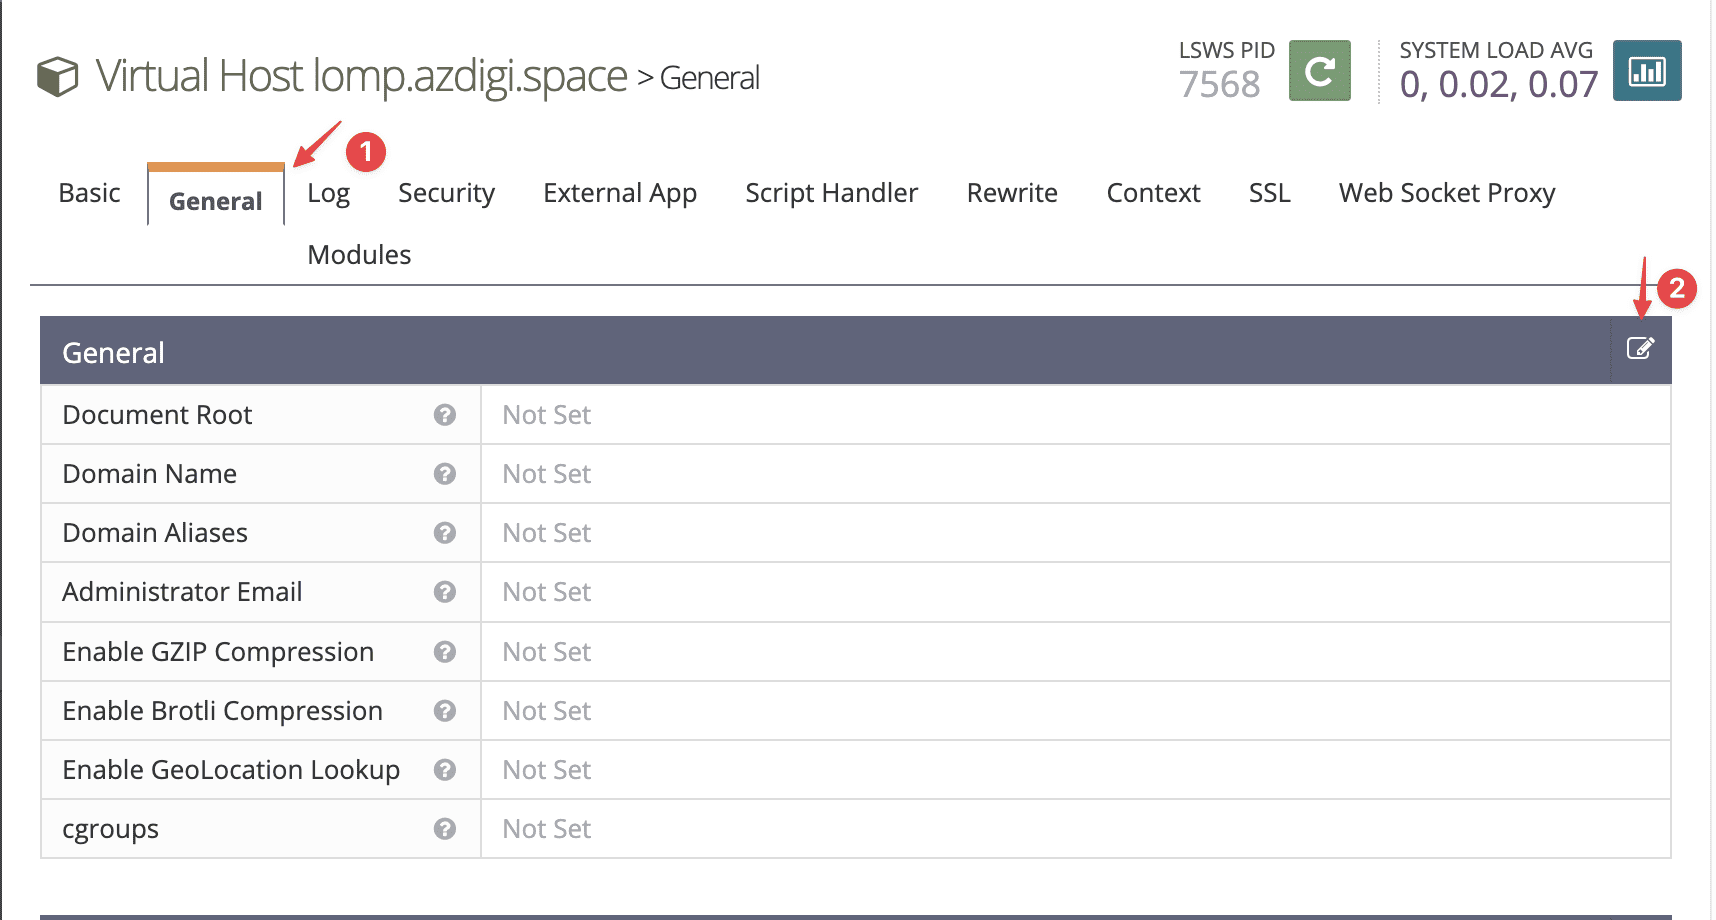
In the General tab >> in the Document Root section, enter the path you created in Step 2: Create a folder to save the website.
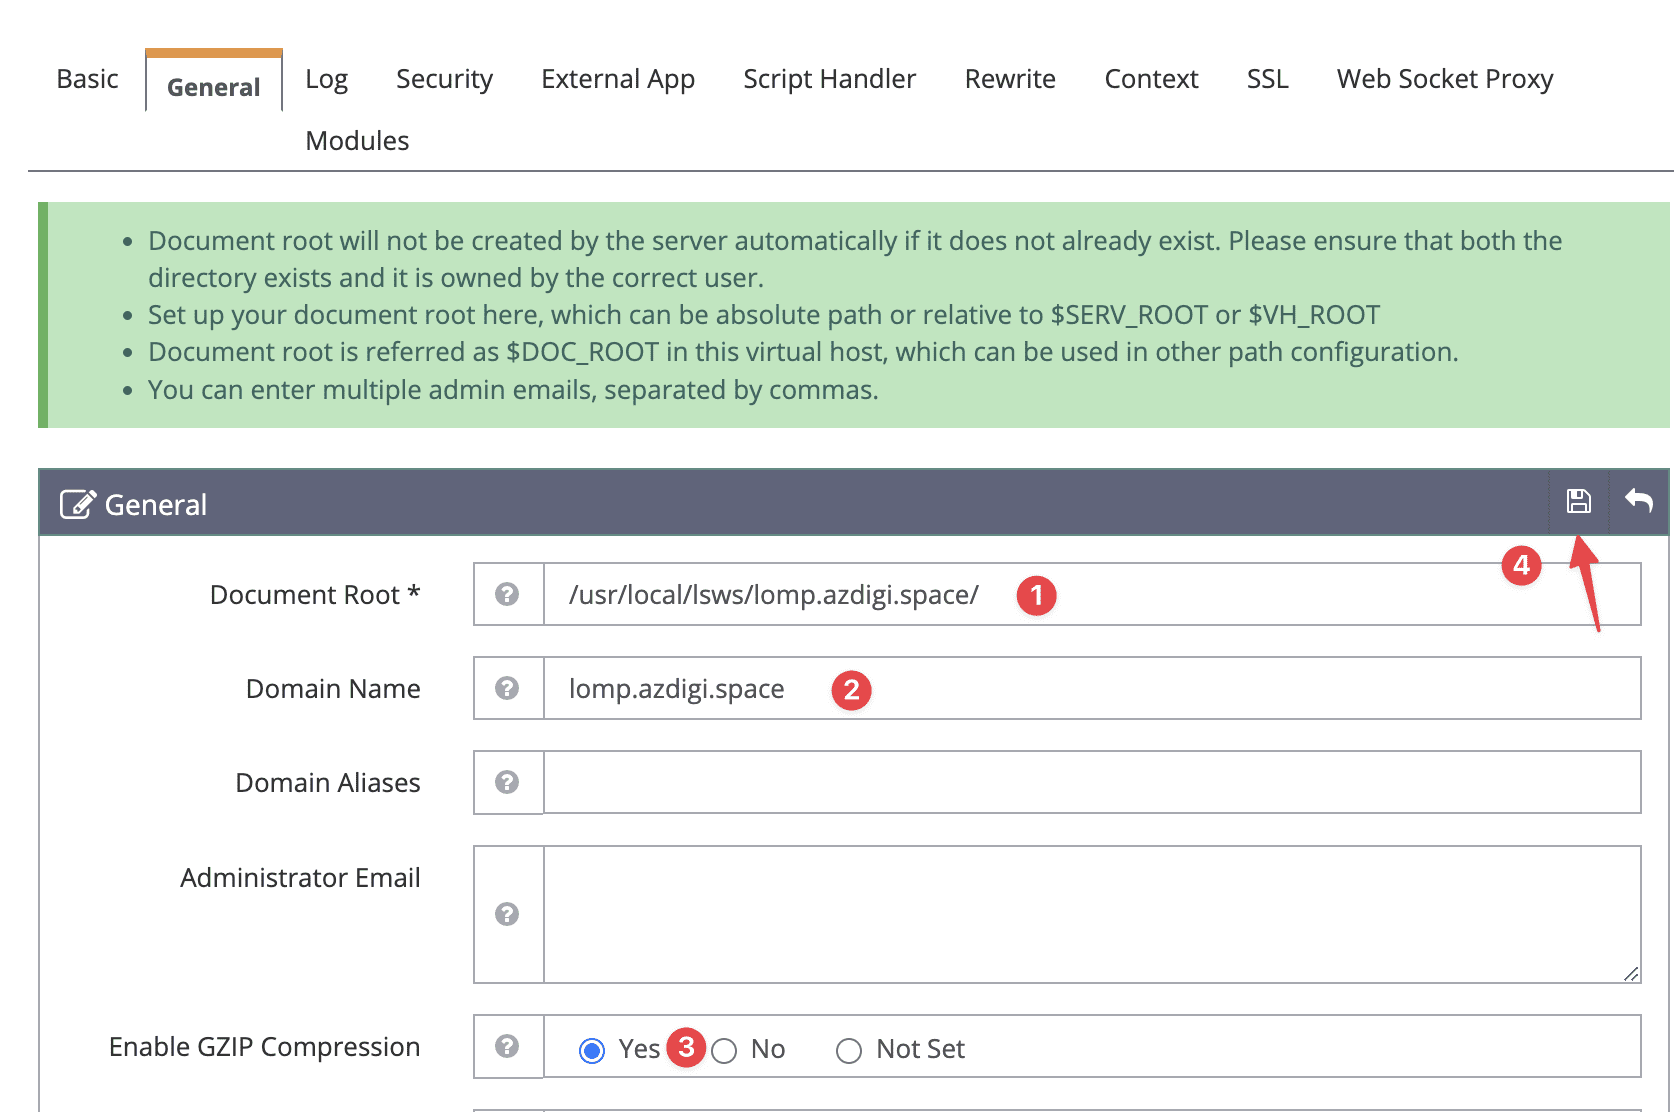
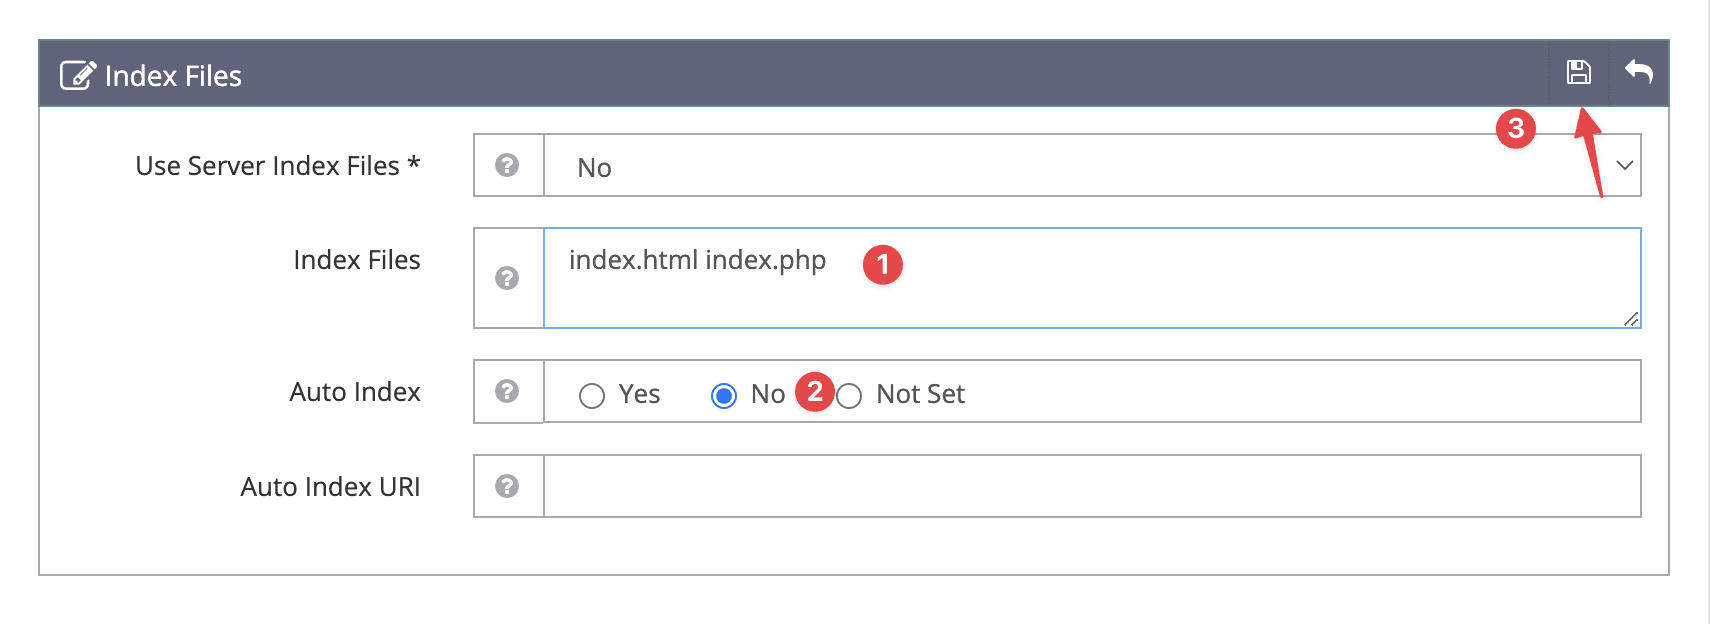
At the Index Files section, you also click the edit icon and change the information as follows:
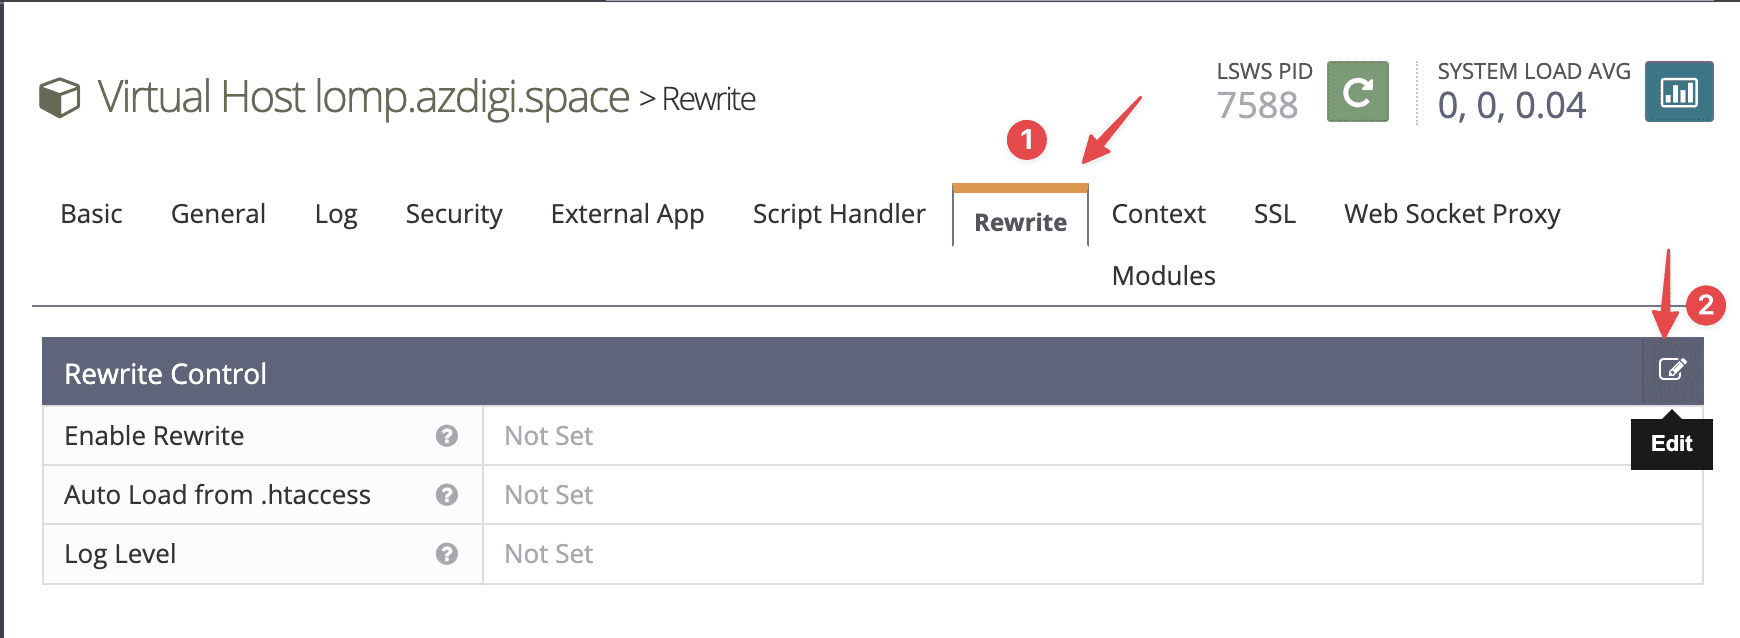
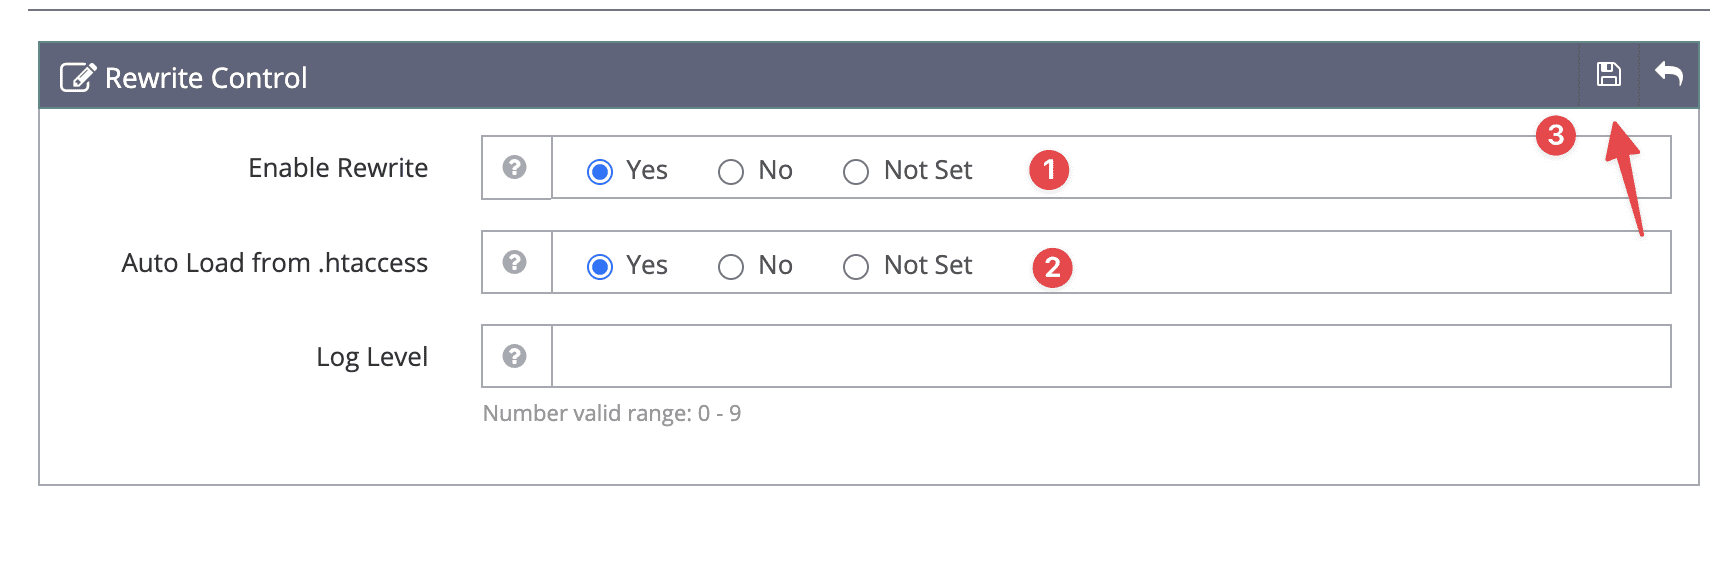
At the Rewrite tab, the Rewrite Control section you edit as below:
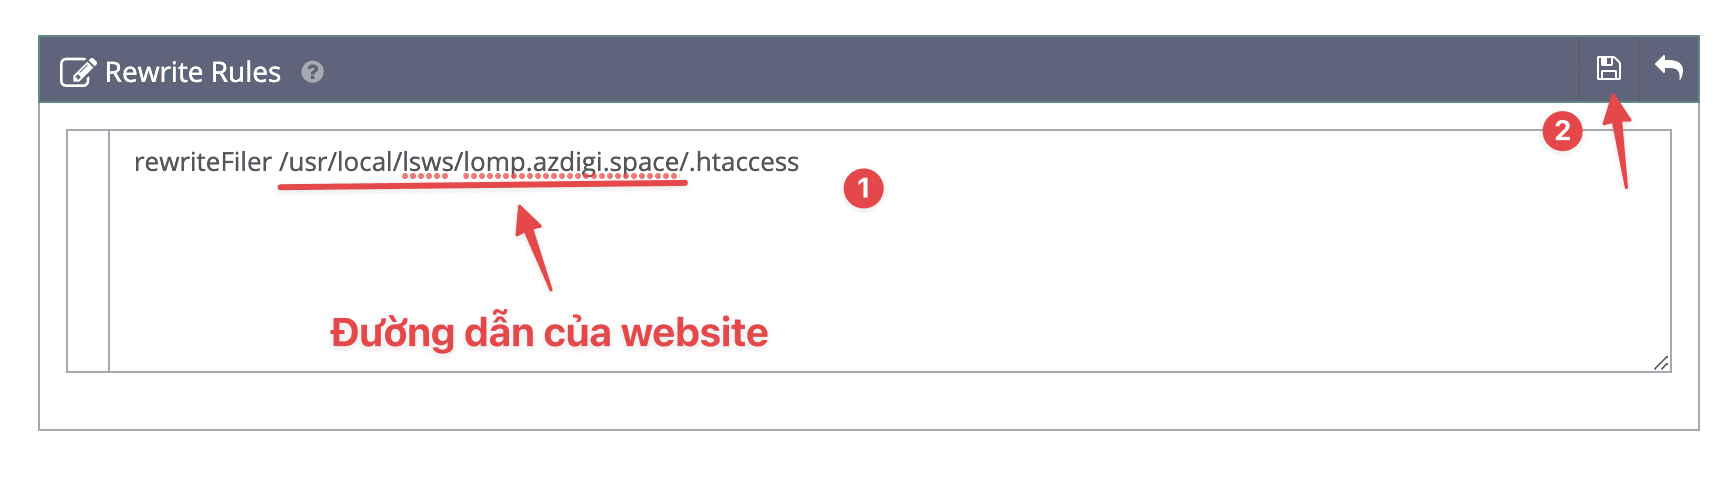
Next, scroll down to the Rewrite Rules section, select edit and add the content below:
rewriteFiler /usr/local/lsws/lomp.azdigi.space/.htaccessNote: Remember to replace the bolded part with your website path.
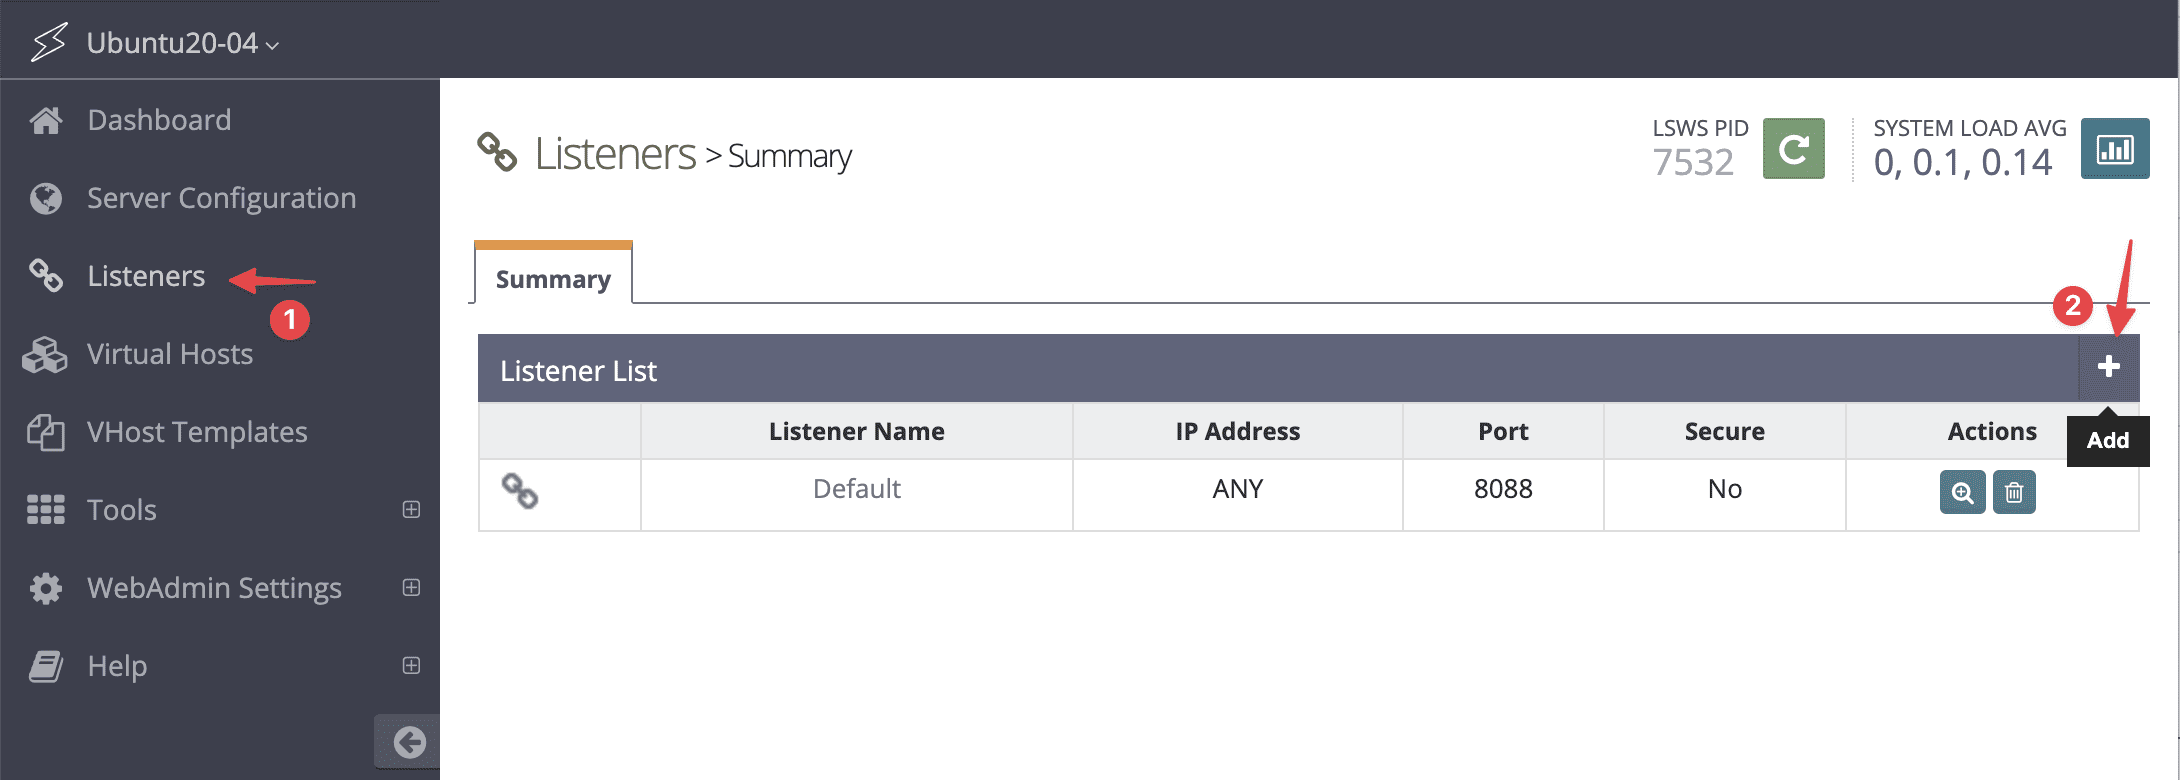
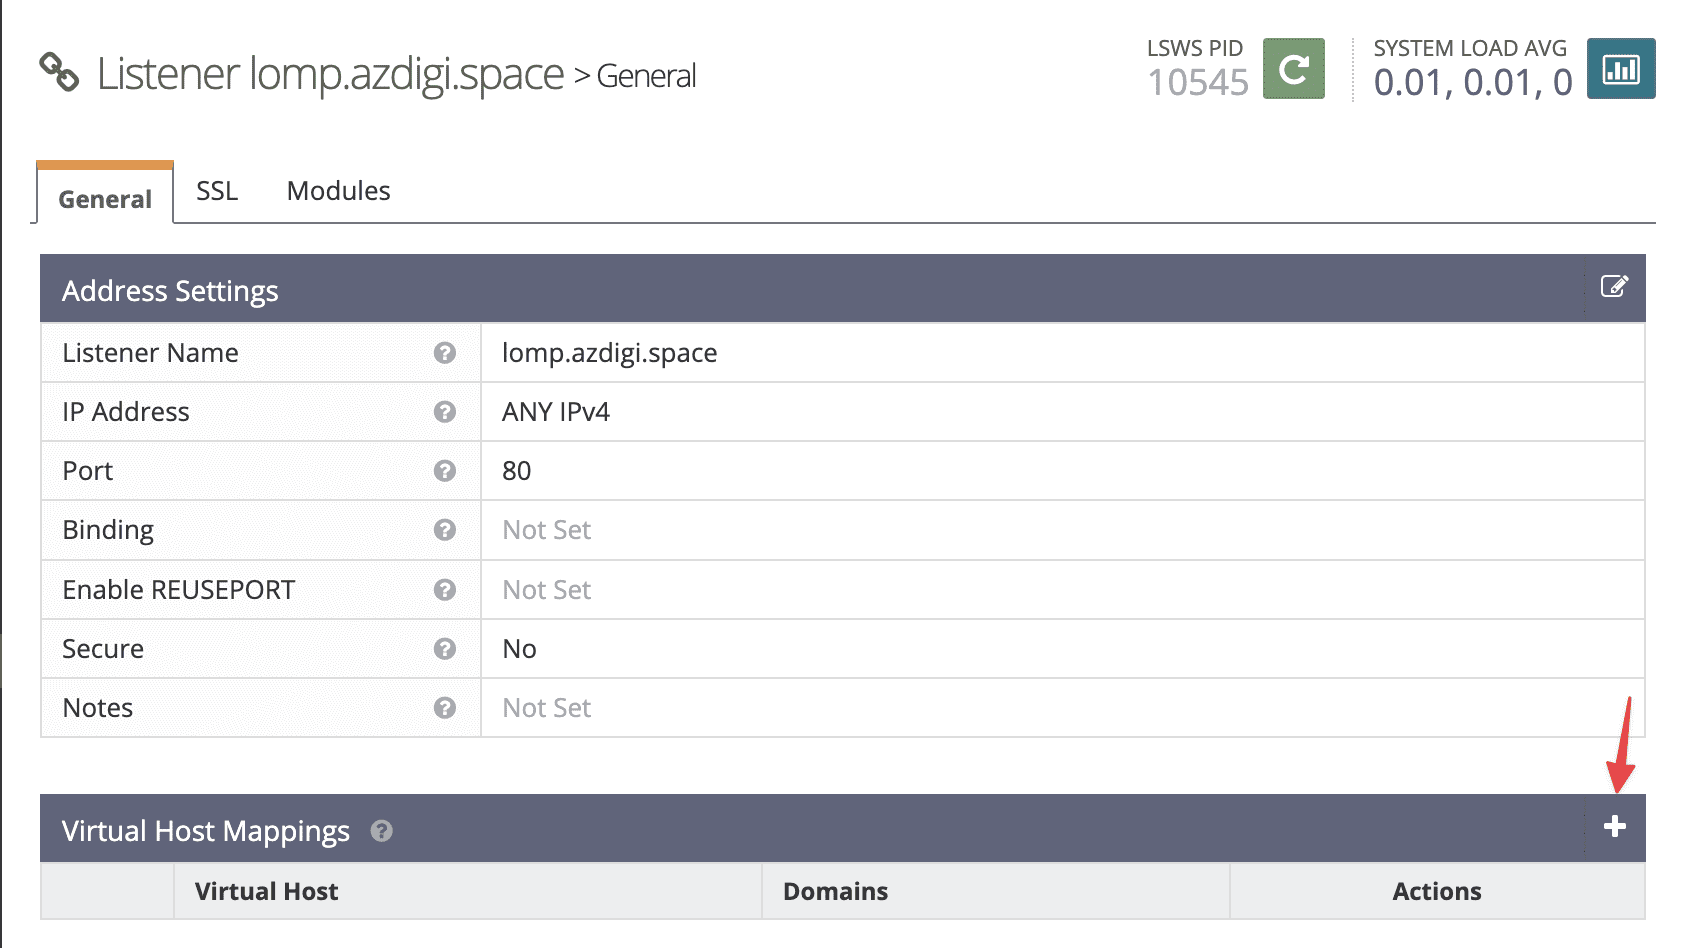
- Connect new Vhost to port 80
You need to connect to the website with port 80 to be able to access it. To configure, you access Listeners >> press the + sign to add configuration.
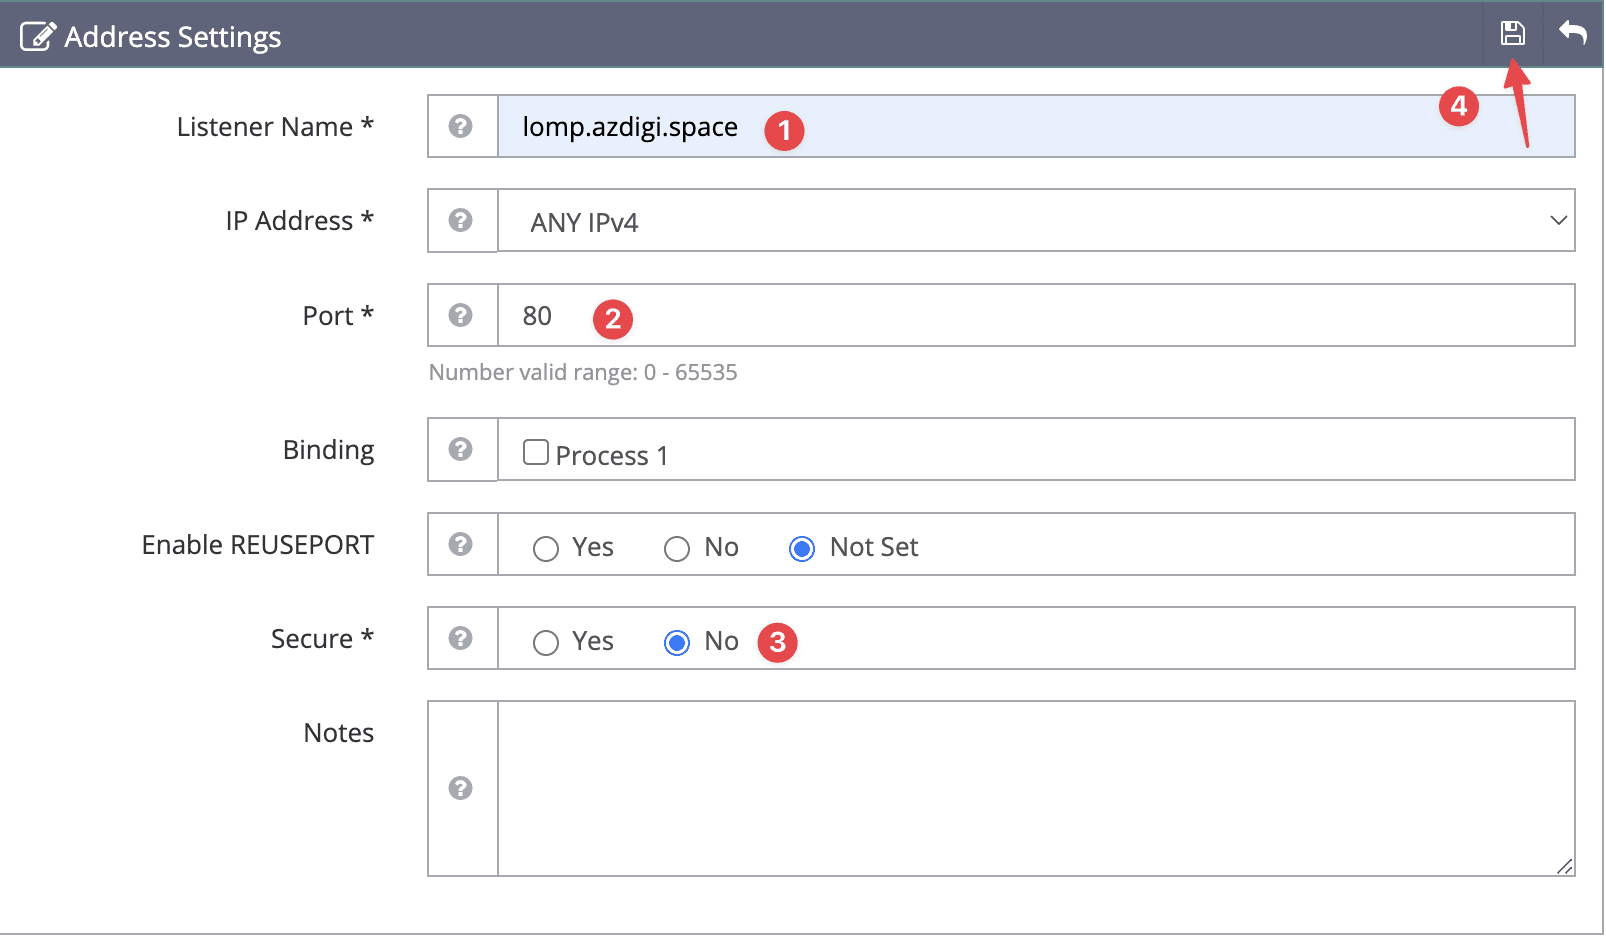
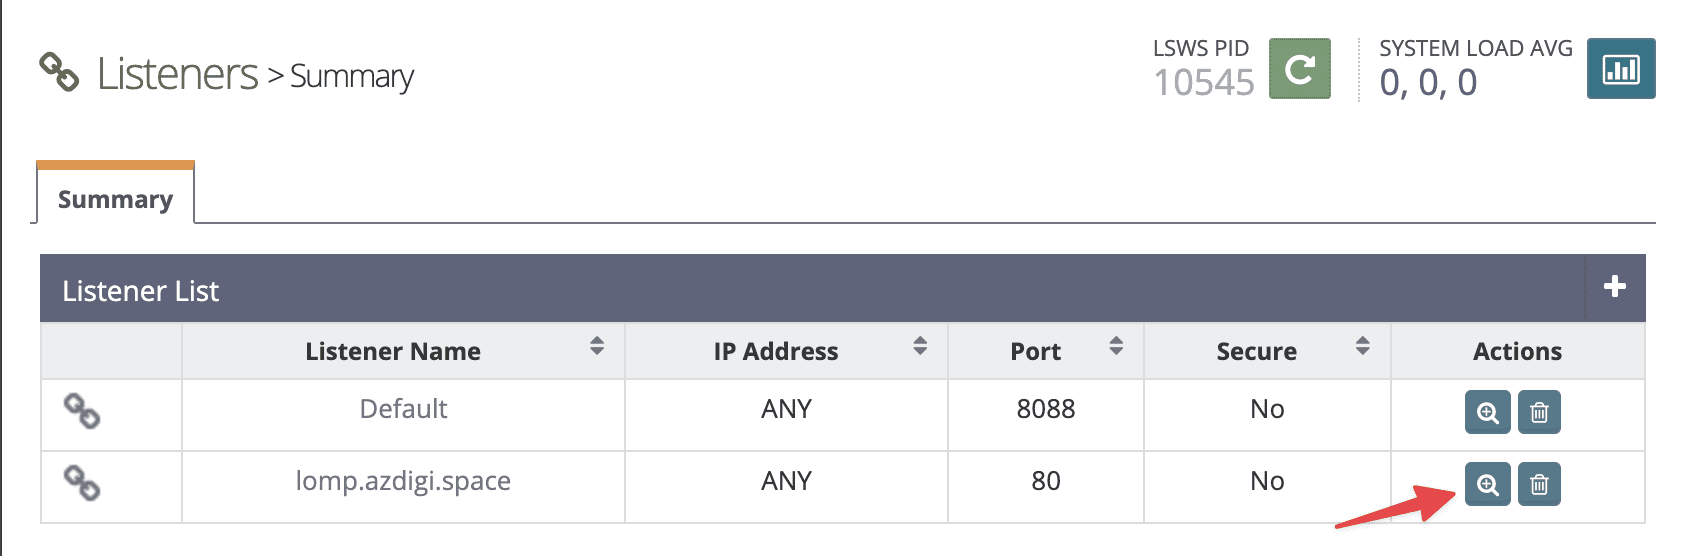
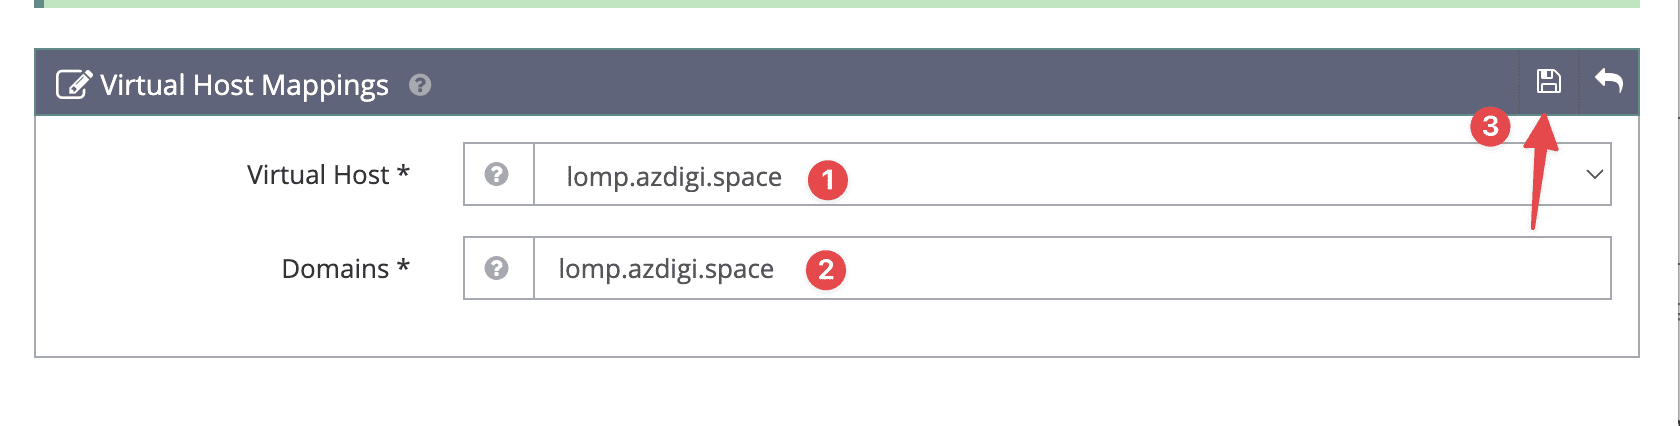
Next, you need to edit as follows:
Step 4: Install SSL for the website
To make your website secure and look more professional, you should install SSL. And I will install SSL through the Cerbot automated tool with the following commands:
- Install Cerbot
sudo apt-get install -y certbot
- Create Let’s Encrypt certificate for website
certbot certonly --webroot -w /usr/local/lsws/lomp.azdigi.space/ -d lomp.azdigi.space
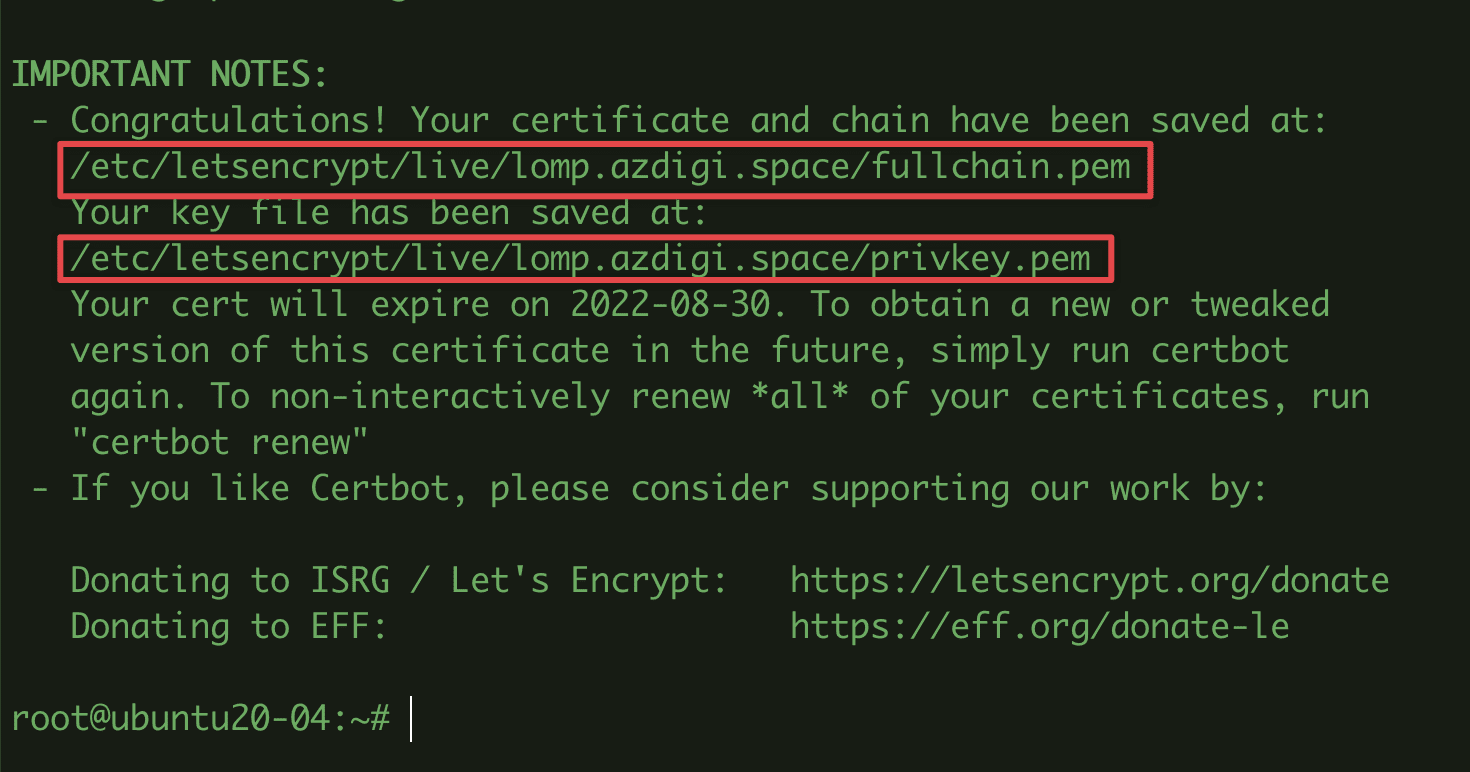
After successful installation, you will receive 2 Certificates and Private key paths as above. You proceed to save these 2 paths to configure in the next part.
To use SSL, you need first to adjust the configuration to allow SSL use as follows:
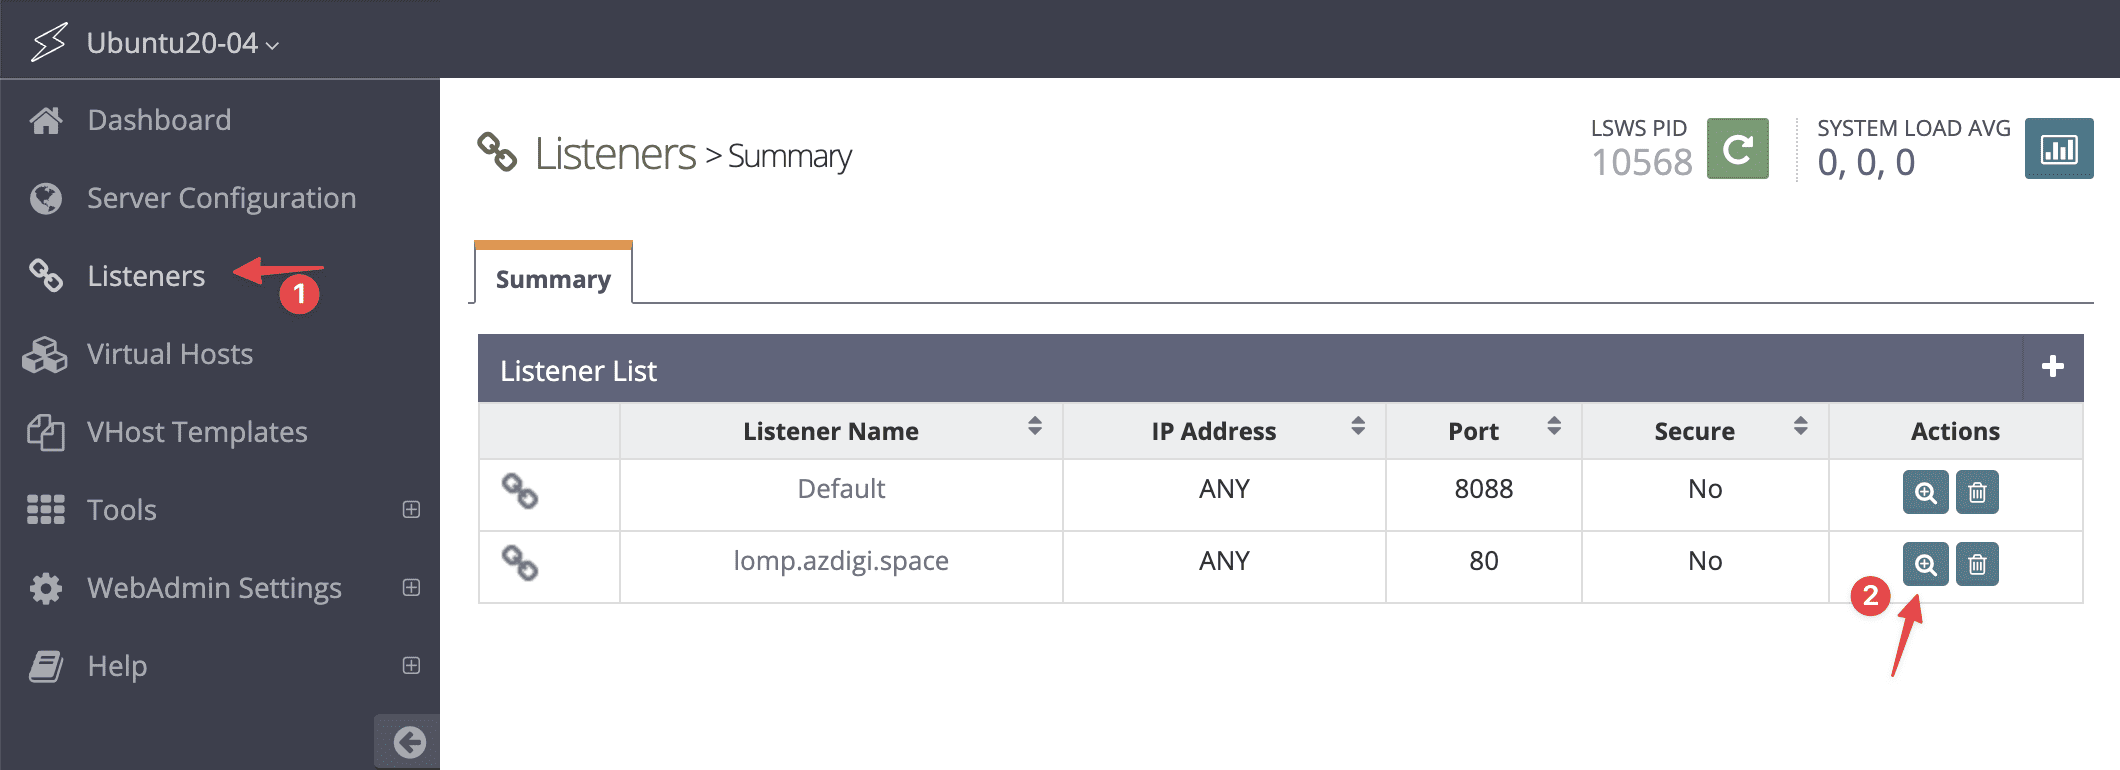
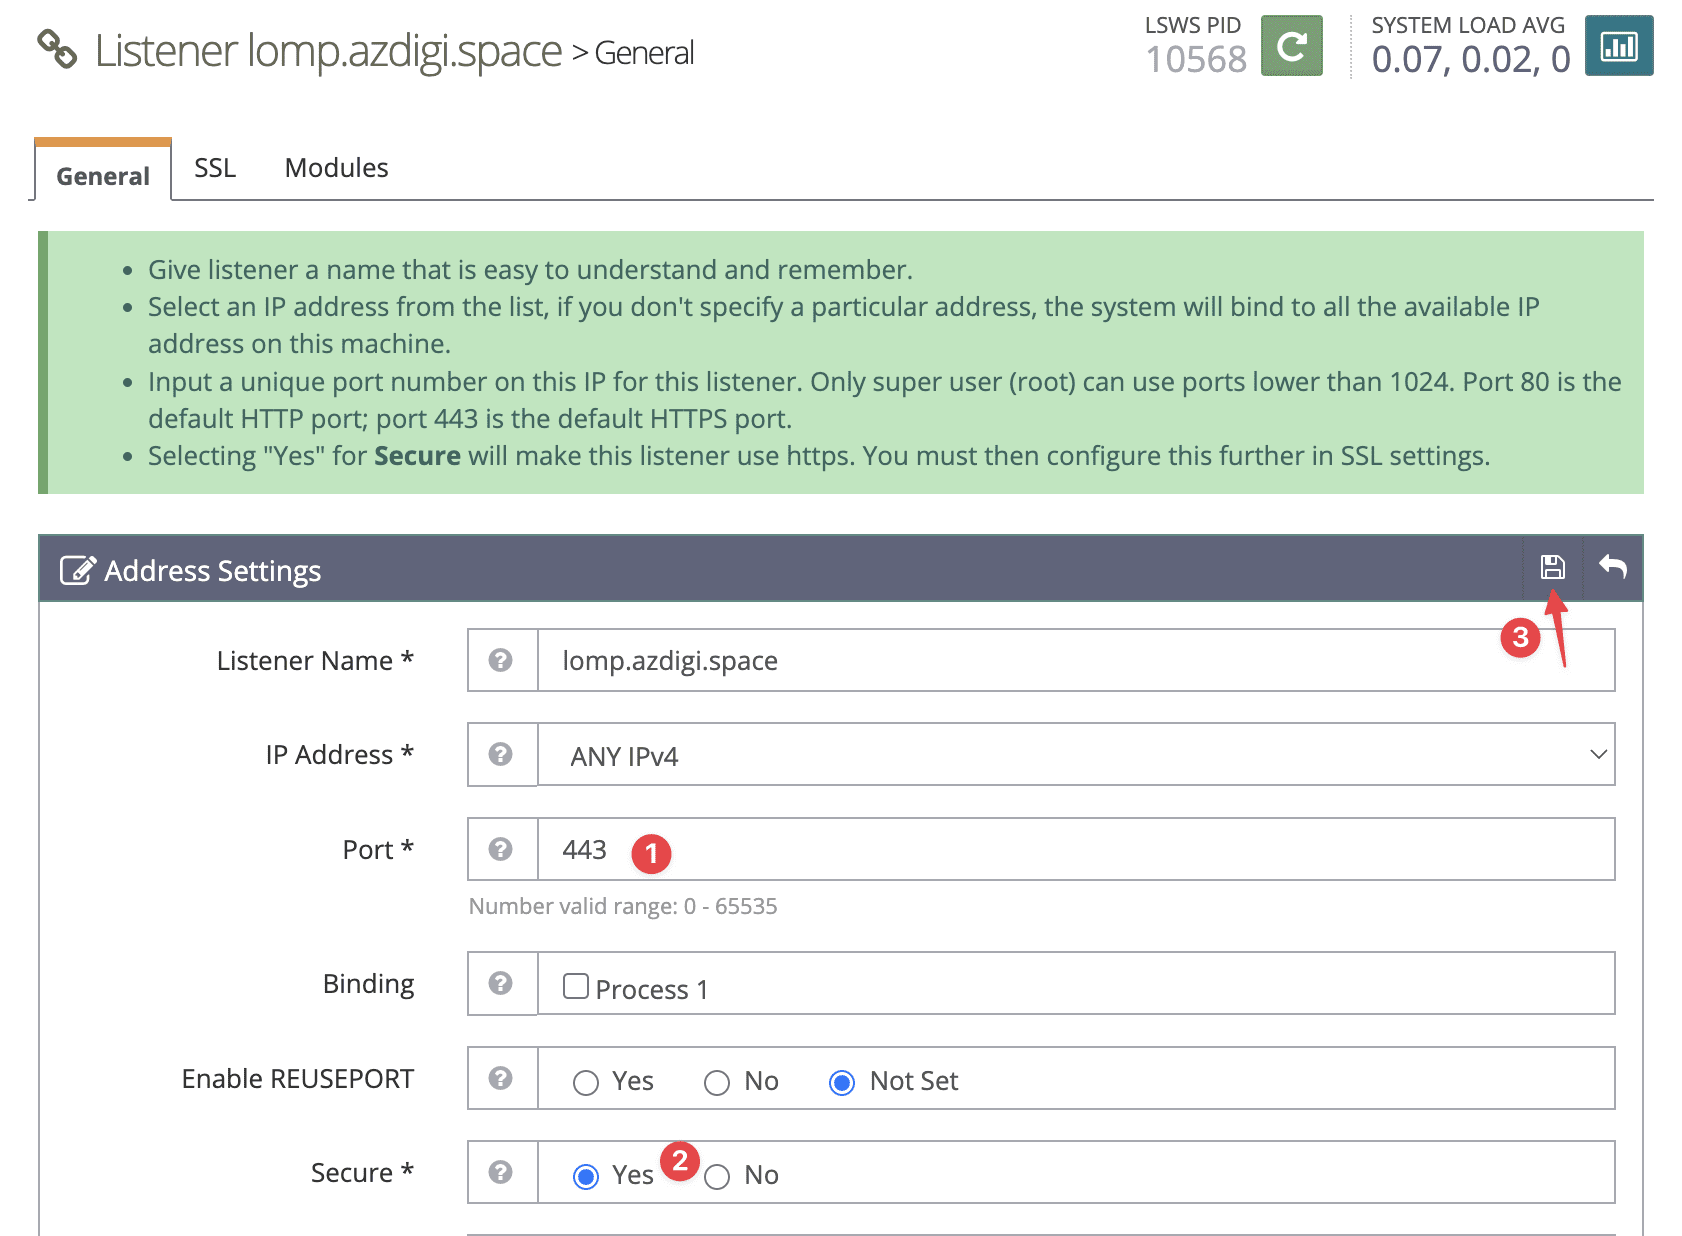
- Change the port to 443 and set the Secure status to Yes
You go to Listeners >> and choose to edit the Listener corresponding to your website.
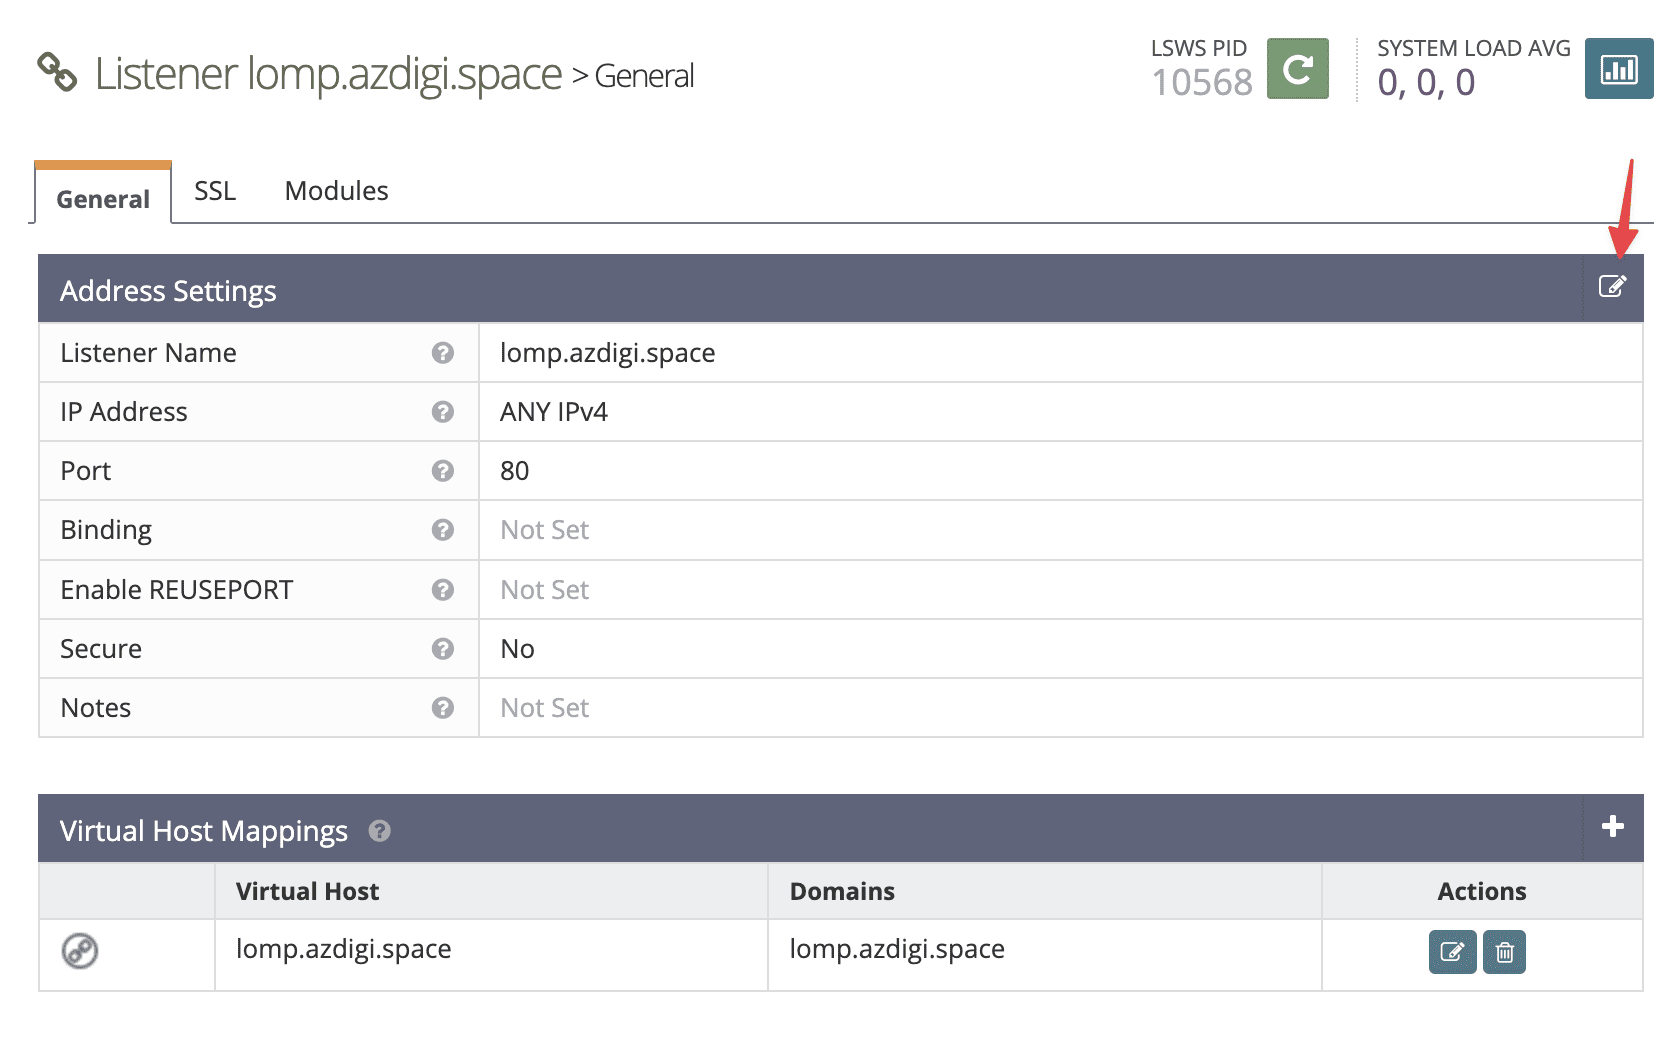
Next, edit the configuration as below:
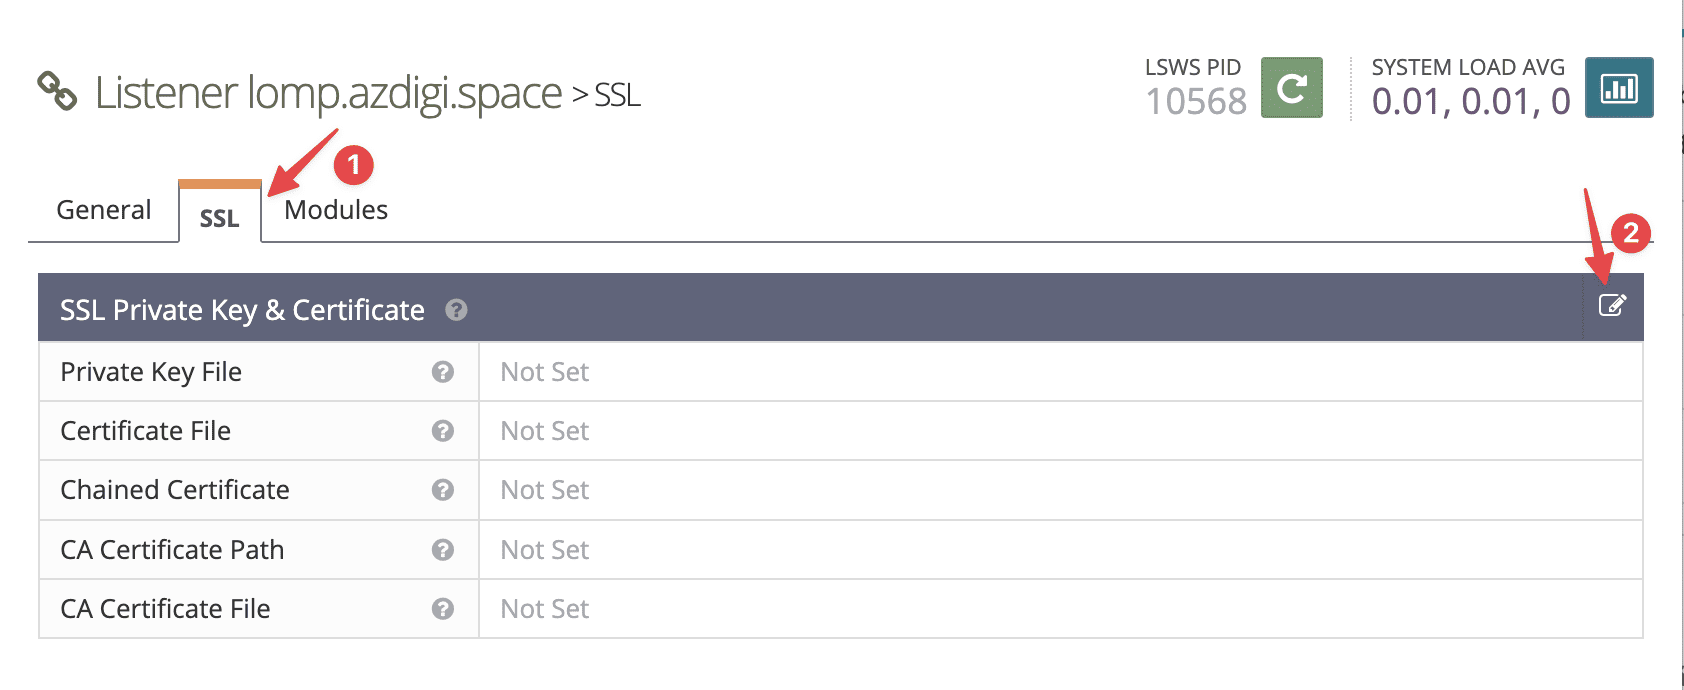
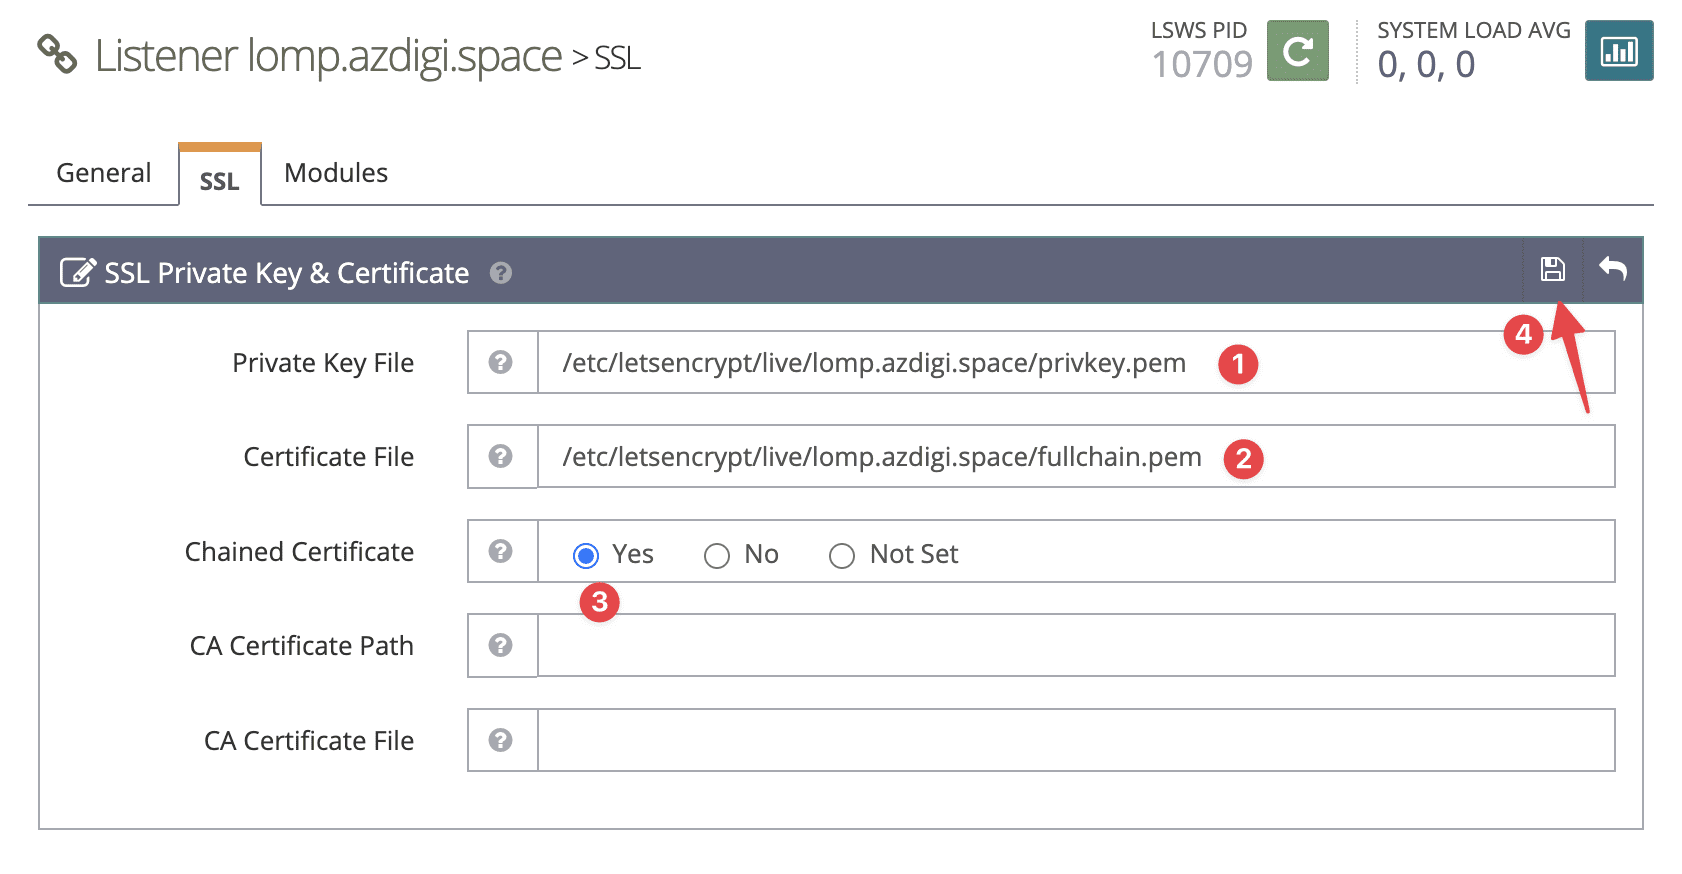
- Set the path containing the SSL certificate
In this step, you need to set the path containing the SSL certificate you just installed above for your website by accessing the SSL tab >> SSL Private Key & Certificate.
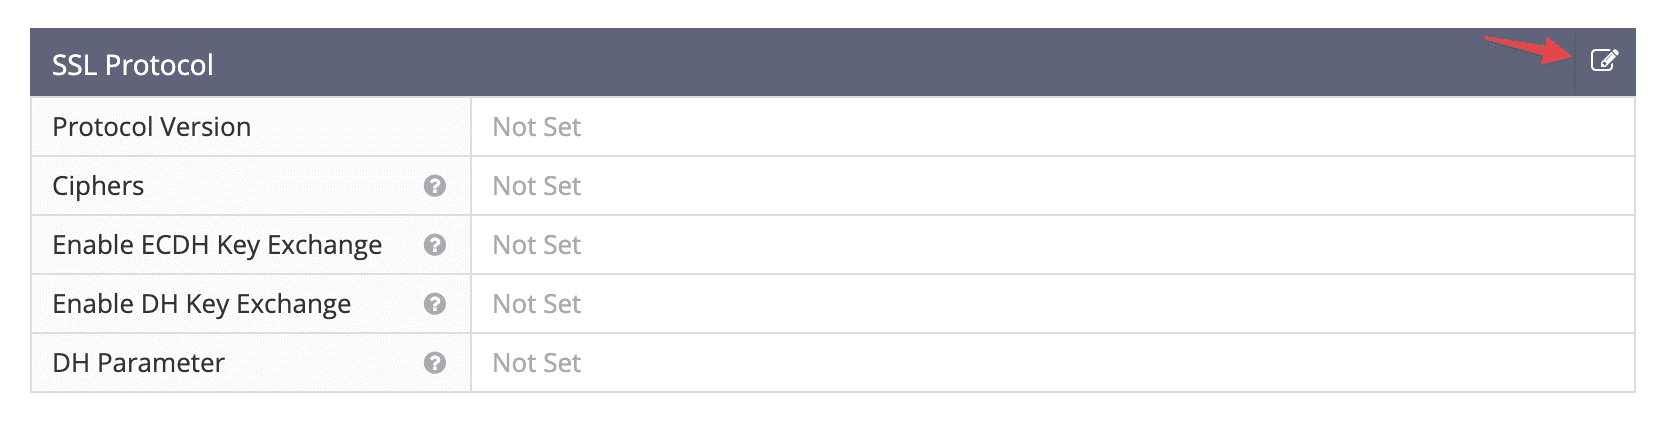
Next, scroll down to the SSL Protocol section and click the edit icon.
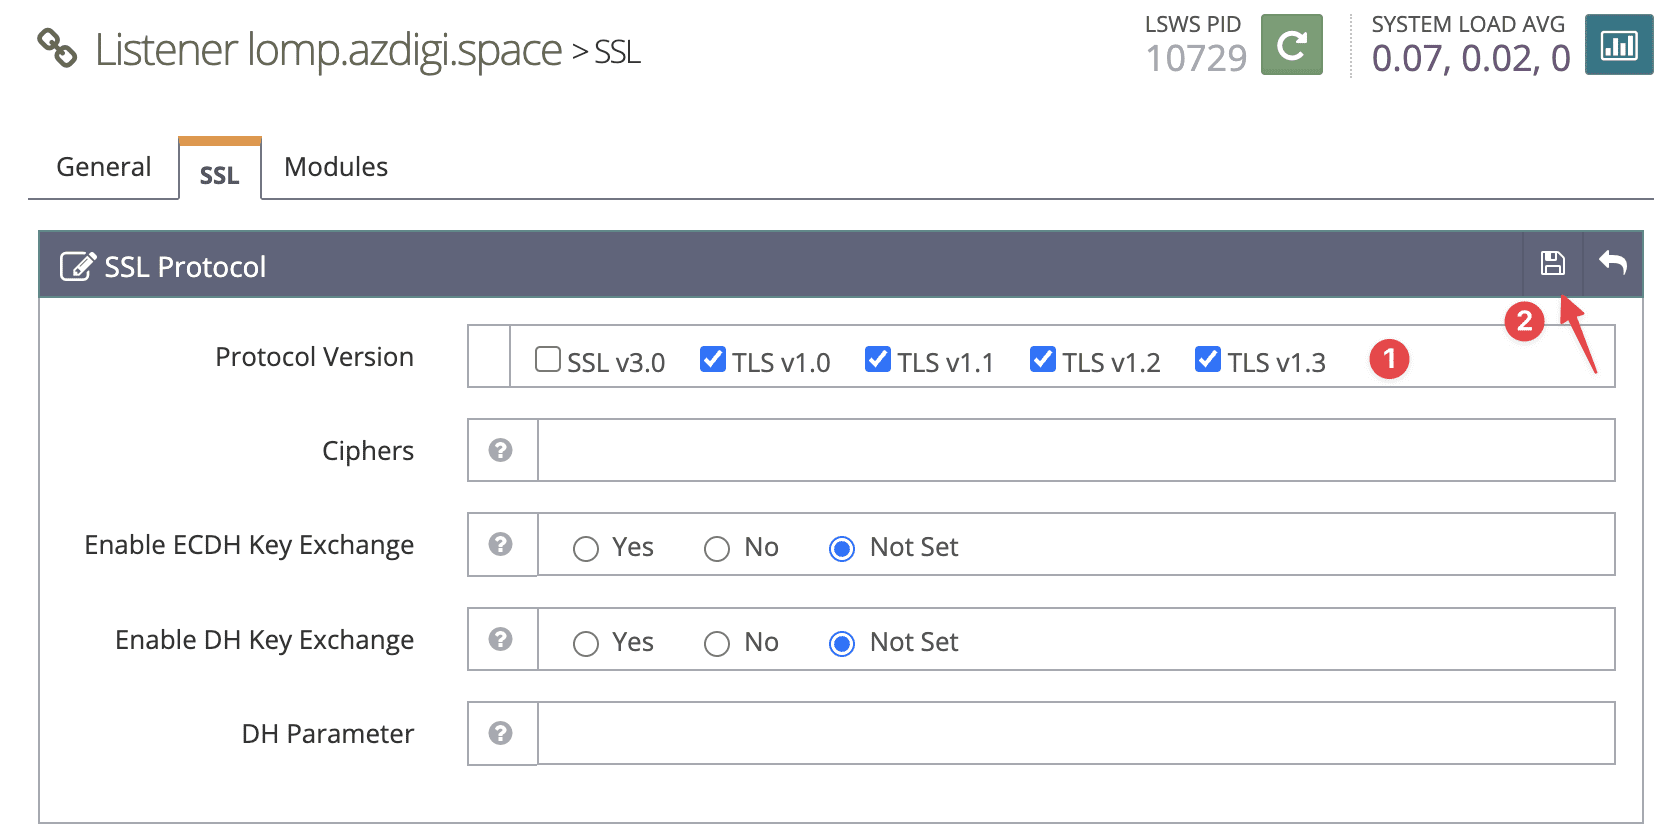
After editing the configuration, you can restart Openlitespeed by clicking the Graceful Restart button.

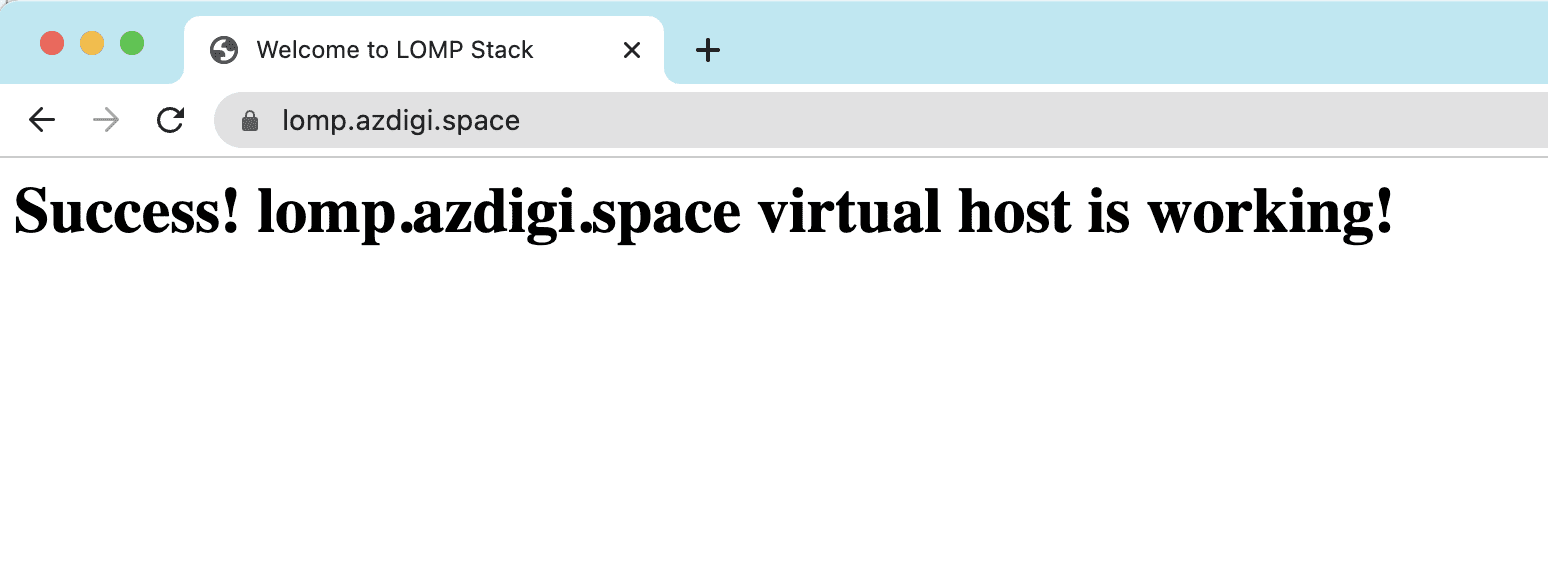
Now go to your website to check the results. And as a result, I have successfully accessed the website with SSL and previously created index.html content.
Above are all the steps to add a website to the LOMP Stack on Ubuntu 20.04 server. Hopefully, this article is helpful to you and wish you success.
You might also like
- How to install LOMP Stack on Ubuntu 20.04
- Add a new website to LAMP Stack on Ubuntu 22.04
- How to add the website to OpenLiteSpeed WebAdmin GUI
- How to create a WordPress website with LEMP on Ubuntu 22.04
- How to install NextCloud on Ubuntu 20.04 with NGINX
- Install WordPress with OpenLiteSpeed using Docker Compose on Ubuntu 22.04
About the author

Thạch Phạm
Đồng sáng lập và Giám đốc điều hành của AZDIGI. Có hơn 15 năm kinh nghiệm trong phổ biến kiến thức liên quan đến WordPress tại thachpham.com, phát triển website và phát triển hệ thống.