Let’s install LAMP Stack on Ubuntu 22.04 with AZDIGI.
I. Introduction
What is LAMP Stack?
LAMP is an acronym commonly used to refer to the use of Linux, Apache, MySQL software and the PHP or Perl or Python command languages to create a web server environment capable of hosting and delivering dynamic web pages.
The specific functions you can quickly understand are that LAMP works from Linux software, with the web server Apache, the database server MariaDB or MySQL and the dynamic file content handled by PHP.
LAMP is an open-source form with the advantage of being free, so in recent years, LAMP has always been trusted by the community because of its stability, ease of installation and ease of operation.
You can learn more about LAMP Stack here.
II. Implementation Guide
To install LAMP Stack, you can follow these 5 steps.
Step 1: SSH into the server and update the system
To upgrade the ProFTPD version on DirectAdmin, we first need to SSH or access your VPS/server with root privileges. If you don’t know how to SSH into your VPS/Server, you can refer to the following tutorial:
After successfully SSHing into the server, you proceed to update the packages installed on the Ubuntu system with the command:
sudo apt update -y && apt upgrade -y
Step 2: Install Apache Web Server
The Apache web server is one of the most popular web servers in the world. It has been well-documented and widely used for a long time, which makes Apache a great default choice for hosting a website.
Since Apache is available in Ubuntu 22.04’s repositories, you can simply install it using the apt install command.
- Install apache2 and apache2-utils to integrate some utilities for Apache HTTP.
sudo apt install -y apache2
- Some Apache management commands
systemctl start apache2 (Khởi động dịch vụ Apache)
systemctl stop apache2 (Dừng dịch vụ Apache)
systemctl reload apache2 (Tải lại dịch vụ Apache)
systemctl restart apache2 (Khởi động lại dịch vụ Apache:)
systemctl enable apache2 (Thiết lập Apache khởi động cùng hệ thống)
systemctl disable apache2 (Vô hiệu hoá Apache khởi động cùng hệ thống )
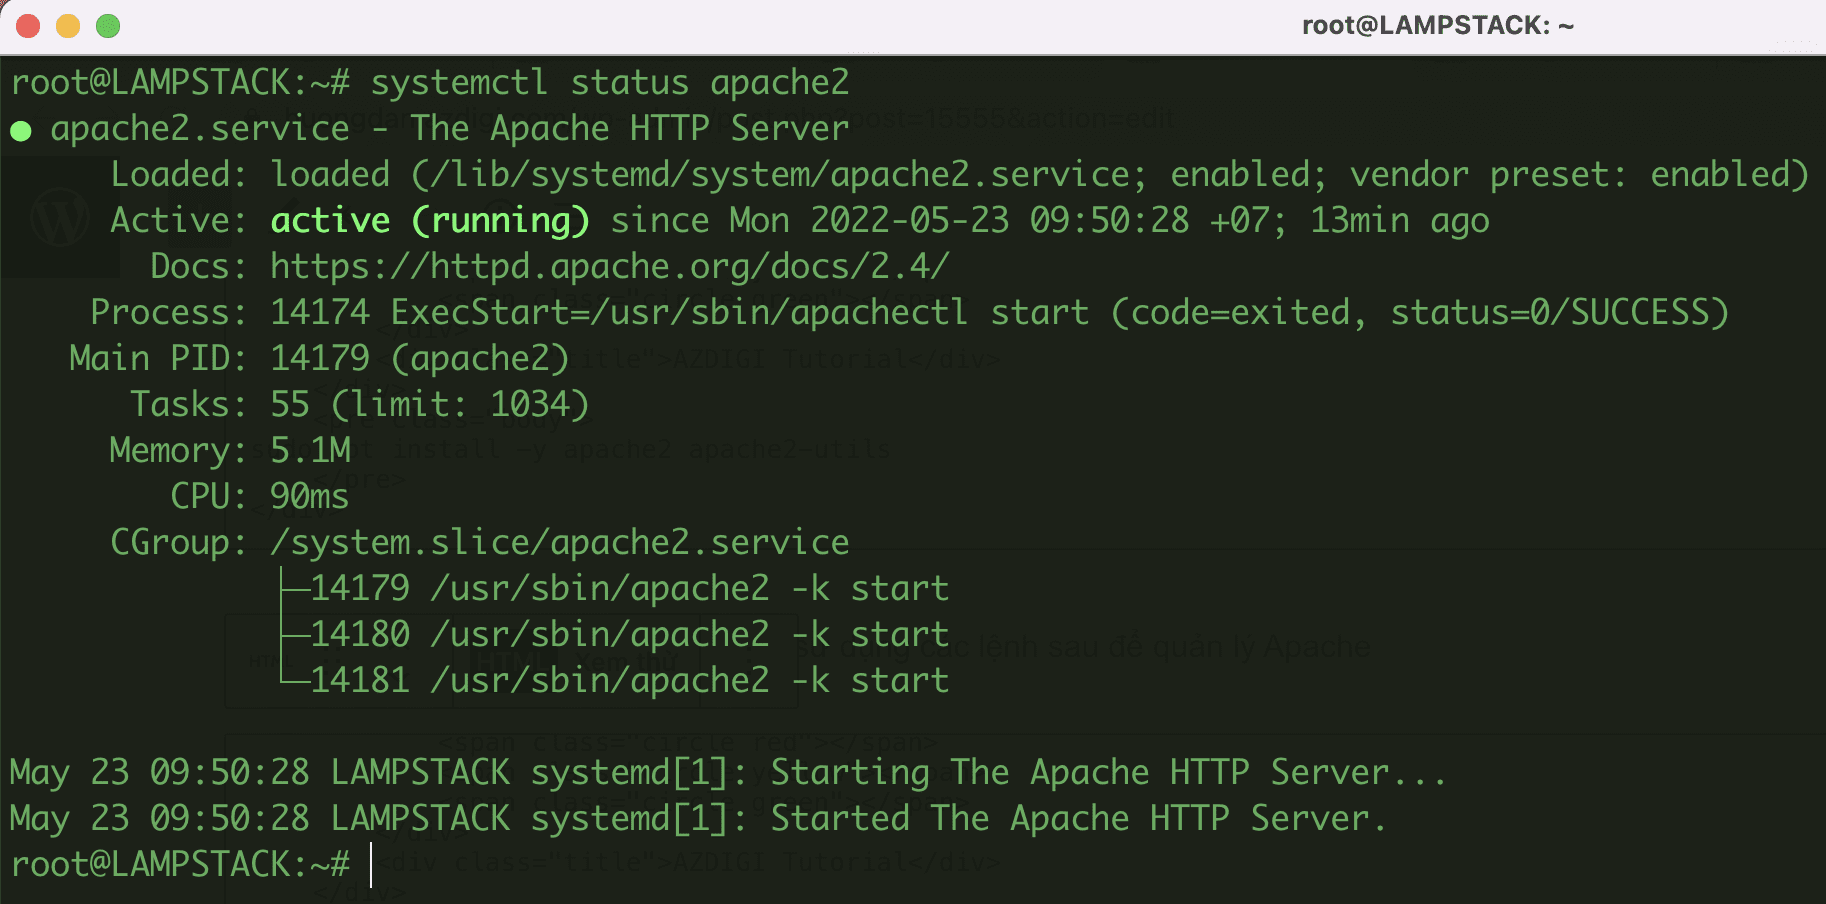
systemctl status apache2 (Xem trạng thái dịch vụ Apache)
- Check the version of Apache
apache2 -v
root@LAMPSTACK:~# apache2 -v
Server version: Apache/2.4.52 (Ubuntu)
Server built: 2022-03-25T00:35:40- Check Apache operation
Check Apache operation If the browser displays the Apache2 Default Page as below, it is successful.

- Open Port 80 (HTTP) with a firewall
If you enter the IP and can’t access it, don’t worry about the problem in the server’s firewall. You just need to open port 80 with the command below:
With iptables
sudo iptables -I INPUT -p tcp --dport 80 -j ACCEPT
With Firewall UFW
sudo ufw allow 'Apache'
- Re-authorize the owner
You need to set the owner permission to www-data (apache user) for the Apache Document root with the command below because the owner will be root by default.
sudo chown www-data:www-data /var/www/html/ -R
- Fix the error (if any)
If you receive the same message below:
AH00558: apache2: Could not reliably determine the server's fully qualified domain name, using 127.0.0.1. Set the 'ServerName' directive globally to suppress this messageDon’t worry too much, you can fix this problem by editing the servername.conf file as follows:
sudo nano /etc/apache2/apache2.conf
And add the content below and save.
ServerName 127.0.0.1Then reload Apache with the command:
systemctl reload apache2
Step 3: Install MariaDB Database Server
MariaDB is an alternative to MySQL. It was developed by former members of the MySQL team. You use the commands below to install MariaDB on Ubuntu 22.04.
- Install MariaDB Database Server
sudo apt install -y mariadb-server mariadb-client
- Some MariaDB management commands
systemctl start mariadb      (Khởi động dịch vụ mariadb)
systemctl stop mariadb       (Dừng dịch vụ mariadb)
systemctl restart mariadb   (Khởi động lại  dịch vụ mariadb)
systemctl enable mariadb     (Thiết lập mariadb khởi động cùng hệ thống)
systemctl disable mariadb    (Vô hiệu hoá mariadb khởi động cùng hệ thống )
systemctl status mariadb     (Xem trạng thái dịch vụ mariadb)
- Advanced Setup for Mariadb
Now you will set the root password for Mariadb and set some other customizations with the command:
sudo mysql_secure_installation
root@LAMPSTACK:~# sudo mysql_secure_installation
NOTE: RUNNING ALL PARTS OF THIS SCRIPT IS RECOMMENDED FOR ALL MariaDB
      SERVERS IN PRODUCTION USE!  PLEASE READ EACH STEP CAREFULLY!
In order to log into MariaDB to secure it, we'll need the current
password for the root user. If you've just installed MariaDB, and
haven't set the root password yet, you should just press enter here.
Enter current password for root (enter for none):  Nhấn Enter
OK, successfully used password, moving on...
Setting the root password or using the unix_socket ensures that nobody
can log into the MariaDB root user without the proper authorisation.
You already have your root account protected, so you can safely answer 'n'.
Switch to unix_socket authentication [Y/n] n
 ... skipping.
You already have your root account protected, so you can safely answer 'n'.
Change the root password? [Y/n] Y             (Nhấn Y để tạo pass root mới)
New password:  Nhập passwd root
Re-enter new password: Nhập lại passwd root
Password updated successfully!
Reloading privilege tables..
 ... Success!
By default, a MariaDB installation has an anonymous user, allowing anyone
to log into MariaDB without having to have a user account created for
them.  This is intended only for testing, and to make the installation
go a bit smoother.  You should remove them before moving into a
production environment.
Remove anonymous users? [Y/n] Y
 ... Success!
Normally, root should only be allowed to connect from 'localhost'.  This
ensures that someone cannot guess at the root password from the network.
Disallow root login remotely? [Y/n] Y
 ... Success!
By default, MariaDB comes with a database named 'test' that anyone can
access.  This is also intended only for testing, and should be removed
before moving into a production environment.
Remove test database and access to it? [Y/n] Y
 - Dropping test database...
 ... Success!
 - Removing privileges on test database...
 ... Success!
Reloading the privilege tables will ensure that all changes made so far
will take effect immediately.
Reload privilege tables now? [Y/n] Y
 ... Success!
Cleaning up...
All done!  If you've completed all of the above steps, your MariaDB
installation should now be secure.
Thanks for using MariaDB!- Check the version of Mariadb
mariadb --version
root@LAMPSTACK:~# mariadb --version
mariadb  Ver 15.1 Distrib 10.6.7-MariaDB, for debian-linux-gnu (x86_64) using  EditLine wrapper
Step 4: Install PHP
At the time of writing this article, PHP 8.1 is the latest version of PHP, it has superior performance over its predecessors. Therefore, I will install PHP 8.1 and some necessary PHP modules.
- Add PPA package (ondrej/php) to install PHP 8.1 and the necessary modules for Apache.
sudo apt install software-properties-common
sudo add-apt-repository ppa:ondrej/php
sudo apt install -y php8.1 libapache2-mod-php8.1
sudo apt install php-net-ldap2 php-net-ldap3 php-imagick php8.1-common php8.1-gd php8.1-imap php8.1-mysql php8.1-curl php8.1-zip php8.1-xml php8.1-mbstring php8.1-bz2 php8.1-intl php8.1-gmp php8.1-redis
- Check the version of PHP
php -v
root@ubuntu-2204:~# php -v
PHP 8.1.6 (cli) (built: May 17 2022 16:46:54) (NTS)
Copyright (c) The PHP Group
Zend Engine v4.1.6, Copyright (c) Zend Technologies
with Zend OPcache v8.1.6, Copyright (c), by Zend Technologies- Check operation
To test the PHP with the Apache server, we need to create an info.php at the Apache Document root with the command below:
sudo nano /var/www/html/info.php
Enter the content below and save.
<?php
phpinfo();
?>
Next, you go to the browser and follow the path: http://IP_Server/info.php to check. If the browser displays PHP as below, it is successful.
Step 5: Install phpMyAdmin
phpMyAdmin is an application used to manage databases in the form of an interface, through phpMyAdmin will help you manage databases more intuitively. To install it, please do the following:
- Install phpMyAdmin
sudo apt install -y phpmyadmin
Next, select apache2 and press Enter

At the next interface, select Yes to configure the database for phpMyAdmin with dbconfig-common.

Now you create a new password for user phpmyadmin and press Tab key to switch OK and press Enter.

Continue to re-enter the password and press the Tab key to switch to OK and press Enter.

- Add privileges for user phpmyadmin
sudo mysql -u root
show grants for phpmyadmin@localhost;
exit;

- Configure to access phpMyAdmin
After installing phpMyAdmin, you need to configure it with Apache to be able to access the web interface.
sudo ln -s /etc/phpmyadmin/apache.conf /etc/apache2/conf-available/phpmyadmin.conf
sudo a2enconf phpmyadmin.conf
sudo systemctl reload apache2
- Check phpMyAdmin operation
After the configuration is complete, go to the browser and follow the path http://IP_Server/phpmyadmin to access phpMyAdmin. If successful, the interface will be as below, and you will use the information created in the phpMyAdmin Settings section to log in.

So AZDIGI has shown you to install the LAMP Stack on Ubuntu 22.04 complete. LAMP Stack will help your servers operate lighter and have better load capacity. LAMP Stack is a suitable solution for servers with low CPU/RAM resource configuration.
Wishing you success!
You can refer to other user manuals at the link below
If you need support, you can contact support in the ways below:
- Hotline 247: 028 888 24768 (Ext 0)
- Ticket/Email: You use the email to register for the service and send it directly to: support@azdigi.com
About the author

Thạch Phạm
Đồng sáng lập và Giám đốc điều hành của AZDIGI. Có hơn 15 năm kinh nghiệm trong phổ biến kiến thức liên quan đến WordPress tại thachpham.com, phát triển website và phát triển hệ thống.