In this article, AZDIGI will show you how to change the root password of Pro VPS and KVM VPS services at AZDIGI through the control panel at https://my.azdigi.com.
Currently, AZDIGI has turned off the password setting feature when registering to ensure VPS is not set to a simple password. So if you have just completed the registration of Pro VPS and KVM VPS services, you may need to set up a password for the first time to be able to log in to the VPS via SSH.
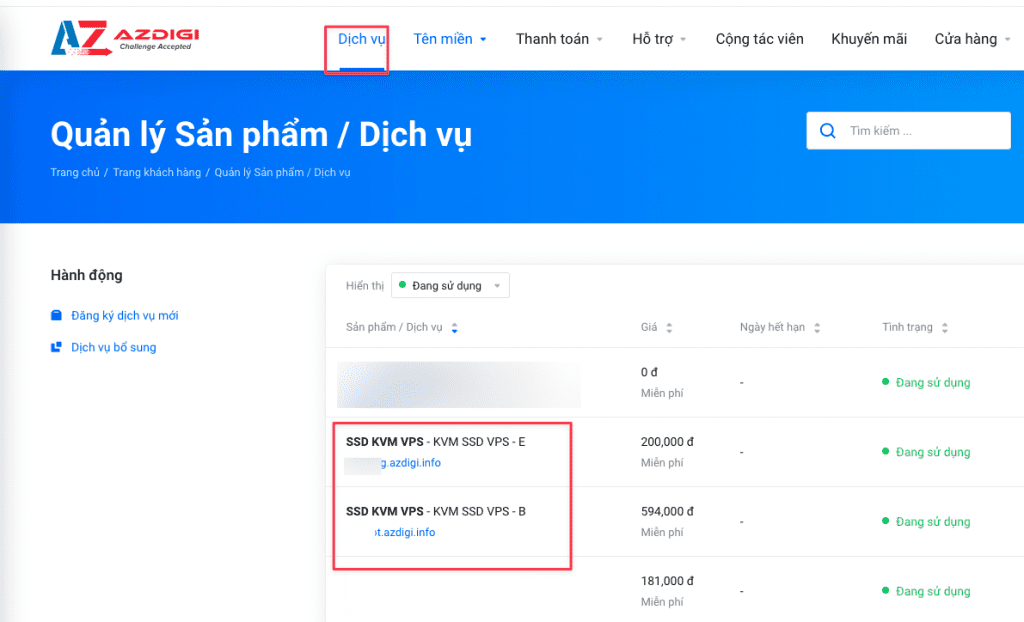
First, you go to https://my.azdigi.com, then select Services and select the VPS that you need to change the root password.

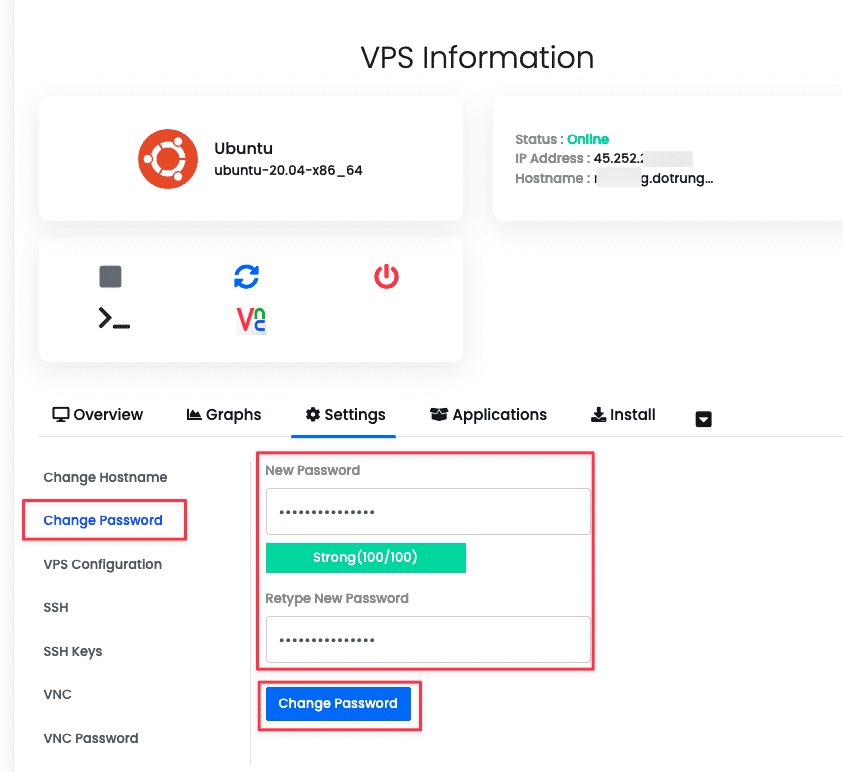
You will then receive a copy of the VPS Information. Here you choose Settings => Change Password and enter the root password to be changed, and finally click Change Password to execute.
Note: If VPS Information has not appeared, please wait a few minutes for the system to load the information

You should pay attention to setting a complex password, avoid using passwords like admin123456 ,123456 , … because it is very easy to be penetrated by software that automatically scans passwords (brute-force attack) even though the VPS has just been created.
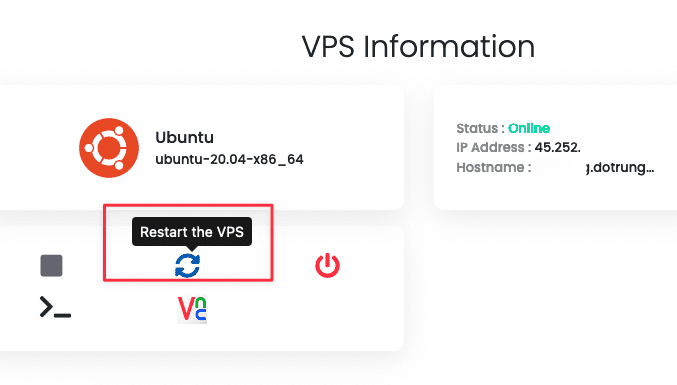
Note: For the KVM VPS service, you must restart the VPS via the Restart button in the interface for the password setup to complete.

If you encounter any difficulties in the process of using VPS at AZDIGI , please contact the Technical Department directly through the information below:
- Email : support@azdigi.com
- Ticket : http://bit.ly/azdigi-ticketkythuat
- Hotline: 028 888 24768
./.

