Install paid SSL on LarVPS
In this article, AZDIGI will guide you through adding a paid SSL certificate to your website using LarVPS simply with just a few steps. Specifically, I will install an SSL certificate from the GoGetSSL® SSL provider, please follow along.
I. Overview
What is an SSL certificate?
SSL is a type of certificate that helps encrypt information on devices or applications that support encryption using SSL certificates. SSL certificate will have Private Key and Public Key, in which Public Key will be installed in terminal applications that browsers or other applications can access. Private Key will be installed in applications that handle receiving data.
Its purpose of operation is like the key to helping decrypt the data sent from the terminal, which is also encrypted through the Public Key.
Who is GoGetSSL?
GoGetSSL belongs to EnVers Group SIA based in Latvia, established in 2009 as a company that provides SSL certificates globally. Today, this is a famous and trusted brand in the CAs (Certificate Authority) list. Up to now, GoGet SSL has been operating for more than 10 years with more than 77,000 customers and partners in 226 different countries and territories.
In Vietnam, where can you find Goget SSL?
Among the SSL providers in Vietnam today, only AZDIGI has become a strategic partner with Goget SSL and you can find Goget SSL products here. With a low price but fully meeting the highest criteria of an SSL certificate, Goget SSL is worthy of your experience and has a great security certificate.
And you can refer to GoGetSSL’s paid SSL authentication method
So how to install a paid SSL on a website using LarVPS, please see the steps below.
II. Implementation Guide
To install SSL for your website on LarVPS, you need to follow these 3 steps.
Note: During the implementation process, remember to replace azdigi.cf with your domain name.
Step 1: Prepare SSL Certificate
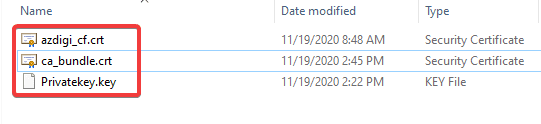
After you have been granted a certificate from Goget, you need to check if the files are complete as below. If it is complete, you can install SSL.
- Certificate: *.crt
- Private Key: *.key
- CACertificate *.crt

Step 2: SSH into your LarVPS server
First, you need to SSH into your VPS as root, if you don’t know how to SSH, you can see the instructions below:
Step 3: Install SSL
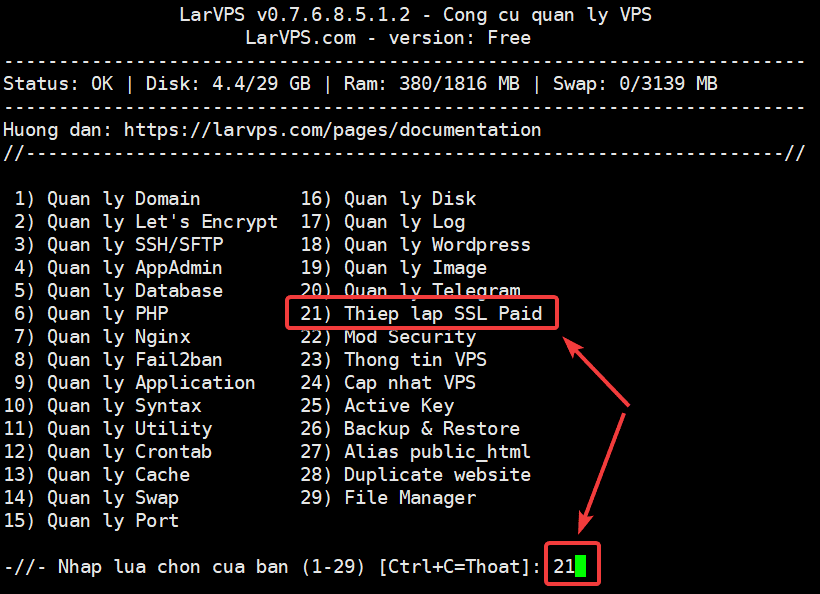
After SSHing into your VPS, type larvps to access the LarVPS menu. At the menu, you notice and type the number corresponding to the function to use.
Now I need to install SSL for the website, I press the key 2 corresponding to the Setup Paid SSL section.
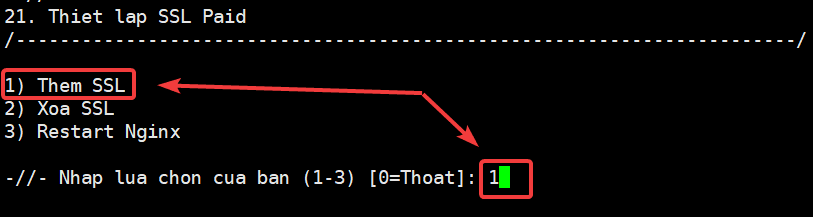
After entering the Setup Paid SSL section, you need to select the number corresponding to the operation you need to use.
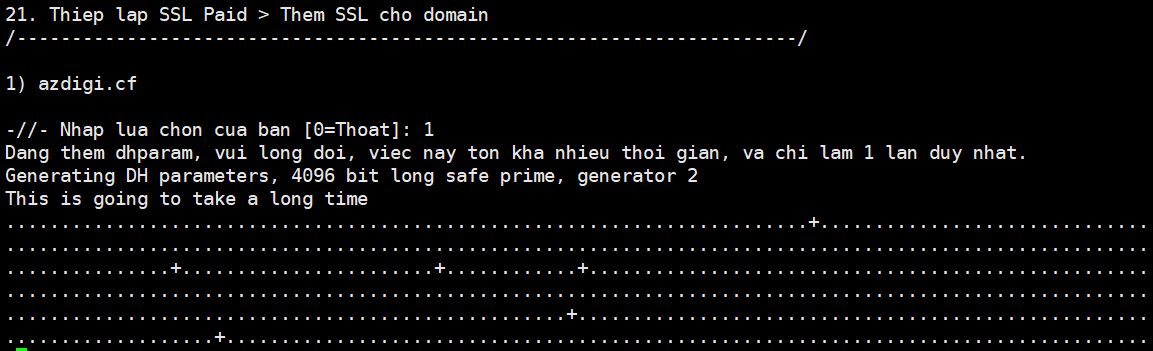
Because I will install a paid SSL on the website, I will type the number 1 corresponding to Add SSL.
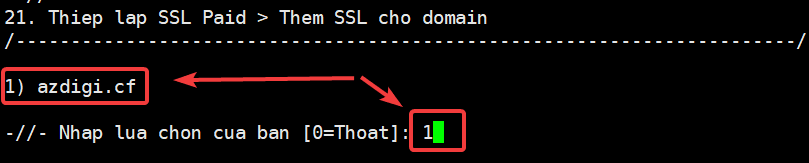
After entering the Add SSL section, continue to select the number corresponding to the website to be installed.
I need to install SSL for a website named azdigi.cf, then I will choose the corresponding number 1 as follows:
After selecting the website to be installed, the system will now need to create an additional partition (path) to store the paid SSL certificate for the website. The process will take about 5-10 minutes, you wait for the system to run until it completes.
Note: at this step, if your website has been installed with Let’s Encrypt free SSL before, the system will ask you to remove the Let’s Encrypt SSL certificate before installing the paid SSL (if you don’t know how to remove it, you can refer to the instructions here)
After running, the system will provide you with a paid SSL configuration path corresponding to the website in the form: /home/azdigicf/azdigi.cf/ssl (this will be the path you need to upload the SSL certificate files)

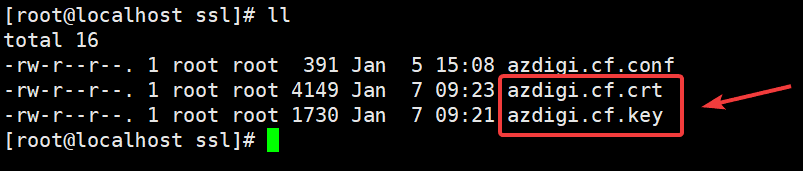
Now you need to upload the SSL certificate file to the path /home/azdigicf/azdigi.cf/ssl. If you leave the default according to the configuration of LarVPS, you need to rename the certificate file correctly with the names azdigi.cf.crt and azdigi.cf.key.
Note: For servers using Nginx, the CA root certificate file (CACertificate *.crt) will be combined with the Certificate file. The file azdigi.cf.crt will have both Certificate and CA root.
You can use software like Filezilla, WinSCP to upload files, after uploading, move to the path containing the file and use the ll command to check the file. As shown below, the upload was successful.
Next, you quickly start the Nginx service with the following command for the system to receive the configuration.
systemctl restart nginx
Step 4: Check the certificate after installation
To more accurately check if your website has successfully installed SSL, you can check more through the 2 methods below.
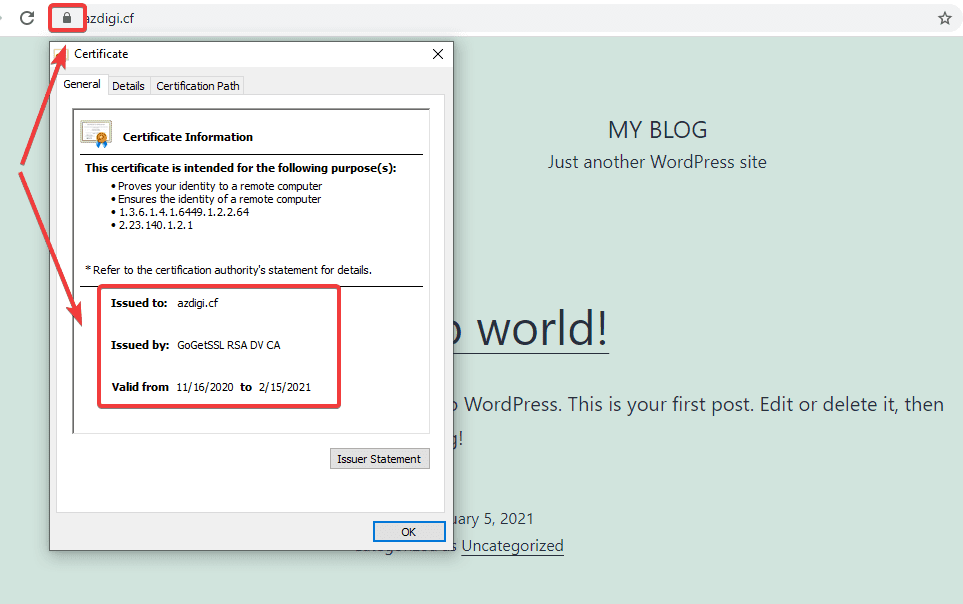
Method 1: Check from the browser
You can access your website in a browser and click on the padlock icon as shown below. It will display which company’s certificate the website uses and specify the issue date and expiration date.
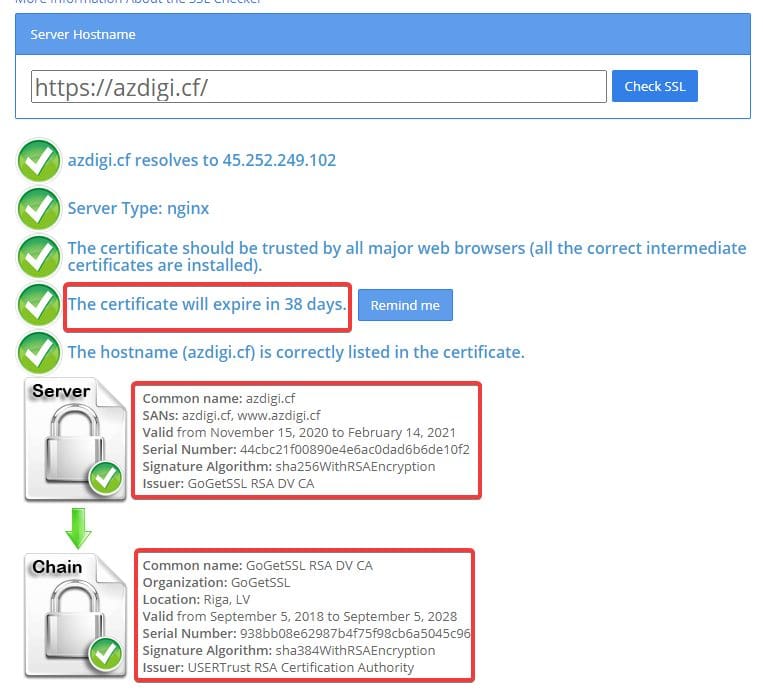
Method 2: Check from the SSL Shopper page
You can access the SSL Checker page by following the link: https://www.sslshopper.com/ssl-checker.html
Then you enter your domain and click Check SSL. At this point, all information about the website’s certificate will be fully displayed as below:
III. Summary
So in this article, AZDIGI has shown you how to install paid SSL on your website using the LarVPS script completed with just a few simple steps. Installing SSL may seem simple, but it can be quite helpful for your website in terms of security as well as being great for SEO. Hopefully, this article will help you to install Let’s Encrypt SSL successfully!
If you find the article helpful, please share it widely. In addition, you can check out some other articles about LarVPS at the link below:
If you need assistance, you can contact support in the ways below:
- Hotline 247: 028 888 24768 (Ext 0)
- Ticket/Email: You use the email to register for the service and send it directly to: support@azdigi.com
About the author

Thạch Phạm
Đồng sáng lập và Giám đốc điều hành của AZDIGI. Có hơn 15 năm kinh nghiệm trong phổ biến kiến thức liên quan đến WordPress tại thachpham.com, phát triển website và phát triển hệ thống.