Nội dung
Hi guys, In this article, AZDIGI will show you how to create a Database on CentOS Web Panel (CWP) for convenience during use or provide you with devs to create a new website.
I. Overview
CentOS Web Panel is a control panel that has both a free version as well as a paid version. Particularly with the free version, you can create user accounts with limited bandwidth depending on the level you want. The big difference is that with the free version, we can’t create a Reseller and don’t have the option to install multiple versions of PHP at the same time.
And in this article, AZDIGI will guide users to create a Database on CentOS Web Panel for convenience during use as well as provide website editors with access to data processing.
II. Create a Database on CentOS Web Panel
To create a Database on CentOS Web Panel, follow these 3 steps.
Step 1: Login to CentOS Web Panel with user account
To log in to CentOS Web Panel with a user account, we just need to access the following link on the browser. With login port of 2083 similar to cPanel.
https://IP:2083/
Remember to change IP to the IP address your CentOS Web Panel server is using.
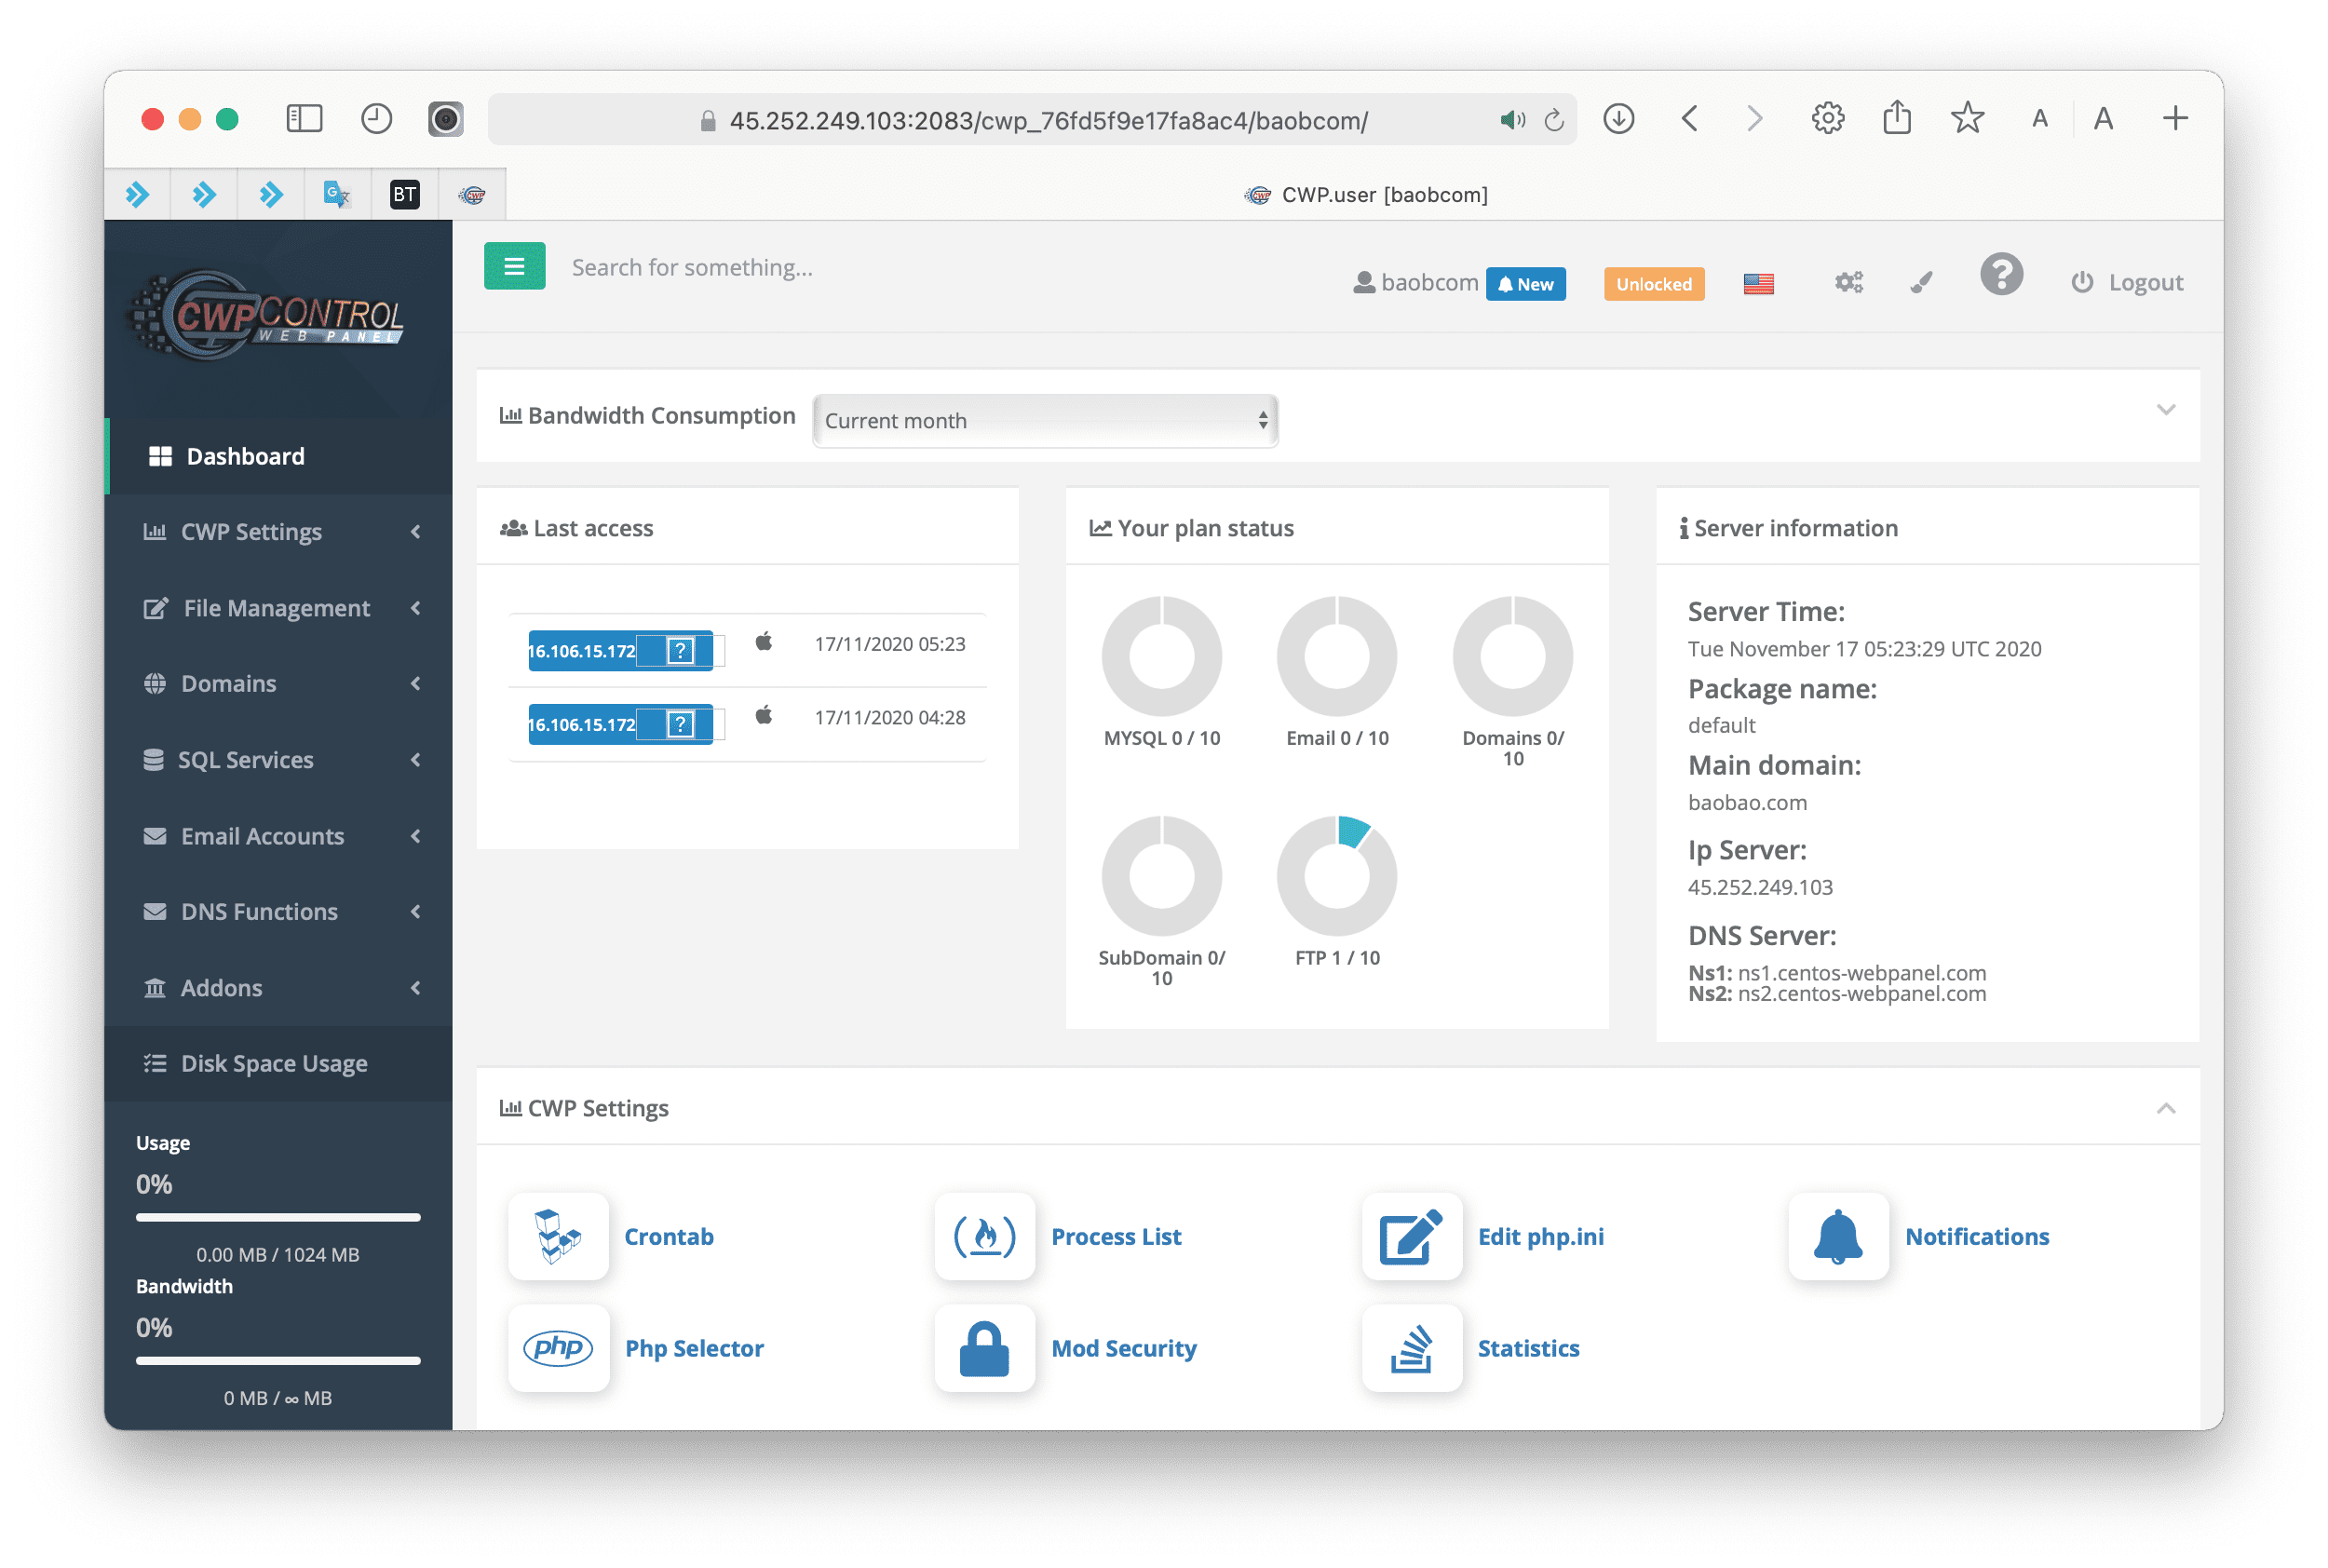
Below is my CentOS Web Panel interface:

We continue with step 2 to create a Database on CentOS Web Panel.
Step 2: Create a Database on CentOS Web Panel
Still at the first interface when logging in to CentOS Web Panel, you scroll down Find the SQL Services feature => select Mysql Manager to enter the database management interface.

At the Mysql Manager interface, we will see the previously created Databases and Users. However, I don’t have anything yet, so I will choose Add database to add a new database.

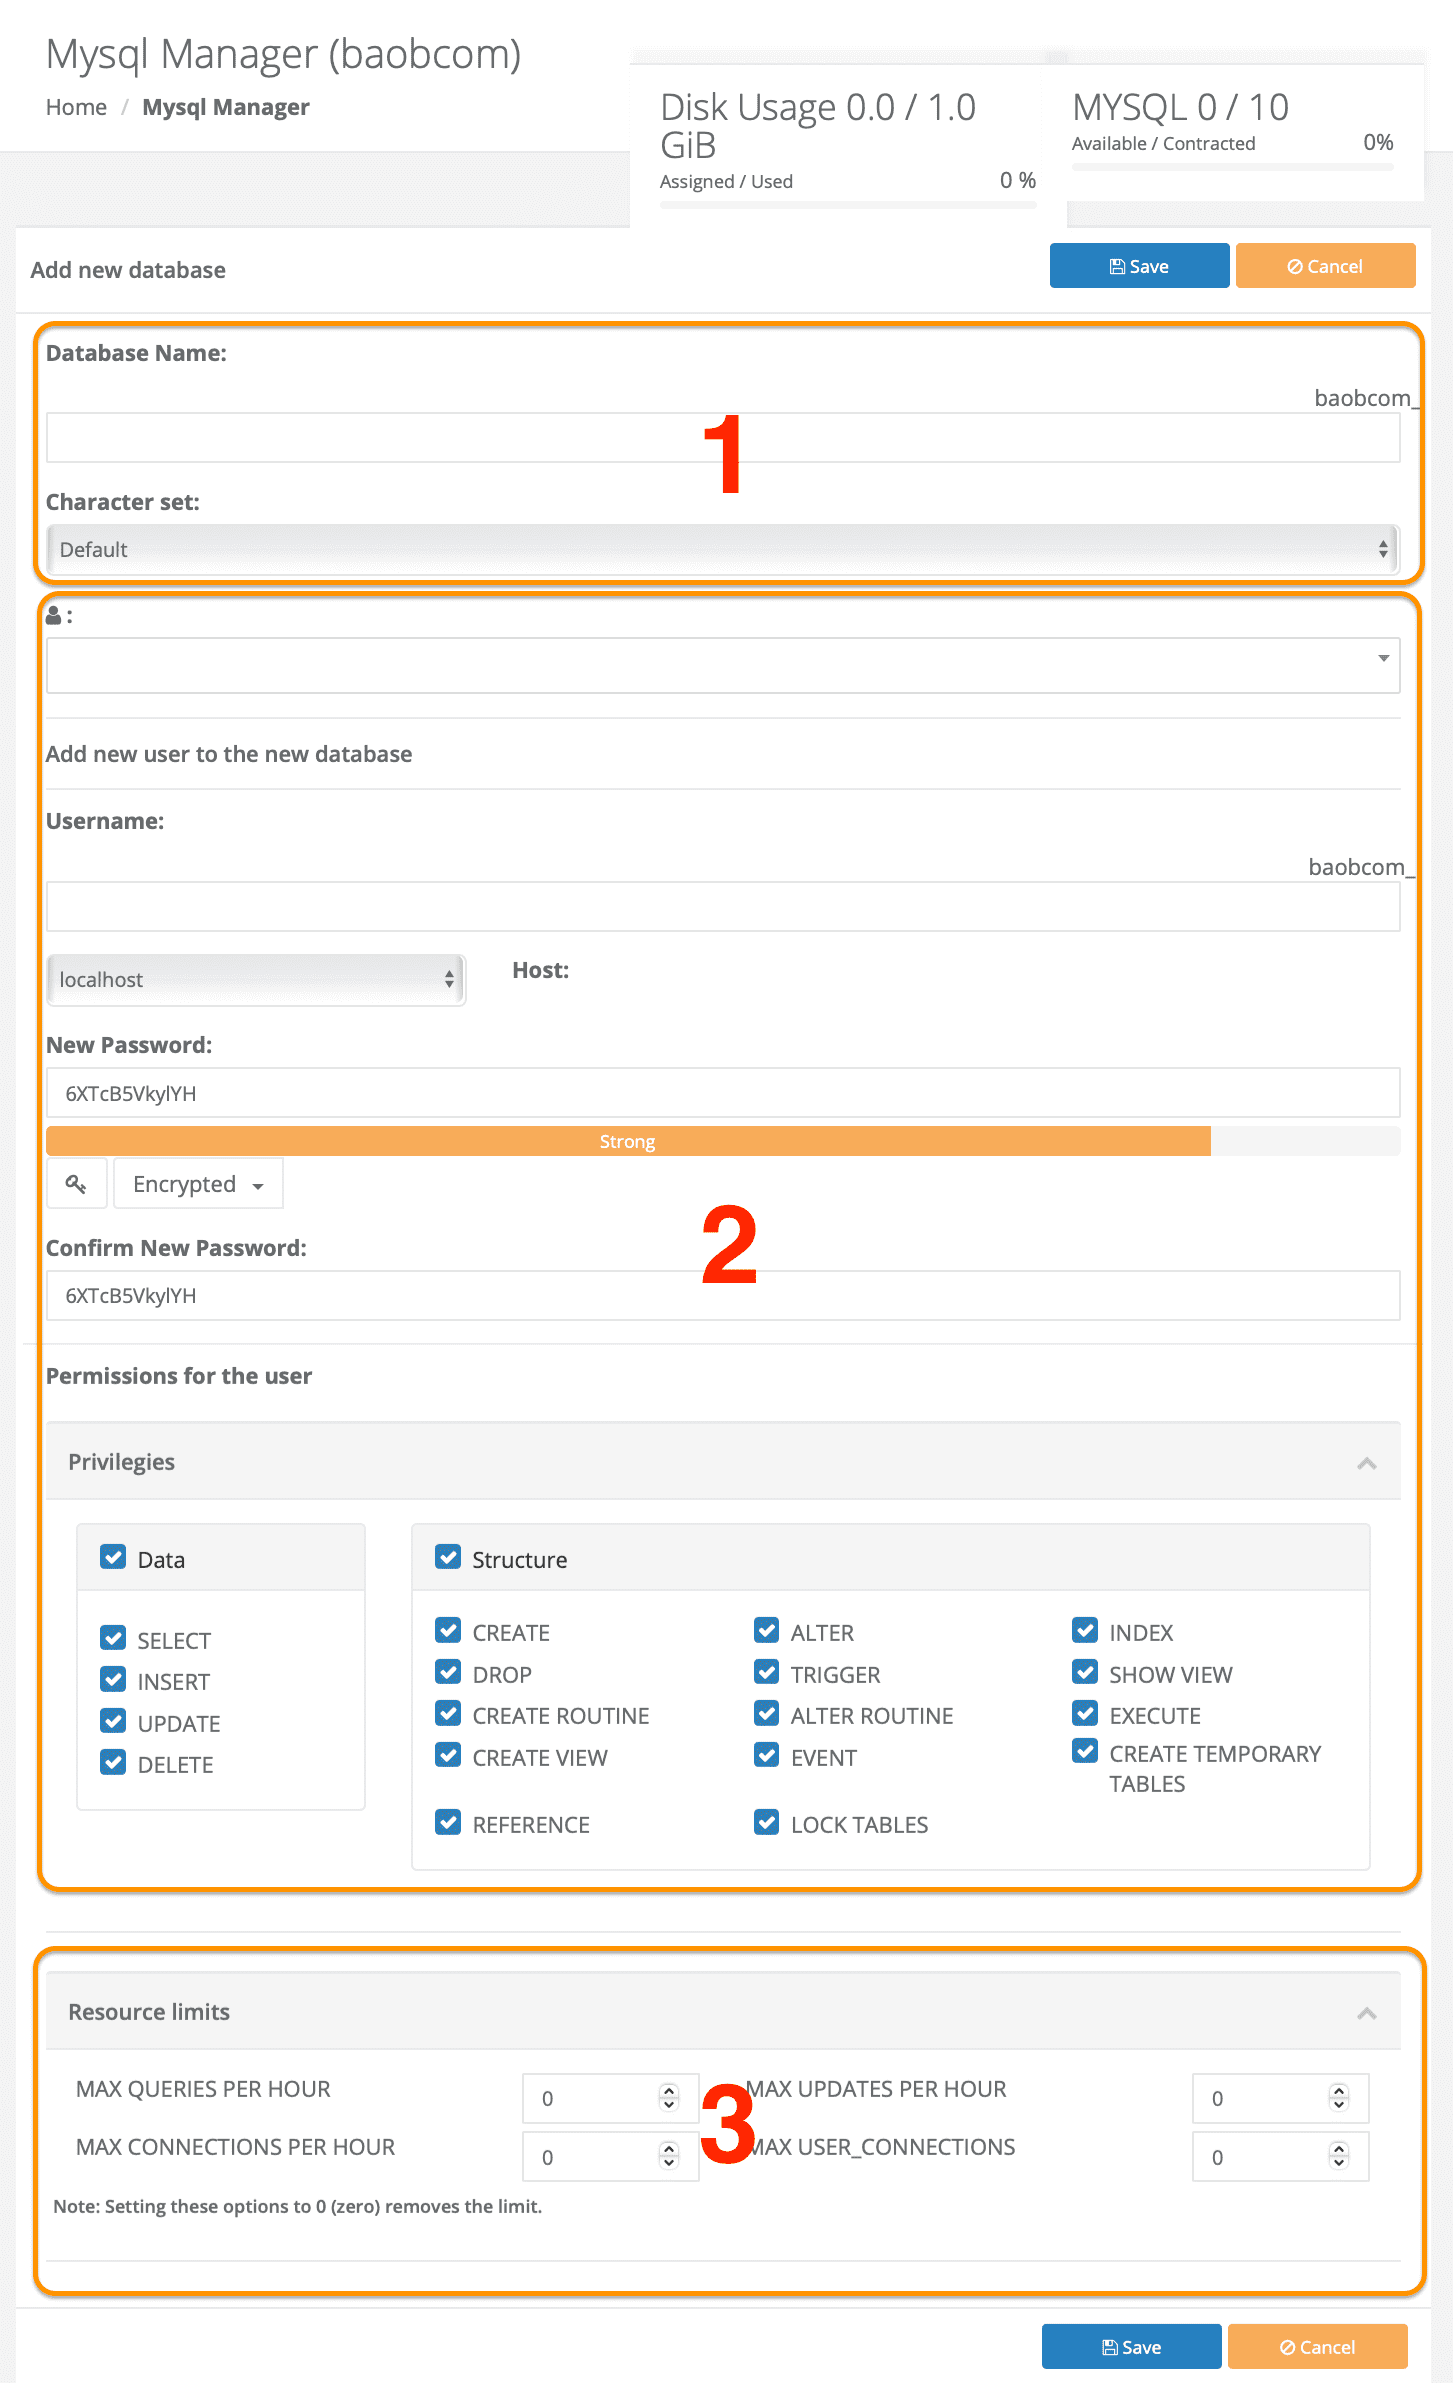
Below is the interface to create a new Database. Here you will see there are 3 areas as shown below:
- Area 1: Database naming area and properties will be created. The database name will be in the form Username_DBname.
- Area 2: The user creation area has access to the Database to be created. And this area you can customize the User‘s permissions, but you should turn on all the permissions as shown below:
- Area 3: Resource-limited area for Database. If you just use it normally, you should leave it the default, without limit.

After you have entered all the information you need, select Save to save and create it.
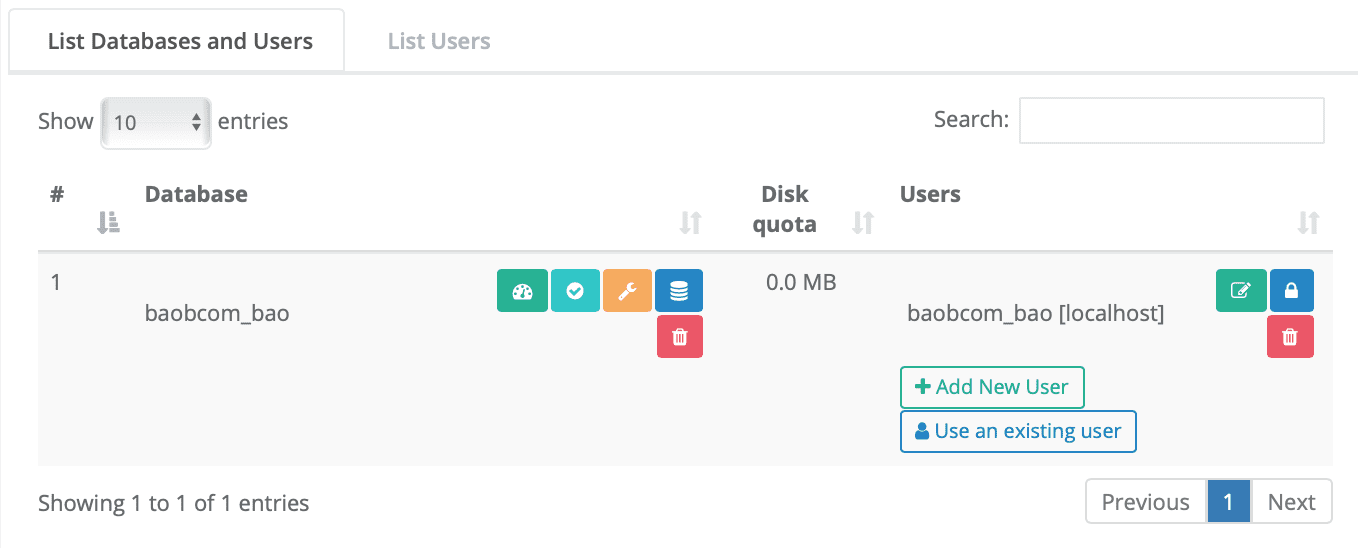
After creating, you will see the Database has appeared in the management list. At this interface you will see some quick action buttons.
- Database Optimization.
- Check Database.
- Fix Database error.
- Backup Database.
- Delete Database.

If you want to quickly access phpMyAdmin on CentOS Web Panel, you just need to visit the following link. And use the Username/Password information to login.
https://IP:2087/pma/index.php
Remember to change IP to the IP address your CentOS Web Panel server is using.
So we have completed the steps of creating a Database on the CentOS Web Panel.
III. Summary
So with just two basic steps, you can create a Database on CentOS Web Panel successfully and can be used immediately.
Hope this article will be of help to you. Wishing you success!
See more useful articles about CentOS Web Panel at the following link:
If you need assistance, you can contact support in the ways below:
- Hotline 247: 028 888 24768 (Ext 0)
- Ticket/Email: You use the email to register for the service and send it directly to: support@azdigi.com .

