Nội dung
In this article, AZDIGI will show you how to quickly upgrade Apache on Centos Web Panel with just a few simple steps without using complex command lines. So please continue to read the article.
I. Overview
Apache is a free and open source Web Server software that accounts for about 46% of the worldwide website market share. The official name of Apache is Apache HTTP Server, operated and developed by the Apache Software Foundation. Apache is one of the oldest and most trusted web servers, the first version was released more than 20 years ago, in 1995.
Although Apache is called a web server, it is not a physical server. It is a piece of software that runs on that server. Its job is to establish a connection between the server and the user’s browser (Firefox, Google Chrome, Safari…). Then transfer files back and forth between them (two-way client-server architecture). Apache is a cross-platform software that works well with Unix and Windows servers.
How Apache works
When a visitor loads a web page on your website, for example, you go to the browser and type in the name of a certain website, the user browser will send a request to upload that website to the server and Apache will return the result with all the files that make up the website (images, text, etc). The server and client communicate via the HTTP protocol, and Apache is responsible for ensuring this process goes smoothly and securely between the client and server.
II. Implementation guide
To upgrade/downgrade the Apache version, follow these 3 steps:
Step 1: Check the current Apache version
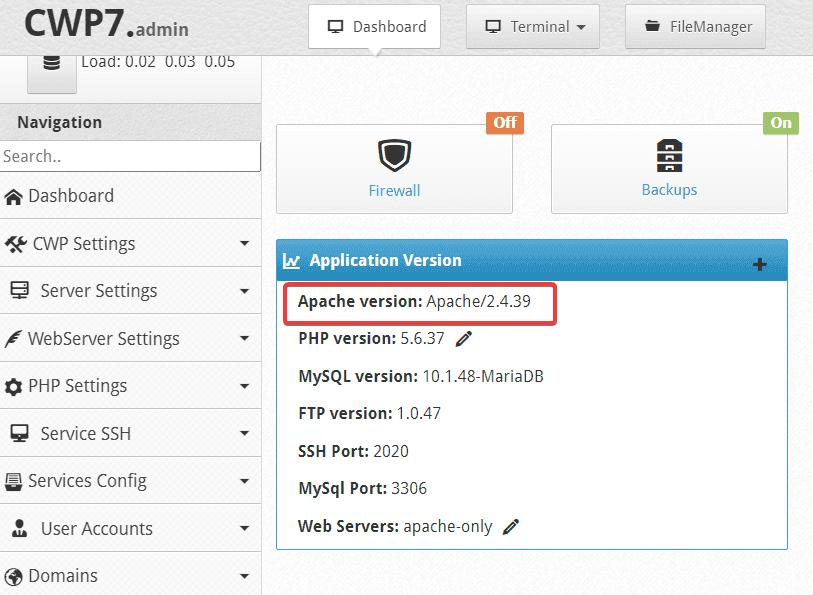
With CWP, you can check quickly by going to the homepage interface => find the Application Version section as shown, the screen will show the services running on the VPS and the version of that service.
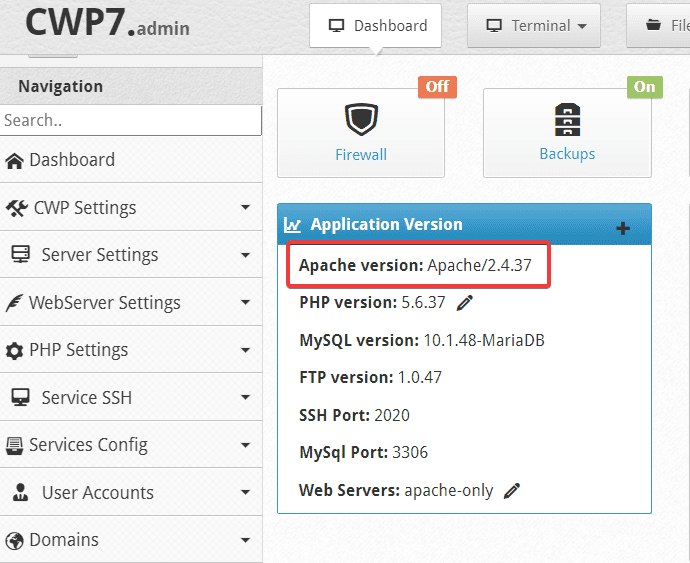
As shown above, Apache is currently running version 2.4.37.
Step 2: Upgrade/Downgrade Apache Version
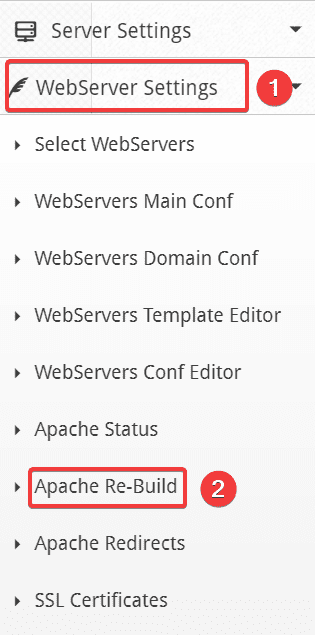
At the main interface, click Server Settings => Apache Re-Build
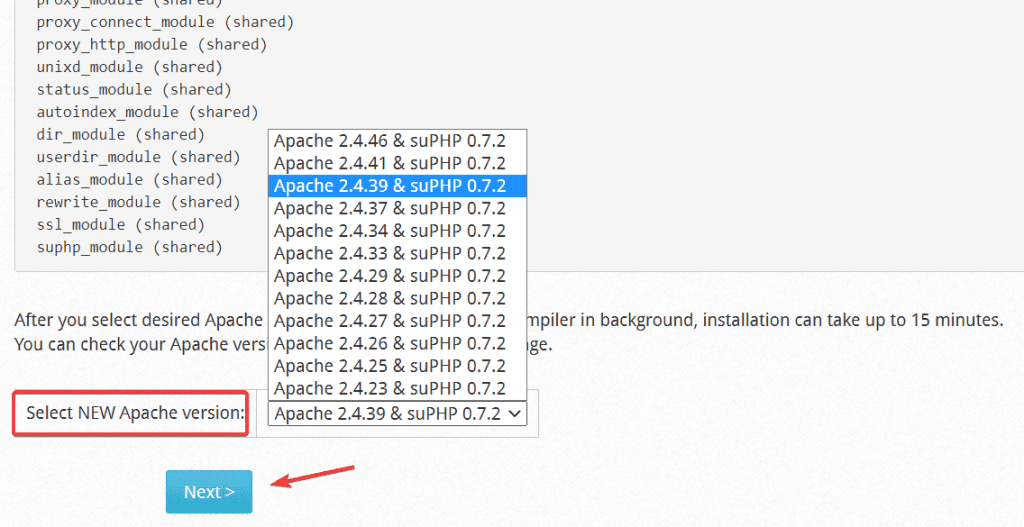
At the next interface, in the Select NEW Apache version section, you need to select the new version to upgrade or downgrade. I will choose to upgrade from Apache 2.4.37 to Apache 2.4.39
After selecting the version, click Next
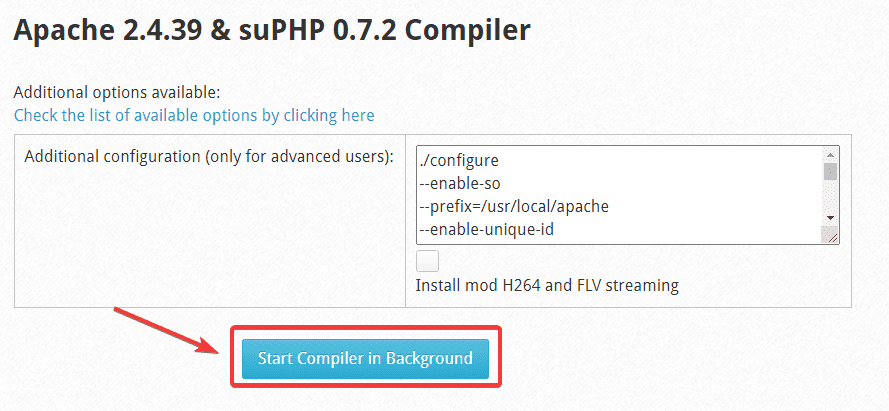
Next, click Start Compiler in Background.

The above message means that the system has started to install and is running in the background, now you can exit and continue to step 3.
Step 3: Check the installation process
Method 1:
You can SSH into the VPS and use the tail -f /var/log/apache-rebuild.log command to monitor the execution.

The system shows the message that Apache Rebuild Completed is successful.
Method 2:
In addition, you can see if the process is complete by going to the notification section in the CWP interface as shown below:
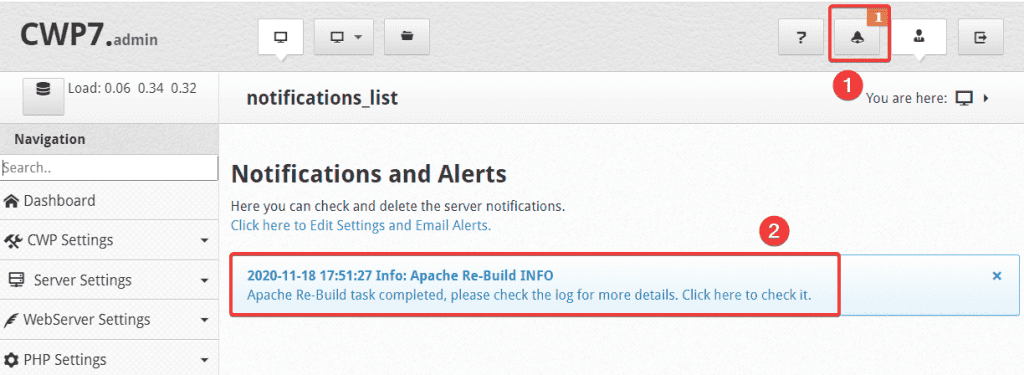
The system displays the message Apache Re-Build task completed that you have successfully upgraded.
So I have successfully updated Apache 2.4.37 to Apache 2.4.39 complete.
III. Summary
So AZDIGI showed you how to quickly upgrade the Apache version on a server using CWP with just a few simple steps. Regularly upgrading to new versions will help your VPS work more stable and patch some holes left in previous versions. Hopefully, through this article, you can better understand what an Apache Web server is and help you gain more knowledge to be able to manage your VPS well.
If you find the article helpful, please share it widely! You can refer to other articles about CWP at the link below:
If you need assistance, you can contact support in the ways below:
- Hotline 247: 028 888 24768 (Ext 0)
- Ticket/Email: You use the email to register for the service and send it directly to: support@azdigi.com

