Nội dung
How to copy Database on phpMyAdmin with 2 steps.
Introduction
In this article, AZDIGI will show you how to copy a Database directly on the phpMyAdmin interface with just a few steps. Here are some typical cases that you should copy before operating:
- When you need to edit the website.
- When you need to clone the content of website A to website B.
Implementation Guide
Note: You should only copy the database this way if your database capacity is about a few dozen MB. If the database is up to several hundred MB, you should export the database according to the instructions below and then import it again later.
Step 1: Login to your phpMyAdmin
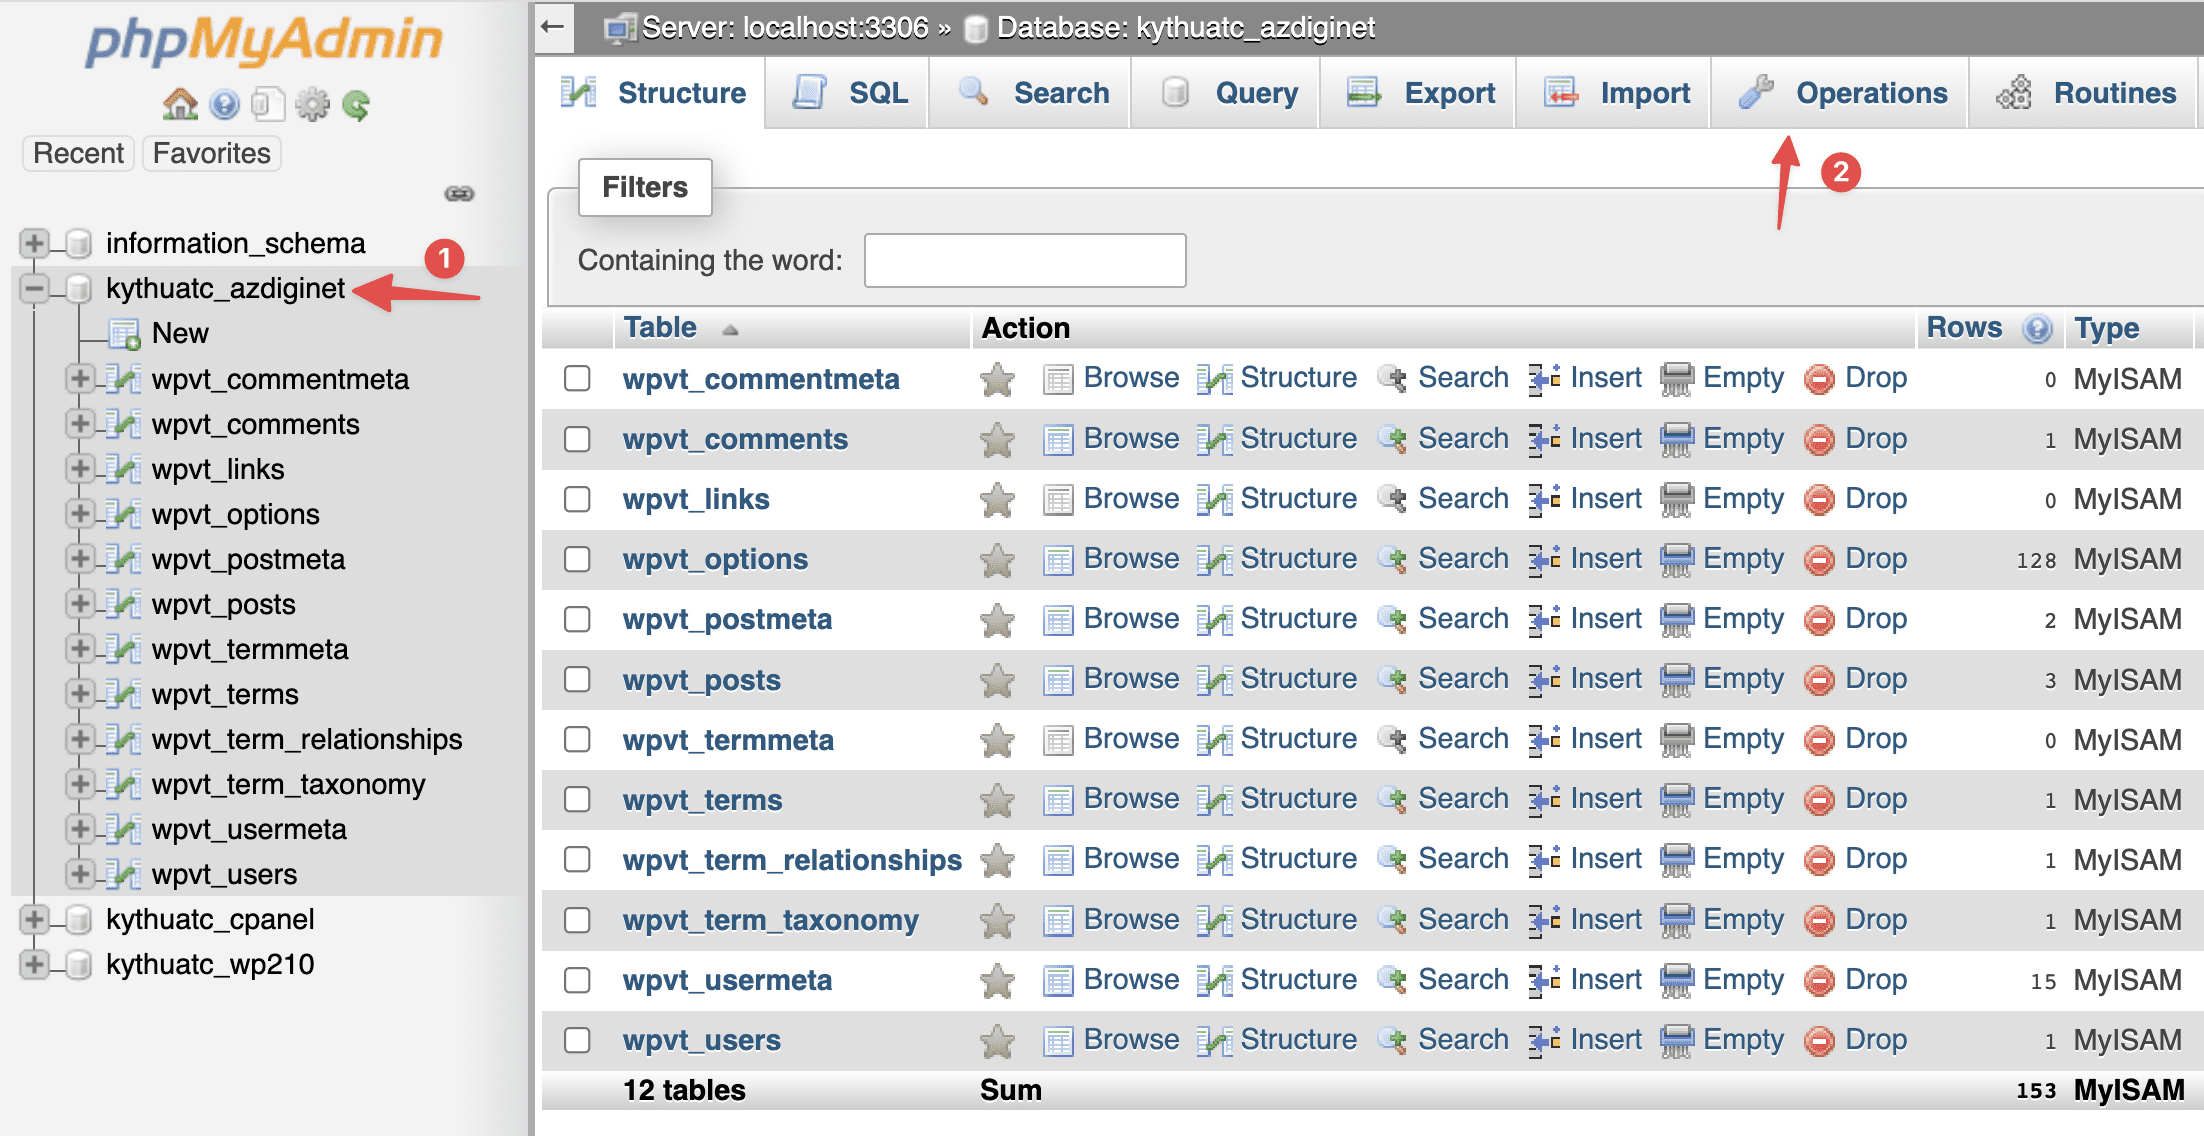
At your phpMyAdmin interface, in the left column, you need to specify the Database to copy, for example, I need to copy database kythuatc_azdiginet, then I will click on kythuatc_azdiginet (1) >> Operations (2)
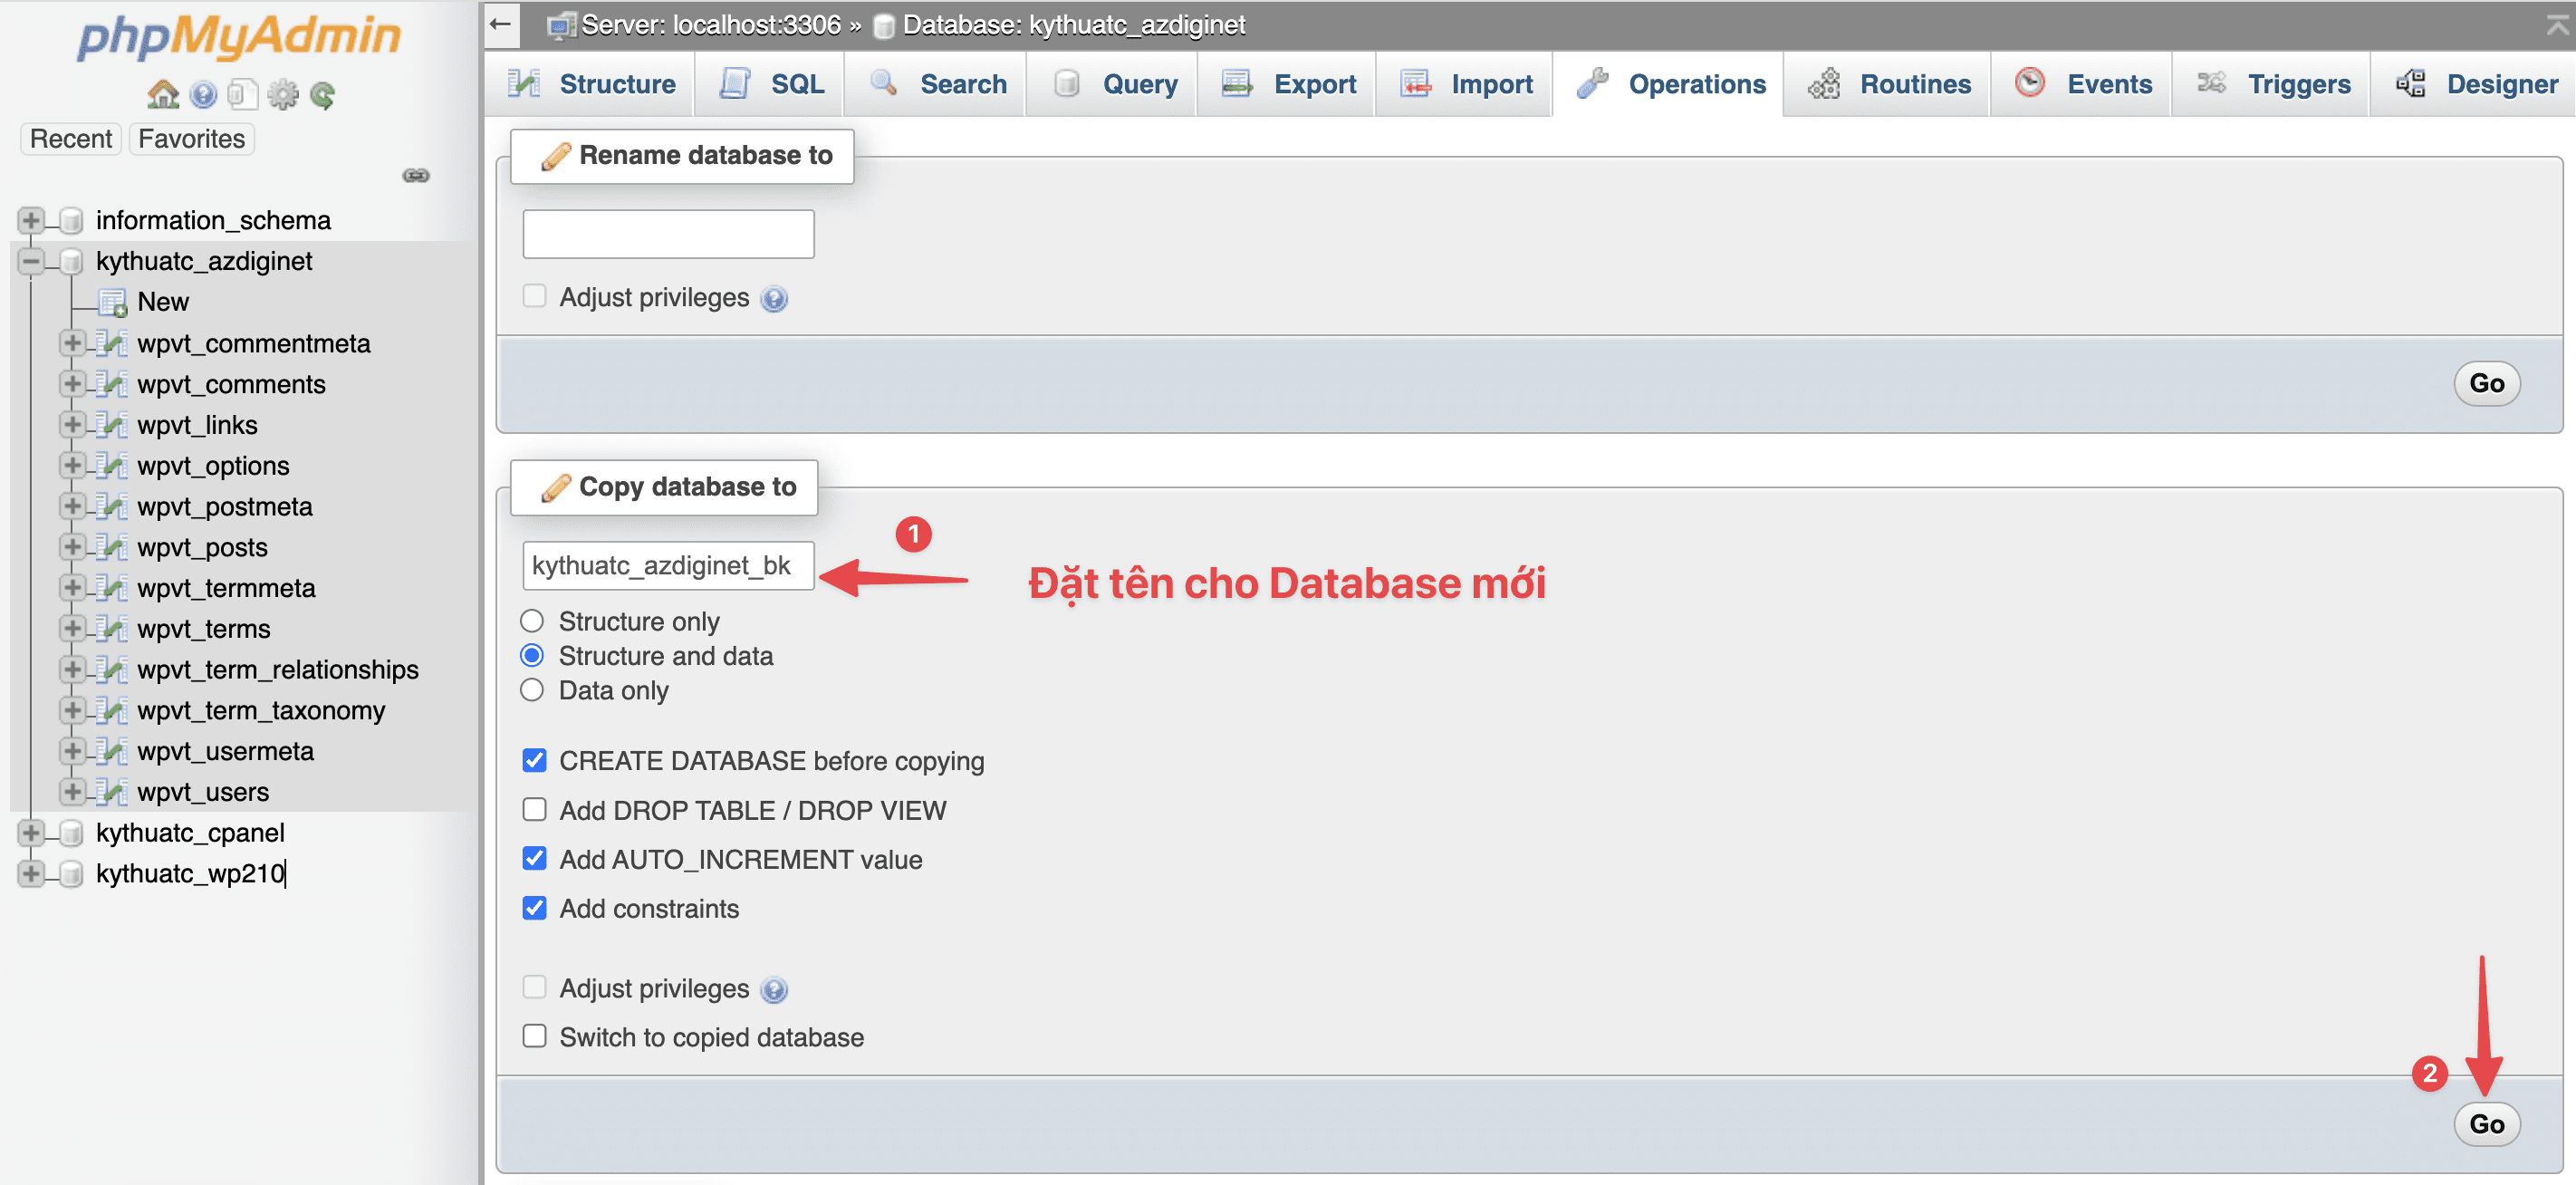
In the next interface, scroll down to the Copy database to section, enter the new Database name when copying and click Go to start the copy process.
Note: The new database name must be placed according to the user host structure in front of the Database name, for example, user_name_database.
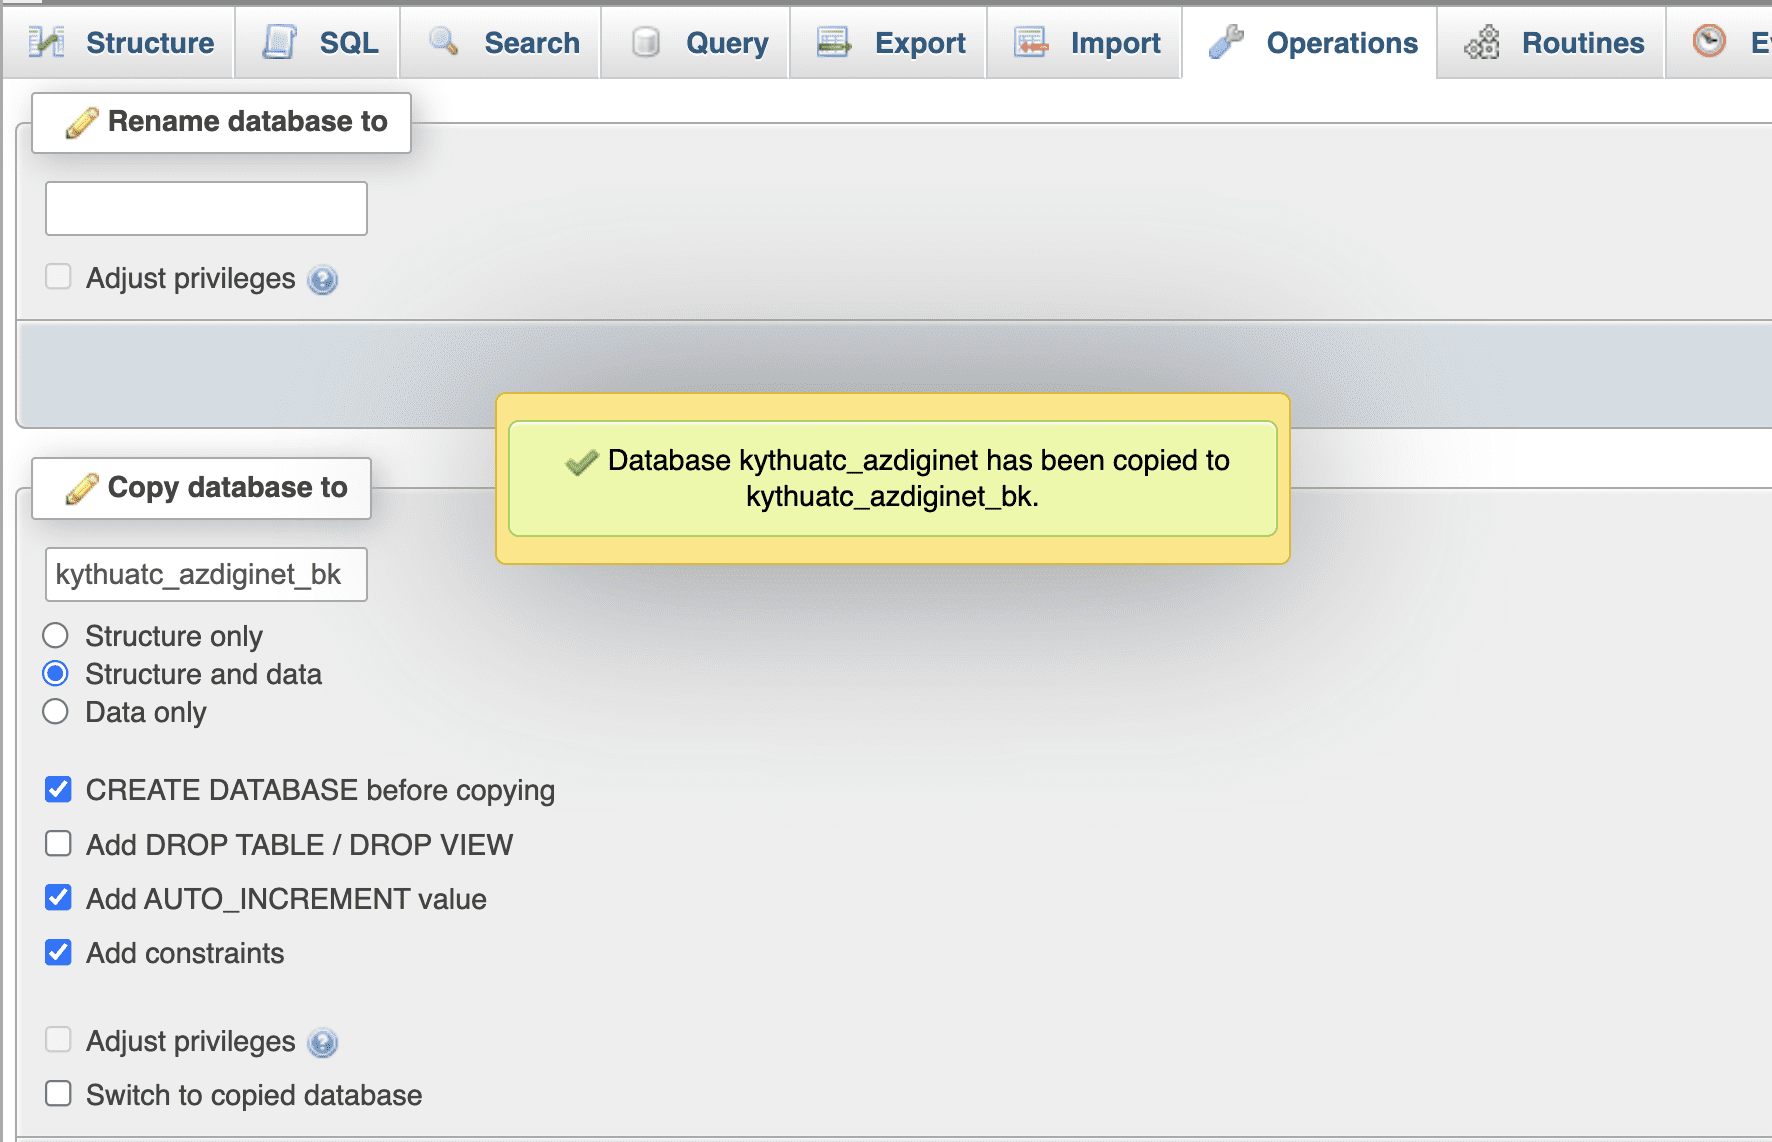
The copy process is fast or slow, depending on the size of the database. When the copy is successful, you will receive a message as shown below:
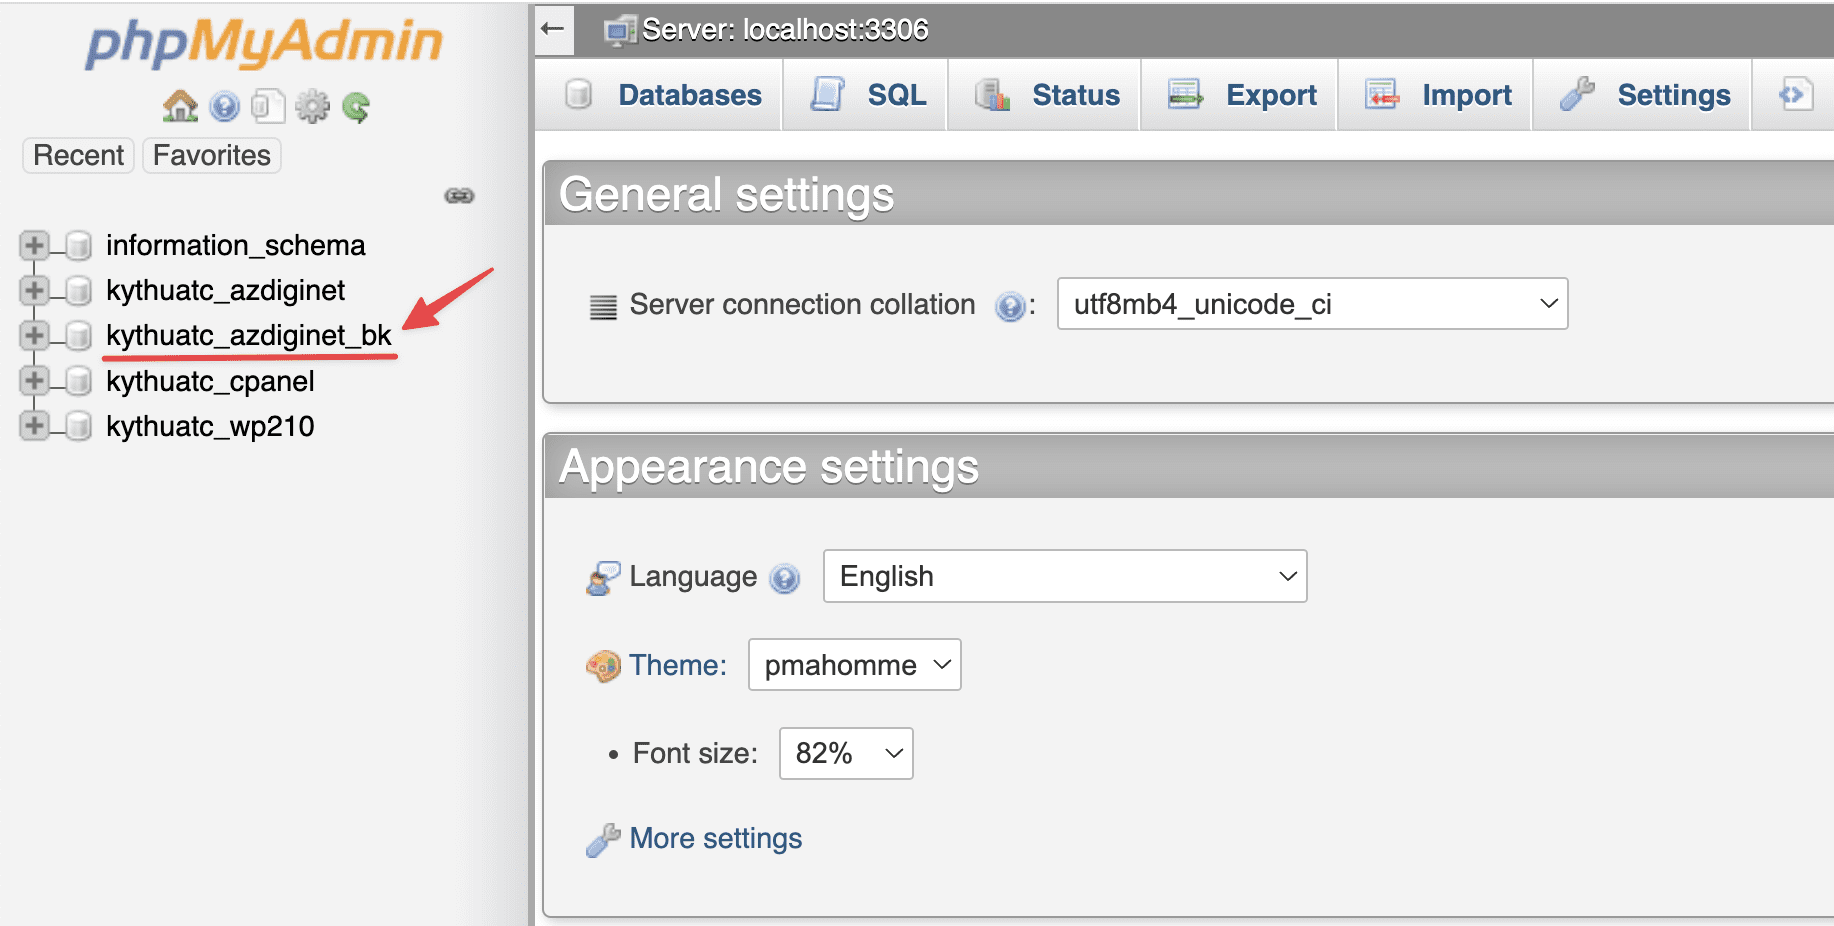
So I have copied out a new database named kythuatc_azdiginet_bk, and have the same data as database kythuatc_azdiginet.
Step 2: Create a user and assign permissions to the database
If you need to clone website A to website B, you should create a new User Database and assign permissions to it with the database you just copied.
- Create the new user
At the cPanel interface, go to MySQL® Databases and scroll down to the Add New User section to create a user.
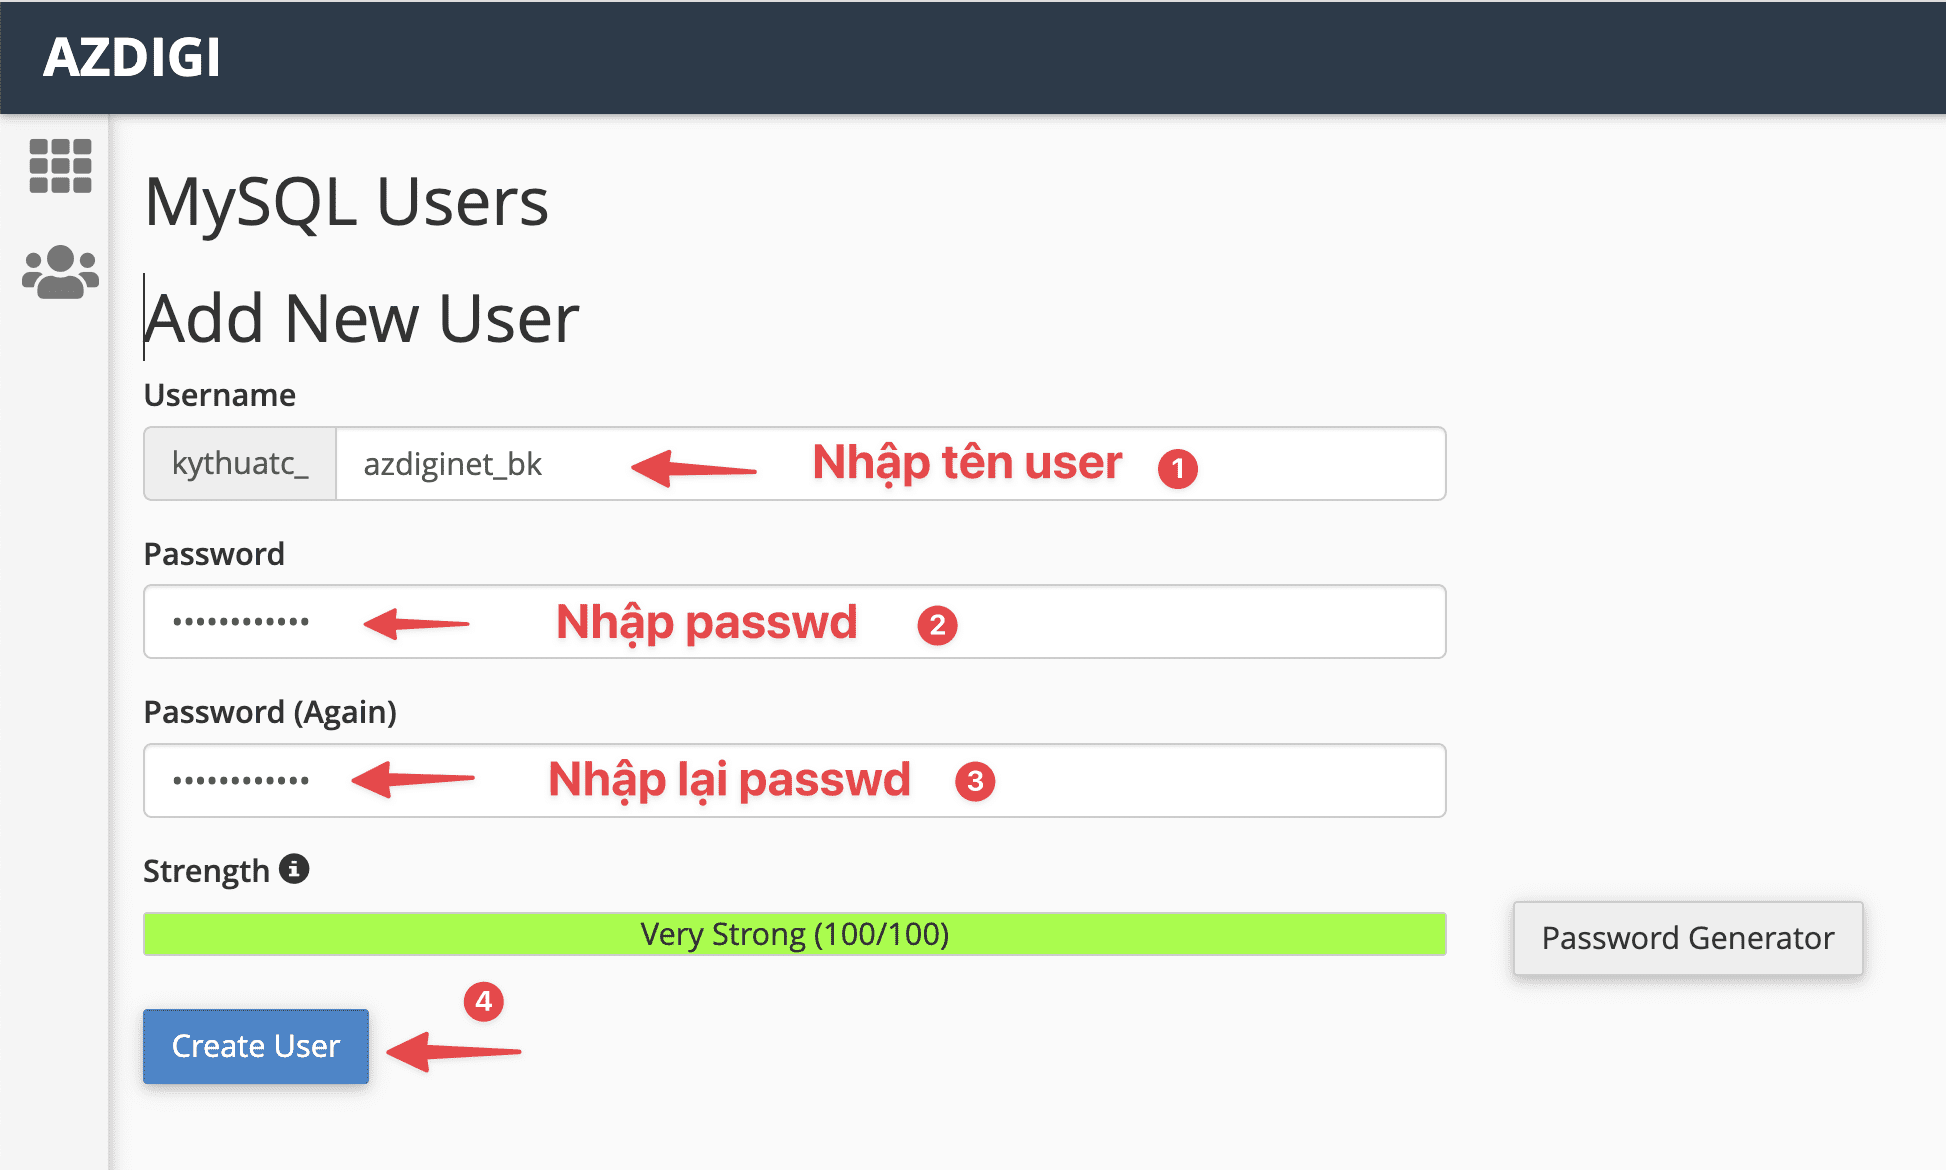
If successfully created, you will receive the message:

- Assign rights to use Database
After creating, you need to assign the user the right to use the database. You access MySQL® Databases, scroll down to the Add User To Database section.
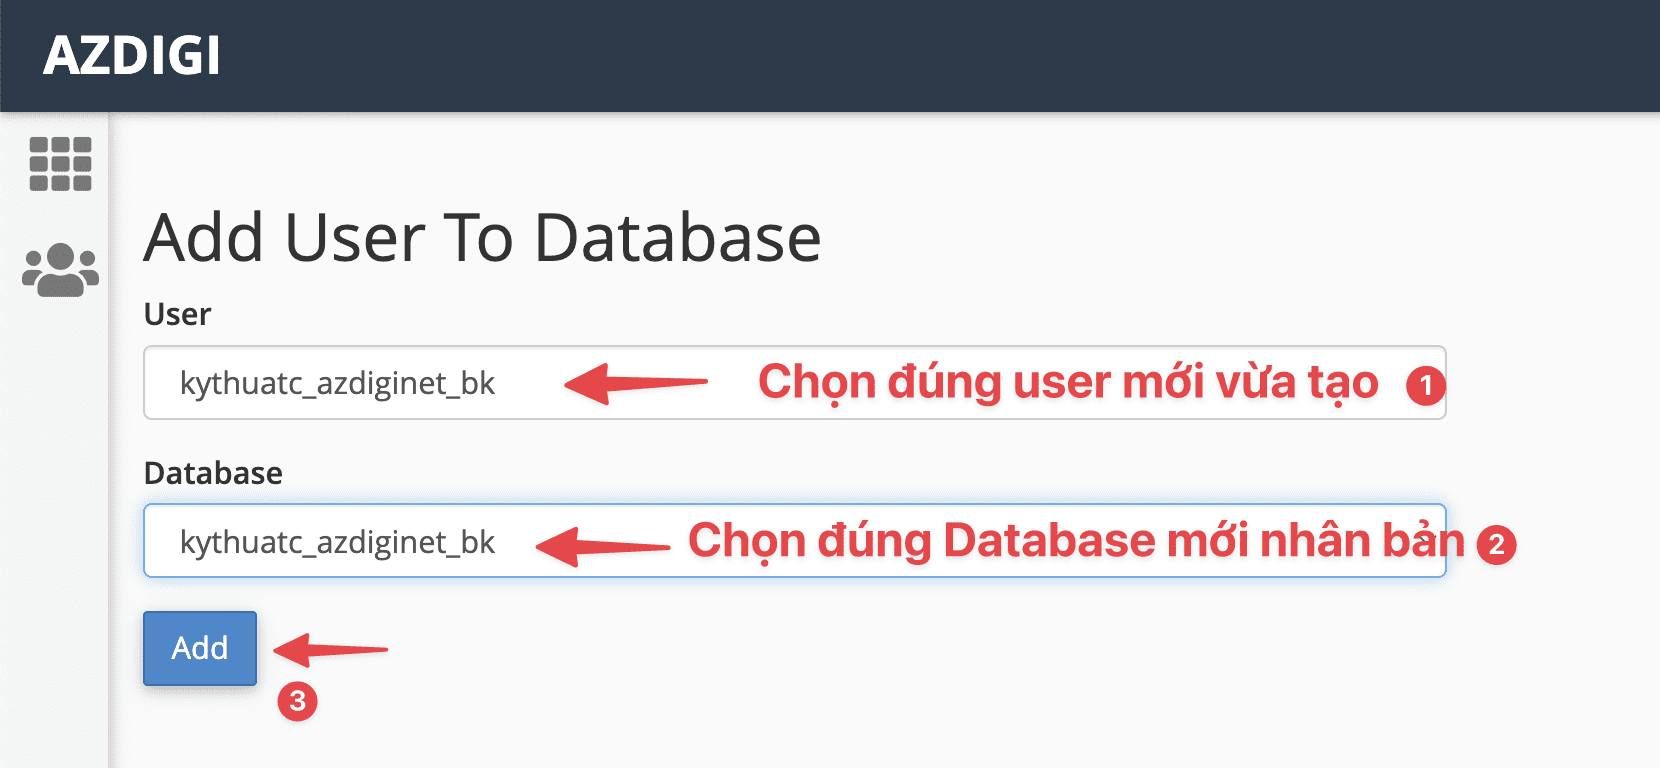
Next, select ALL PRIVILEGES to assign full permission. If you need to turn off any permission, you can untick it.
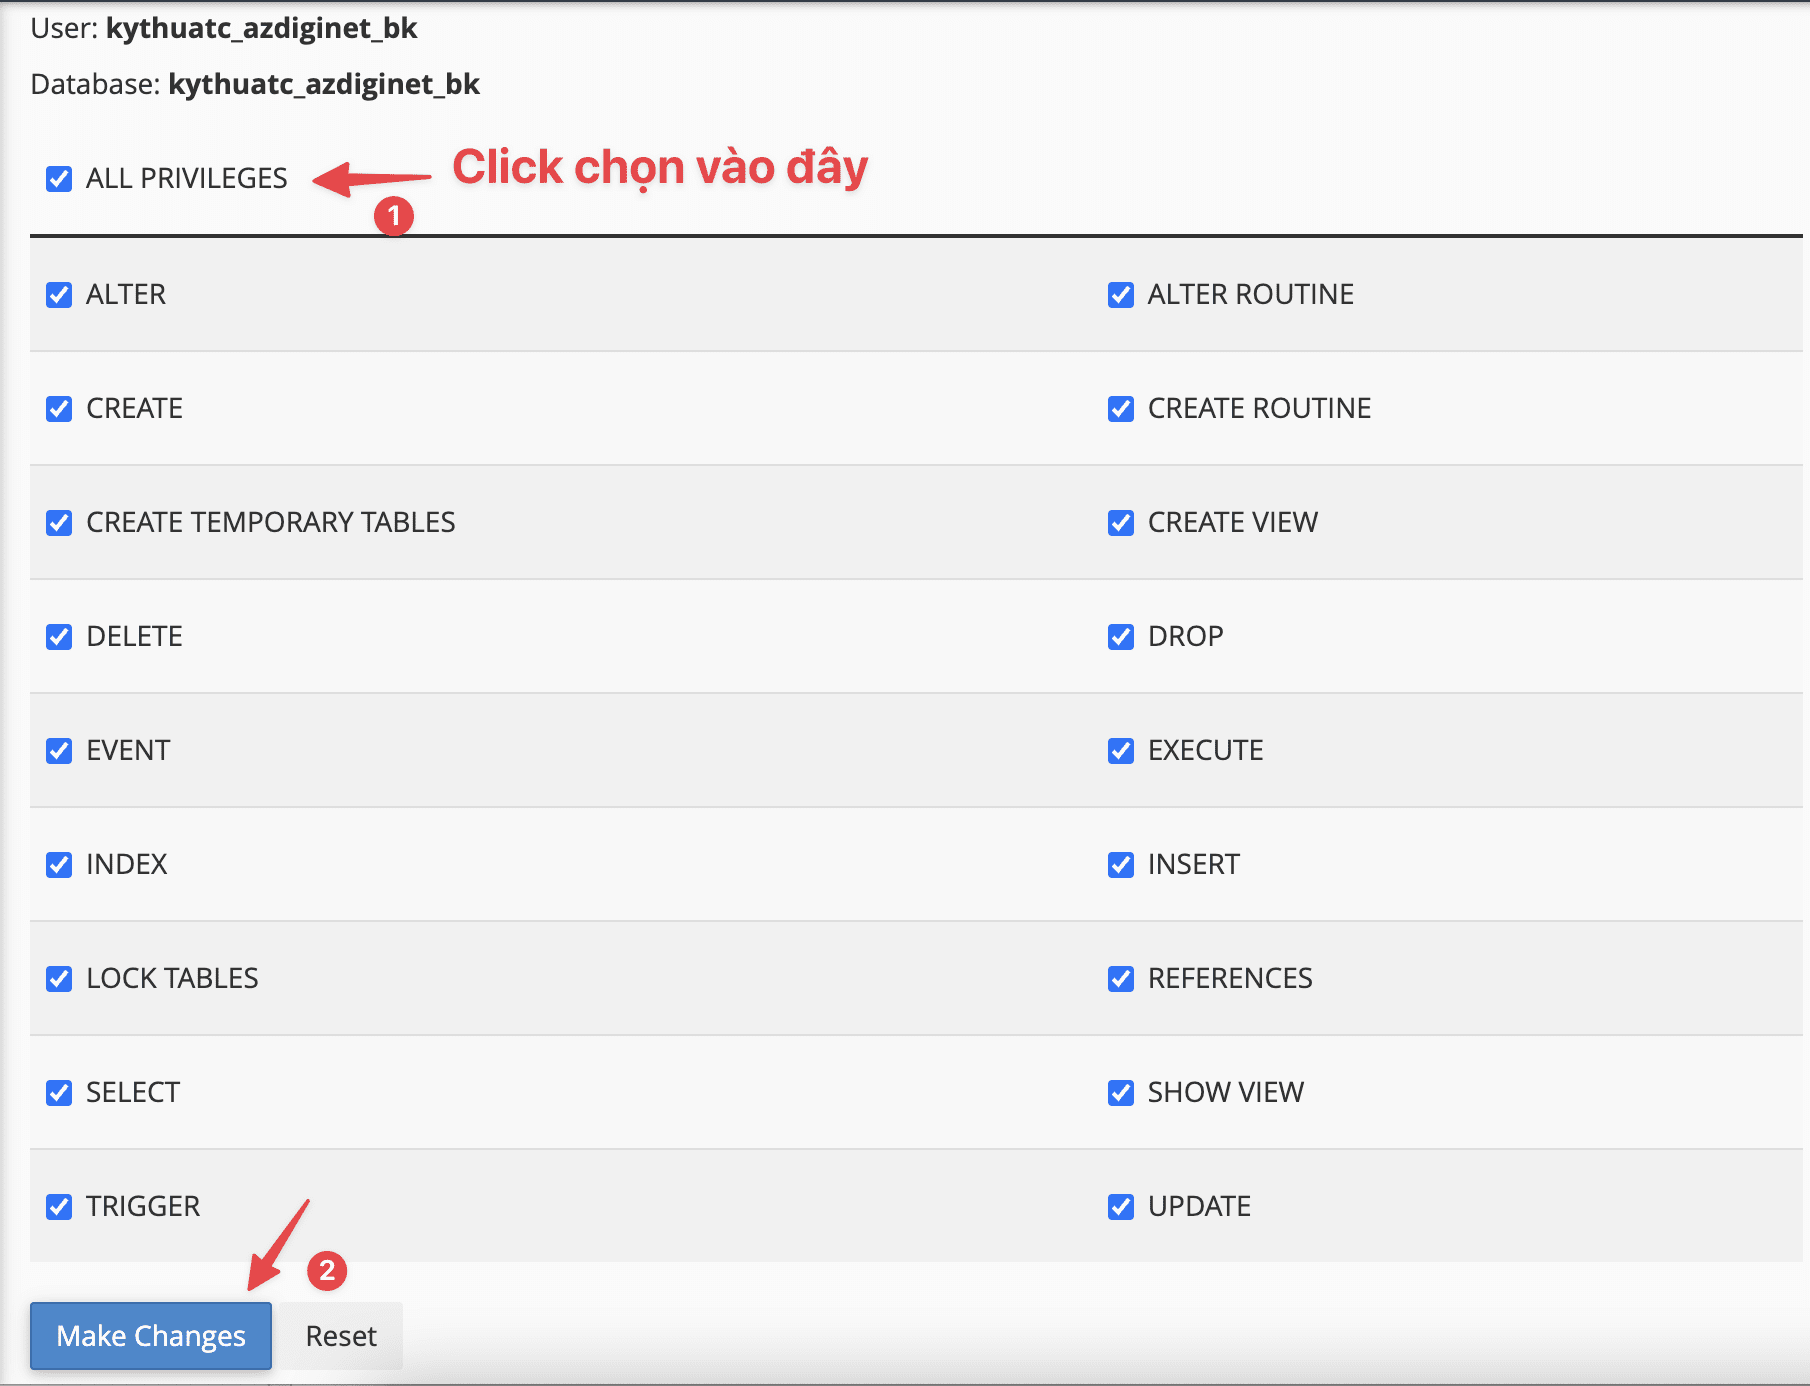
Assigning permissions successfully, the screen will display the message:

That’s it, all that remains is for you to configure the information on the website to use it.
Wishing you success!

