Nội dung
On CyberPanel, there is a built-in feature that transfers users from one CyberPanel server to another (Migration CyberPanel to CyberPanel).
I. What is migration CyberPanel to CyberPanel?
This feature that helps transfer users between CyberPanel servers together is called Remote Transfer but commonly referred to as Migration CyberPanel to CyberPanel, this extremely powerful feature will save you a lot of time and effort in transferring some or all users/websites from the old server to the new server.
The backup and restore process is completely automatic, you just need to do a few basic steps and let the server do its work.
All of the following data will be migrated to the new server:
- Source code
- Database
- SSL
- Entire configuration settings
- And others…
Let’s see the next part of the article to know how to perform migration CyberPanel to CyberPanel.
II. Use migration CyberPanel to CyberPanel feature
In this article, I will call my two CyberPanel servers: a source server (push users) and a destination server (server will receive users).
To use this feature, we need to follow these 3 steps.
Step 1: Access the CyberPanel interface from the destination server
To access CyberPanel, we need to access with the following path:
https://IP:8090
In there, IP is your destination server IP and source server IP.
Below is the CyberPanel interface on my server:
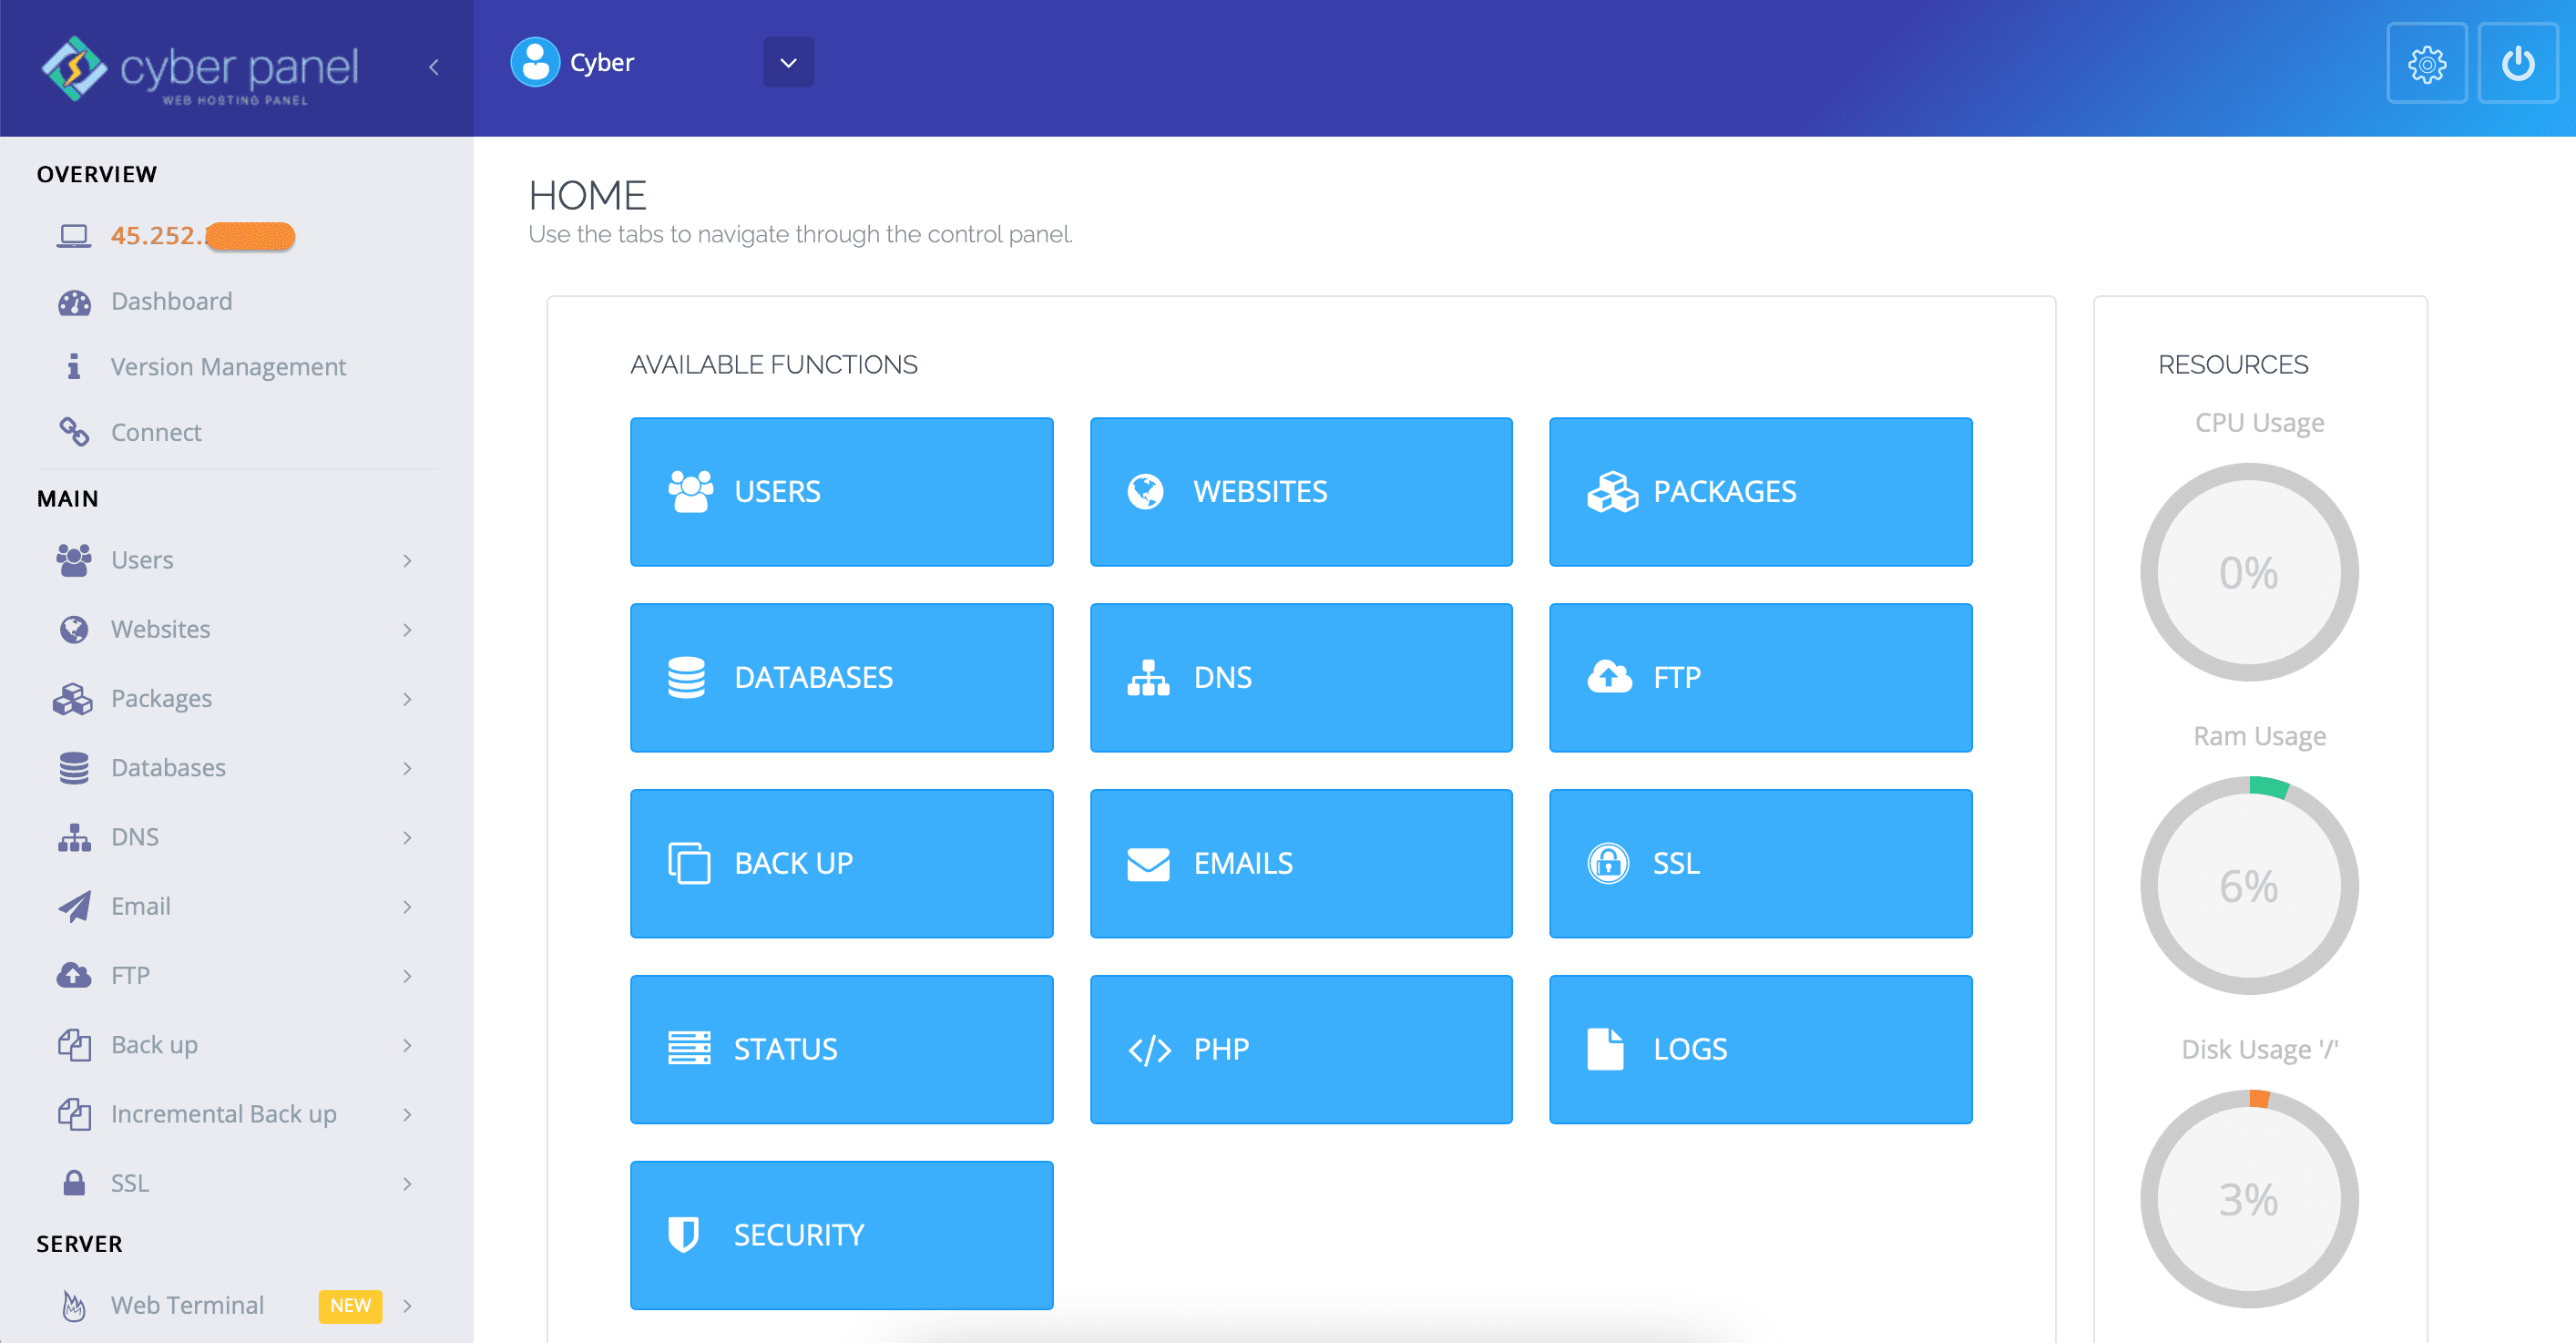
After accessing the CyberPanel interface on the two servers, we continue to step 2 to enable the API Remote Transfer on the source server.
Step 2: Enable API Remote Transfer on the source server
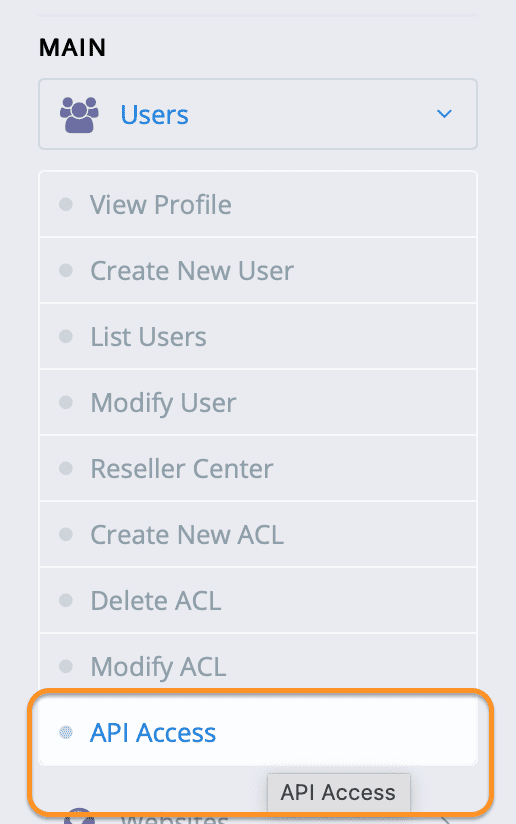
At the source server, you access User > API Access feature as shown below:
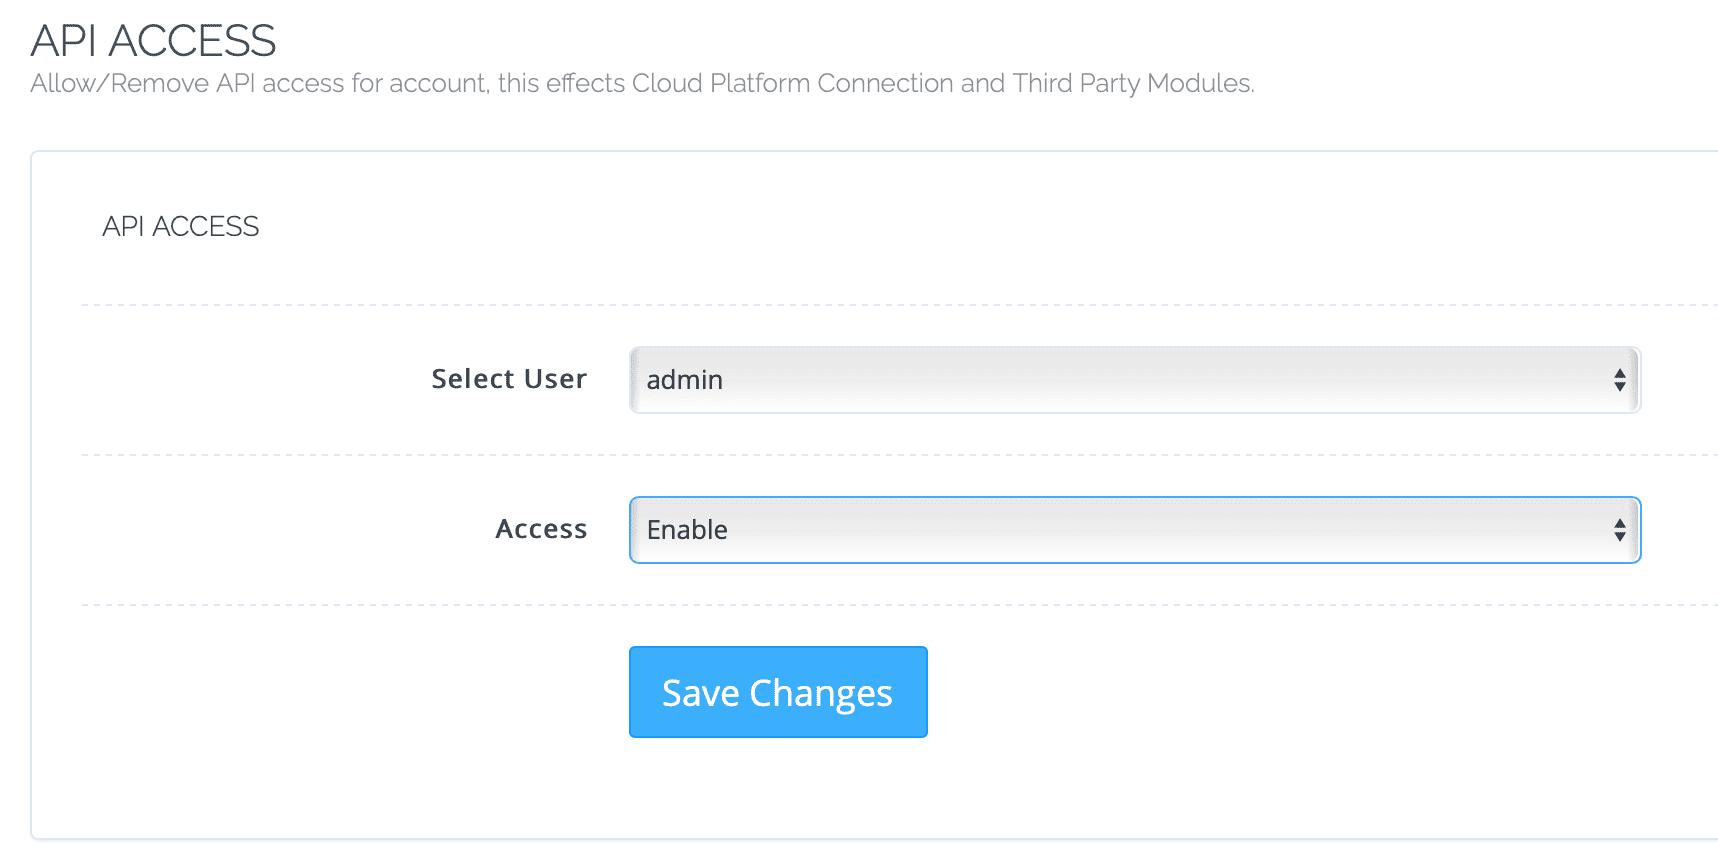
Next, select User as Admin and access permission as Enable. => click Save Changes.
Next, we come to step 3, the final step in migrating CyberPanel users to CyberPanel.
Step 3: Migration CyberPanel to CyberPanel
Note: At the source server, you need to make sure that it still has enough free space for CyberPanel to compress the data before pushing it to the new server.
At the CyberPanel interface in the destination server, go to Back up > Remote Back ups as shown below:
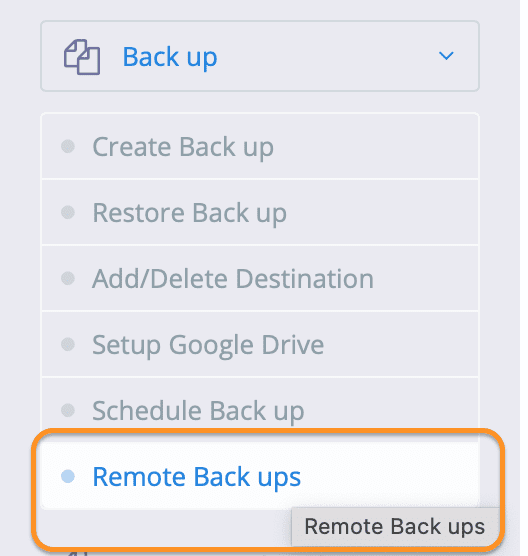
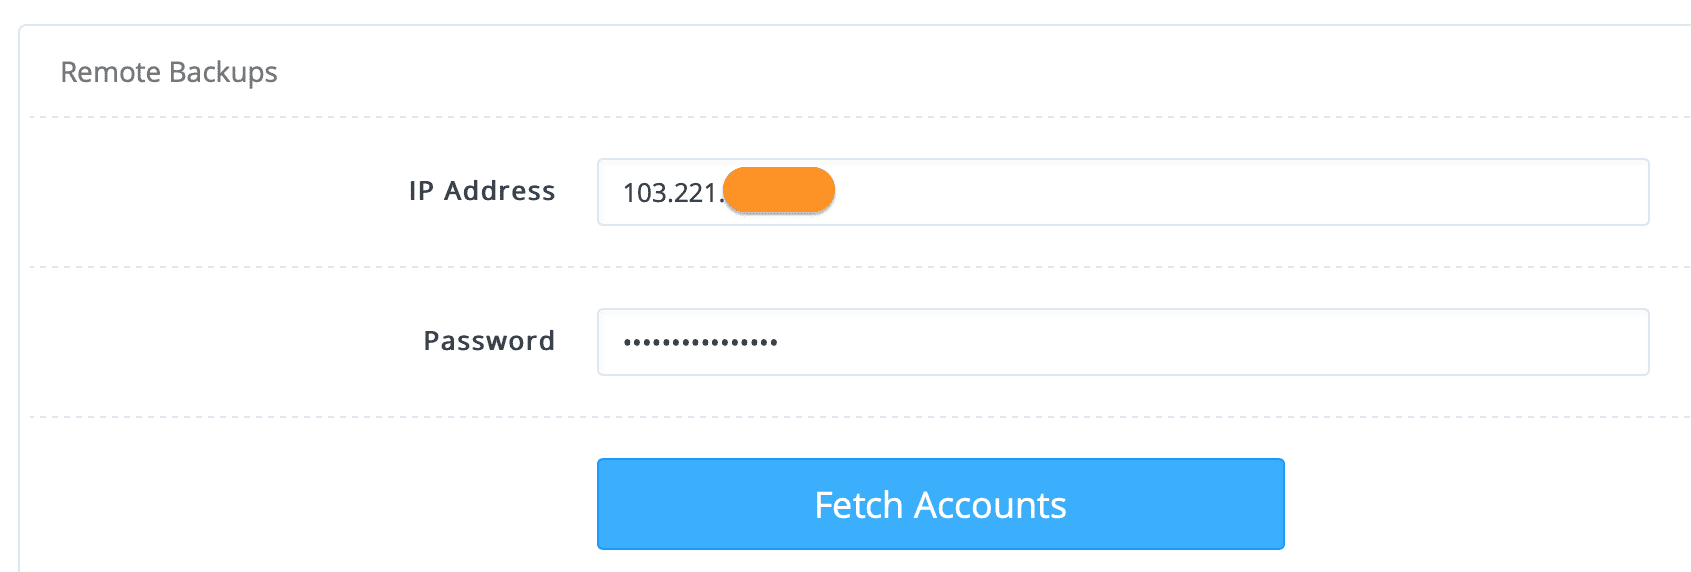
On this screen, you enter the source server IP information and admin password on CyberPanel. select Fetch Accounts to show a list of users on the source server.
If the screen shown below is successful.
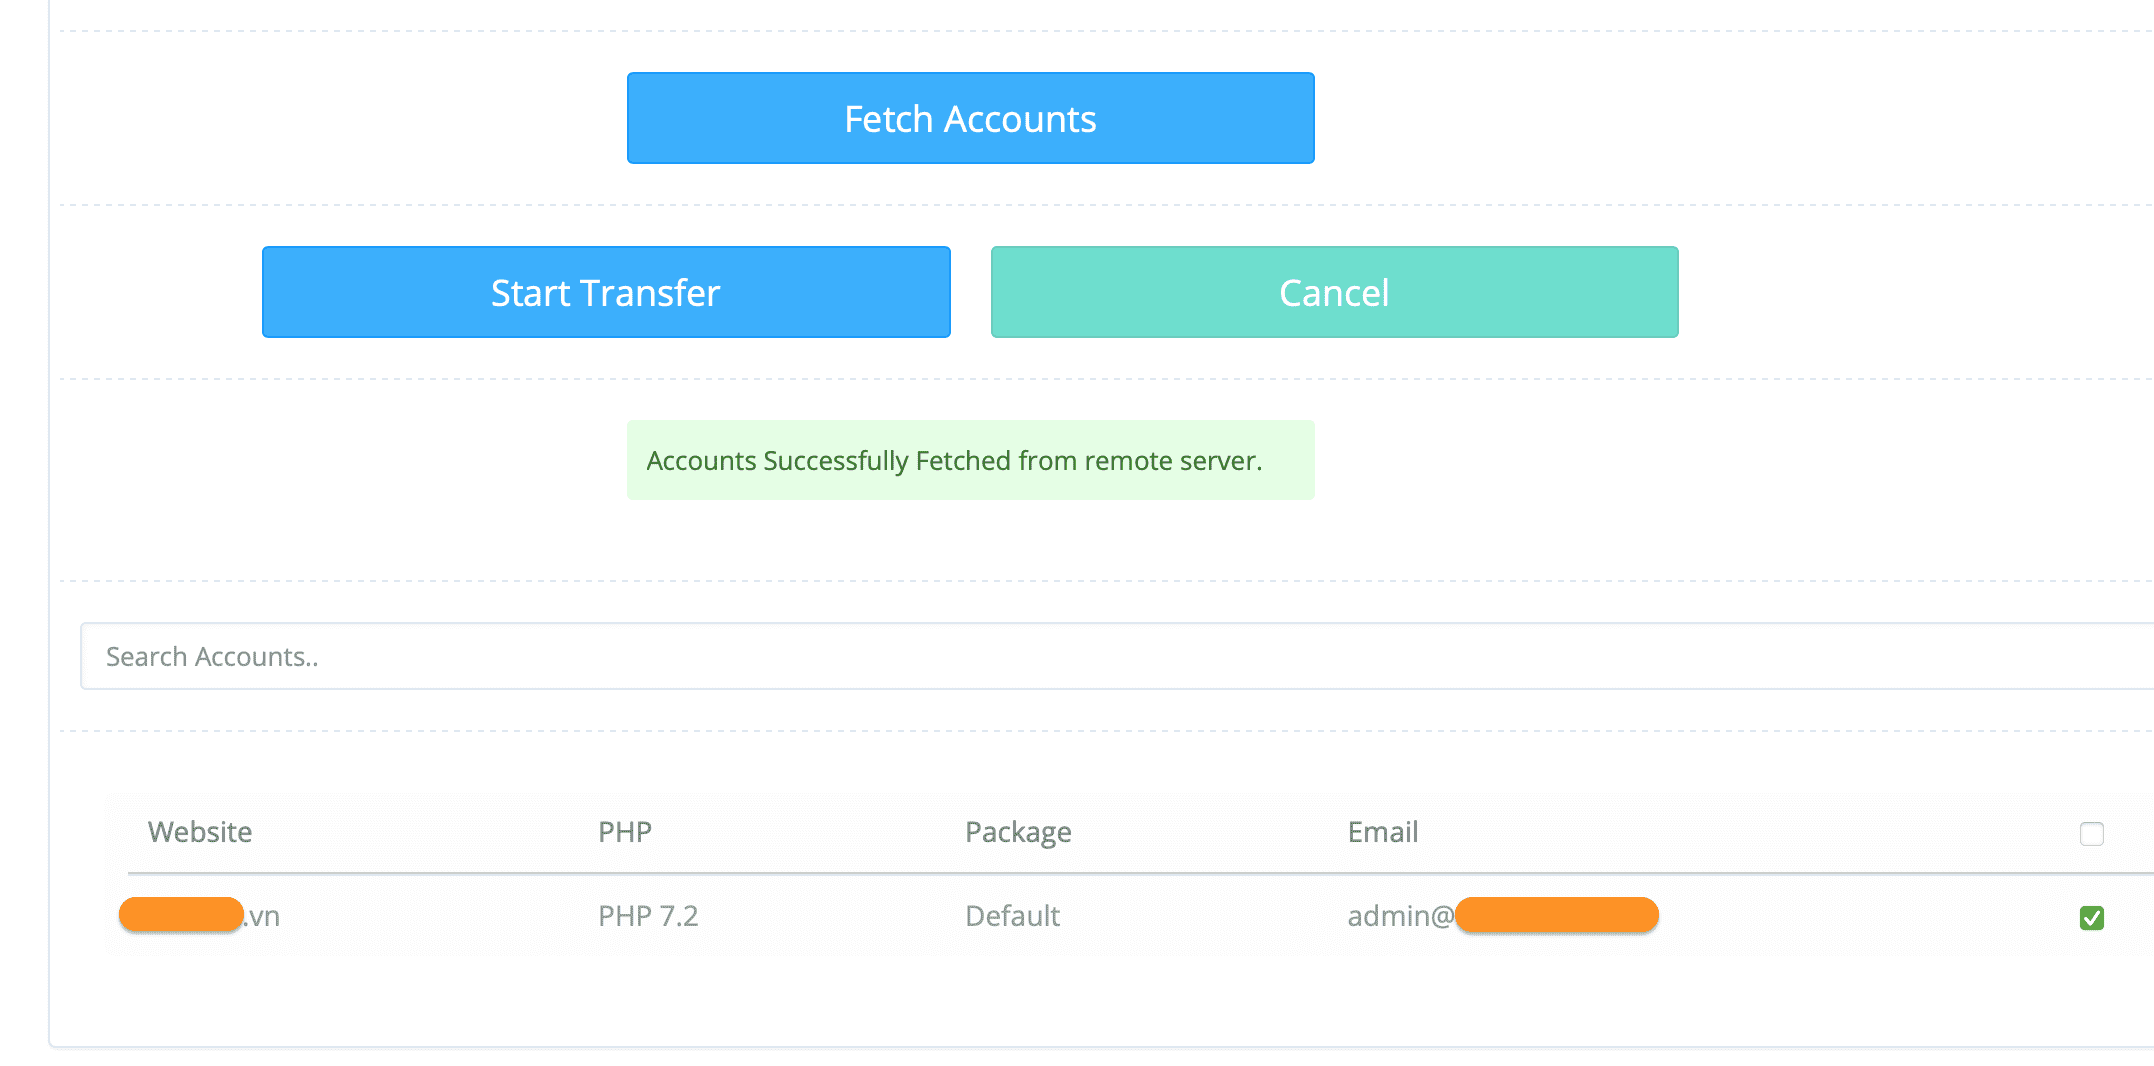
Since the admin on my source server only has one website, I will select this website and start the transfer process with the Start Transfer button.
Now you can relax and wait for two more servers to work. After displaying the messages in both boxes as shown below, we are done.

You can now review your website list to see the sites that have been successfully transferred.
Note: Sometimes, there are some websites after transferring to a new CyberPanel server, there will be an error of losing database connection, you just need to update the database password for that website.
III. Summary
Hopefully, the article will help you save a lot of time and effort as well as serve many different purposes.
Wishing you success.
- See also: The general guide of CyberPanel.
If you need assistance, you can contact support in the ways below:
- Hotline 247: 028 888 24768 (Ext 0)
- Ticket/Email: You use the email to register for the service and send it directly to: support@azdigi.com .

