In this article, AZDIGI will guide you on how to restore the entire SEO hosting package or a website (in case your SEO hosting includes multiple websites) with Jetbackup. In the current digital age, data storage has become more important than ever. Especially for websites operating online, managing and protecting data has become a crucial factor in ensuring smooth and efficient website operations.
However, there are always risks, and data loss can occur at any time. Therefore, restoring data in such situations is extremely important.
I. Full data restoration
Restoring the full data means recovering all the data of websites on SEO hosting to the corresponding backup time.
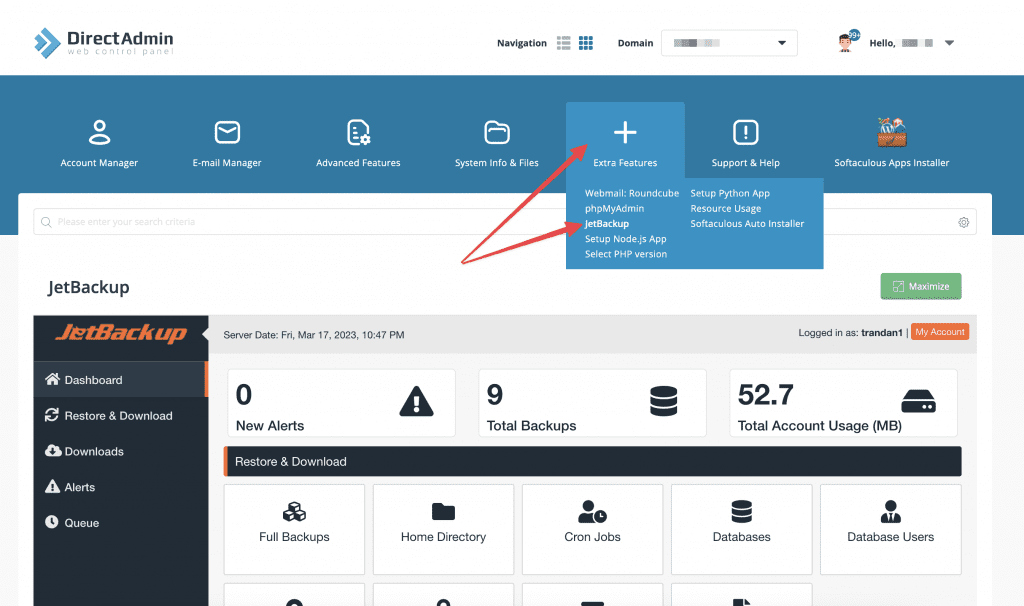
Go to Extra Features and select the Jetbackup section.
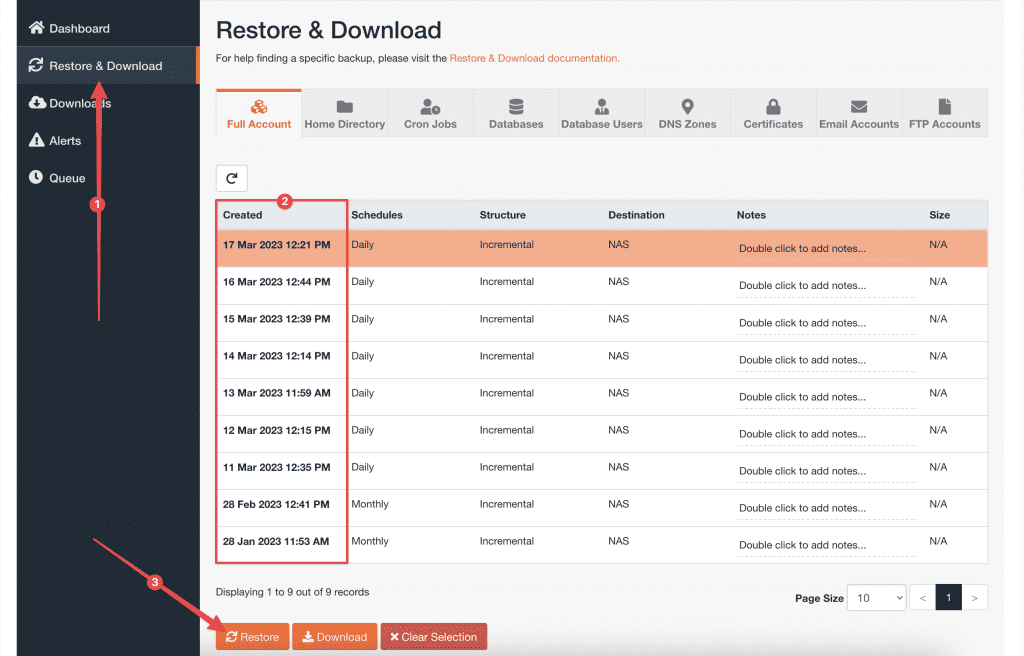
Next, go to the Restore & Download section, where a list of backup timestamps will be displayed. Select the desired timestamp to restore all the data and click on the Restore button below.
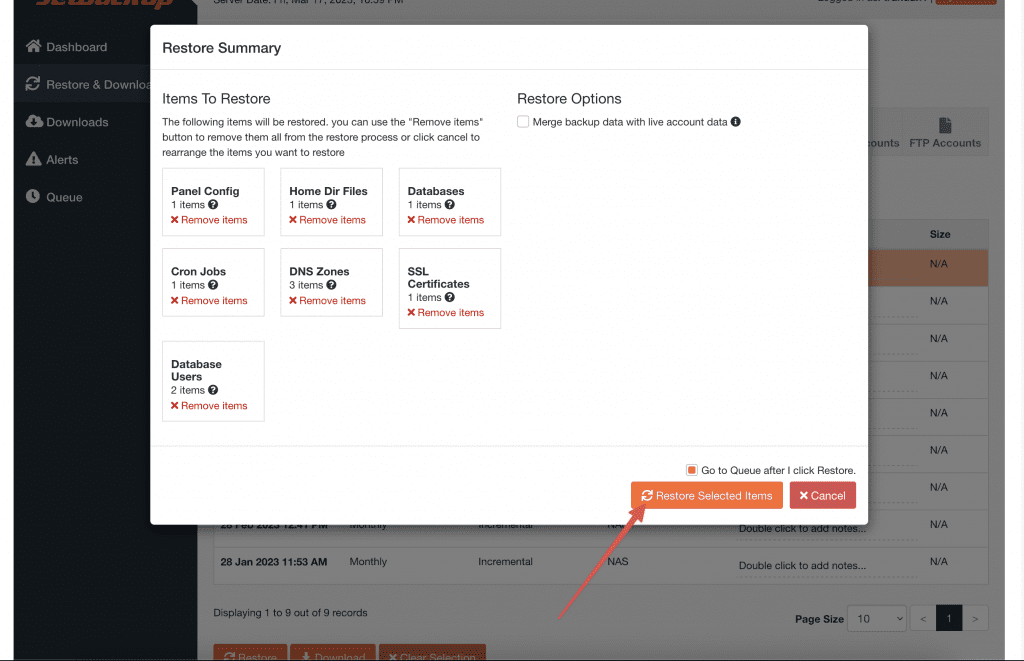
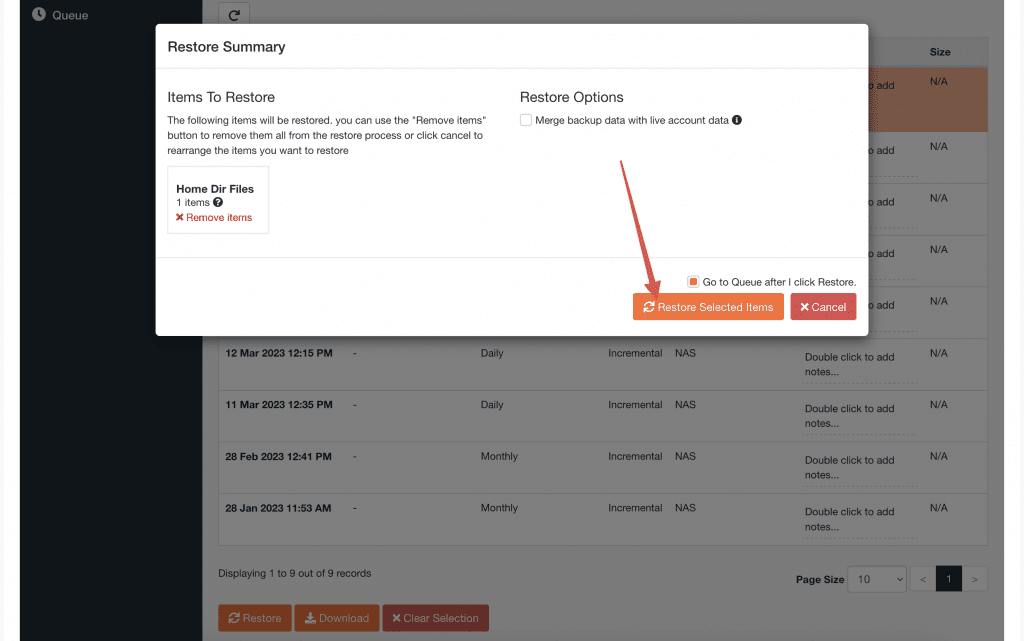
After clicking Restore, an information table will appear, including Panel Config, Home Dir Files, Databases, Cron Jobs, DNS Zones, SSL certificates, and Database Users. Click on Restore Selected Items to initiate the restoration process. When using this mode, the account will be temporarily locked during the data restoration period.
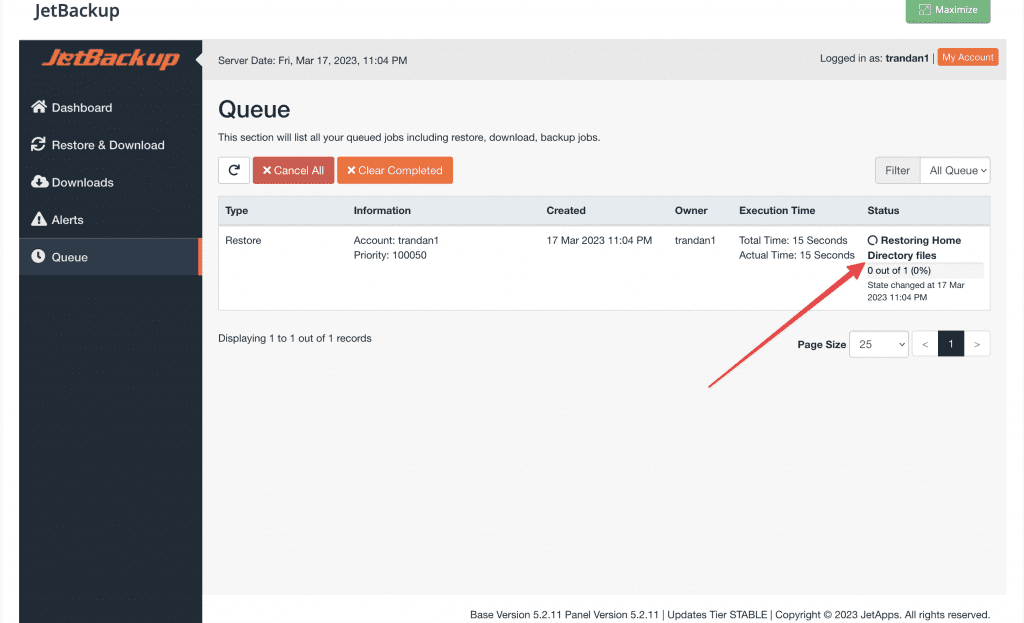
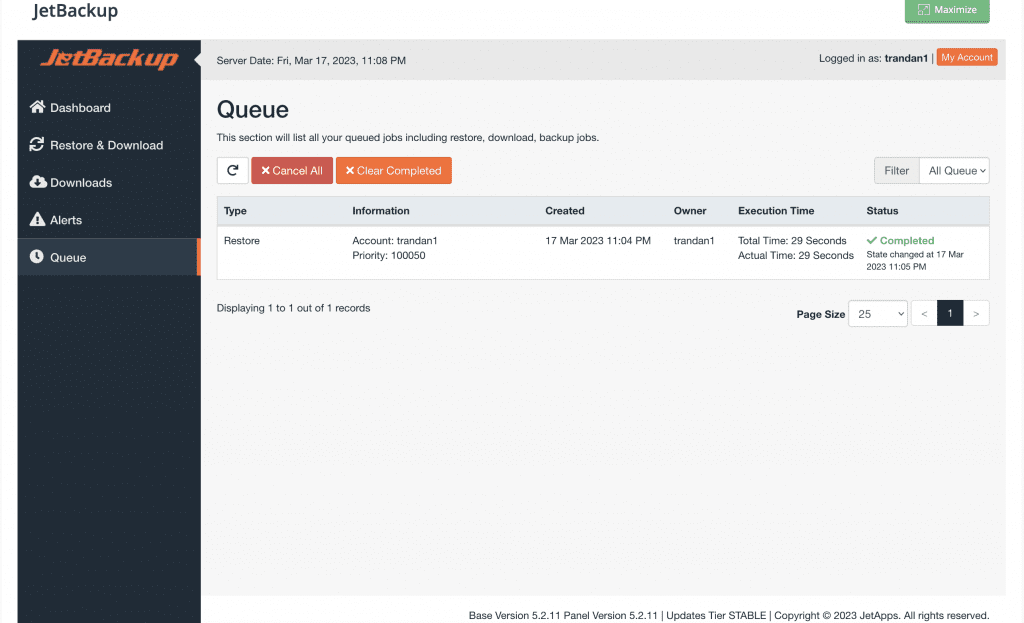
So the data restoration process is currently underway, and you can track this process in the Queue section.
II. Restoring data for a specific website
Unlike restoring all data, restoring a specific website requires separate restoration of its data directory and database.
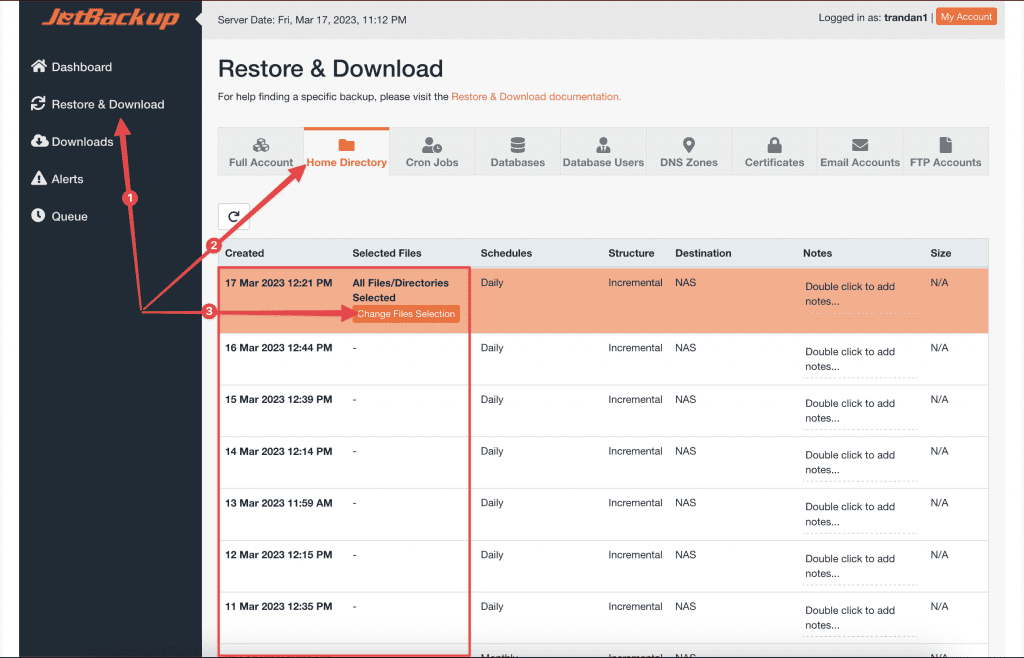
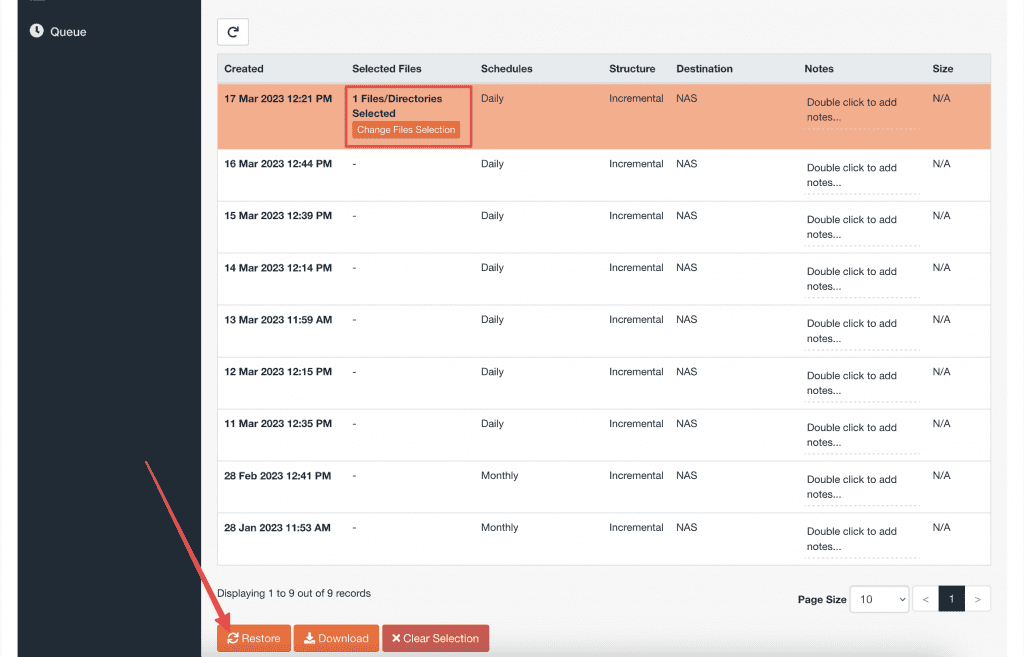
Access the Restore & Download section and navigate to the Home Directory option. Select the desired timestamp for data restoration and click on Change Files Selection to choose the data directory of the website you want to restore.
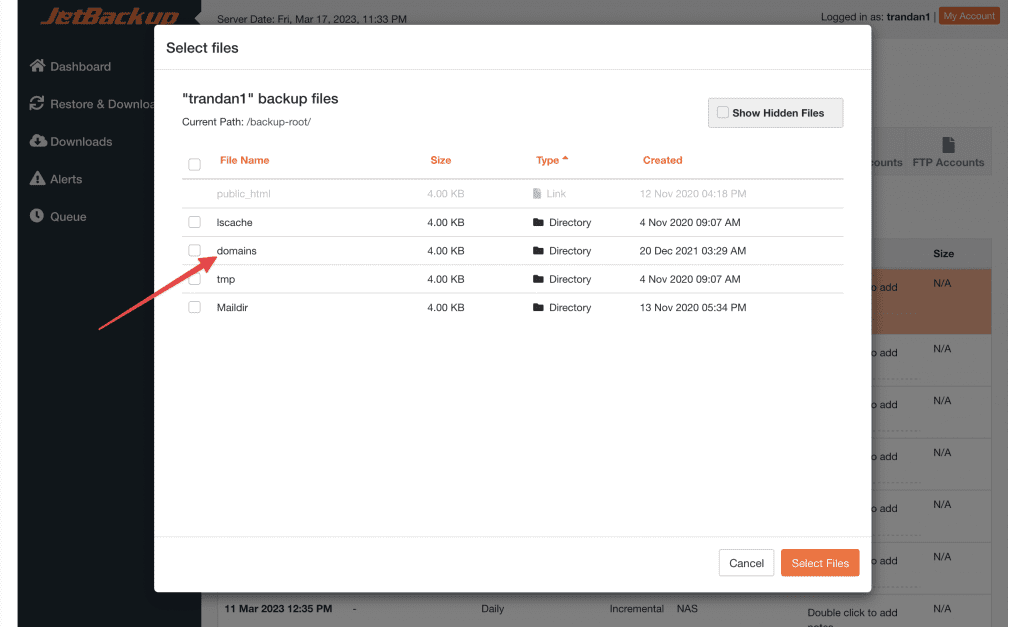
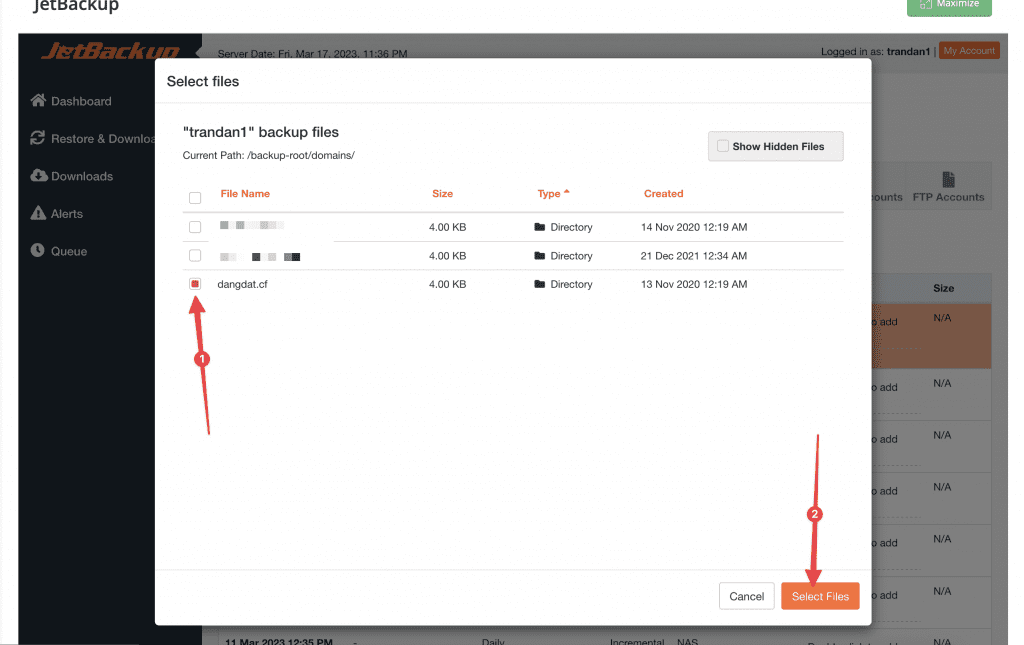
Next, click on the domains section and choose the website you wish to restore, then click Select Files.
You will then see the Selected Files section displaying 1 Files. Click Restore to initiate the restoration process for the website’s data.
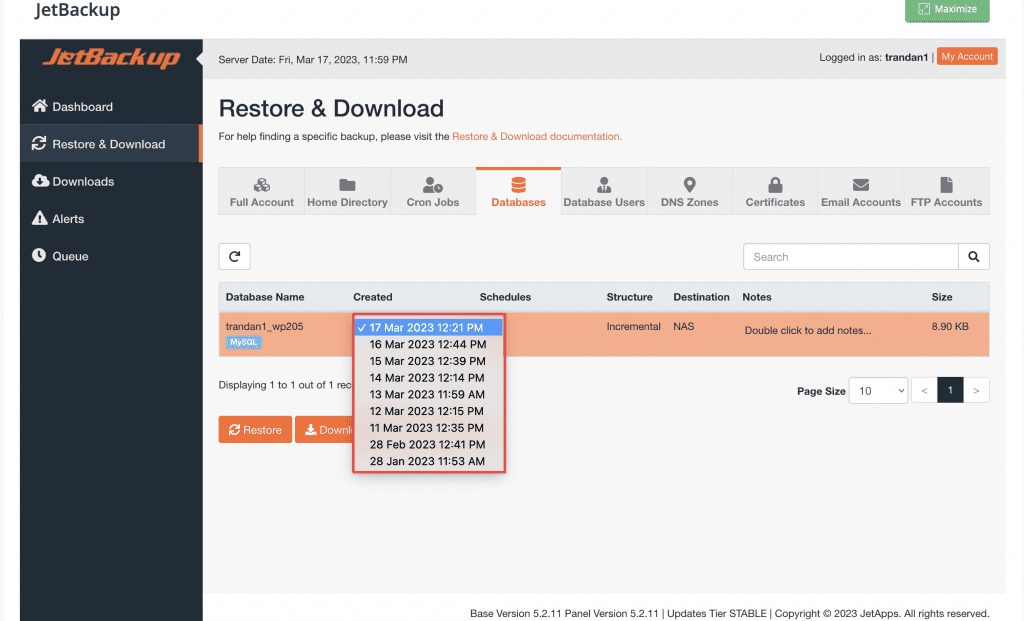
Next, you need to restore the databases to complete the website data restoration process. Go back to the Restore & Download section and select Databases.
Note:
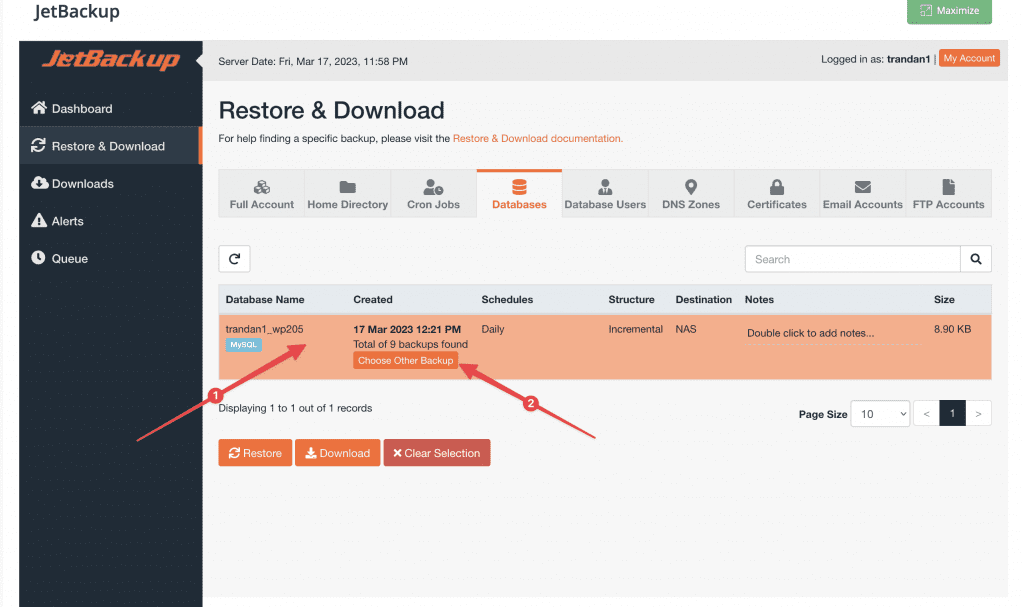
Since there is only one database in this case, it will display only one database. Check which database your website is using and select that database.
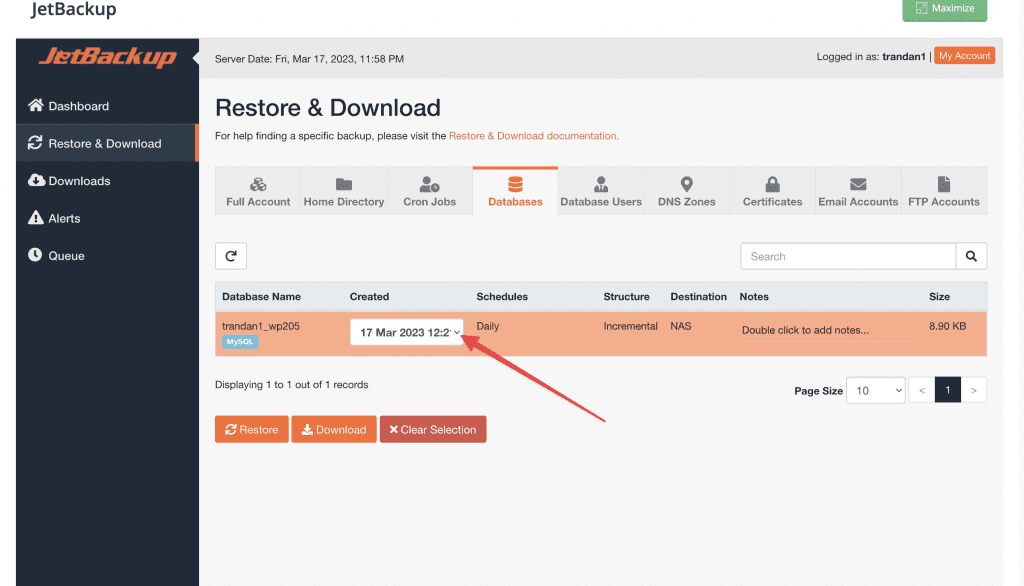
After checking and identifying the database for the website you want to restore, click on the database and then click on the Choose Other Backup option to display the backup timestamps. Choose the timestamp that corresponds to the same time as the restoration of the website’s data directory.
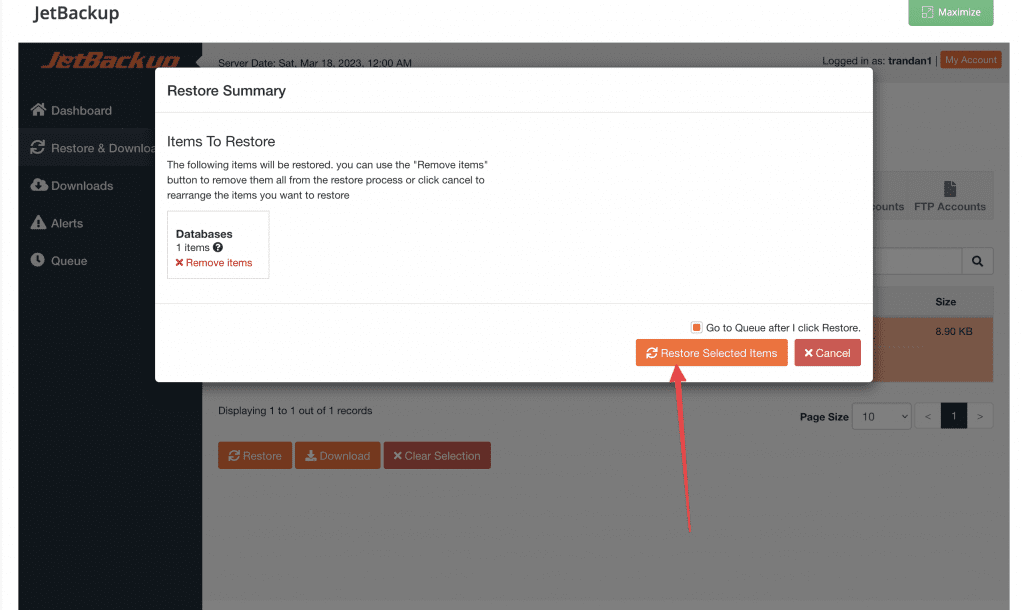
The data restoration process for the website is now complete. Please wait for the restoration process to finish and then access the website to verify.
With Jetbackup, you can now restore the entire data or restore specific websites whenever needed. Wishing you a successful data restoration process.

