In some cases, you may want to restore your database. In this article, AZDIGI will guide you through restoring the database to previous automatic backups by Jetbackup.
Step 1: Access the “Database backups” feature
Before you can use this feature, you need to log in to cPanel on your hosting plan by following the instructions:
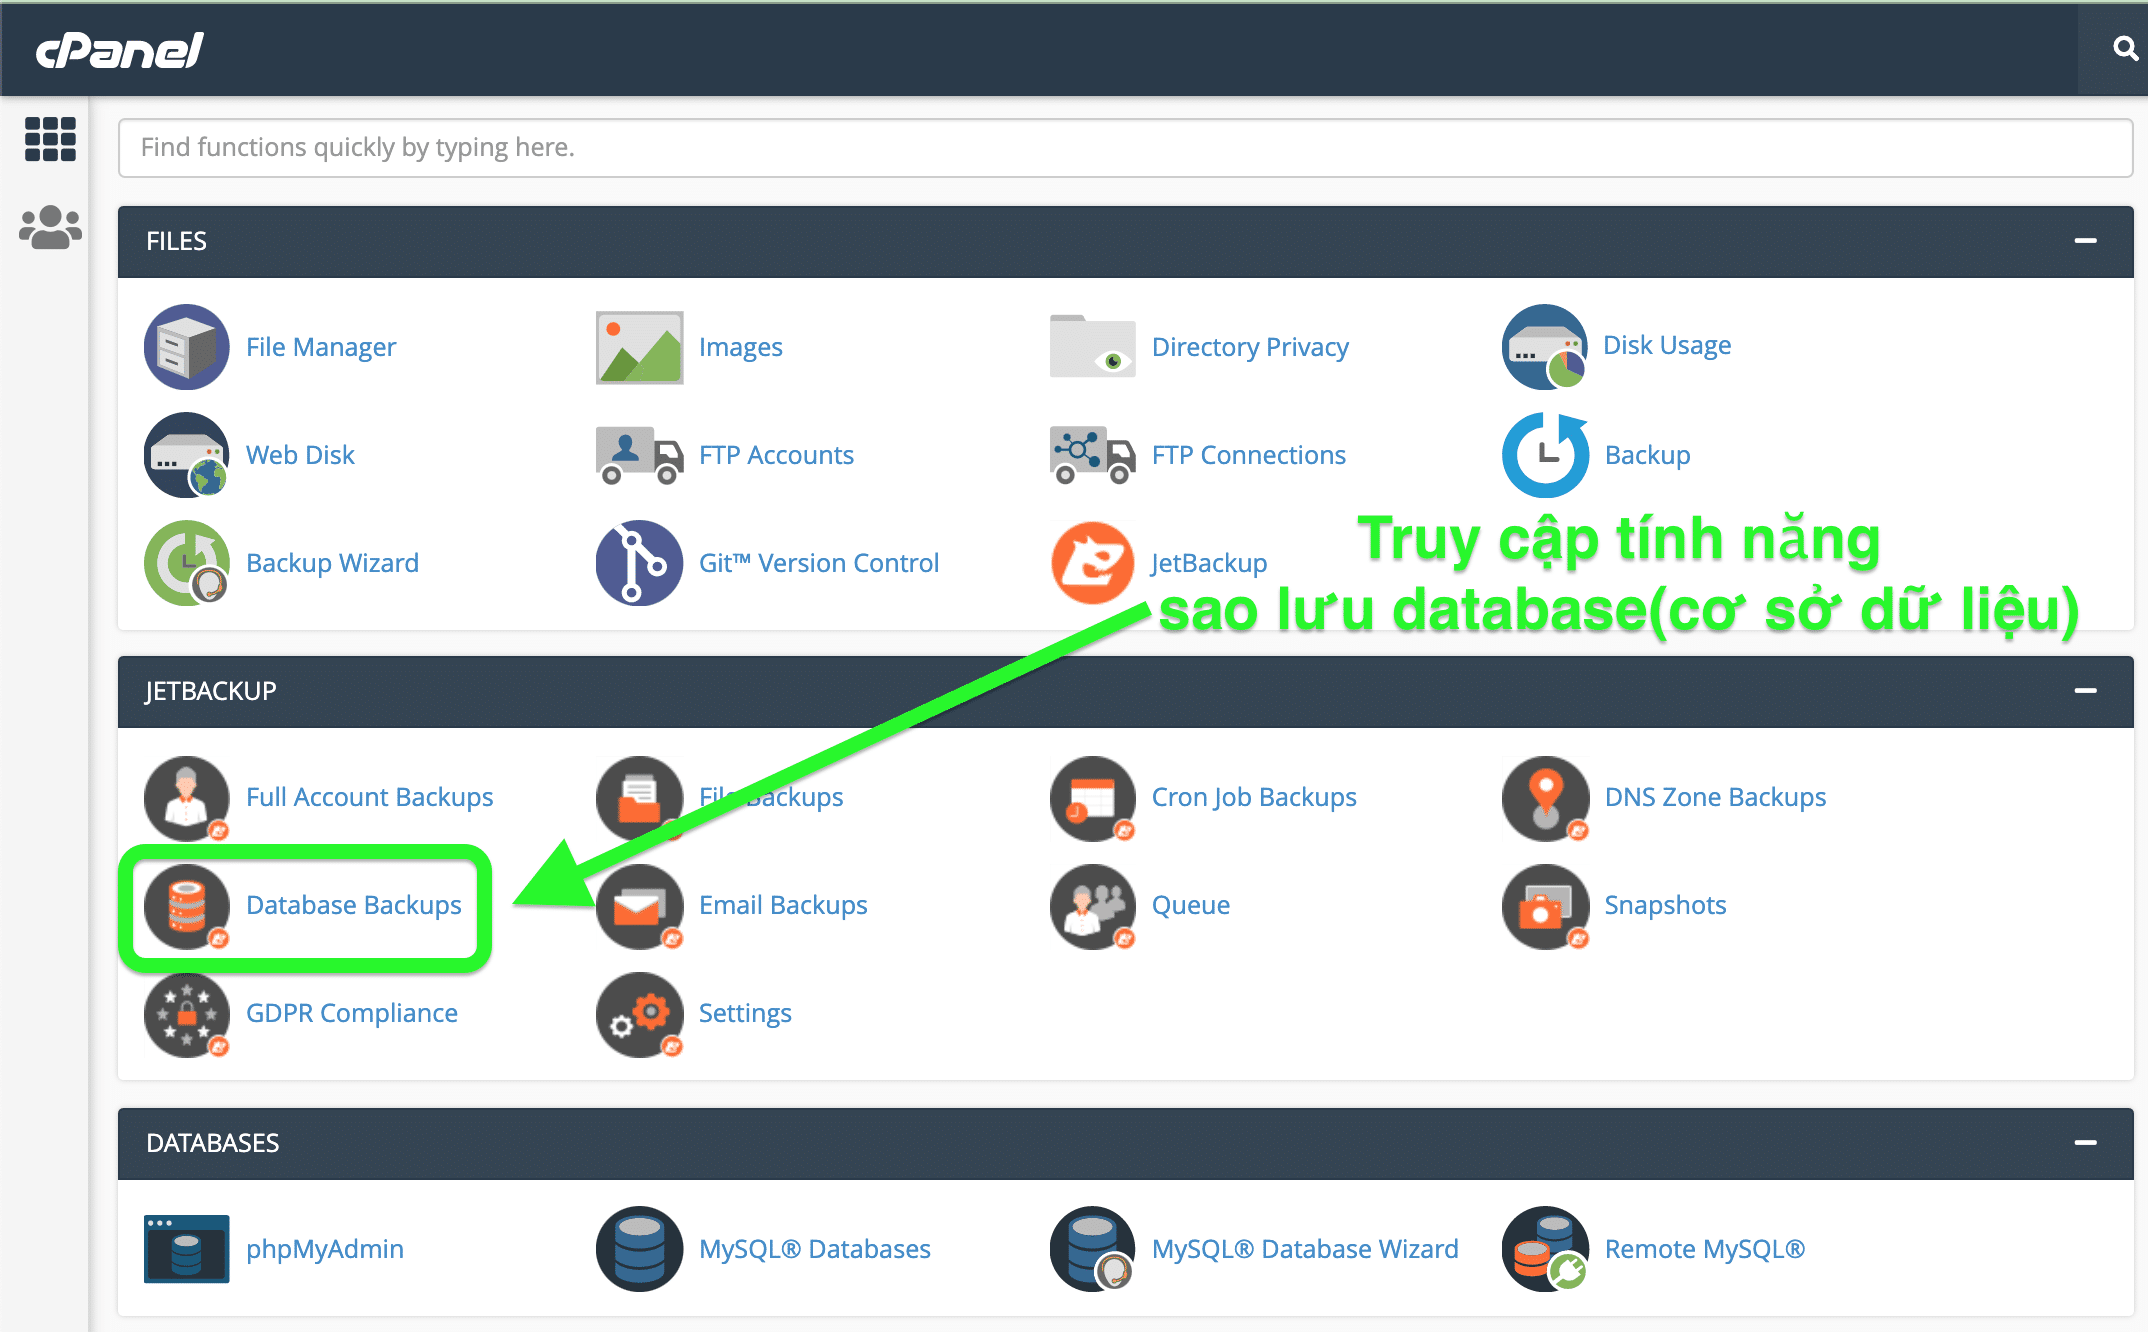
Once you are logged in to cPanel, you can search for this feature with the keyword “database backups” or access directly as shown below:

Step 2: Restore the Jetbackup database
After access to this feature, the interface will be similar to the image below:

I explain some key information as follows:
- Number 1: Your database name.
- Number 2: Time the automatic backups of the system.
- Number 3: The action you want to take, here is restoring the database or downloading the database.
In this tutorial, we choose the Restore action and act like the following image:

After selecting “Add to Restore Queue”, we will return to the main interface of cPanel and access the “Queue” feature to see if the restore process is ongoing or completed.

Here is the Queue interface (Jetbackup’s queuing feature)

Note:
- Number 1: Name of the action performed.
- Number 2: The data name is restored.
- Number 3: The status of the process, the state will have 2 types: Processing and Completed.
The process of restoring a database takes more or less time, depending on the size of the database. A database with an average capacity of 100MB will take about 1 to 2 minutes.
Wishing you success.
- Hotline 247: 028 888 24768 (Ext 0)
- Ticket/Email: You can use your email to register for the service and send it directly to: support@azdigi.com

