In order to support customers in experiencing PHP 7.4 version on Hosting, we have integrated the PHP 7.4 version into all SSD Hosting services available at AZDIGI. And one of the features to improve speed and save resources for websites on PHP 7.4 is Opcache Preload.
Enable PHP 7.4 on SSD Hosting at AZDIGI
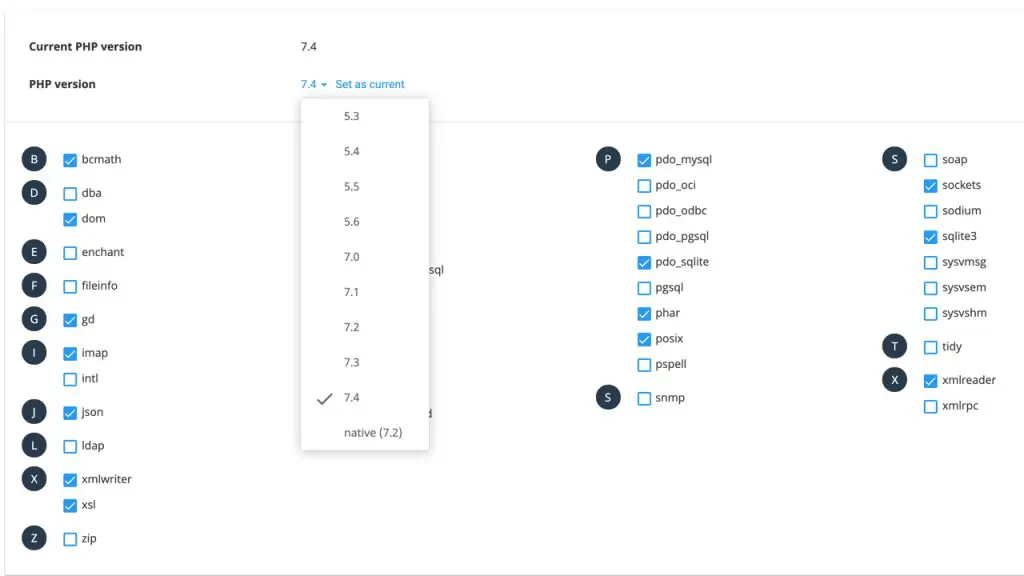
You can change the PHP version for the hosting package by going to the Select PHP Version section in cPanel and selecting PHP 7.4.

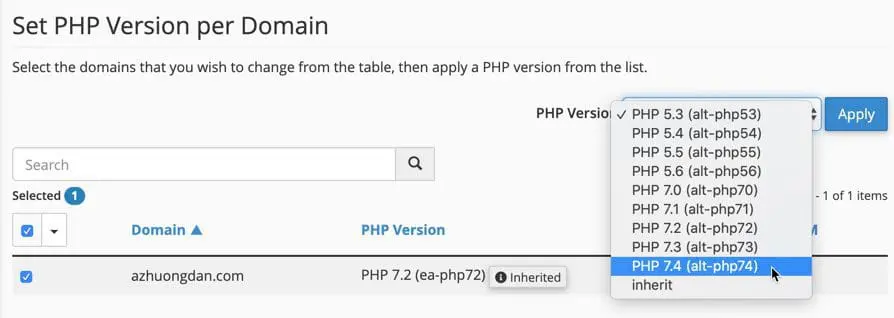
Or if your hosting plan has multiple domains and you only want to use PHP 7.4 for a single domain name, you can choose the version in MultiPHP Manager in cPanel.

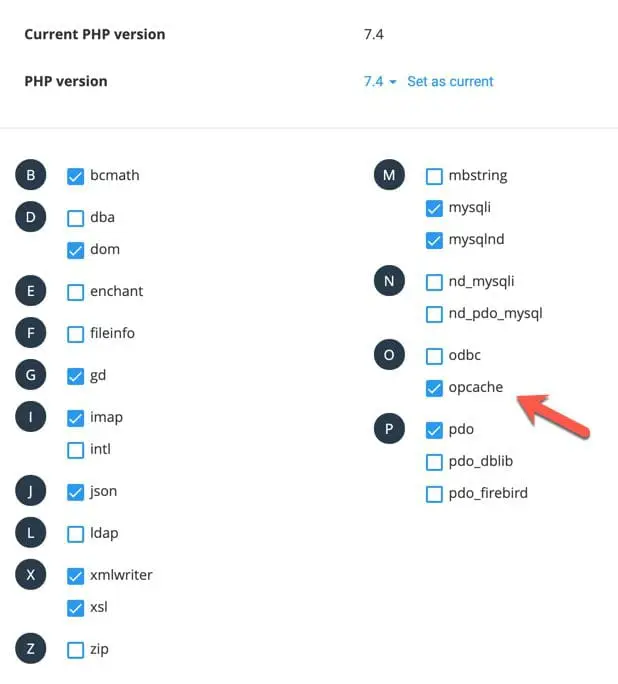
After changing, you can enable Opcache by going to Select PHP Version and selecting PHP 7.4 version, check if opcache is enabled.

Use Opcache Preload for WordPress Hosting
This guide is for reference purposes only and should not be used on the official website. You should customize the preload file to match the source code.
PHP 7.4 will support an option called opcache.preload to set the path containing the preload file that will act as calling or managing files in the source code that want to always be opcached when the server starts.
You can use Opcache Preload for any source code, but AZDIGI will show you how to do it for WordPress source code.
If we want to use this function, we need to create a preload.php file in the root directory of the website to be manipulated (eg, public_html folder for the main domain) on the same level as the wp-config.php file, the content as follows:
<?php
declare(strict_types=1);

$preload_patterns = [
    "*.php",
    "wp-includes/**/*.php",
    "wp-includes/*.php",
];

foreach ($preload_patterns as $pattern) {
    $files = glob($pattern);

    foreach ($files as $file) {
        opcache_compile_file($file);
    }
}
In the above code, we will call all .php files in the root directory of the website and files in the wp-includes directory. It can be understood that we are wanting to opcache the entire WordPress source code (excluding themes and plugins).
Next, open the Terminal and enter the following command:
nano /opt/alt/php74/link/conf/alt_php.iniVà chèn đoạn sau vào cuối tập tin:
opcache.preload = /home/$username/public_html/preload.phpRemember to change the path to the preload.php file correctly, replace $username to your hosting username or you can view it in cPanel as shown below:

How to install Opcache Preload on SSD Hosting
Then press Ctrl + O to save successfully. To check, you can type the following command in Terminal to see if PHP has the preload.php file setup:
php -i | grep opcache.preloadIf the result returned as follows is successful:
opcache.preload => /home/blogazdigi/public_html/preload.php => /home/blogazdigi/public_html/preload.php
opcache.preload_user => no value => no value
So you have completed the opcache preload setup for the WordPress source code. Note that using opcache preload according to this article may not work as intended. So you can manually reset the list of PHP files that need to be preloaded according to your needs, for example, WooCommerce websites should preload the WooCommerce plugin.
Currently, SSD Hosting services at AZDIGI have integrated version 7.4, so you can immediately integrate the Opcache Preload feature to improve speed and save resources for your website.
Wishing you success!

