You have a computer at home running Plex, Nextcloud, or a Raspberry Pi serving as a home server. You want to access it from outside but your ISP does not allow port opening, your modem is behind NAT, or you simply do not have a static IP. Cloudflare Tunnel solves exactly this problem. Instead of opening ports for external connections to come in, tunnel creates an outbound connection from your machine to Cloudflare, then Cloudflare handles the rest.
This approach is particularly useful for personal computers, homelab, NAS, office machines, or any device behind NAT that you do not control the router. VPS can also use it, but VPS already has a public IP and can open ports freely, so tunnel is less necessary.
What is Cloudflare Tunnel?
Cloudflare Tunnel (formerly called Argo Tunnel) allows you to connect your computer to Cloudflare network without opening any ports to the internet. How it works:
- You install
cloudflaredon your machine. cloudflaredcreates an outbound connection (from your machine out) to Cloudflare edge.- When there is a request to your domain, Cloudflare routes traffic through that tunnel to your machine.
- Your machine processes the request and returns the response back through the tunnel.
The machine does not need to listen on any public port. All connections are outbound, so firewalls can block all inbound traffic while everything still works normally.
Why use Cloudflare Tunnel?
The most common question is: “I can just open ports and use Nginx reverse proxy, why use tunnel?” With VPS, that is true, opening ports is not difficult. But with home computers or homelab, it is different.
- ISP blocks ports or multiple NAT layers. Most home internet packages in Vietnam do not allow you to open ports 80/443. Sometimes ISP modems are behind CGNAT, you cannot port forward even if you want to. Tunnel bypasses all these barriers because connections go out, no one needs to connect in.
- No need for static IP, no need for public IP. Home machines only need internet access. No need to request static IP from ISP, no need to use DDNS.
- Much more secure. Your machine does not open any ports to the internet. No one can scan, no one can brute force. Machine is like “invisible” on the internet.
- Automatic SSL. Cloudflare handles all SSL certificate parts. You do not need to install Let’s Encrypt or manually renew certificates.
- Free. Cloudflare Tunnel is completely free, even on Free plan.
What to use tunnel for?
The most common use cases:
- Access home NAS (Synology, QNAP) from outside without QuickConnect or opening ports on modem.
- Share app in development for clients or team to see, instead of deploying to server just for demo. Run
localhost:3000then tunnel it out, done. - Homelab: expose Plex, Jellyfin, Home Assistant, Nextcloud, Grafana, or any service running on home machine.
- Office machines behind corporate firewall that you do not control.
- Raspberry Pi running web apps, IoT dashboards, or anything with HTTP interface.
Installing cloudflared
You need to install cloudflared on the machine you want to expose. This is the daemon that maintains tunnel connection with Cloudflare. Depending on your operating system, choose the appropriate installation method below.
Windows
The fastest way is using winget (available on Windows 10/11):
winget install --id Cloudflare.cloudflaredOr download the .exe file directly:
- 64-bit: cloudflared-windows-amd64.exe
- 32-bit: cloudflared-windows-386.exe
After downloading, you can run directly from the download folder or add to PATH to call from anywhere. To install as Windows service:
cloudflared.exe service install eyJhIjoixxxxxxxxx...⚠️ cloudflared on Windows does not auto-update. You need to manually download new versions when available.
macOS
Using Homebrew:
brew install cloudflaredOr download compressed file:
- Apple Silicon (M1/M2/M3/M4): cloudflared-darwin-arm64.tgz
- Intel Mac: cloudflared-darwin-amd64.tgz
Linux
Ubuntu/Debian:
curl -L --output cloudflared.deb https://github.com/cloudflare/cloudflared/releases/latest/download/cloudflared-linux-amd64.deb
sudo dpkg -i cloudflared.deb
RHEL/Rocky/AlmaLinux/CentOS:
sudo rpm -i https://github.com/cloudflare/cloudflared/releases/latest/download/cloudflared-linux-x86_64.rpmFor ARM64 machines (Raspberry Pi, Oracle Cloud Free Tier), use cloudflared-linux-arm64.deb or cloudflared-linux-aarch64.rpm correspondingly.
Docker
If your machine already has Docker, you do not need to install anything else — run tunnel with container:
docker run cloudflare/cloudflared:latest tunnel --no-autoupdate run --token eyJhIjoixxxxxxxxx...This method is convenient for NAS (Synology, QNAP) or machines where you do not want to install additional packages.
Verify Installation
After installation, verify with:
cloudflared --versionSee complete list of downloads at Cloudflare official downloads page.
Creating Tunnel via Dashboard
There are two ways to create tunnel: via CLI (locally-managed) and via Dashboard (remotely-managed). I recommend using Dashboard because it is easier to manage, all configurations are stored on Cloudflare, and you do not need to keep config files on your machine.
Step 1: Log in to Cloudflare Zero Trust Dashboard.
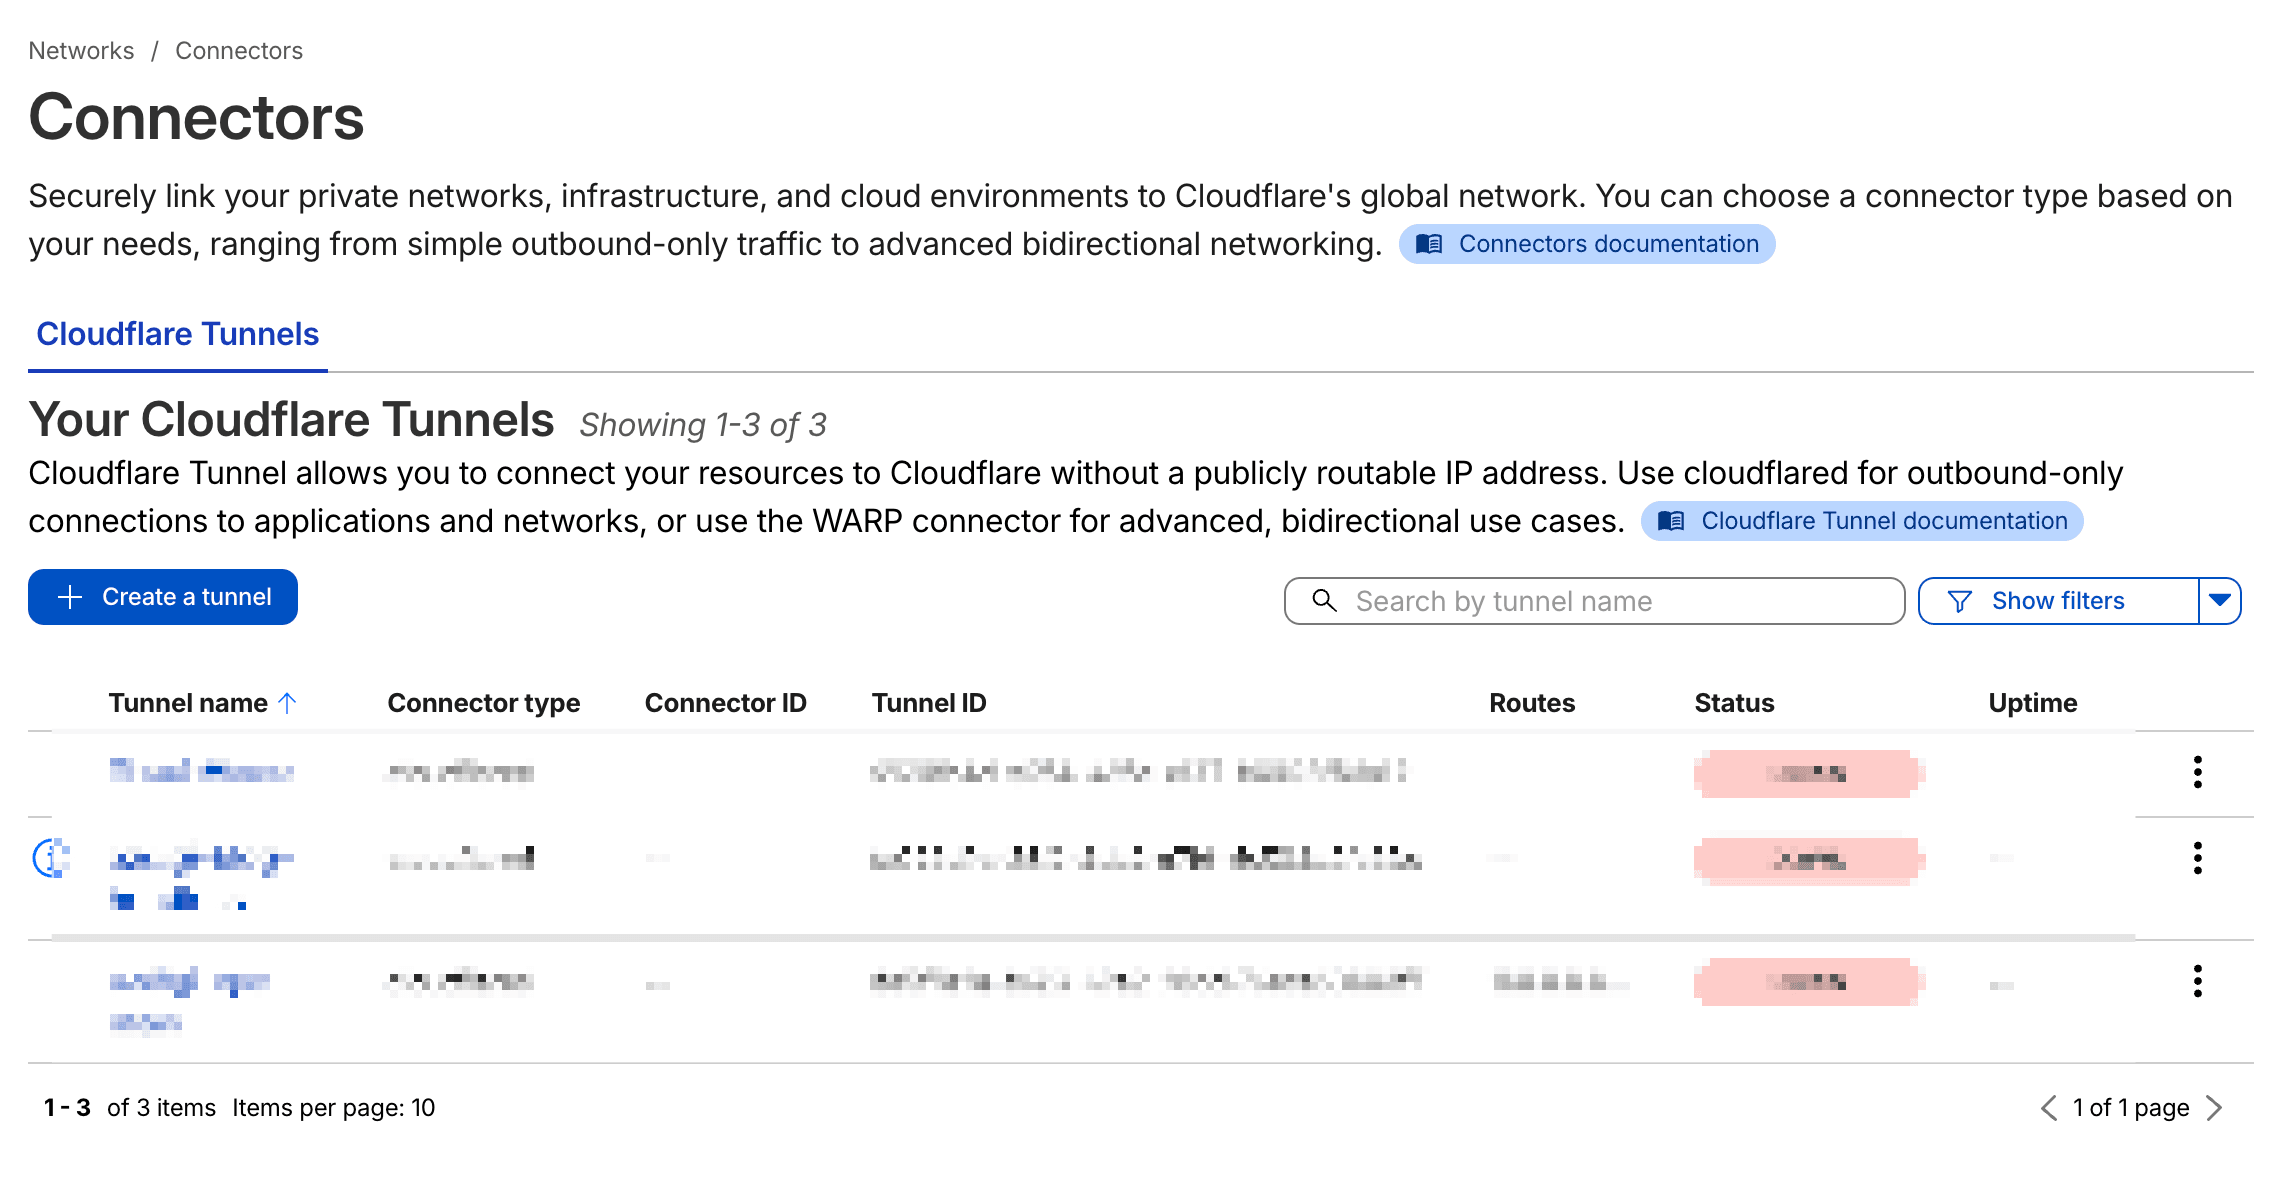
Step 2: Go to Networks → Tunnels → Create a tunnel.
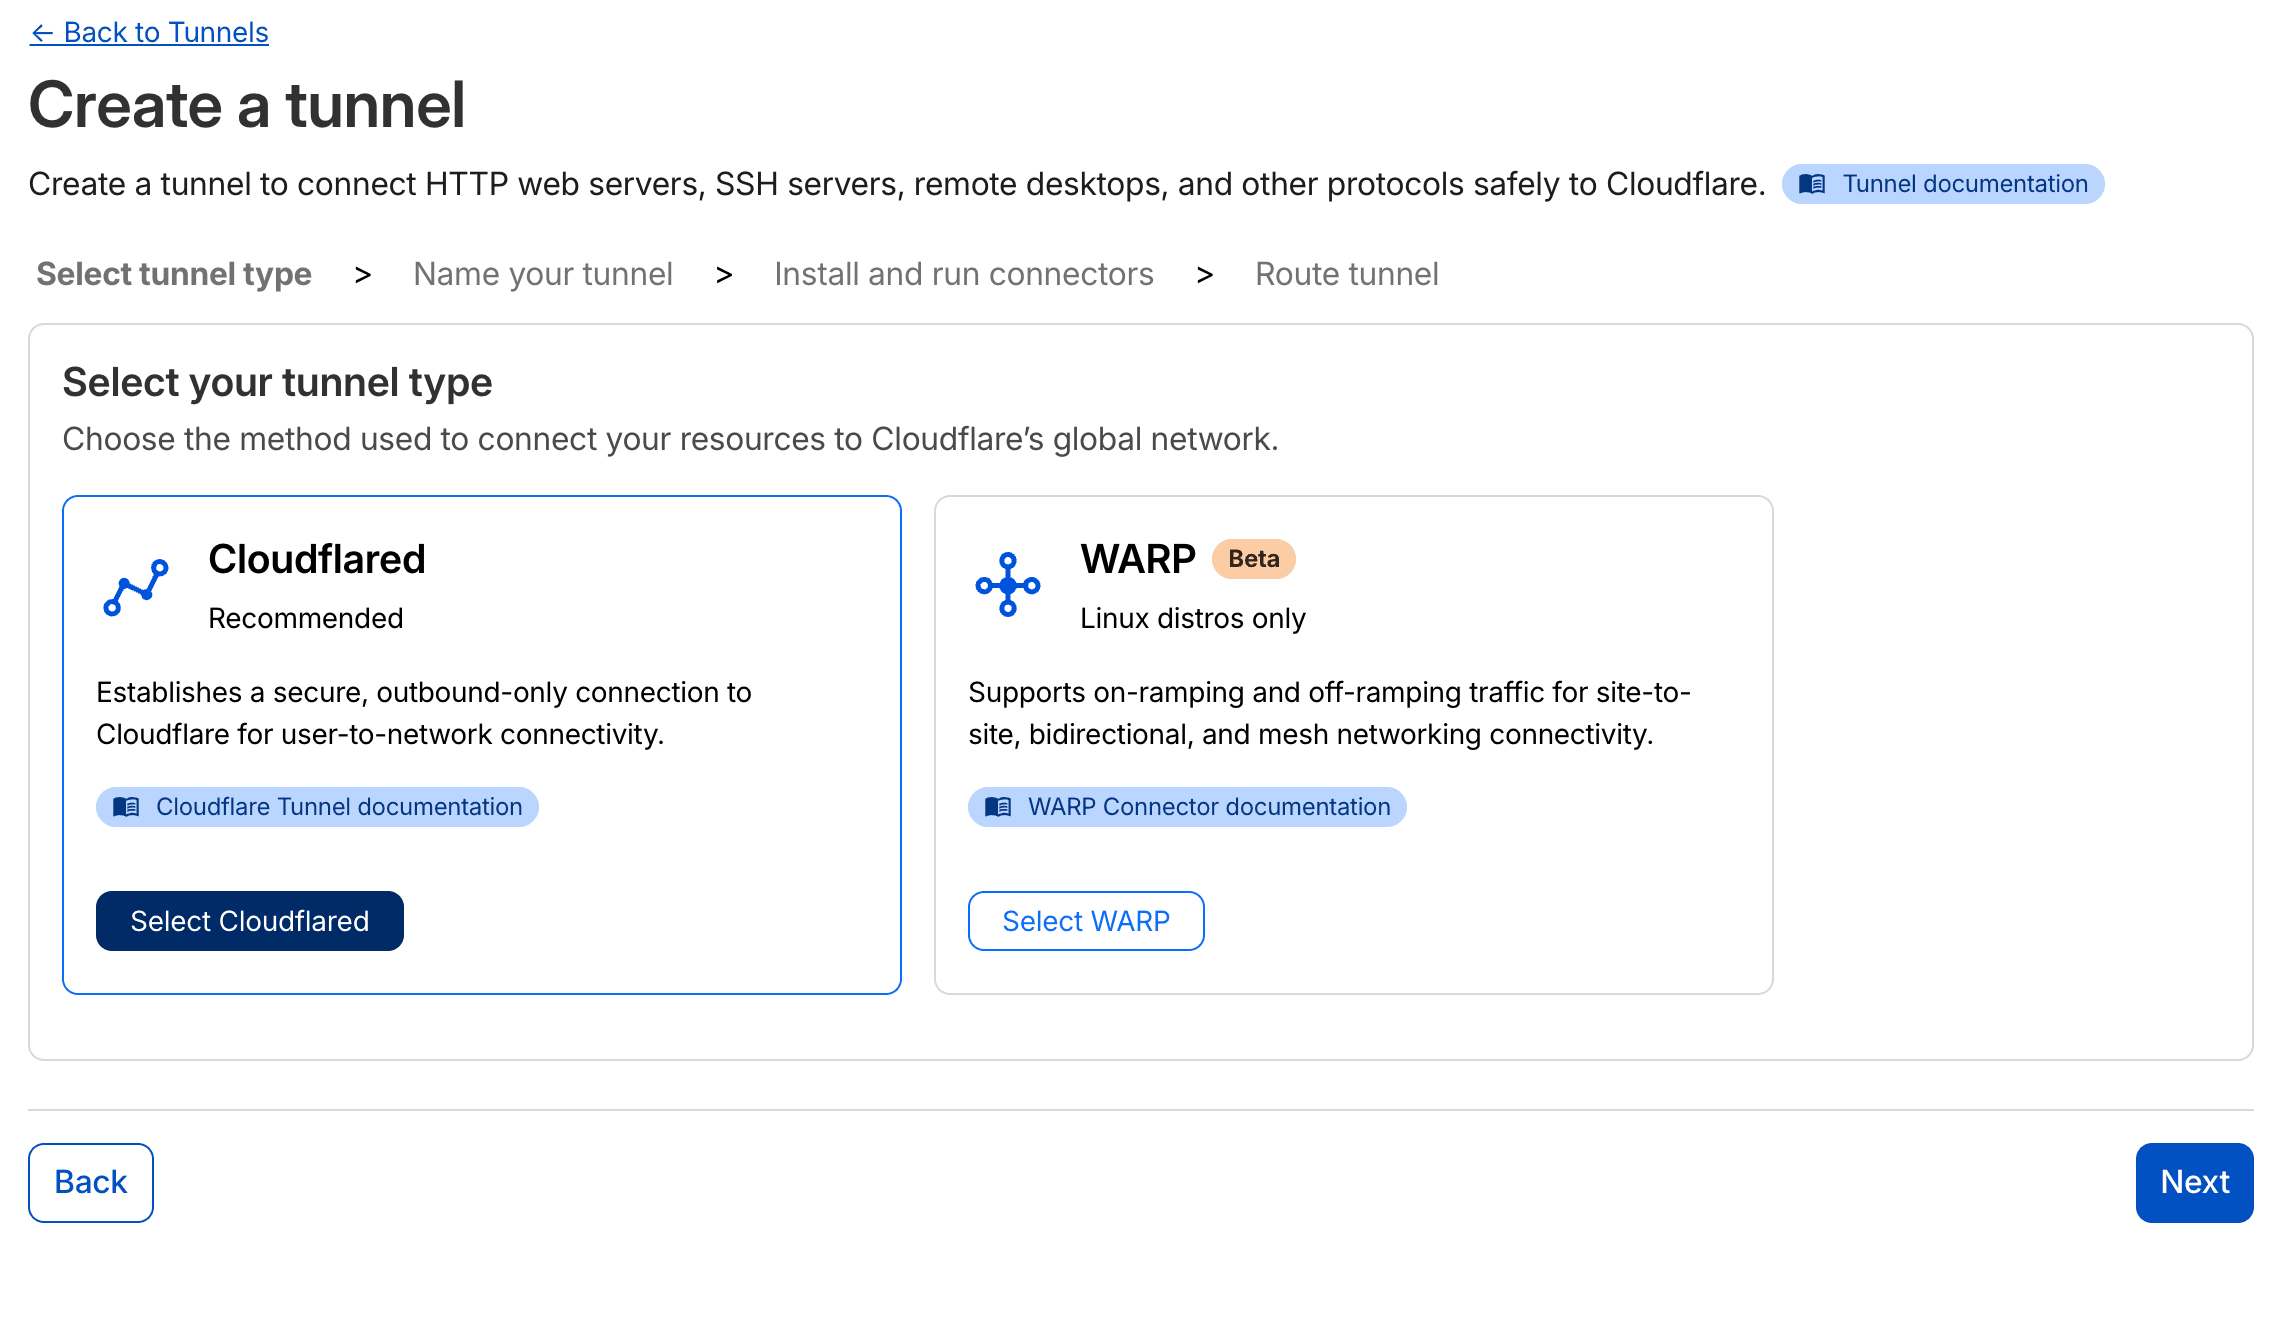
Step 3: Choose Cloudflared as connector type, name your tunnel (example: home-tunnel), then click Save tunnel.
Step 4: Cloudflare will display an install command. Copy this command and run on your machine. The command will look like:
sudo cloudflared service install eyJhIjoixxxxxxxxxxxxxxxxx...This command automatically installs cloudflared as a systemd service and connects the tunnel to Cloudflare. After running, you will see the tunnel status change to Connected on the Dashboard.
⚠️ The token in install command contains tunnel authentication information. Do not share this token with anyone.
Adding Public Hostname
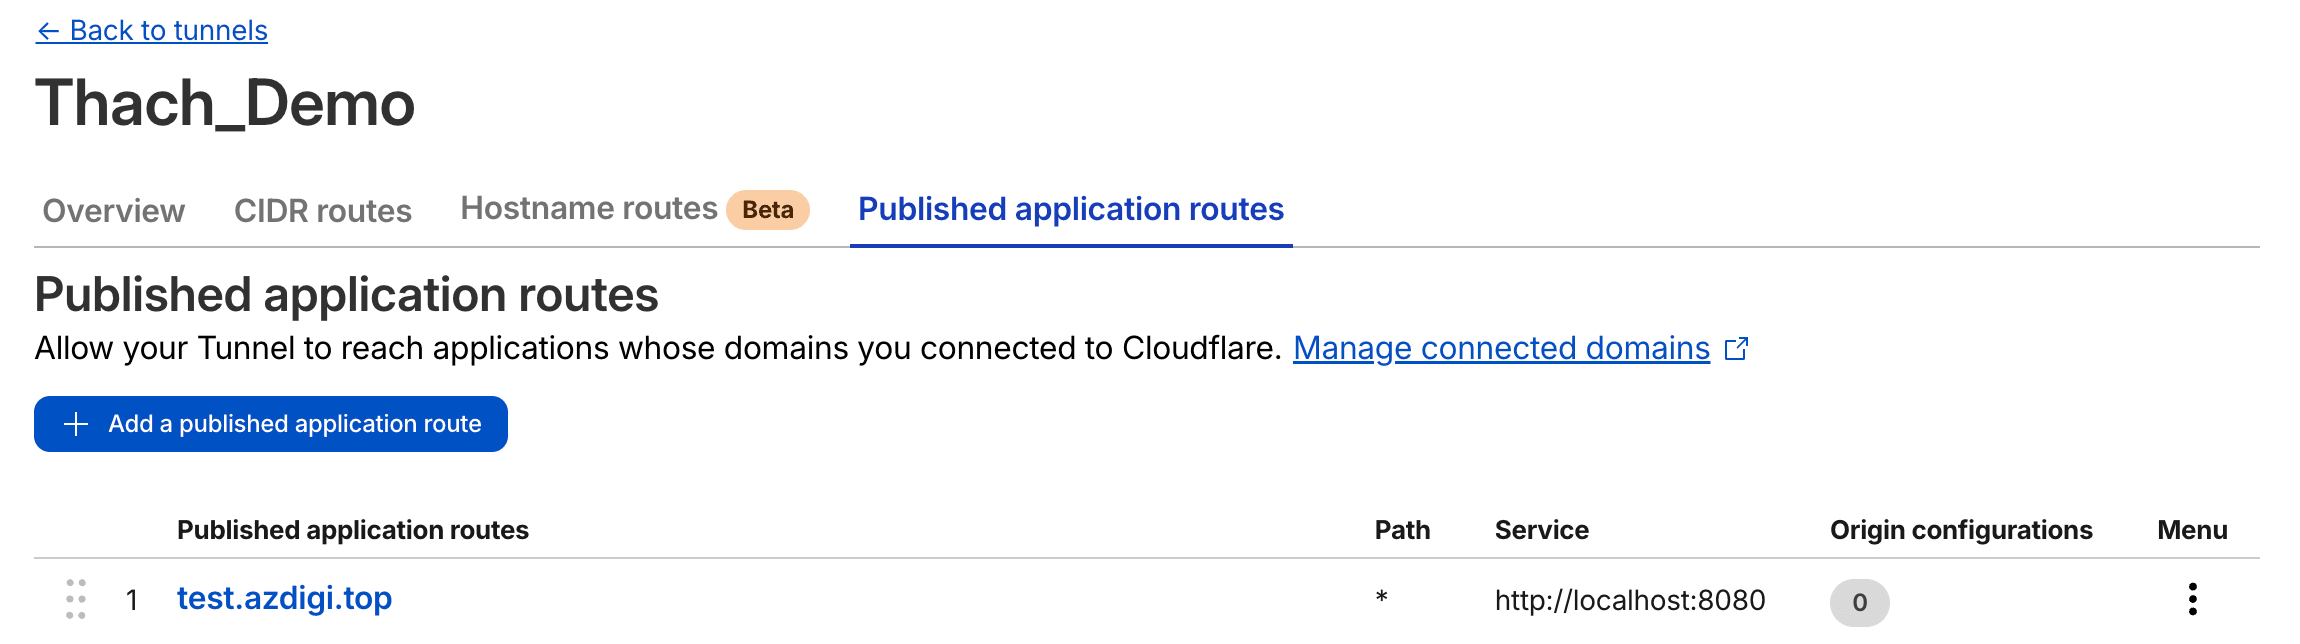
The tunnel is connected, now you need to add public hostname to route traffic from domain/subdomain to services on your machine.
In the tunnel configuration section, select the Public Hostname → Add a public hostname tab.
Fill in the information:
- Subdomain: The subdomain part you want to use (example:
nas,plex, or leave blank for root domain). - Domain: Choose domain already added to Cloudflare.
- Type: Choose
HTTPorHTTPSdepending on service. - URL: Service address on your machine, example
localhost:3000orlocalhost:8080.

Click Save hostname. Cloudflare will automatically create DNS record (CNAME) pointing to tunnel. After a few seconds, you can access the service via the configured domain.
Real Examples
Access Synology NAS from Outside
Synology DSM runs on port 5000 (HTTP) or 5001 (HTTPS) by default. Install cloudflared on NAS (Synology supports Docker, use cloudflare/cloudflared container), then point hostname nas.example.com → http://localhost:5000. Done, access from anywhere without QuickConnect.
Share Development App for Client Review
Coding a React app running on localhost:3000? Instead of deploying to Vercel just for demo, you create tunnel pointing demo.example.com → http://localhost:3000. Client clicks link and can see immediately, while you continue coding on your machine normally.
Home Assistant / Plex / Jellyfin
These homelab services usually run on Raspberry Pi or mini PC at home. Tunnel allows you to access Home Assistant (localhost:8123), Plex (localhost:32400), or Jellyfin (localhost:8096) from outside without touching ISP modem.
Running cloudflared as systemd service
If you created tunnel via Dashboard and ran the install command above, cloudflared is already installed as systemd service. Check status:
sudo systemctl status cloudflaredService will auto-start when machine reboots. Some management commands:
# Restart service
sudo systemctl restart cloudflared
# View logs
sudo journalctl -u cloudflared -f
# Stop service
sudo systemctl stop cloudflared
If you created tunnel using CLI (locally-managed), you need to run cloudflared service install manually to register systemd service.
Multiple hostnames on 1 tunnel
One tunnel can serve multiple hostnames simultaneously. No need to create separate tunnel for each service. For example, on the same machine you can configure:
nas.example.com→http://localhost:5000(Synology DSM)plex.example.com→http://localhost:32400(Plex)ha.example.com→http://localhost:8123(Home Assistant)cloud.example.com→http://localhost:8080(Nextcloud)
All go through the same tunnel, same cloudflared connection. To add new hostname, go to Dashboard → select tunnel → Add a public hostname.
Access control with Zero Trust policies
By default, anyone with the link can access services through tunnel. If you want to limit who can access, combine with Cloudflare Access.
For example, you want only yourself (or a few family members) to access NAS:
- Go to Zero Trust Dashboard → Access → Applications → Add an application.
- Choose Self-hosted, enter domain (example:
nas.example.com). - Create policy: allow specific email, example
your.email@gmail.com. - When accessing
nas.example.com, Cloudflare will require authentication via email OTP or Google/GitHub before allowing access.
Very useful for things that should not be public: admin panels, monitoring dashboards, database GUIs, or personal NAS.
Comparison: Tunnel vs traditional port opening
| Criteria | Open ports + Reverse Proxy | Cloudflare Tunnel |
|---|---|---|
| Ports open to internet | 80, 443 (minimum) | No ports needed |
| Public IP | Required | Not needed |
| SSL certificate | Self-install (Let’s Encrypt) | Cloudflare handles |
| Firewall config | Must allow inbound | Only need outbound |
| DDoS protection | Handle yourself or add CDN | Built-in via Cloudflare |
| Access control | Self-implement | Zero Trust policies |
| Setup complexity | Medium | Simple |
| NAT/Firewall bypass | No | Yes |
| Third-party dependency | No | Yes (Cloudflare) |
Tunnel is most suitable when: home machine has no public IP, behind NAT, ISP blocks ports, or you want to expose services without touching modem/router.
Opening ports still makes sense when: you need full control, do not want to depend on Cloudflare, or running protocols that tunnel does not support well (UDP game servers, direct SSH).
Troubleshooting
Common errors:
Tunnel not connecting (status: Inactive)
Check if service is running:
sudo systemctl status cloudflaredIf service has error, view detailed logs:
sudo journalctl -u cloudflared --no-pager -n 50Common causes:
- Wrong or expired token: Delete old tunnel, create new one, run install command again.
- Firewall blocks outbound:
cloudflaredneeds to connect to port 7844 (QUIC) or 443 (HTTP/2) of Cloudflare. Ensure outbound traffic is not blocked. - DNS resolve error: Check if machine can resolve DNS with
nslookup cloudflare.com.
Hostname not accessible (502/504 error)
Tunnel connected but accessing domain shows 502 or 504 error? Problem usually lies with service on your machine:
- Service not running: Check if service is listening on configured port. Example:
curl http://localhost:3000on machine. - Wrong port or protocol: If service uses internal HTTPS, you need to select Type as
HTTPSin hostname config, and may need to enable No TLS Verify if using self-signed certificate. - Service only binds to 127.0.0.1: This is not a problem since
cloudflaredruns on same machine. But if service binds to different IP, adjust URL accordingly.
DNS record conflict
If subdomain already has DNS record (A or CNAME) before you add hostname to tunnel, there might be conflict. Go to Cloudflare DNS dashboard, delete old record, then add hostname again in tunnel config. Cloudflare will automatically create new CNAME record pointing to tunnel.
Conclusion
Cloudflare Tunnel is free and quick to setup. Where it shines brightest is personal computers, homelab, NAS, Raspberry Pi, or any machine behind NAT that you want to access from outside. VPS can also use it, but VPS already has public IP so benefits are less.
If you are running homelab or have a home machine you want to access remotely, tunnel is the simplest way I know. Install cloudflared, create tunnel on Dashboard, add hostname, done.
You might also like
- 4 Free and Open-Source Alternatives to Cloudflare Tunnel Worth Considering
- Securing Self-Hosted AI - SSL, Authentication and Firewall for Ollama
- Domain, DNS and SSL on Coolify — Configure Domain Names and Automatic HTTPS
- How to Rent a VPS: Choose a Configuration and Set It Up Safely
- Reverse Proxy Ollama with Nginx - Access AI via Custom Domain with HTTPS
- What is Coolify? - Self-hosted alternative to Vercel, Heroku for free
About the author

Trần Thắng
Expert at AZDIGI with years of experience in web hosting and system administration.