Nội dung
Introduction
In today’s digital age, safeguarding online information becomes more crucial than ever. SSL (Secure Sockets Layer) is an encryption technology between the client and server, ensuring that transmitted information is secure and protected. In this article, we will explore how to install free SSL on AZDIGI Host with Let’s Encrypt™ SSL.
Installation Steps
Step 1: Log in to cPanel
To check the SSL installation status, you need to log in to cPanel and find the Let’s Encrypt™ SSL section:

Step 2: Choose the Domain
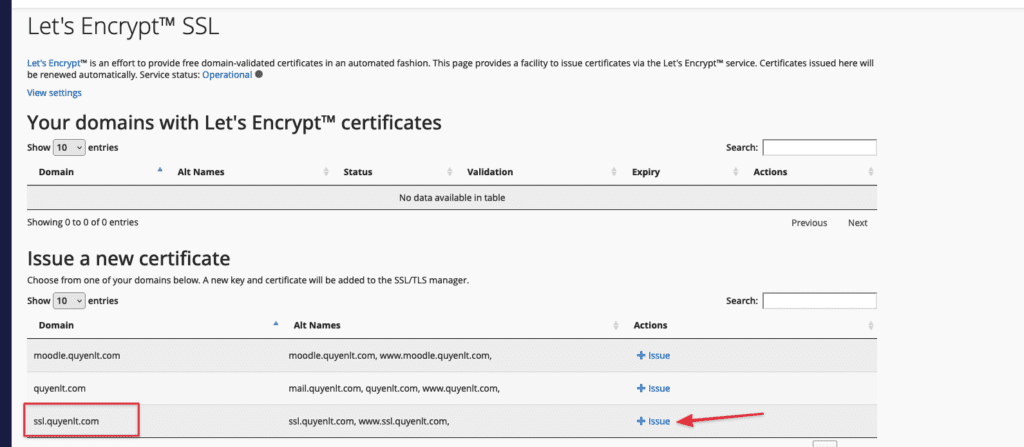
Here, I will install SSL for the subdomain ssl.quyenlt.com, but the process is similar for the main domain or addon domain.
Locate the domain you want to install SSL for => click “Issue” :

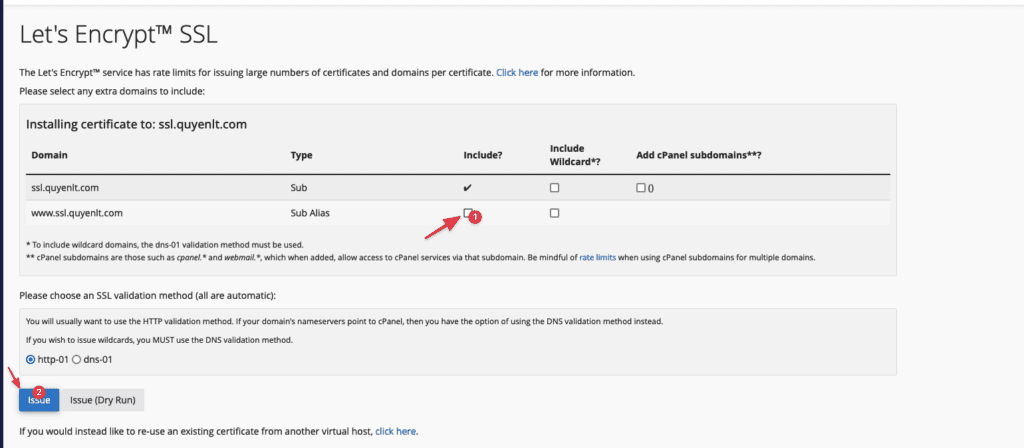
Next, uncheck the “Include?” column if you haven’t pointed the DNS to the IP.
For example, if mail.domain.com is not pointed to the hosting IP, uncheck it, then continue with the “Issue” button, wait for about 30 seconds to 1 minute, and the SSL installation will be completed.

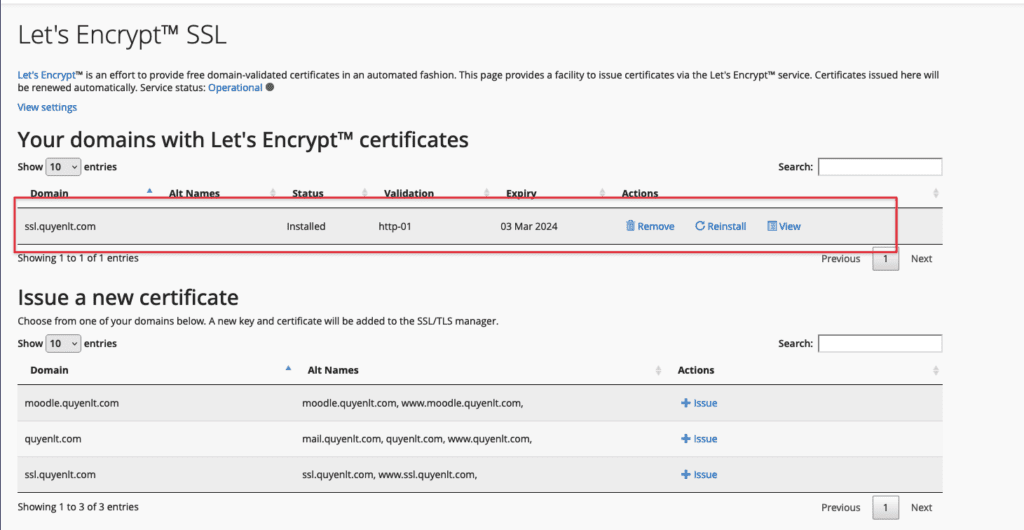
If it appears as below, then you have successfully installed it!

After a few minutes, you will see the SSL successfully installed, displaying actions such as:
- Remove
- Reinstall
- View: View certificate information

In case you encounter an error like the one below:

You just need to go to the SSL/TLS Status section of CPanel, then choose Exclude from AutoSSL for that domain, as SSL/TLS Status may be in the process of installing free SSL on your domain.

The status after Excluding from AutoSSL is as follows:

After that, you can go back to the process from Step 2.
Conclusion
Installing free SSL on AZDIGI Host with Let’s Encrypt™ SSL is a simple and effective way to protect your online information. By using SSL, you can ensure that your data is transmitted securely. Apply the above guide and start securing your website today!
If you need assistance, you can contact support in the ways below:
- Hotline 247: 028 888 24768 (Ext 0)
- Ticket/Email: You use the email to register for the service and send it directly to: support@azdigi.com.

