Nội dung
Use File Manager on HestiaCP efficiently and securely. Let’s find out with AZDIGI!
I. Overview
File Manager is a powerful file management tool handy and almost indispensable for a website administrator. File Manager helps users manage files and folders efficiently with an intuitive interface that is easy to operate.
Almost all control panels have a built-in File Manager, but each control has different interfaces and operations. So does HestiaCP and in this article, AZDIGI will guide you on the operations and usage of File Manager on HestiaCP.
II. How to use File Manager on HestiaCP
To use File Manager on HestiaCP effectively and safely, I will go into each step of the operation:
Step 1: Access File Manager on HestiaCP
To create the User HestiaCP interface, click on Files as shown below to move into the File Manager management interface.

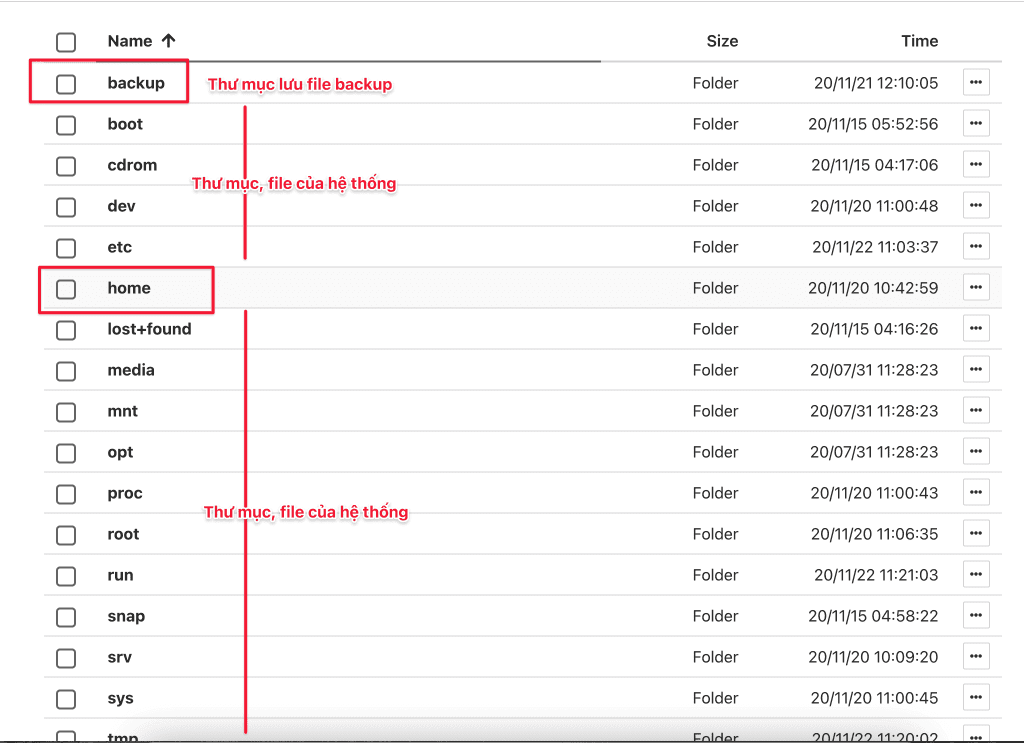
To avoid errors when accessing File Manager, you just need to pay attention and use 2 folders, Home and Backup.
- The home folder will manage all your data.
- The backup folder is where you save the files that you back up.
- In addition to these 2 folders, the remaining folders are of the system, so you should limit and not edit and delete these files and folders so as not to cause errors.
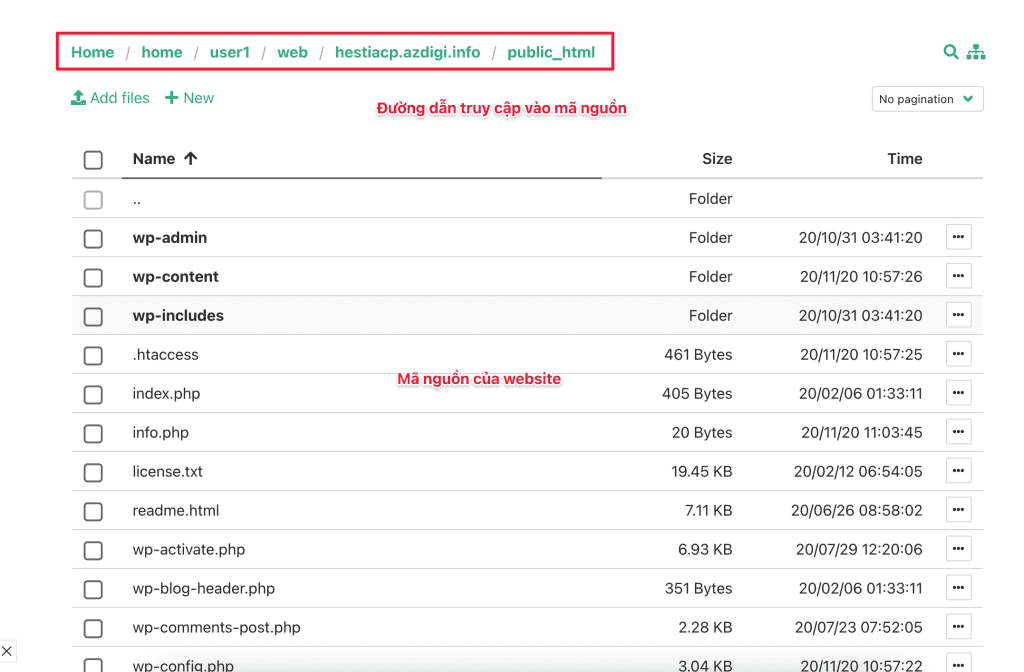
Next, click on the /Home/My-User/Web/My-domain/public_html directory to move to the website hosting directory. Here you will see the path to that folder, and the folder will show the source code.
Step 2: Operations on File Manager
1. Create a folder on HestiaCP
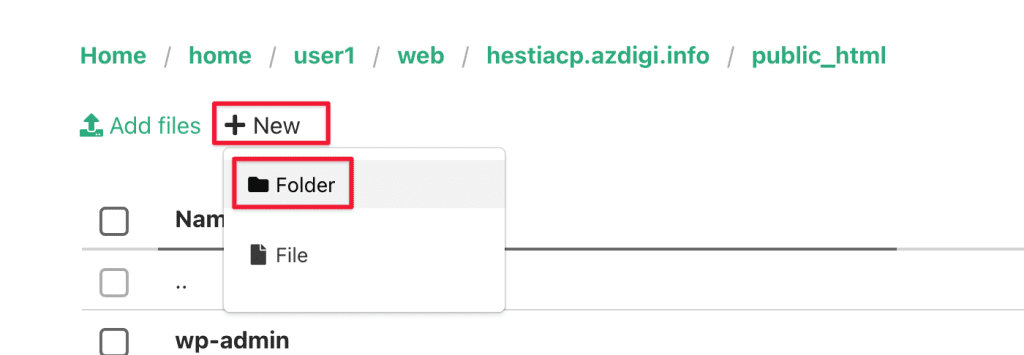
To create a folder, click +New => Folder
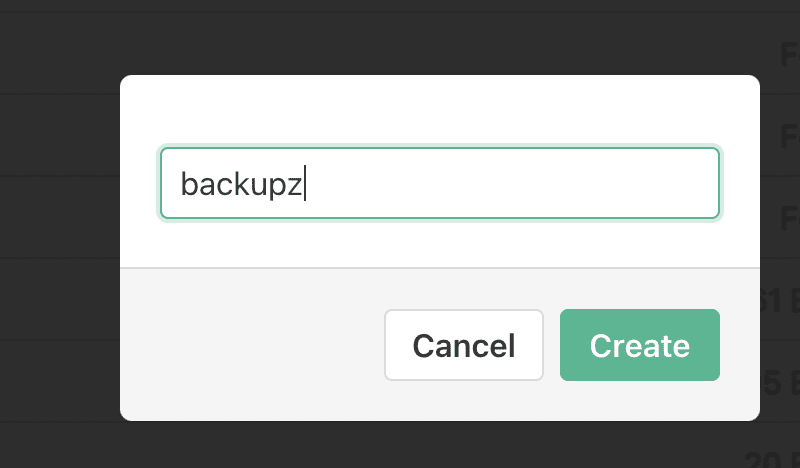
Then name the folder to create => click Create to finish.
2. Create a file on HestiaCP
To create a new file, click +New => File
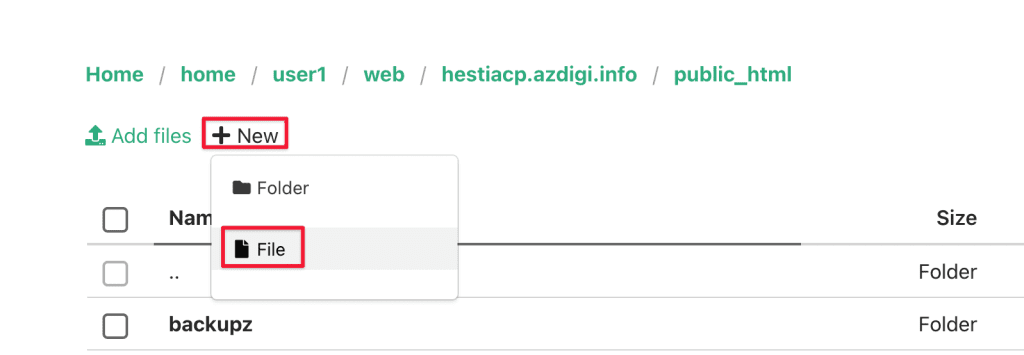
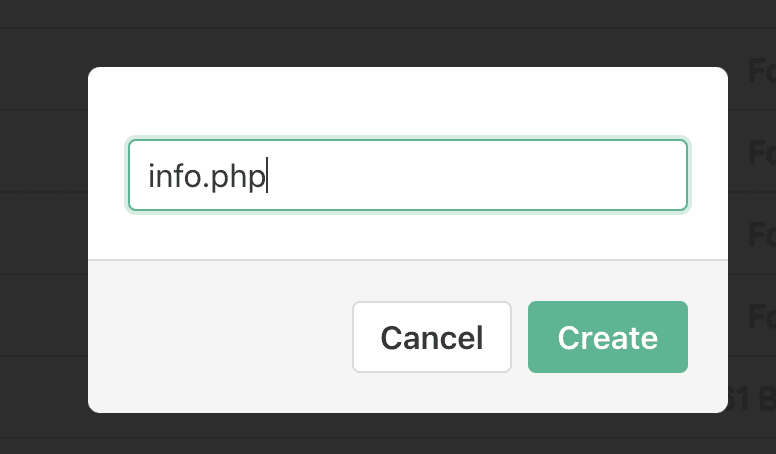
Then name the file to create => click Create.
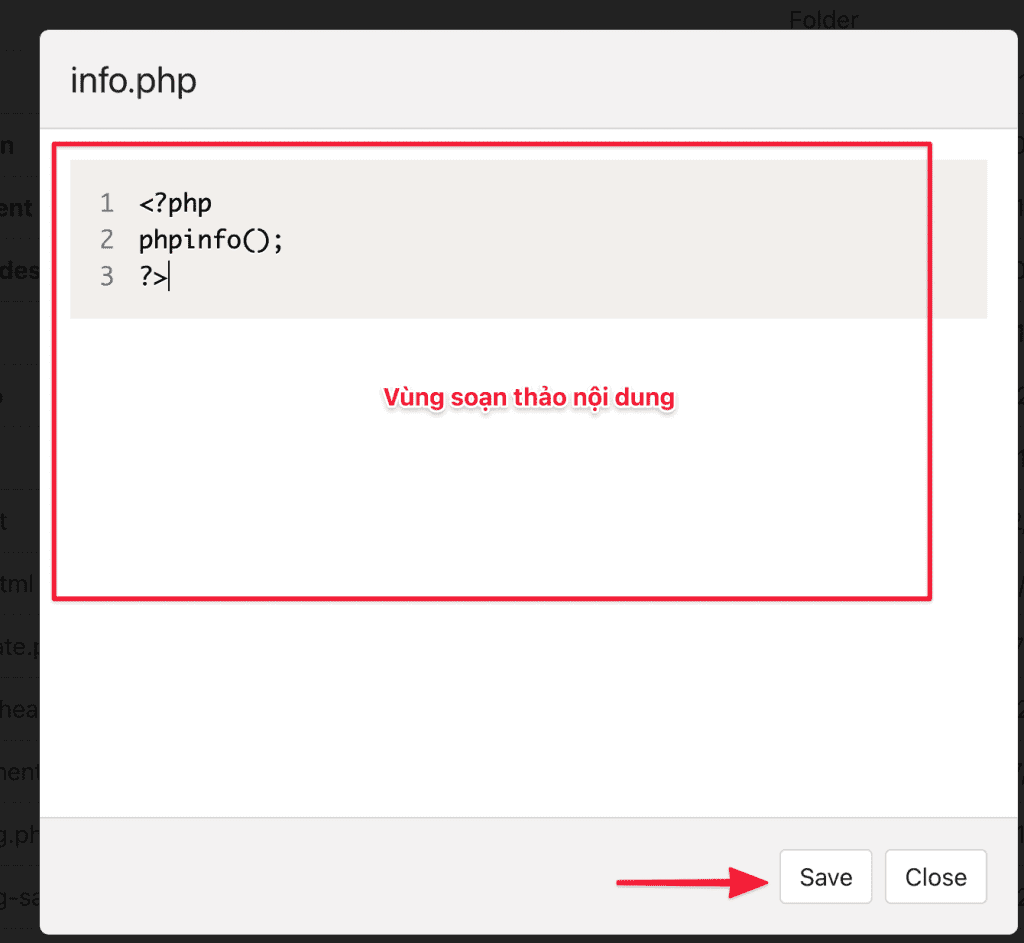
After creating, click on the created file to enter the file content editing interface. When you have finished entering the content, click Save.
3. Deletion on HestiaCP
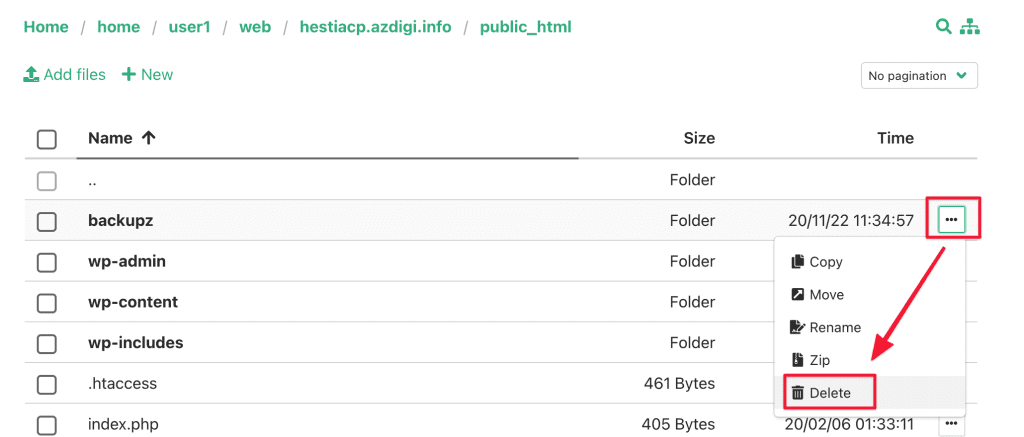
To delete a file or folder, click on the icon ... 3 dot => click Delete. To delete more files, tick the ô vuông check box to select multiple files to delete simultaneously.
A message appears asking if you are sure to delete it. If you agree to delete, click Delete, or you can click Cancel to cancel the operation.

4. Compress files on HestiaCP
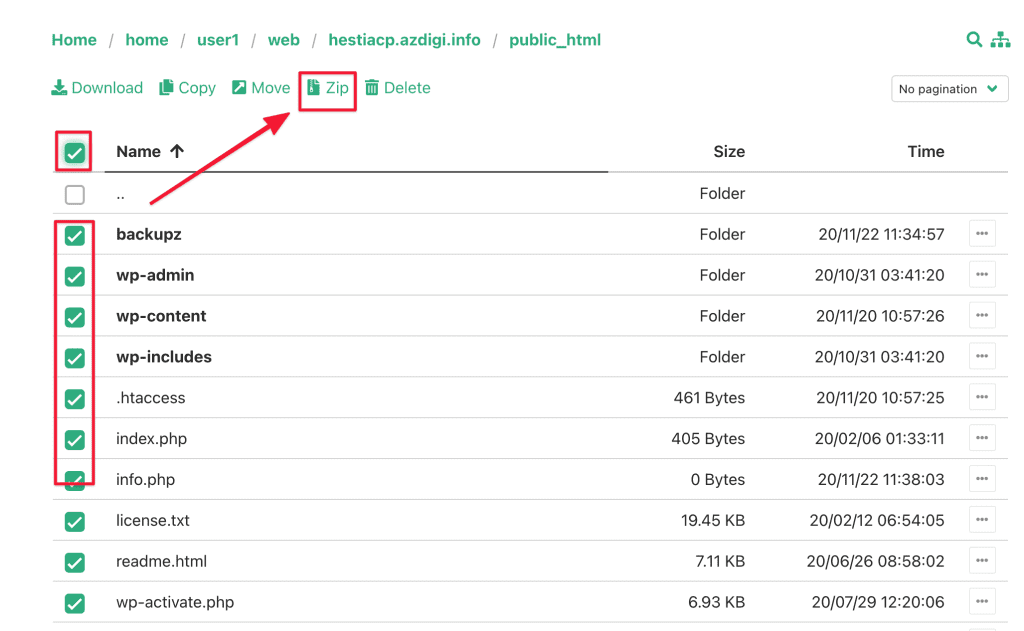
Assuming you want to back up the source code and download it to your computer, you can compress all the folder files into one .zip file. To do this, select certain folder files or all => click on ZIP to execute.
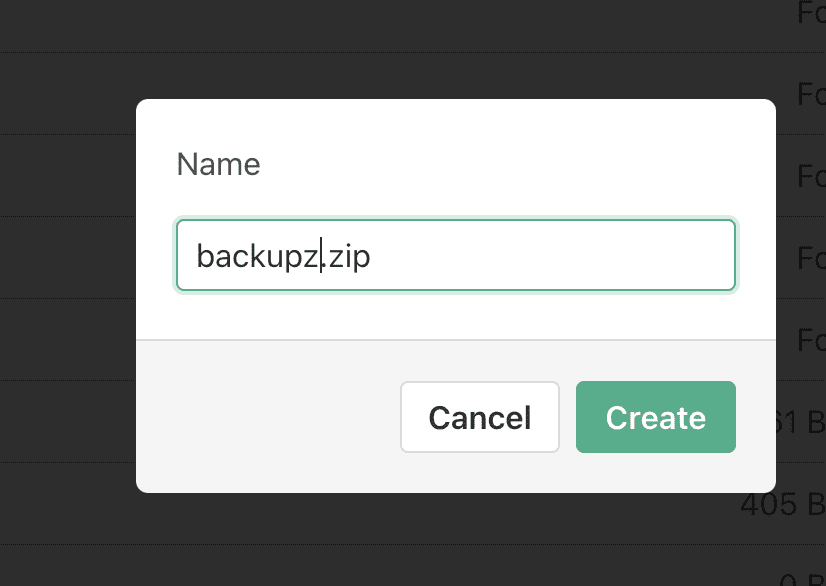
Then you name the file .zip and click Create. Fast or slow execution time will depend on the size of the file.

5. Extract files on HestiaCP
To extract a file, click on the 3 dots “...” icon, as shown below => select Unzip to extract the file.
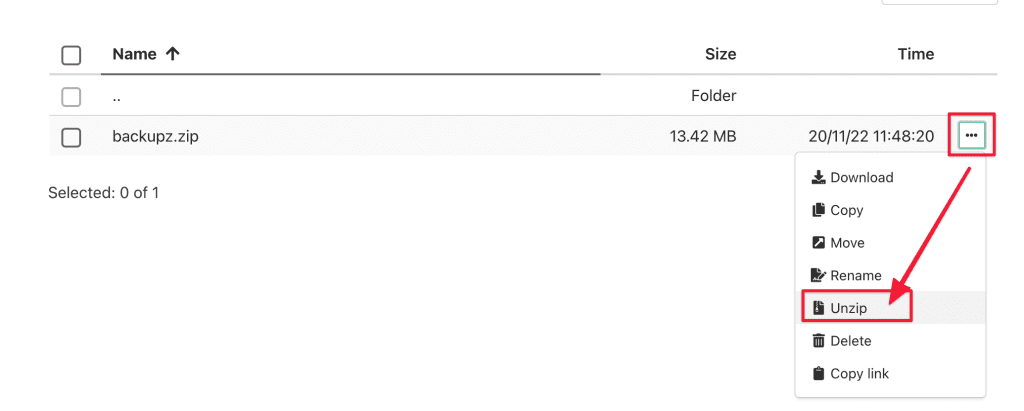
A message appears asking if you are sure to extract, you choose to Unzip to do or Cancel to cancel the operation. With large files, it may take a few minutes to complete.

6. Upload files to HestiaCP
To upload a file from local to HestiaCP through File Manager, click Add files => select the local file to upload.

After clicking on the file, the system will start uploading the file. When the download is complete, you will see the Done message as shown below:

7. Rename files/folders in HestiaCP
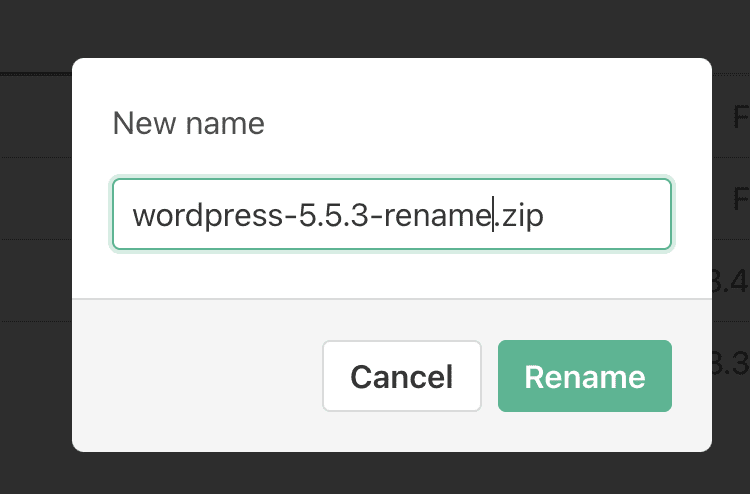
To rename a file/folder in HestiaCP, select the file and click on the 3 dots “...” icon => select Rename.

The system will appear a dialog box for you to enter the name to change => select Rename.
8. Manipulate copy files and folders on HestiaCP
This operation will duplicate a file/folder from folders together.
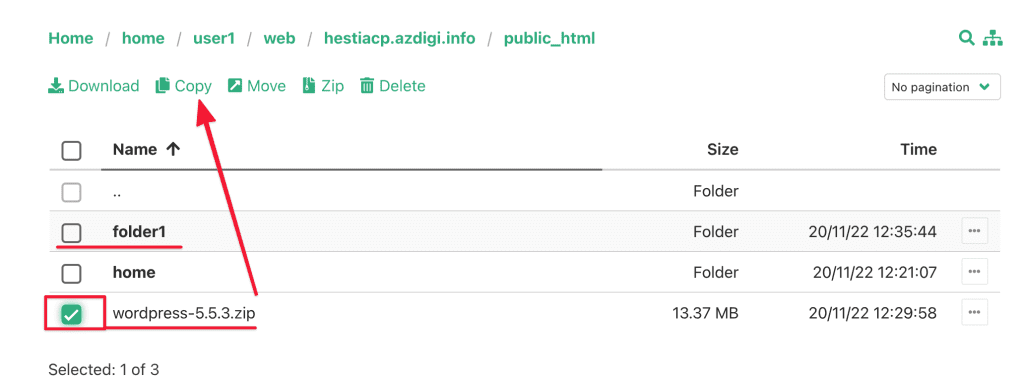
In the illustration below, I have a folder named Folder1, I will copy the wordpress-5.5.3.zip file into this folder1.
You select a file or multiple files to copy => select Copy as shown below:
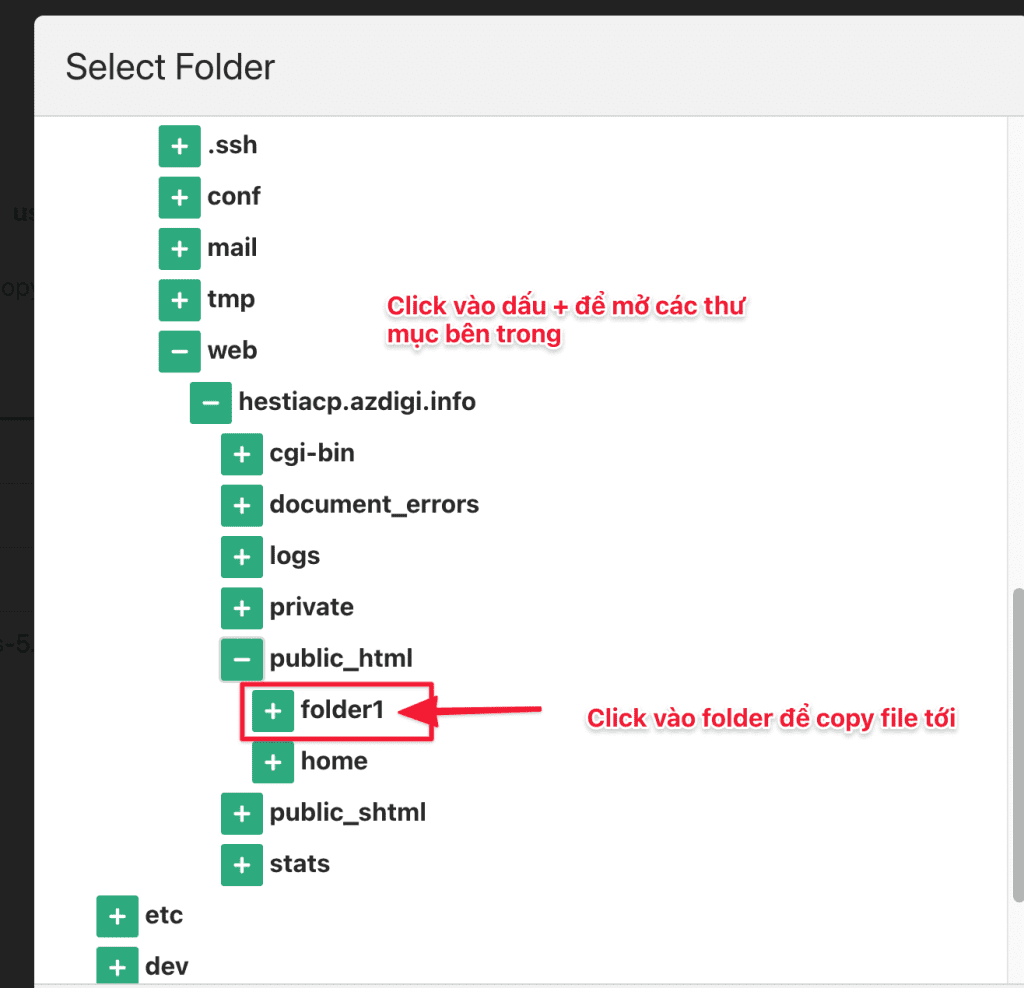
The screen will appear with a folder tree interface, click on + to continue to open the subfolders inside the main folder. Once you have identified the folder to copy, you just need to click on that folder.
And here is my result:

9. Manipulate move files and folders on HestiaCP
This operation will move files from folders together.
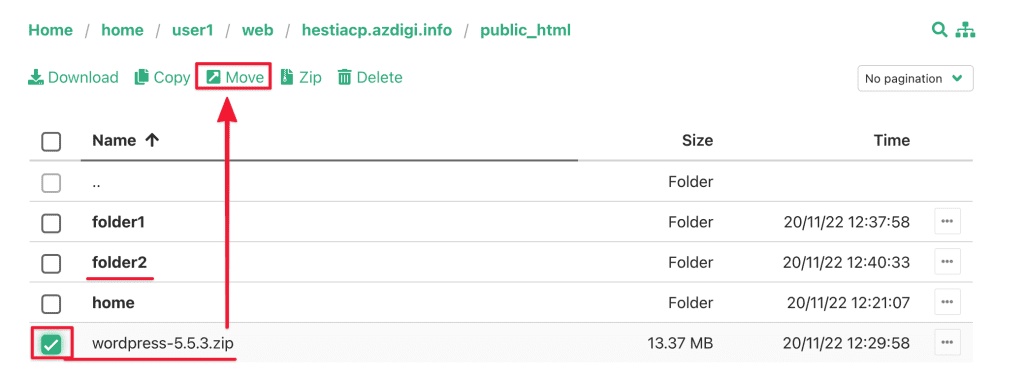
In the illustration below, I have a folder named Folder2, I will move the file wordpress-5.5.3.zip to this folder2.
You select a file or multiple files to move => select Move as shown below:
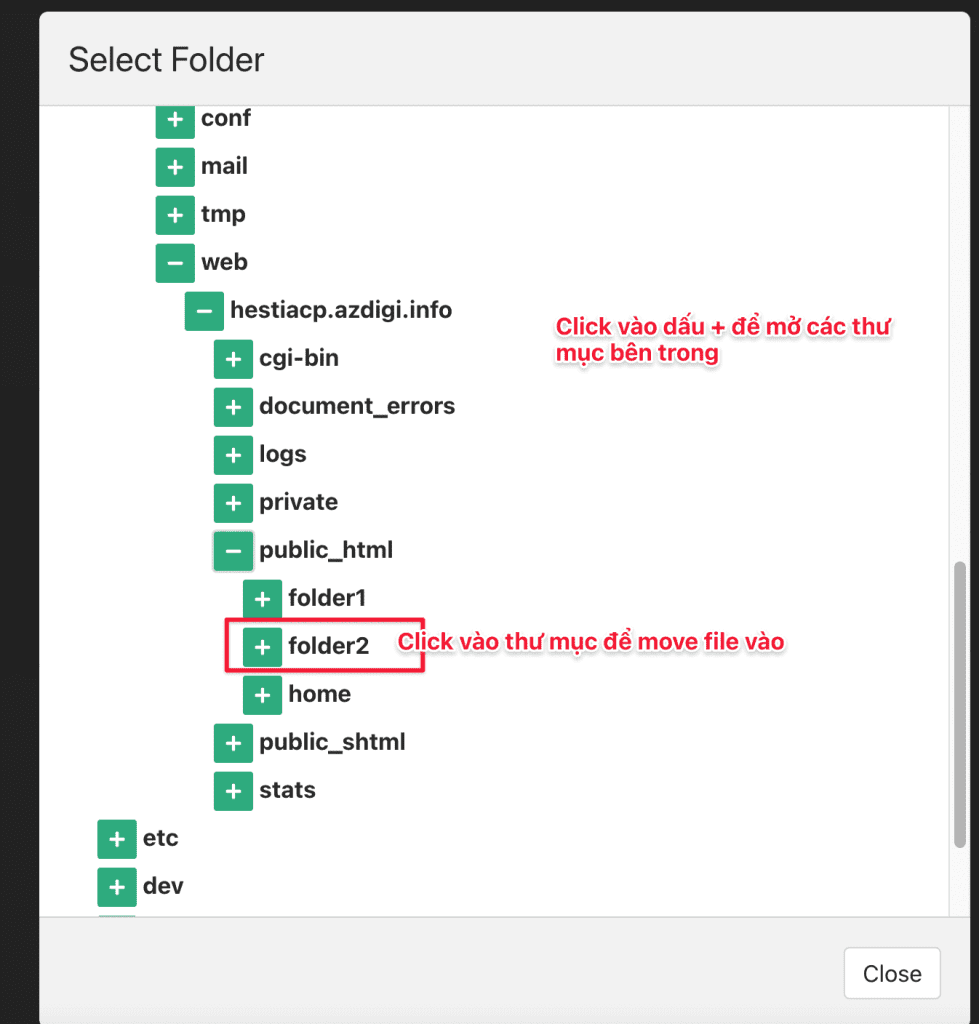
The screen will appear with a folder tree interface, click on + to continue to open the subfolders inside the main folder. Once you have identified the folder to move, you just need to click on that folder.
And below is the result of my move file, the file has been moved in successfully.

III. Summary
Hopefully, this article will provide you with more knowledge to use this tool competently and confidently with File Manager operations.
Wishing you success!
If you need assistance, you can contact support in the ways below:
- Hotline 247: 028 888 24768 (Ext 0)
- Ticket/Email: You use the email to register for the service and send it directly to: support@azdigi.com .

