Configuring DKIM, SPF on HestiaCP helps your emails when sent with high reliability, the ability to go to the inbox is higher than those that do not have DKIM, SPF configured.
I. Overview
AZDIGI currently provides mail hosting services at extremely attractive prices to users. Using email hosting helps your personal and business become more professional. Assuming you are a company, when you send mail to a partner, you cannot use the @gmail.com extension, but your @domain will increase the credibility of your business.
Like AZDIGI, a technology company that provides server infrastructure and mail services… When sending emails to partners and customers, the email extension must be @azdigi.com. This is an indispensable necessity. And letting email into inbox mailbox is a complicated matter; let’s find out with AZDIGI.
II. Steps to configure DKIM, SPF on HestiaCP
To configure DKIM SPF on HestiaCP, follow these 3 steps.
Step 1: Check your email
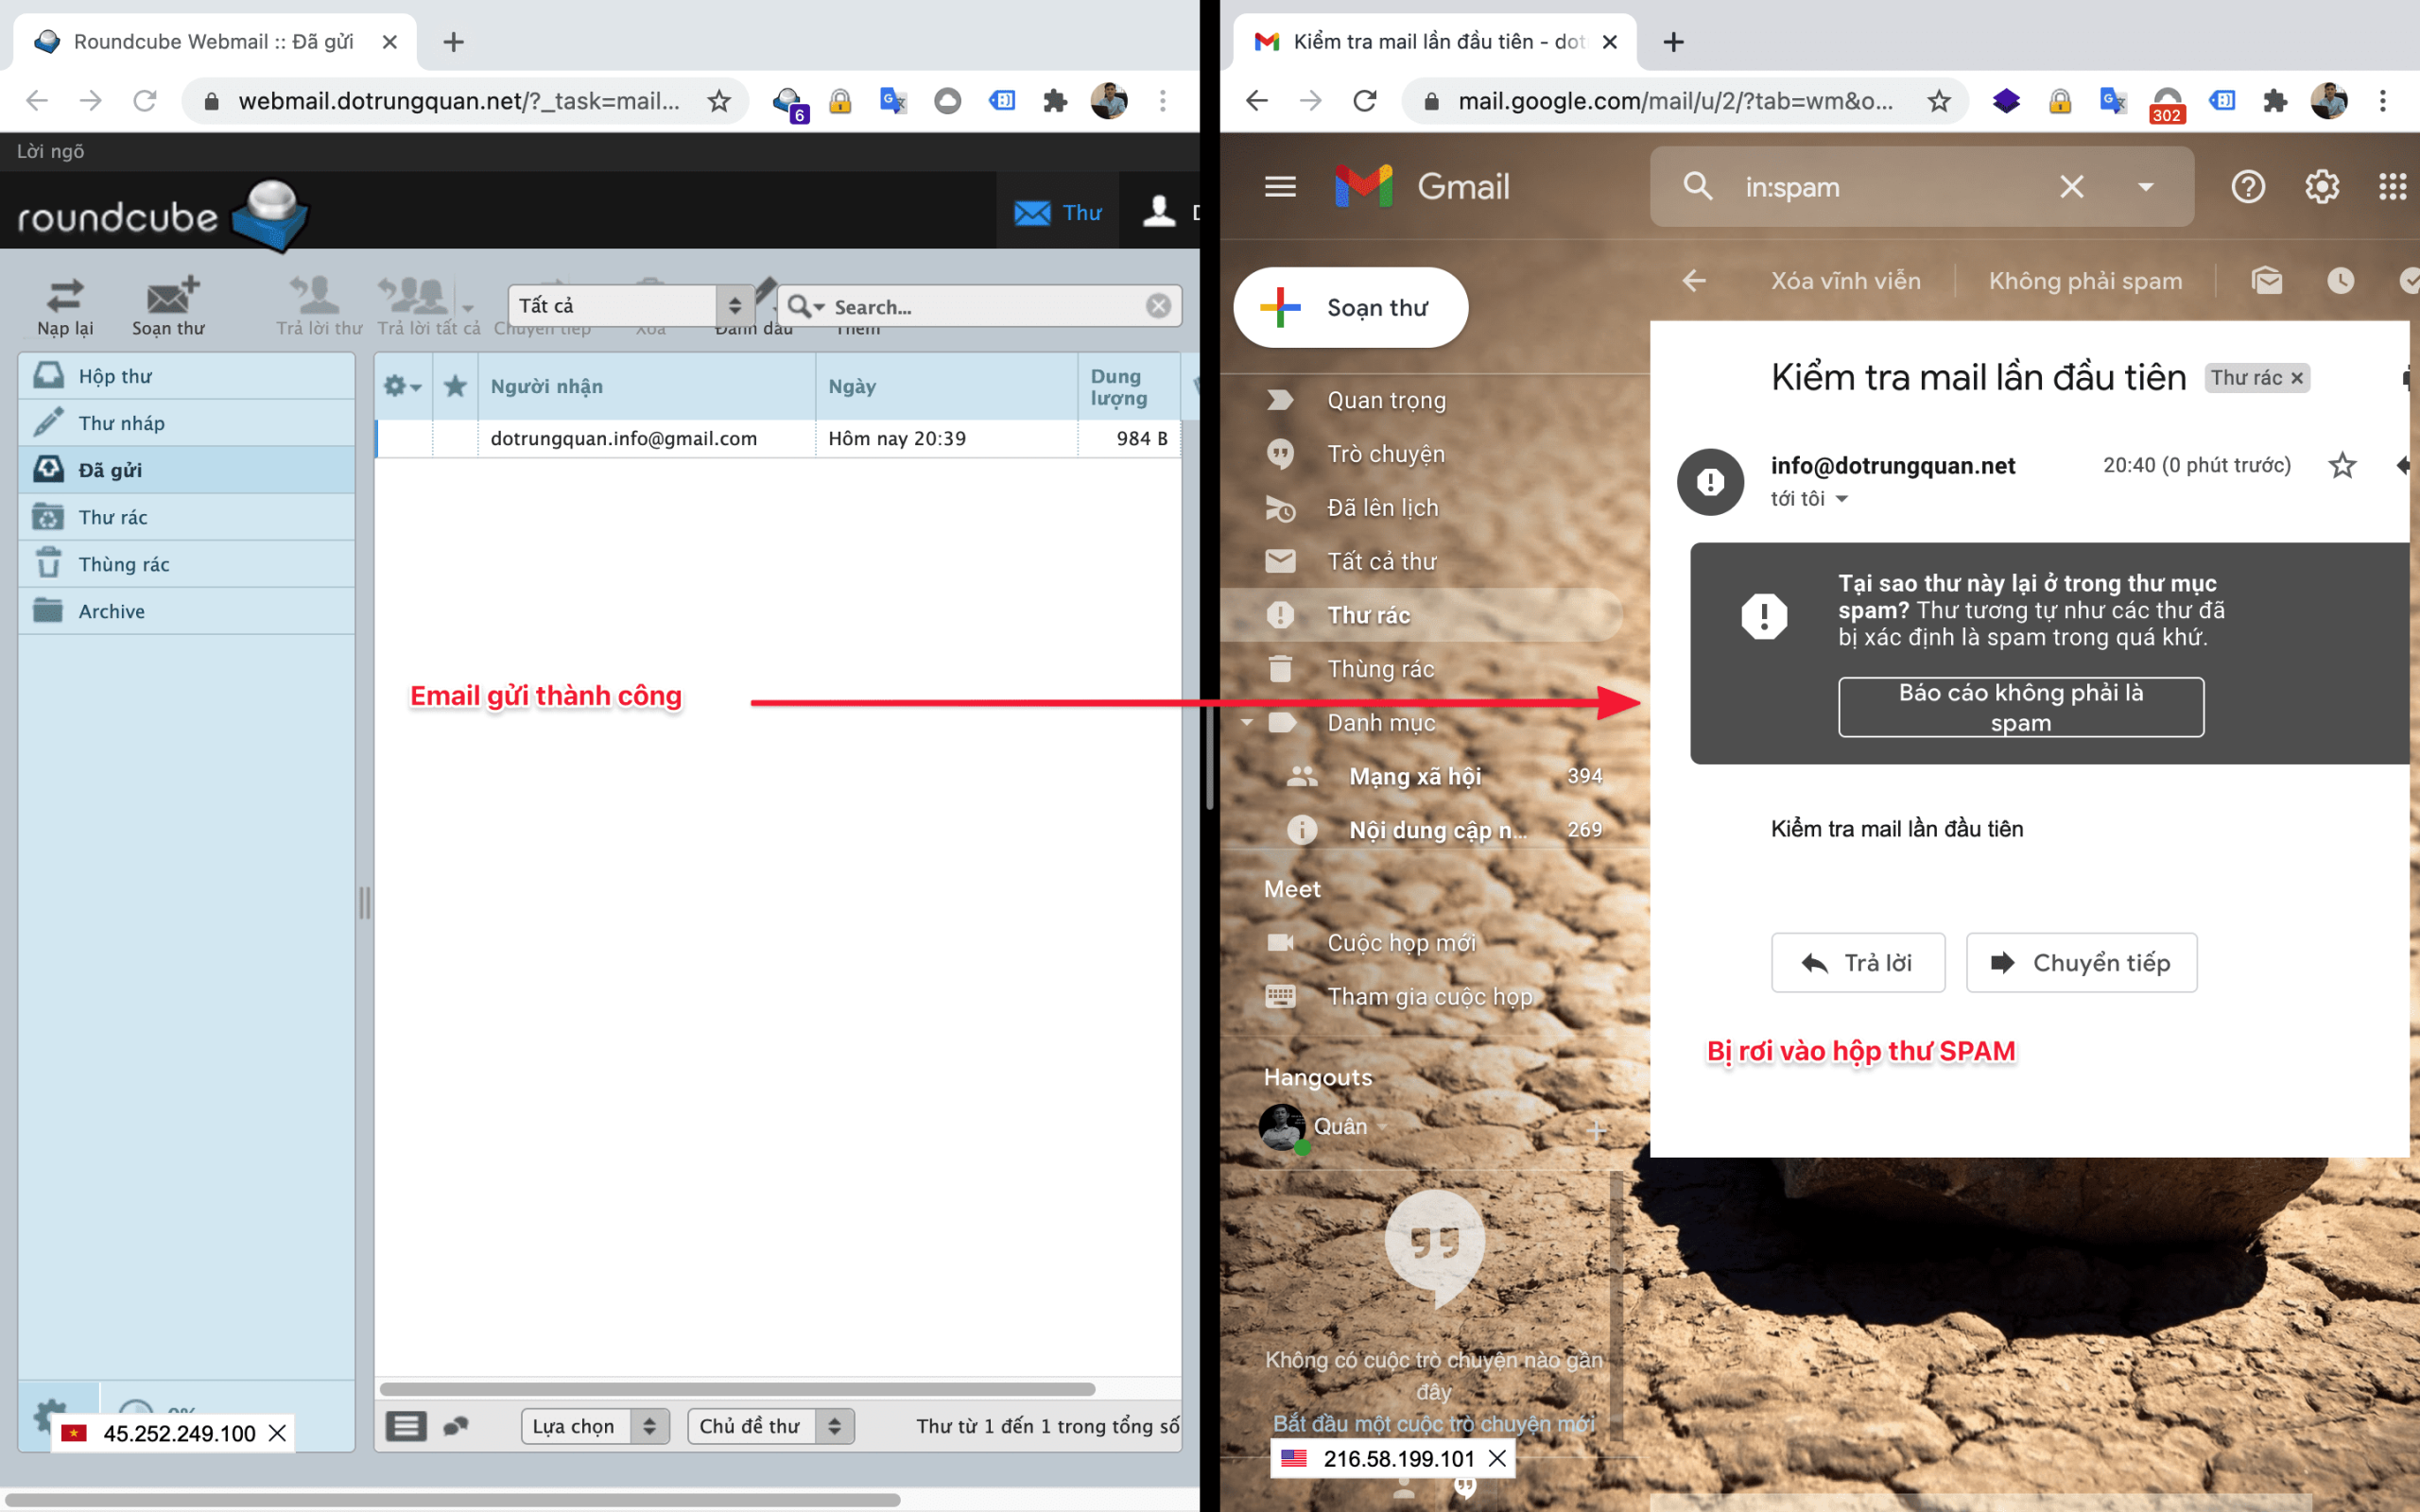
After creating a mail account, you send mail, but the emails are in the SPAM dialog box. This problem makes your emails not reach high users, the reputation of the mail is also greatly reduced compared to the emails sent in INBOX.
Below is an illustration of how I sent mail, but the email fell into the SPAM dialog box.

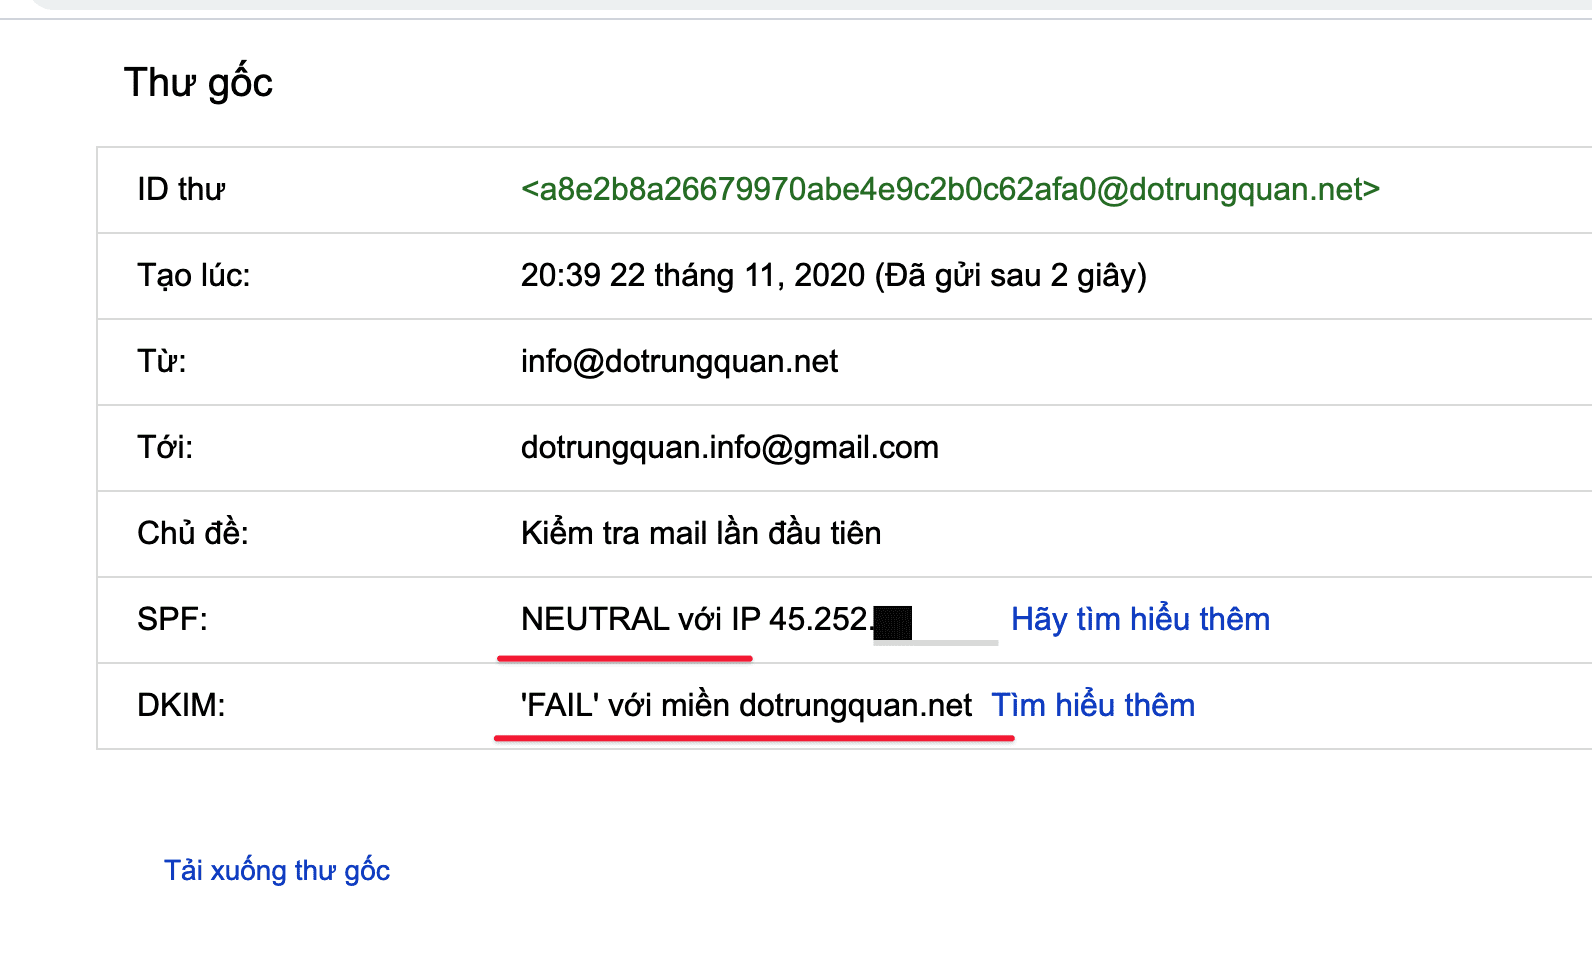
I open Kiểm tra thư gốc (Original Message) and see that the domain name has not been configured with 2 important records, DKIM and SPF. So I will summarize these 2 records:
- DKIM (Domain Keys Identified Mail) is a method to help authenticate emails through the digital signature of the mailing domain, this helps to avoid email forgery, the original main purpose of DKIM was designed to let the recipient can determine if the email is coming from a specific domain, whether that domain is real, authorized or not.
- SPF (SPF Record – Sender Policy Framework) is an email evaluation system that detects whether an email has been spoofed by a mechanism that allows the system to receive the email, check email sent from a domain is authenticated by the domain administrator.
Step 2: Configure DKIM, SPF records
To get the DKIM string, you need to SSH into the server. If you don’t know how to SSH into your VPS/Server, you can refer to the following tutorial:
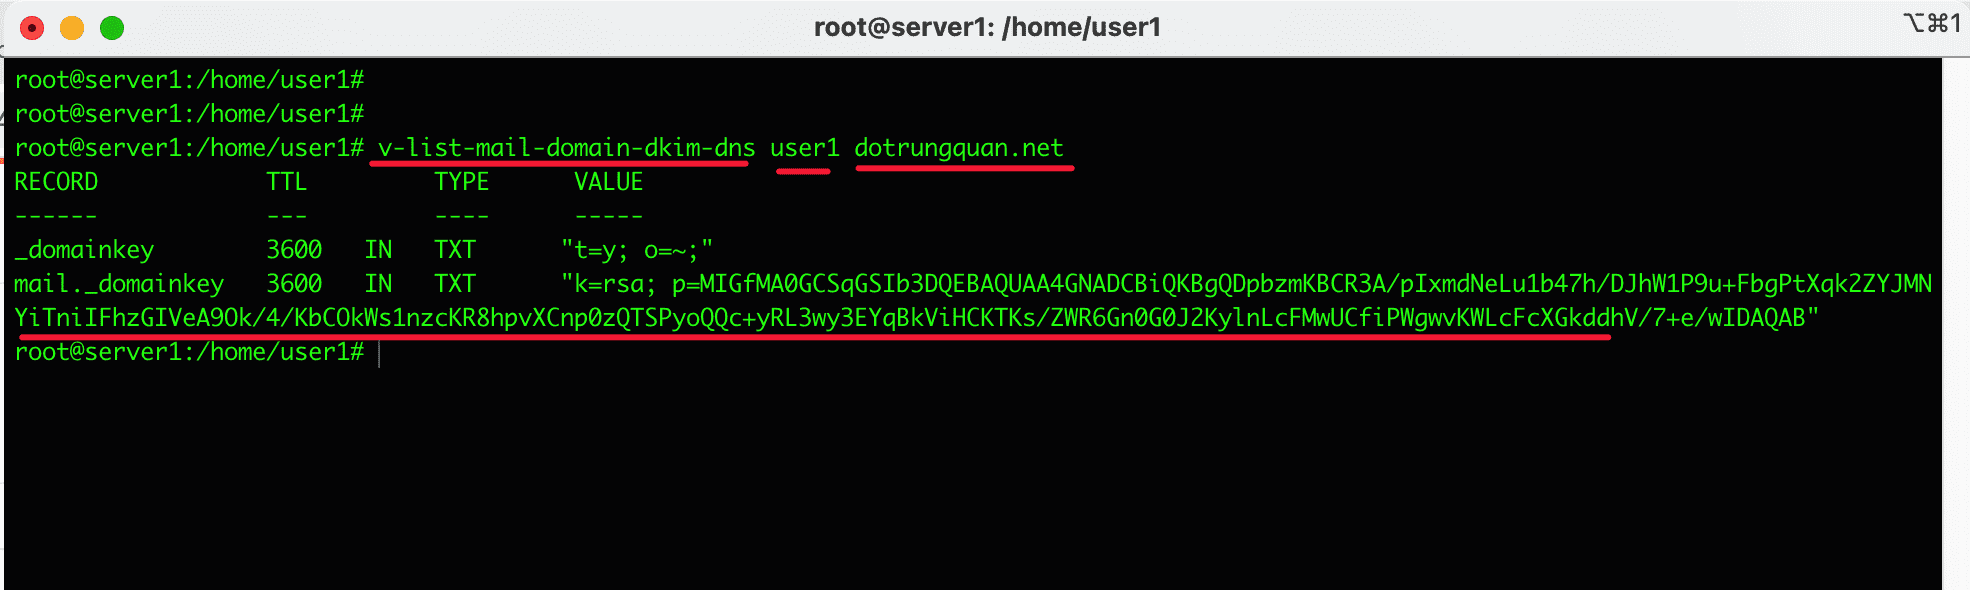
After SSH into the server, enter the following command to get the DKIM string:
v-list-mail-domain-dkim-dns user1 dotrungquan.net
Command annotation:
- v-list-mail-domain-dkim-dns: This is the implementation syntax, you keep this syntax.
- user1: This is the user that I addon the domain to, please replace this user1 with your user.
- dotrungquan.net: Domain by mail. Please replace it with your domain name.
After entering, you will see 2 TXT records appear on the screen, and behind is a string of characters. You need to configure these strings to your DNS domain.
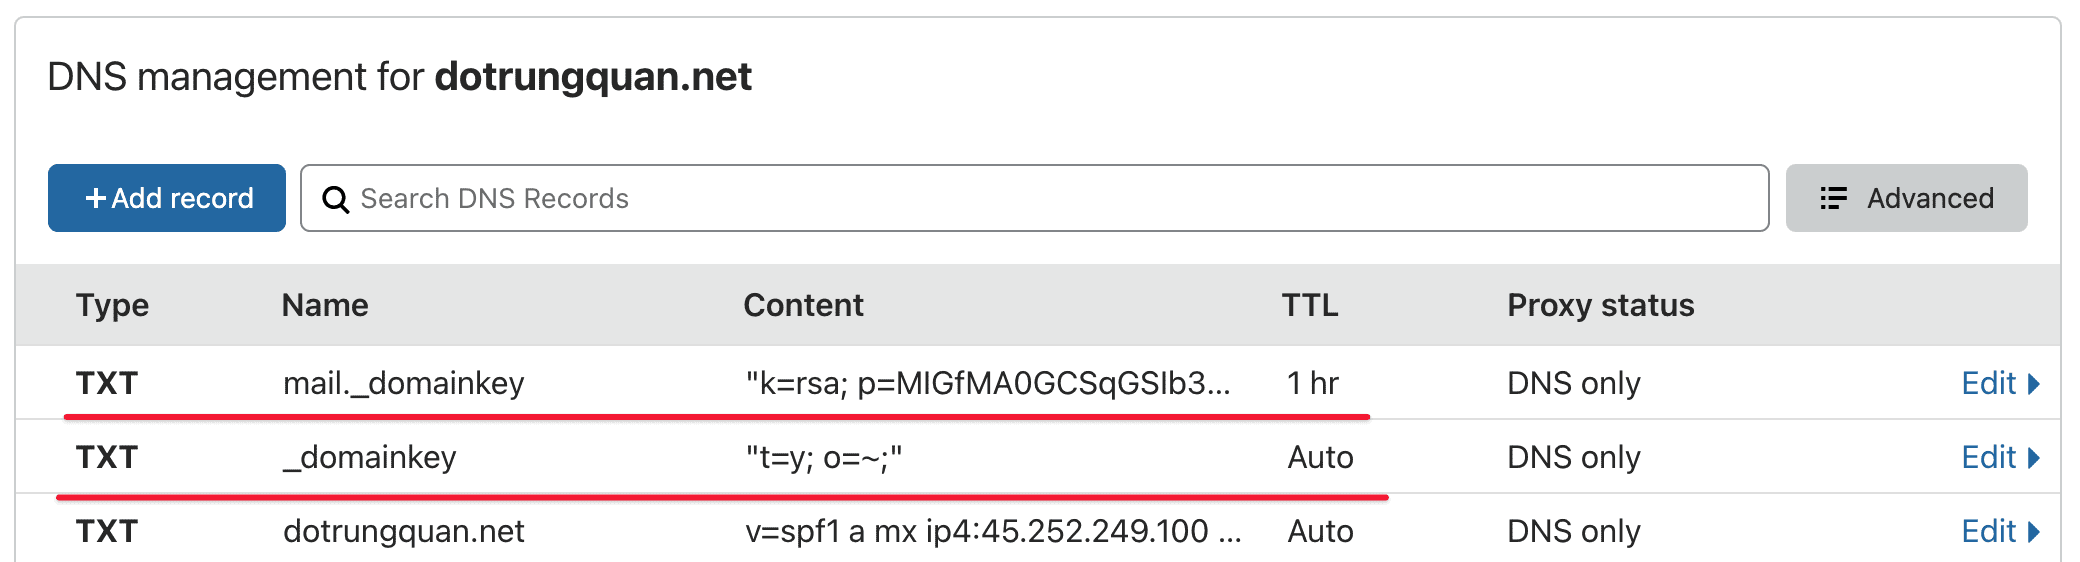
In the interface below, you configure 3 TXT records, including:
- mail._domainkey: You will copy the string above and paste it in
- _domainkey: You will copy the above character string and paste it in
- The last record is the SPF you will configure as follows:
- Type: TXT
- Name: Enter
@ormy-domain - Content (Value): “v=spf1 a mx ip4:45.252.249.100 ~all”
- Note: Replace
45.252.249.100with your server IP.
- Note: Replace
Step 3: Check your mail after updating the record
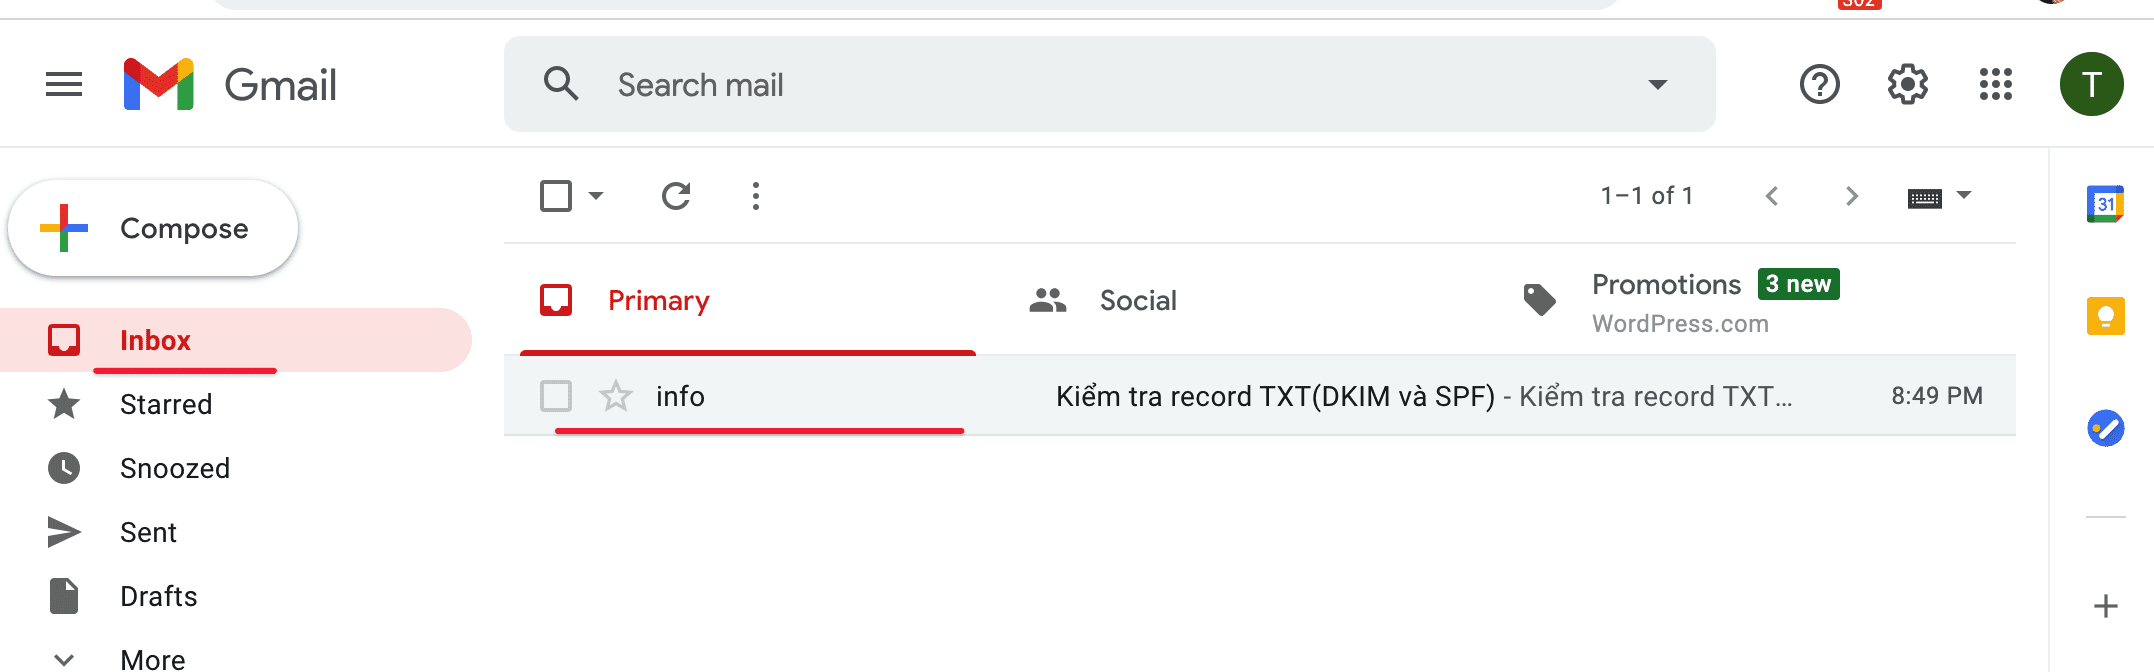
After you have finished updating the records, you wait a little while for the domain server DNS system to update and synchronize the records. And after the system has updated, try composing and sending an email to a new mail account to test.
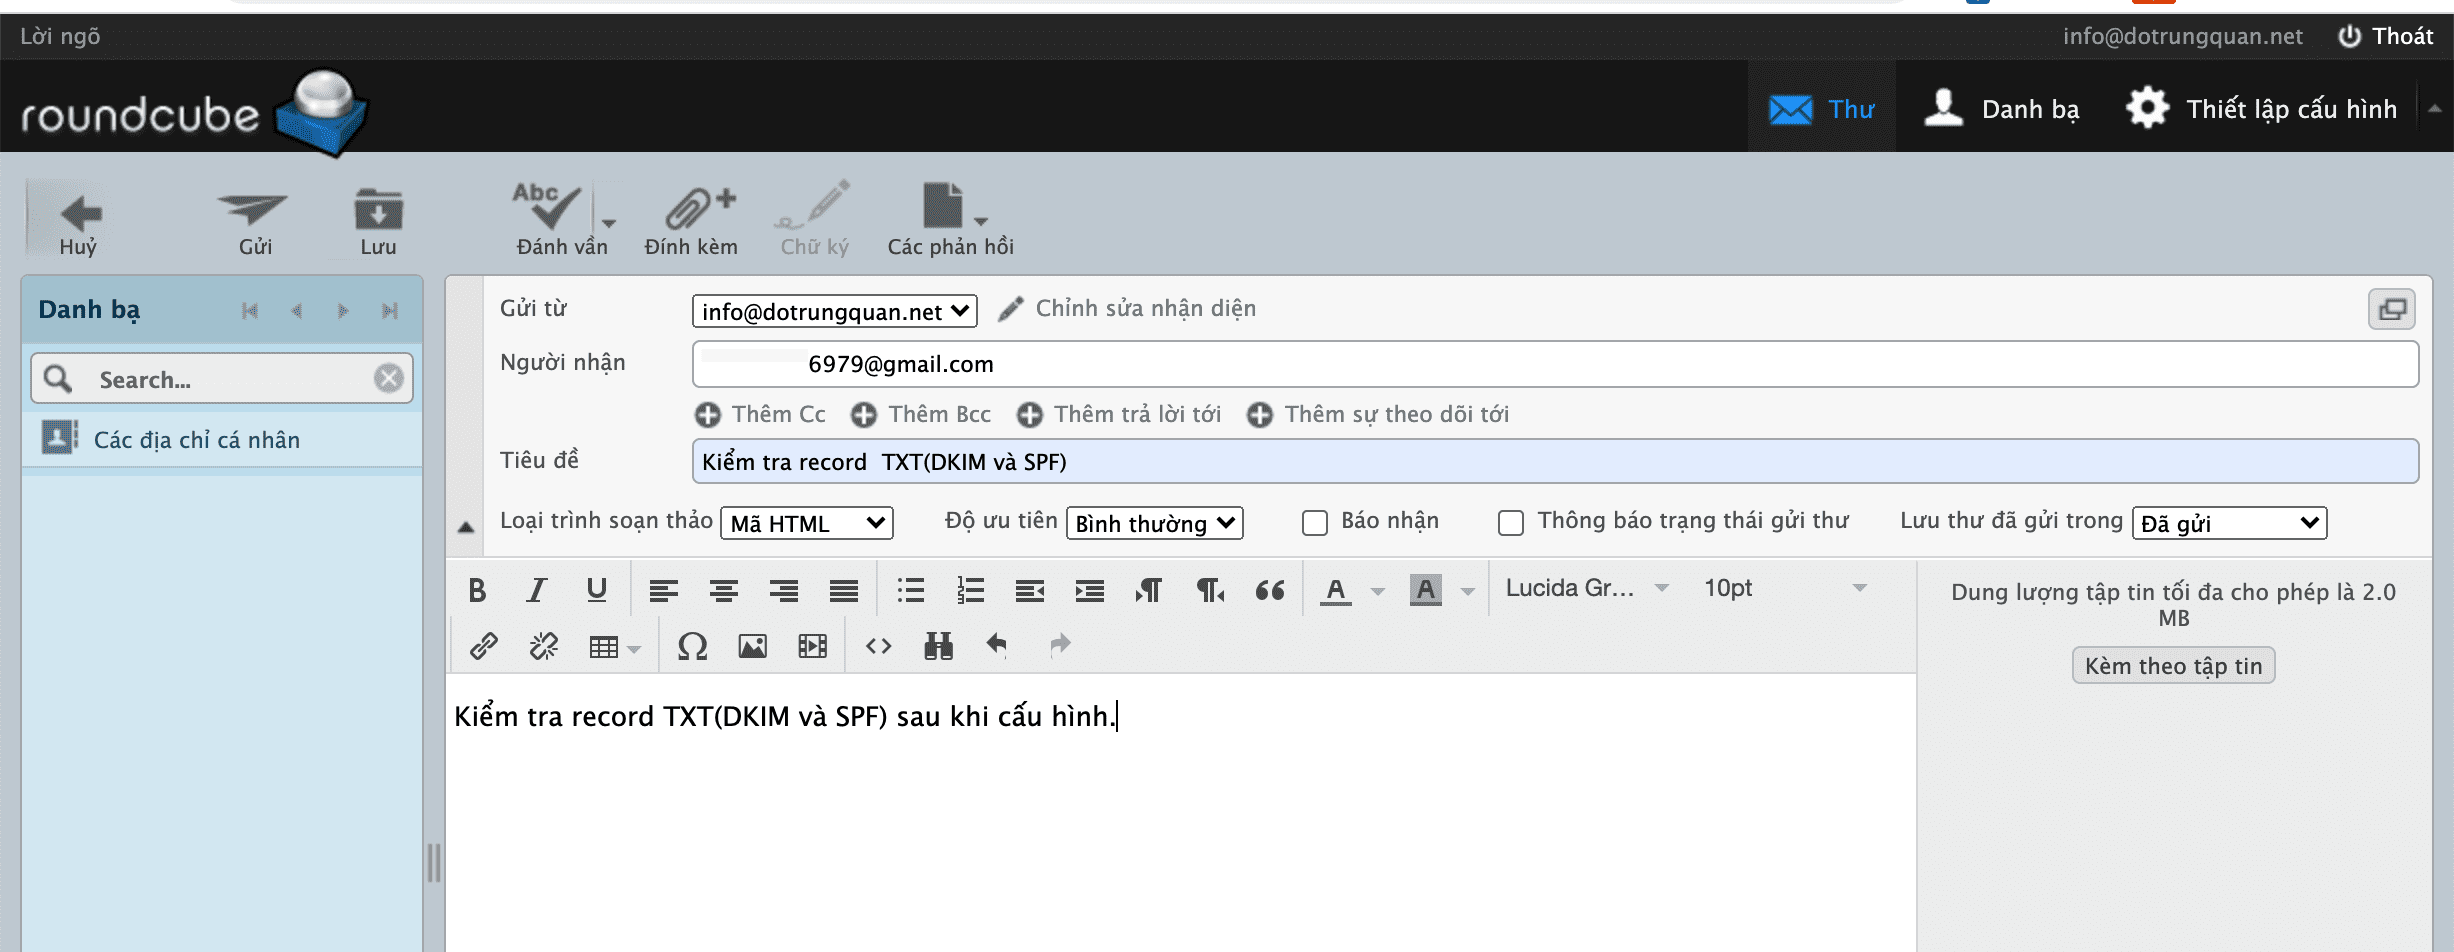
After composing and sending an email, I open my Gmail mailbox and see that the email has been sent to the INBOX dialog box.
To check whether the records have been updated or not, you click on the “... đứng” => select show Hiển thị thư gốc (Original Message) and see the line SPF, DKIM. if it shows the PASS message, the record has been updated.

III. Summary
Hopefully, this article can help you successfully configure the record, making your email delivery go more smoothly. However, you should also note that
not all emails, when fully updating the records, can also enter the INBOX because in addition to the configured record, there are some other factors, such as the trust of the domain name, whether the domain name is a phishing attack, is the email spammed by the user, is the content of the email sent properly, is the attachment infected with a virus, does the sent content contain filtered characters, etc.
Because of mail inadequacies as well as ensuring email delivery problems, AZDIGI has developed an Email Hosting service to serve users with the best and cheapest Email service for smooth use in sending and receiving emails.
If you need assistance, you can contact support in the ways below:
- Hotline 247: 028 888 24768 (Ext 0)
- Ticket/Email: You use the email to register for the service and send it directly to: support@azdigi.com .
About the author

Thạch Phạm
Đồng sáng lập và Giám đốc điều hành của AZDIGI. Có hơn 15 năm kinh nghiệm trong phổ biến kiến thức liên quan đến WordPress tại thachpham.com, phát triển website và phát triển hệ thống.