Backup Restore on HestiaCP keeps your data safe. Let’s find out with AZDIGI!
I. Overview
As a system administrator, data management, ensuring data is always available is the essential thing. Your server may be down, but with the data inside, you need to ensure periodic backups to minimize any risks, thereby improving professionalism as well as ensuring data is always safe.
Usually, every hosting provider has its periodic backup system and these backups are backed up on a set schedule. For example, the provider system schedules backups every 2 AM every Saturday. But during the operation, your data is corrupted and you want to recover the latest data, but if you don’t have it, losing the most recent data is inevitable.
In this article, AZDIGI wants to share how to perform Backup/Restore on HestiaCP. Let’s follow along.
II. Backup/Restore on HestiaCP
Term:
- Backup
- Restore
1. Automatic HestiaCP Backup
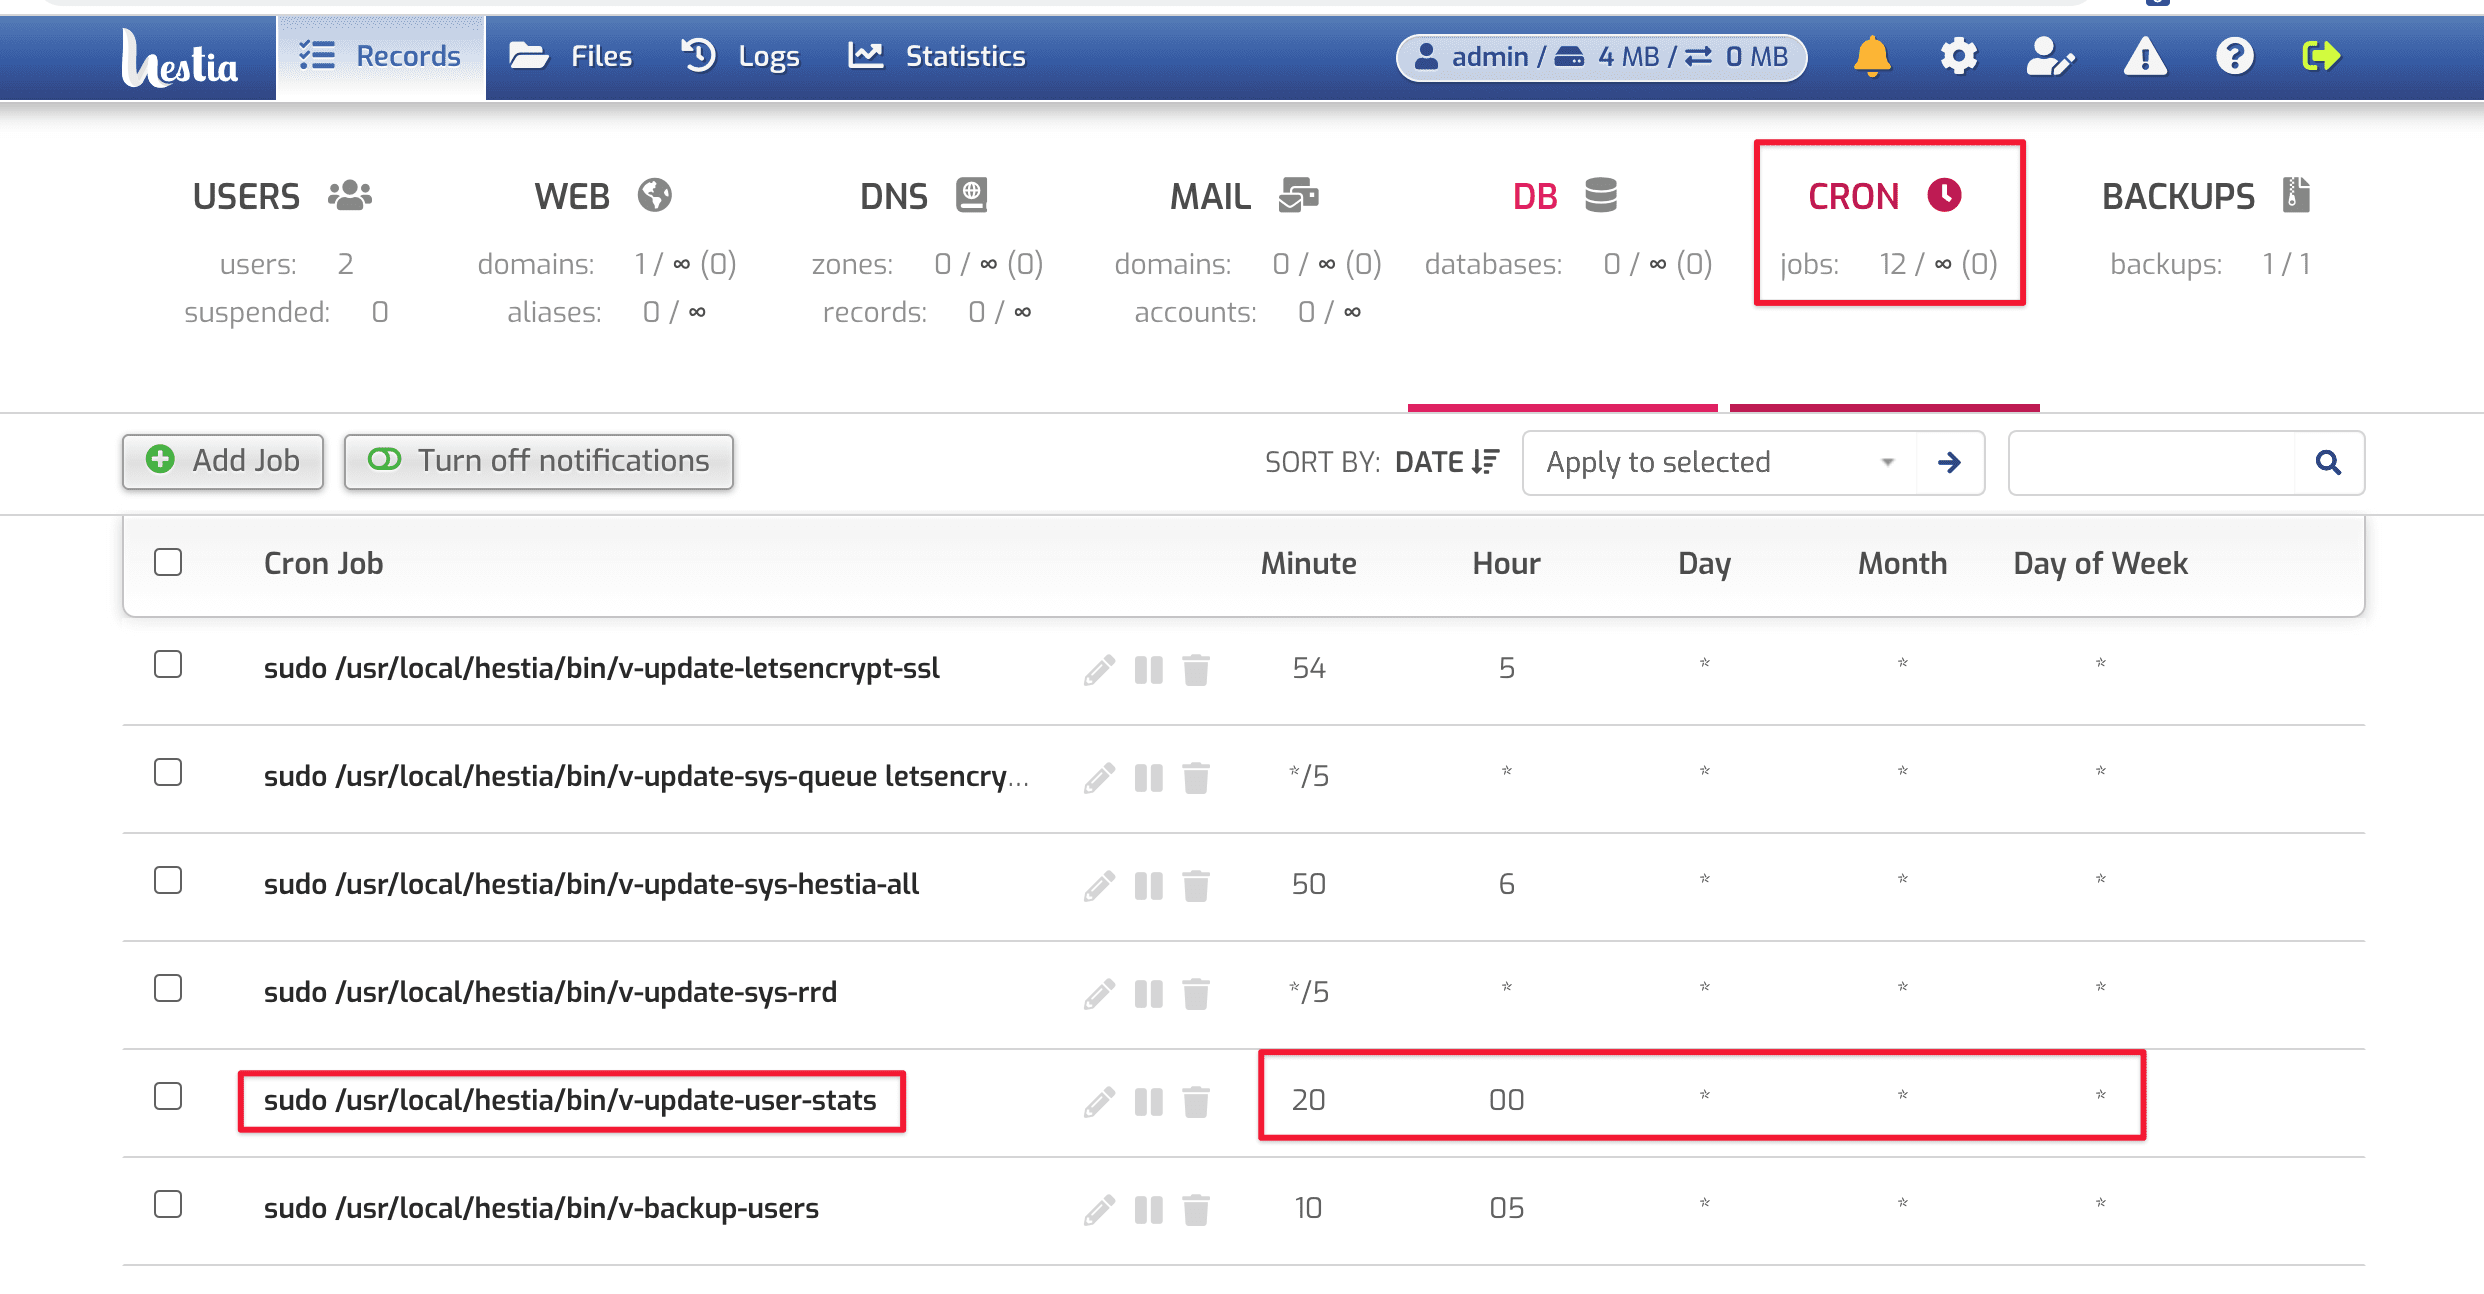
With the HestiaCP control, the system will automatically configure cron to run periodic backups for you when you are done installing. You can check this Cron backup at the HestiaCP admin interface in the CRON section as shown below:

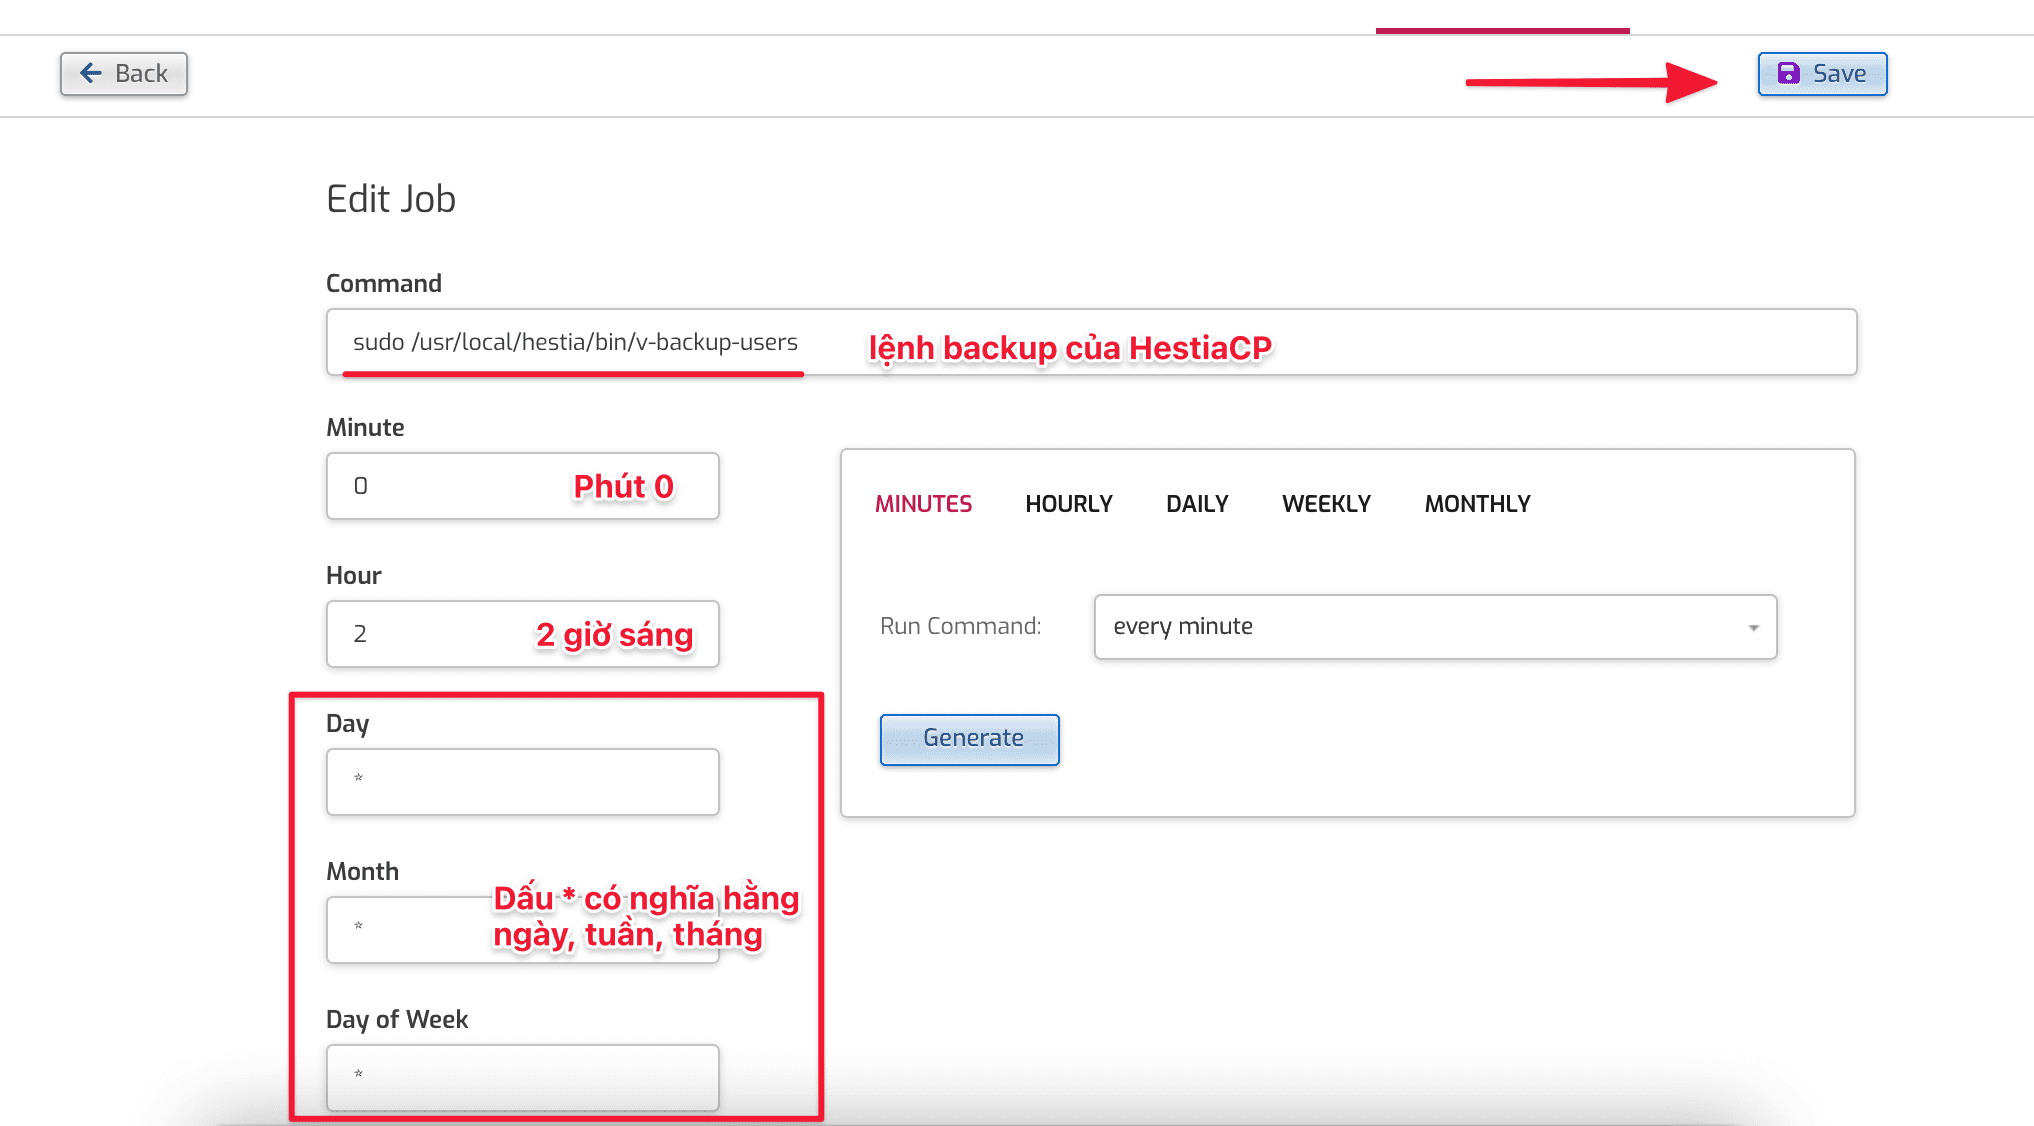
With CRON, the system will automatically back up all USERs available on HestiaCP at (0h20m daily). And you can change this automatic backup schedule by clicking on the “pen” icon and adjusting the execution time:
- Refer to crontab to set the time for CRON.
With a set schedule, the system will automatically run the backup at the right time and minute. Below are the backup files that are backed up according to my schedule.

2. Backup HestiaCP manually
To backup manually on HestiaCP, follow these 2 steps.
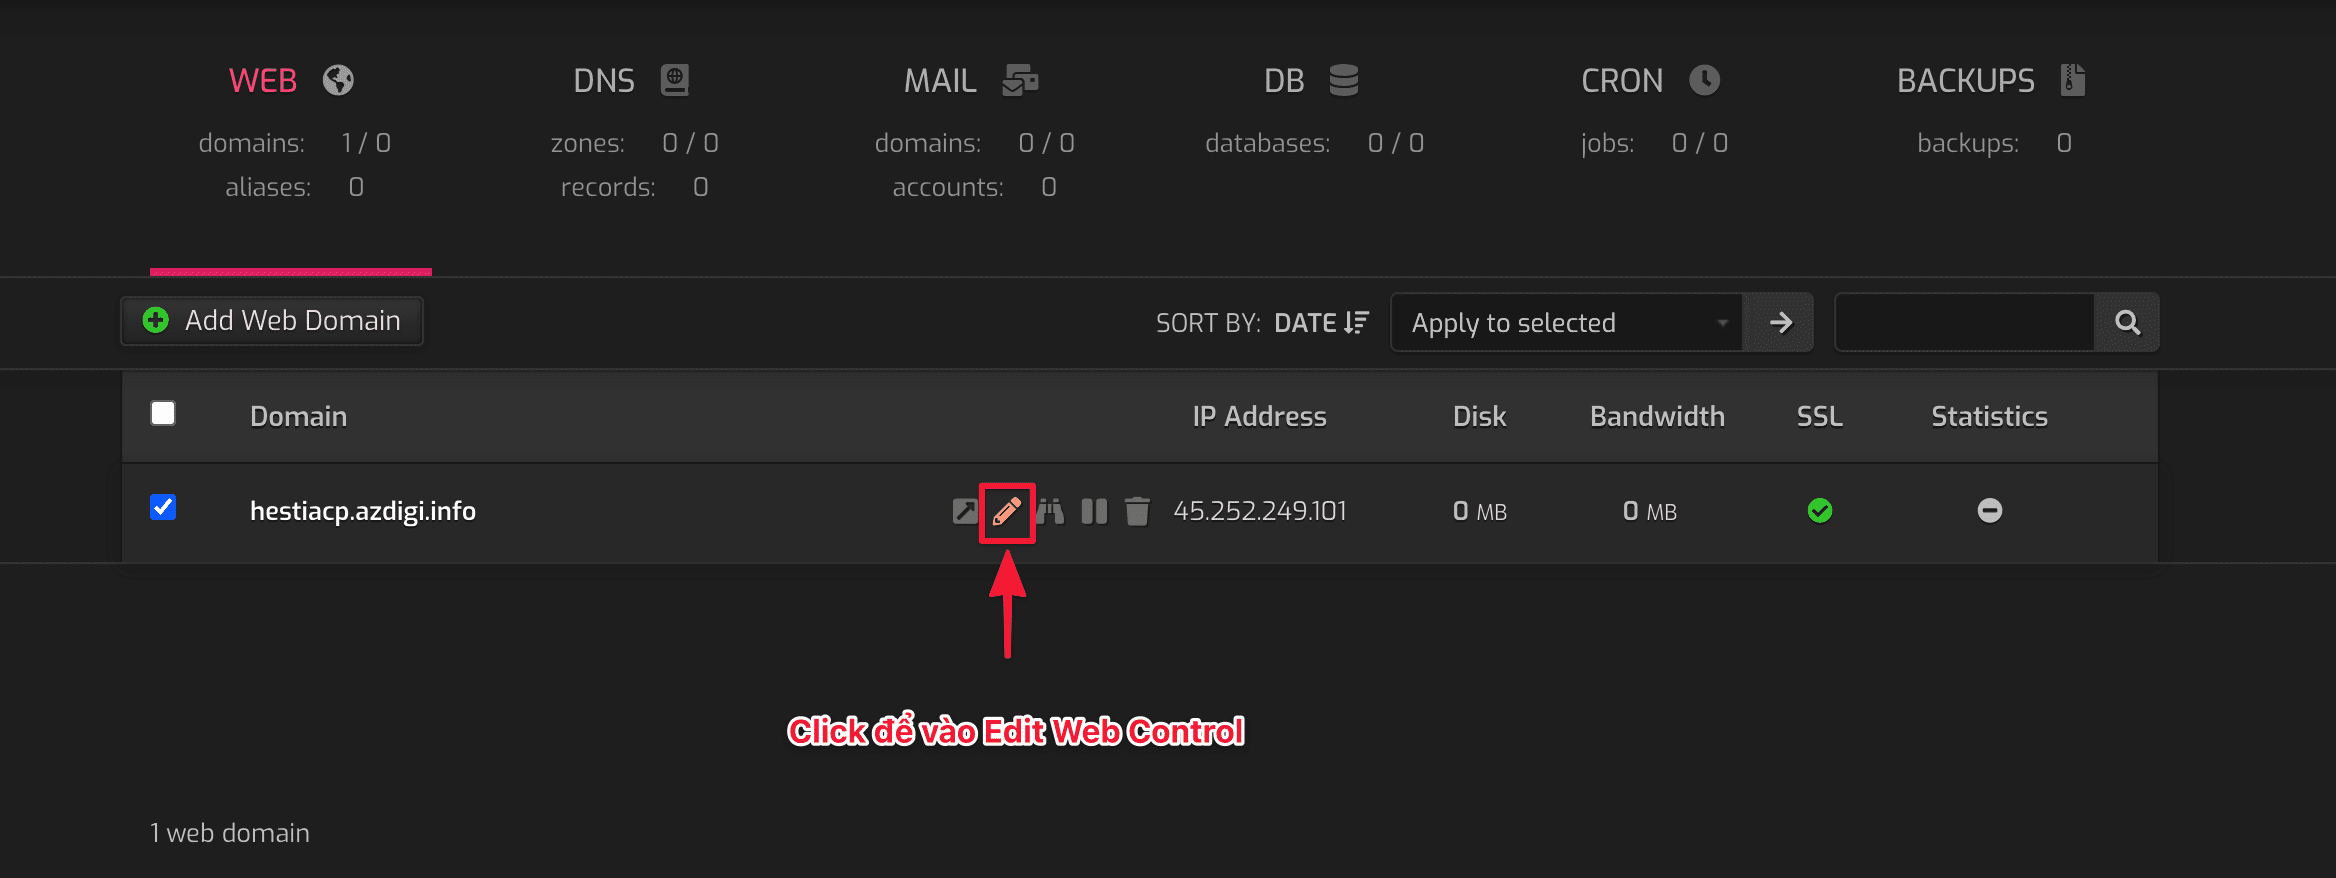
Step 1: Log in to the User you need to backup
To log in to the User that needs to be backup, click on the => icon as below. Or you can log in directly from https://my-ip:8083 with the user and password created earlier.
Step 2: Backup user
Then click BACKUP to create a backup. This file will backup all users including web, mail, database.
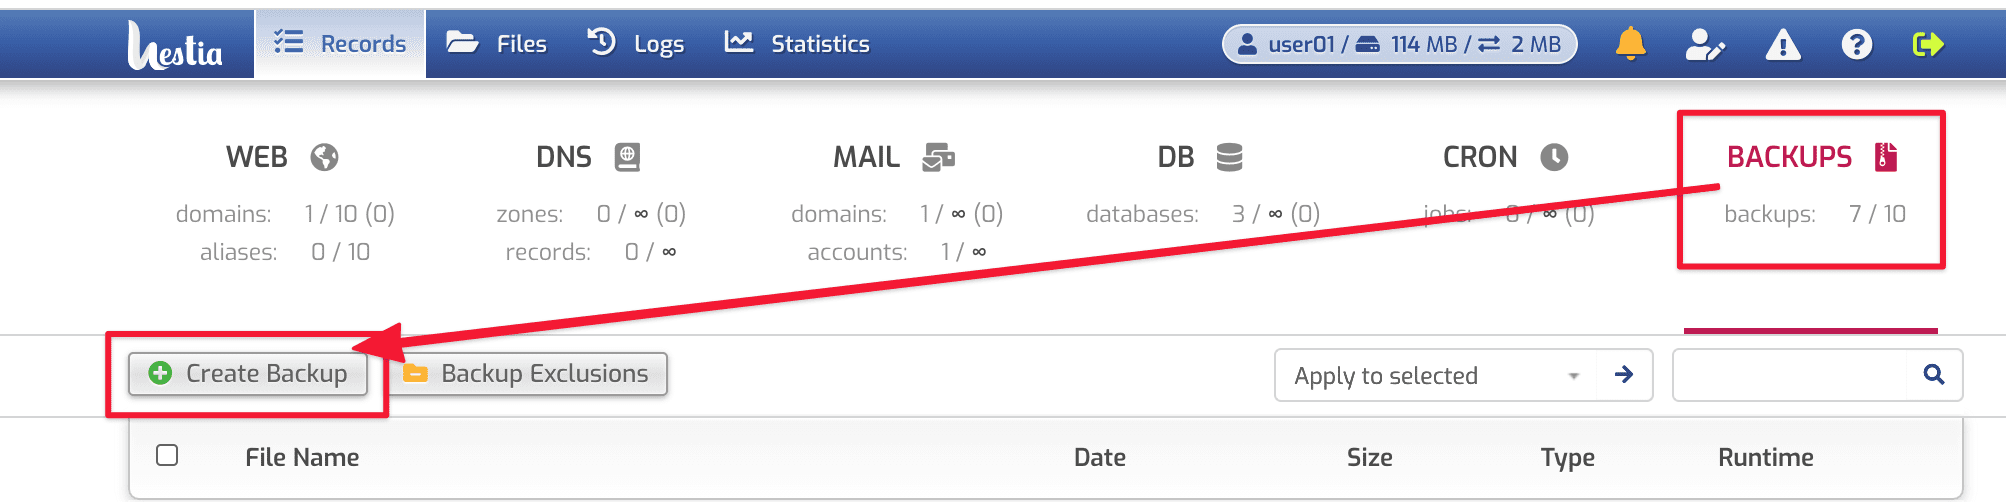
After a successful backup, the system will display the files in the format: username-date-time.tar
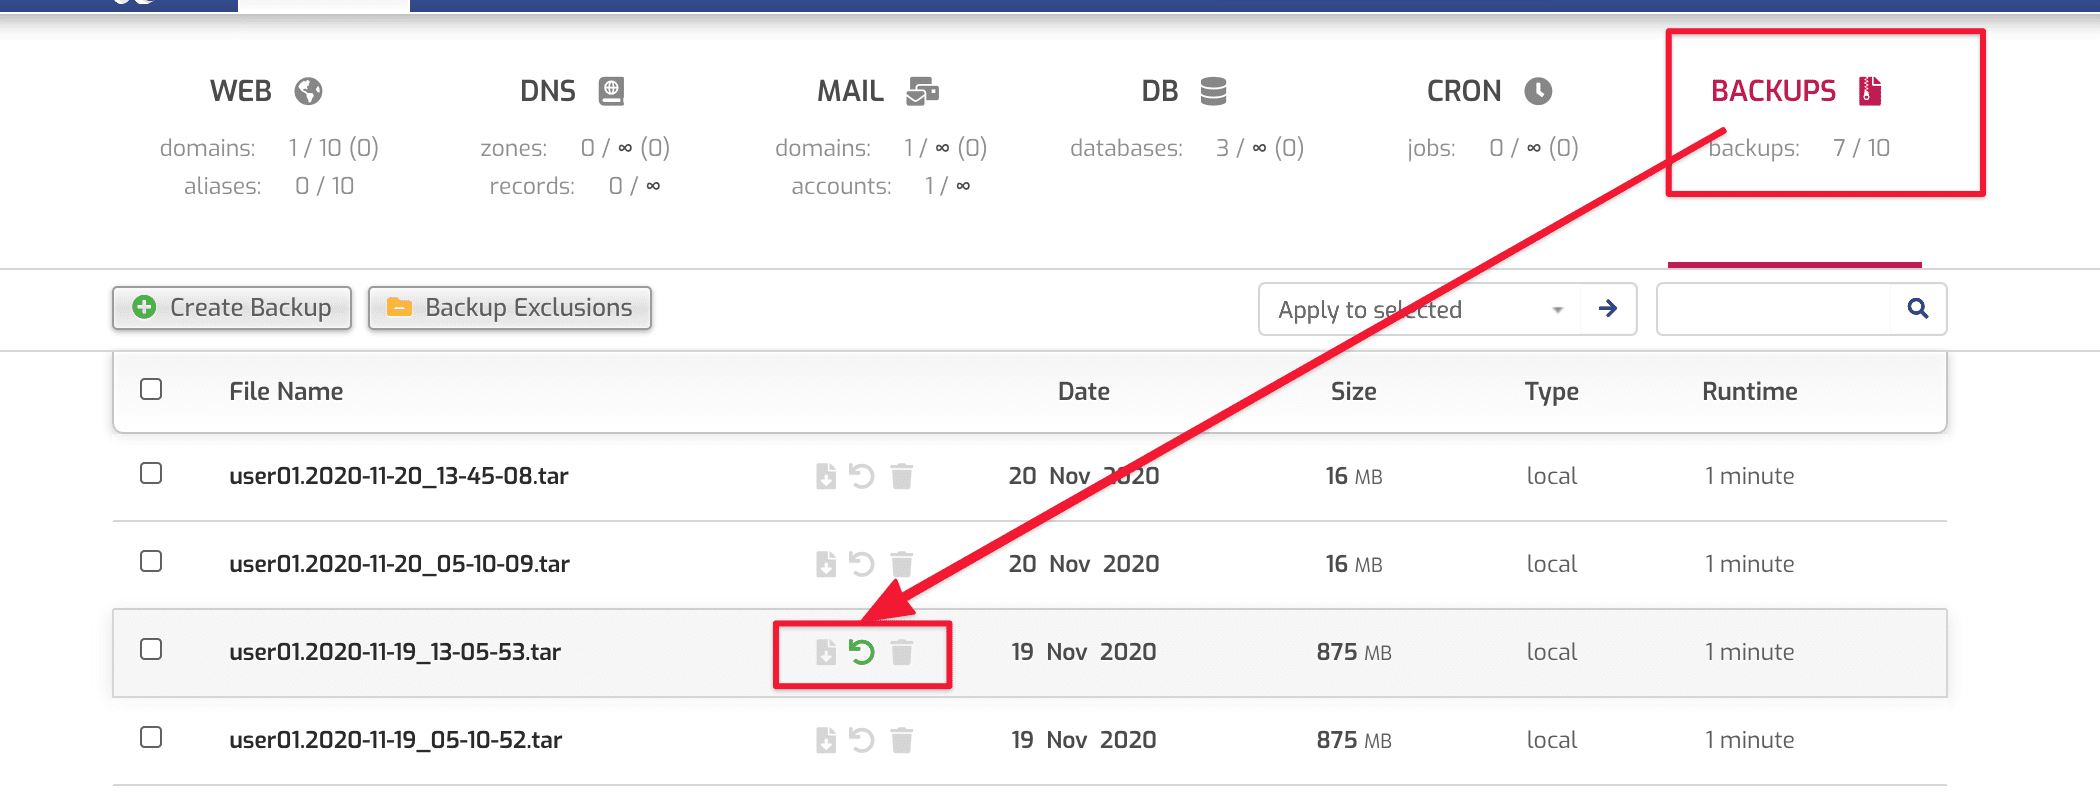
3. Restore from Backup file on HestiaCP
To restore from the backup file, go to BACKUP => click on the “reverse arrow” ↩ icon to restore.
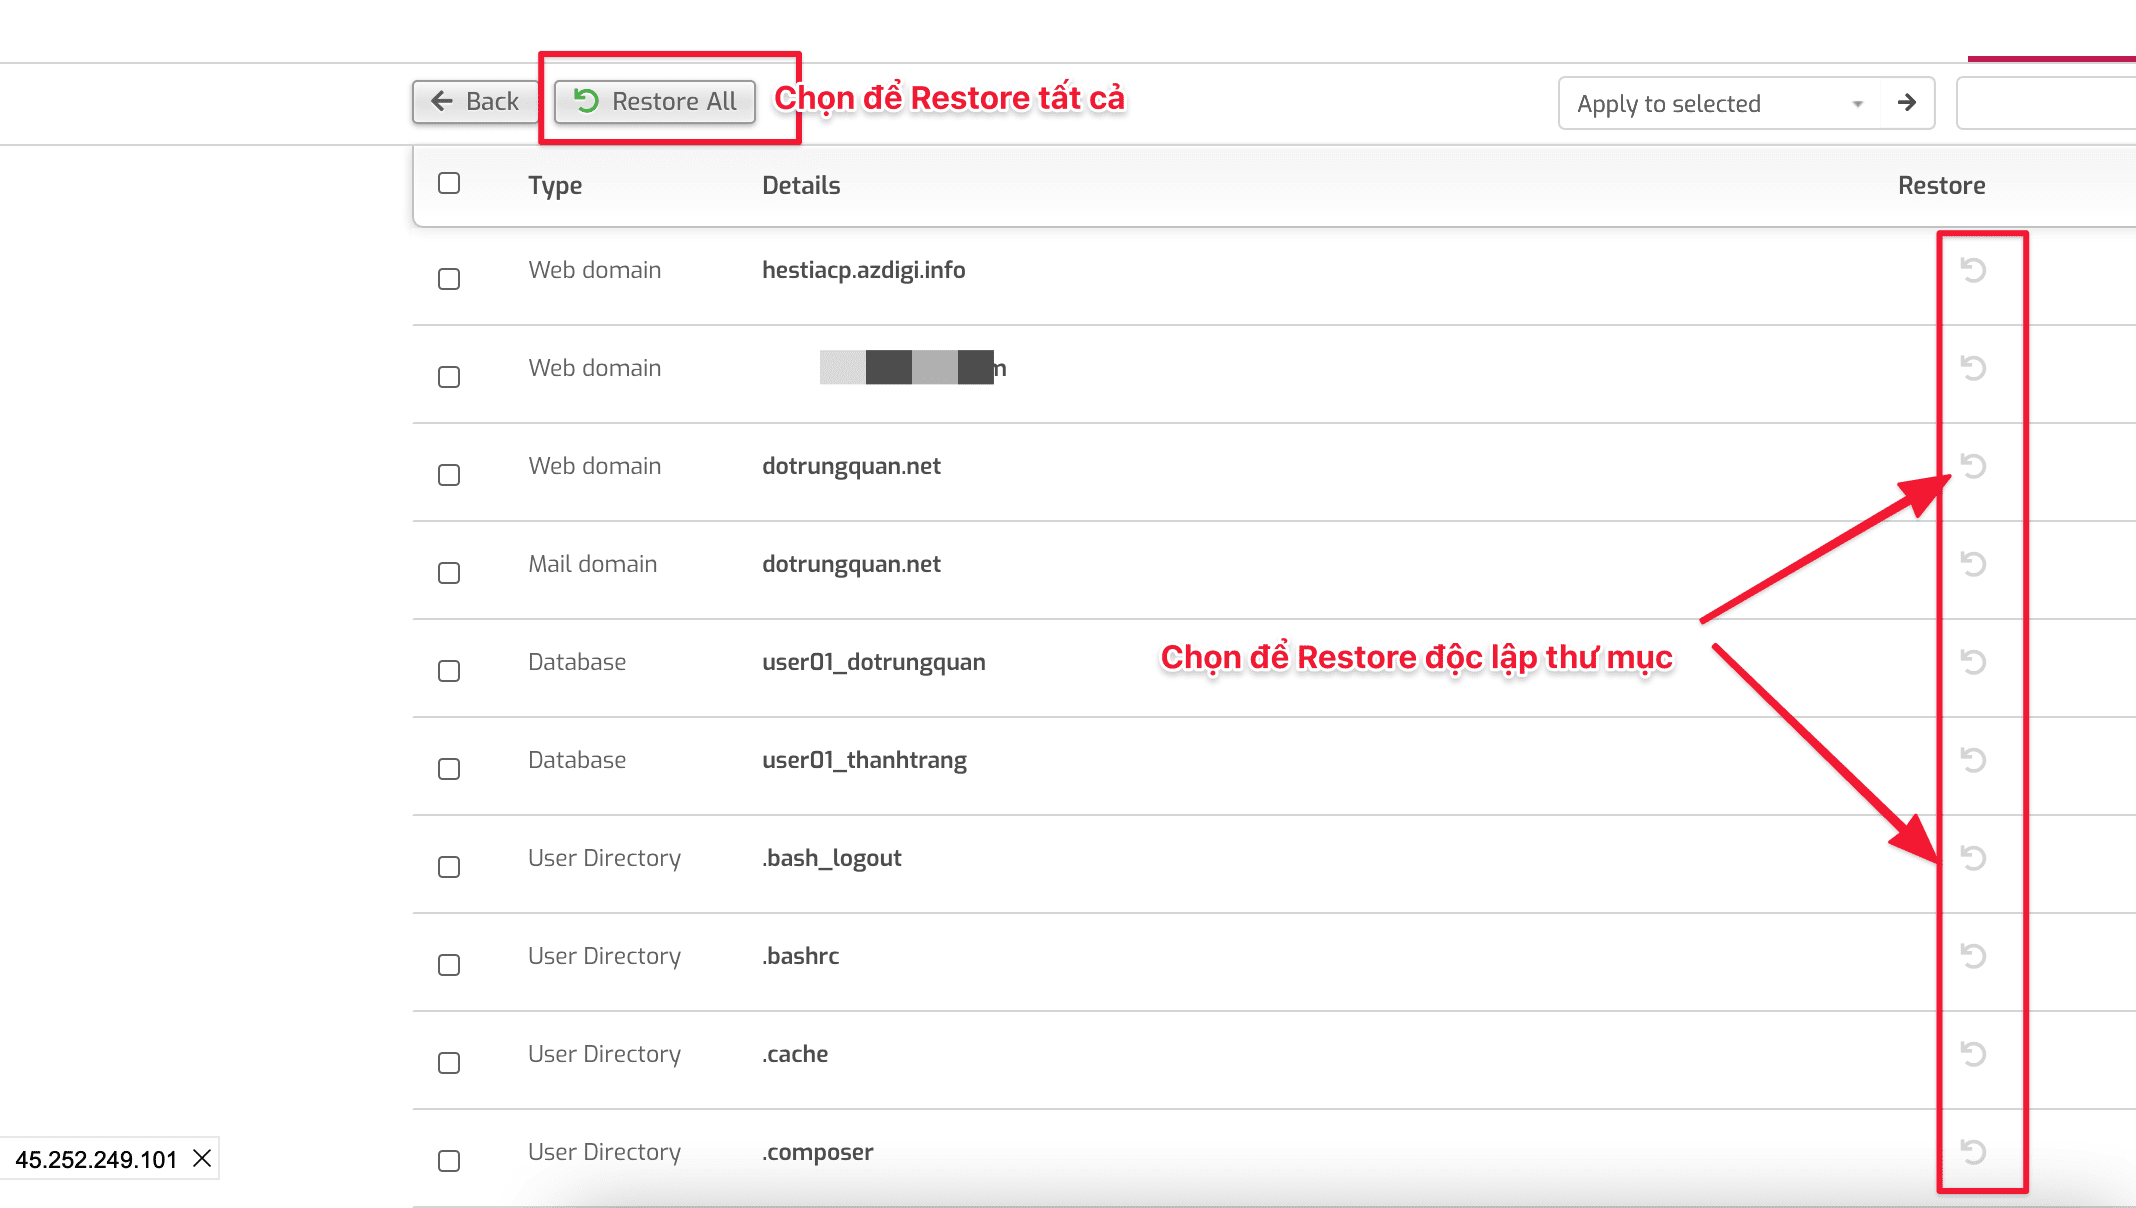
In this section, you will see 2 options:
- Restore All
- Independent Restore: To restore each folder, you define the folders to restore and click on the “Reverse arrow” ↩.
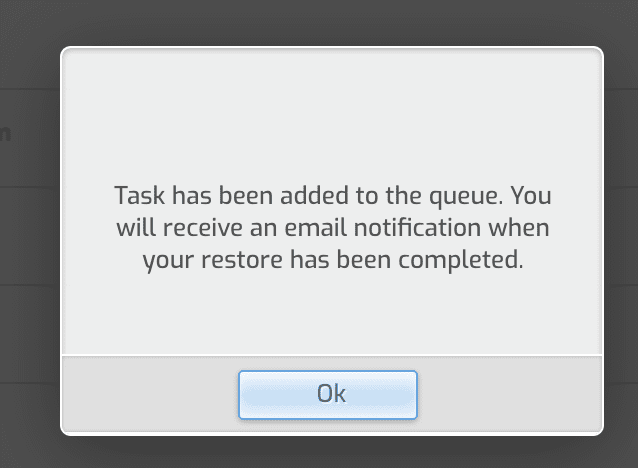
The system will show a message that the Task has been added to the queued, now you just need to wait to complete the process.
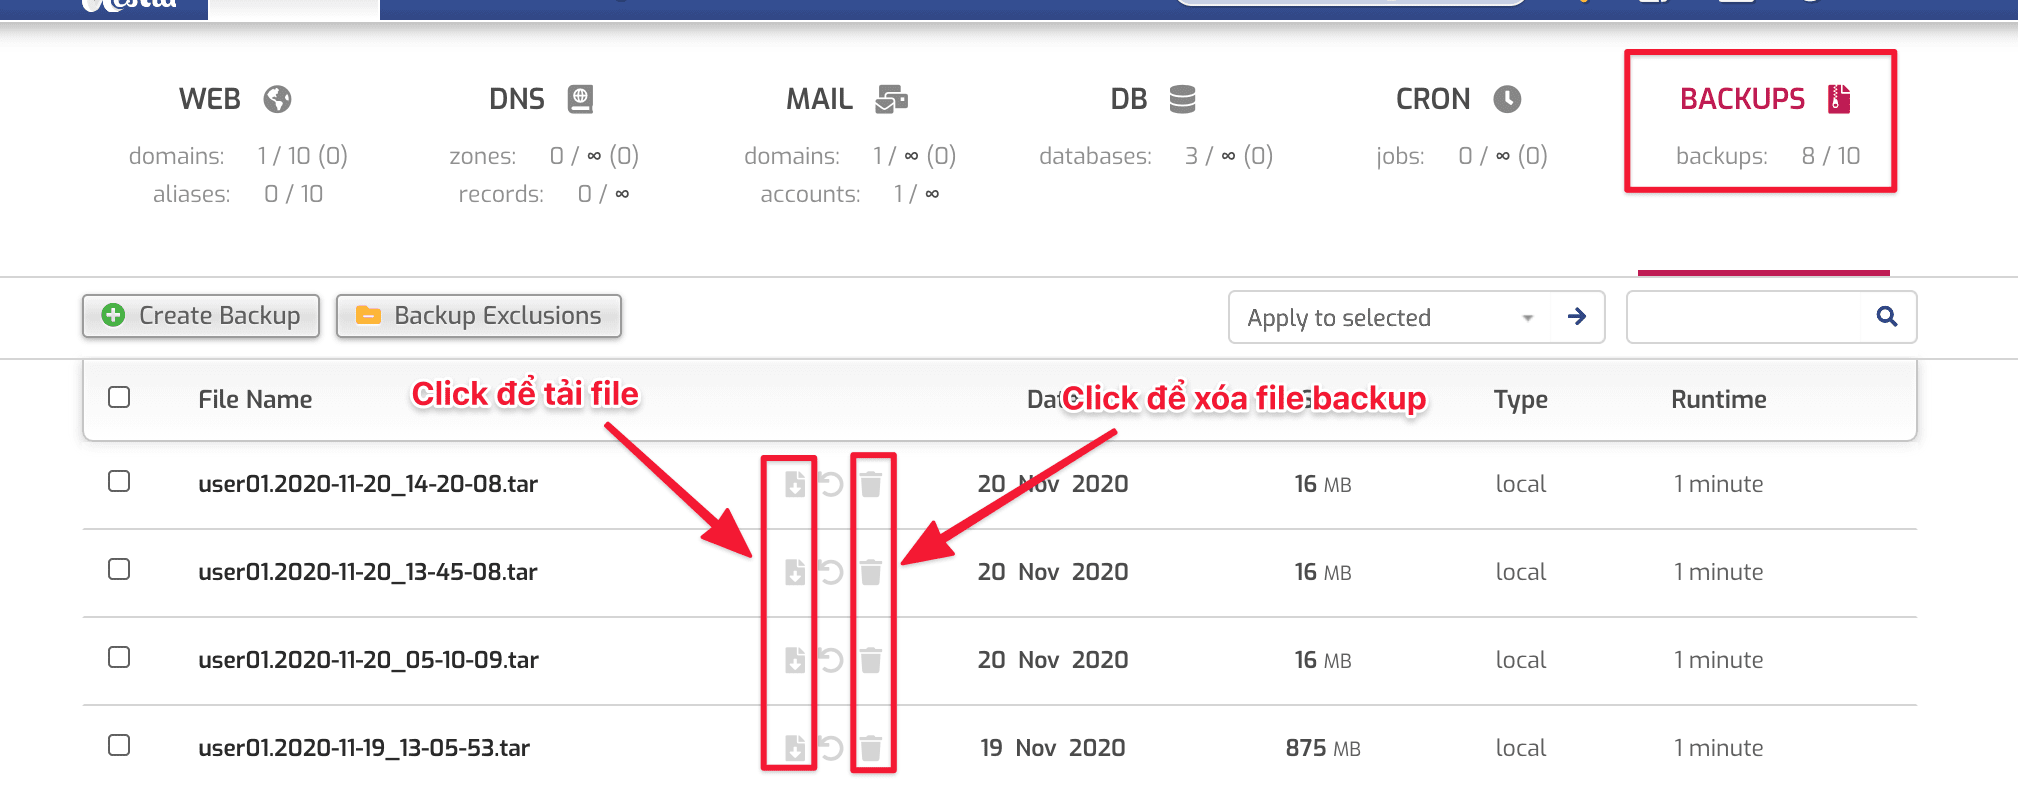
4. Download and delete the backup file
To download or delete the backup file, go to BACKUP. At this point, the screen will display all your files => click the buttons as below to download or delete the files.
III. Summary
Hopefully, this article will bring many new things to help you administer the server using HestiaCP more professionally, thereby helping you to ensure that your data is always available and stable.
Wishing you success!
If you need assistance, you can contact support in the ways below:
- Hotline 247: 028 888 24768 (Ext 0)
- Ticket/Email: You use the email to register for the service and send it directly to: support@azdigi.com .
You might also like
About the author

Thạch Phạm
Đồng sáng lập và Giám đốc điều hành của AZDIGI. Có hơn 15 năm kinh nghiệm trong phổ biến kiến thức liên quan đến WordPress tại thachpham.com, phát triển website và phát triển hệ thống.