MultiPHP on HestiaCP makes it easy to switch PHP versions for each website flexibly and conveniently. Let’s find out with AZDIGI.
I. Overview
Currently, the Selector PHP function is only available on CloudLinux-installed services, a useful and important feature for control panels. Most of the free controls currently support MultiPHP features with users’ needs. MultiPHP is similar to CloudLinux’s PHP Selector.
MultiPHP allows users to customize and set up each website to use a certain version of PHP. Suppose you have 3 websites and the source code of 3 specific websites needs to use different versions of PHP, such as:
- Web A: PHP 5.6
- Web B: PHP 7.0
- Web C: PHP 7.4
HestiaCP will help you solve this problem with the optional MultiPHP function, please follow along.
II. Customize MultiPHP on HestiaCP
To use MultiPHP on HestiaCP, make sure that when you install HestiaCP, you have the Option MultiPHP ticked. Because if you have not checked this option, your server will not have MultiPHP attached. If you have not installed HestiaCP, please refer to the following article for a complete HestiaCP installation.
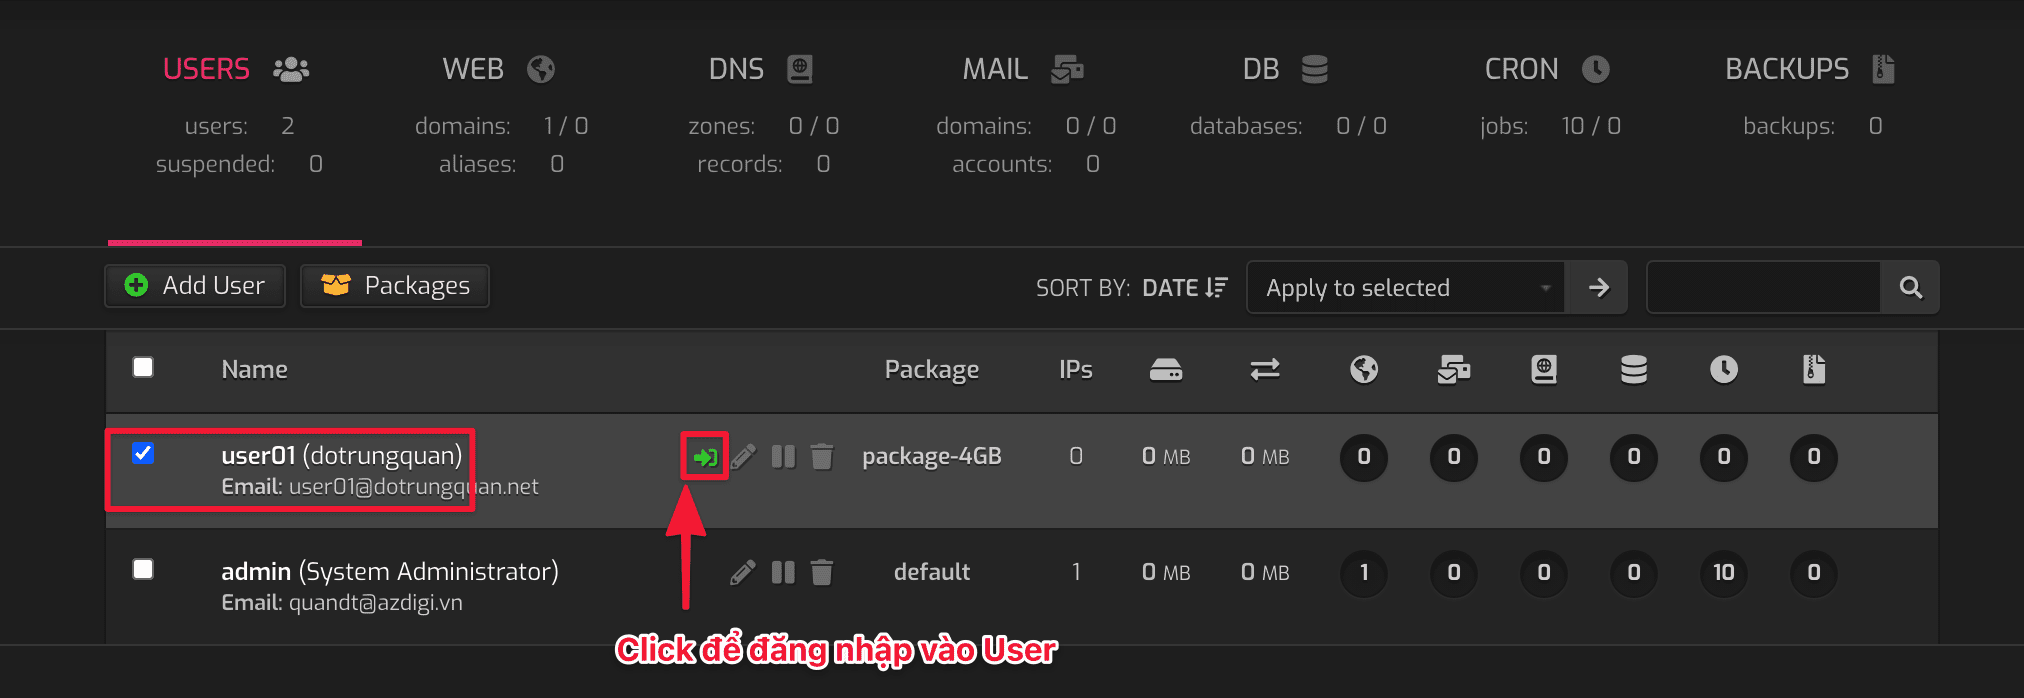
Step 1: Log in to HestiaCP in User
To log in to the User to MultiPHP on HestiaCP, click on the => ⏩ icon, as shown below. Or you can log in directly from https://my-ip:8083 with the user and password created earlier.

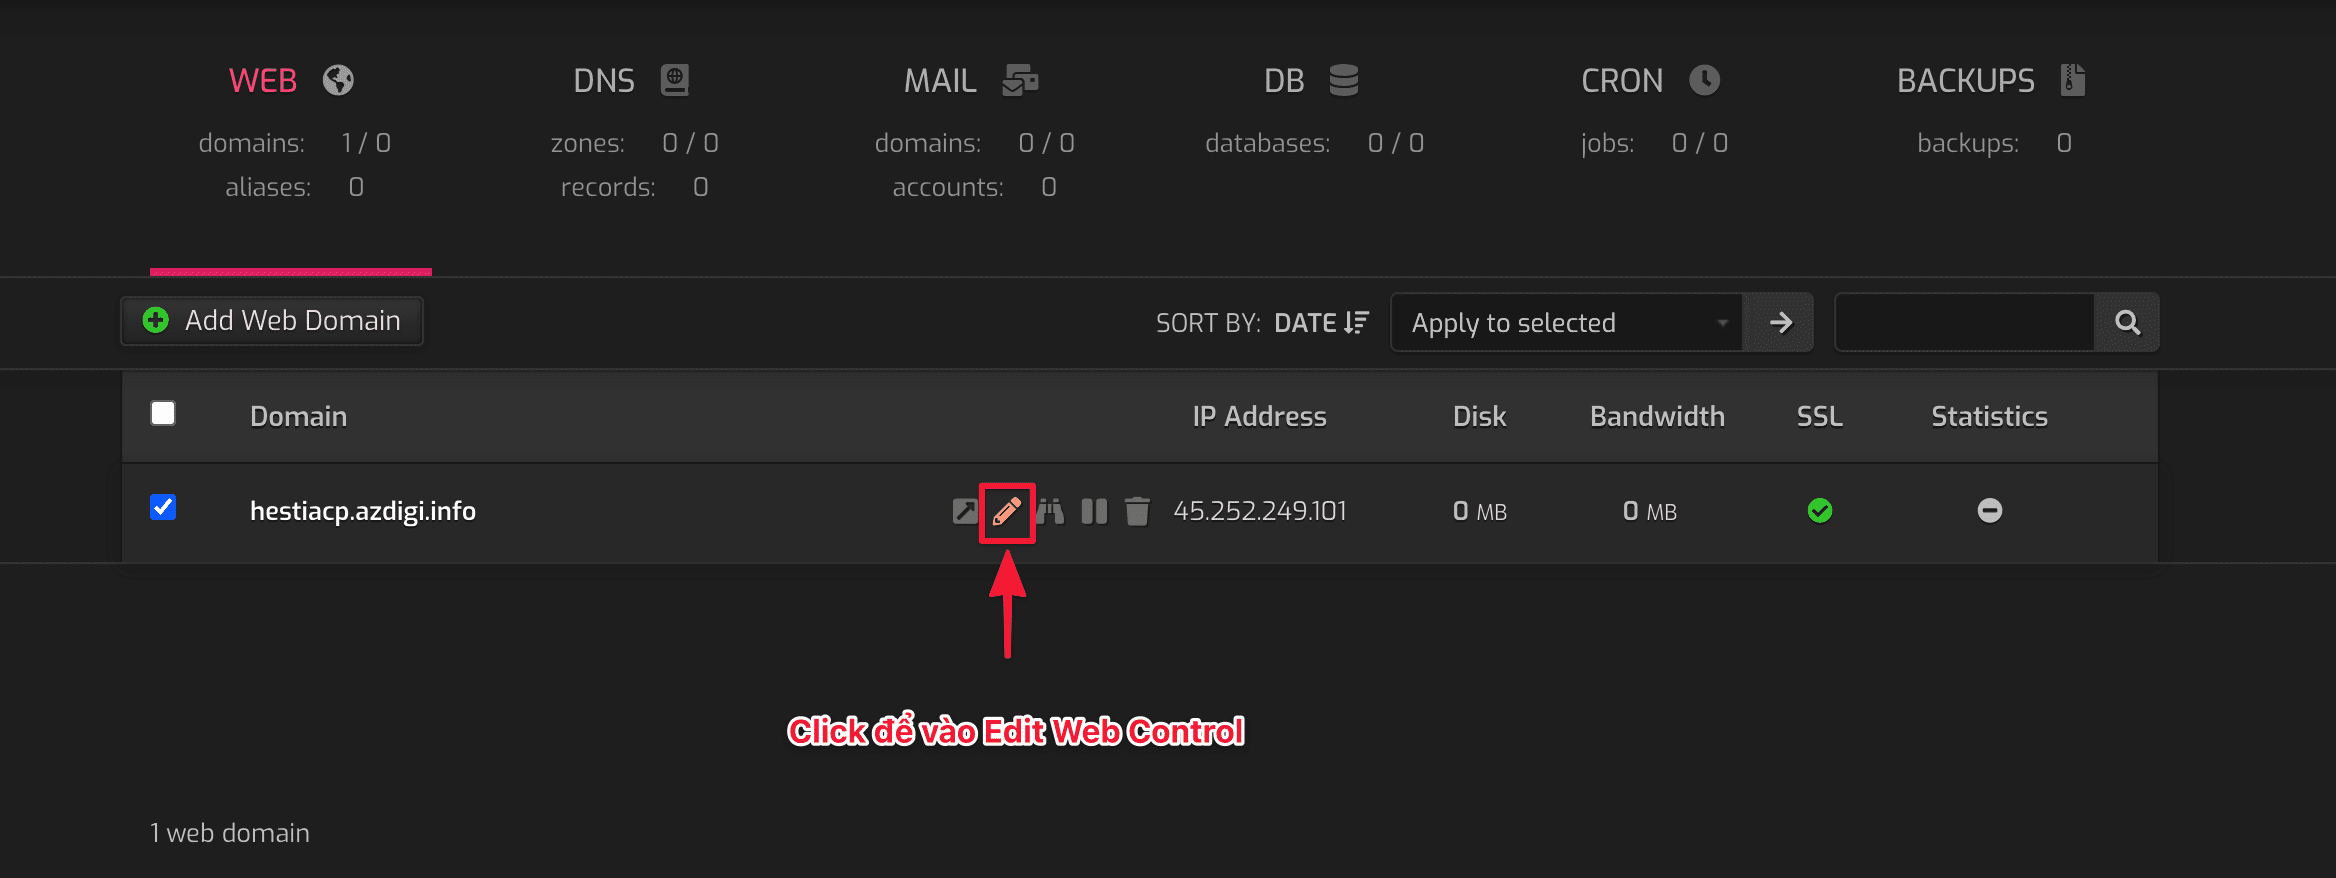
Step 2: MultiPHP option on HestiaCP
Click on the “pen” icon to enter the Edit Web Control interface.
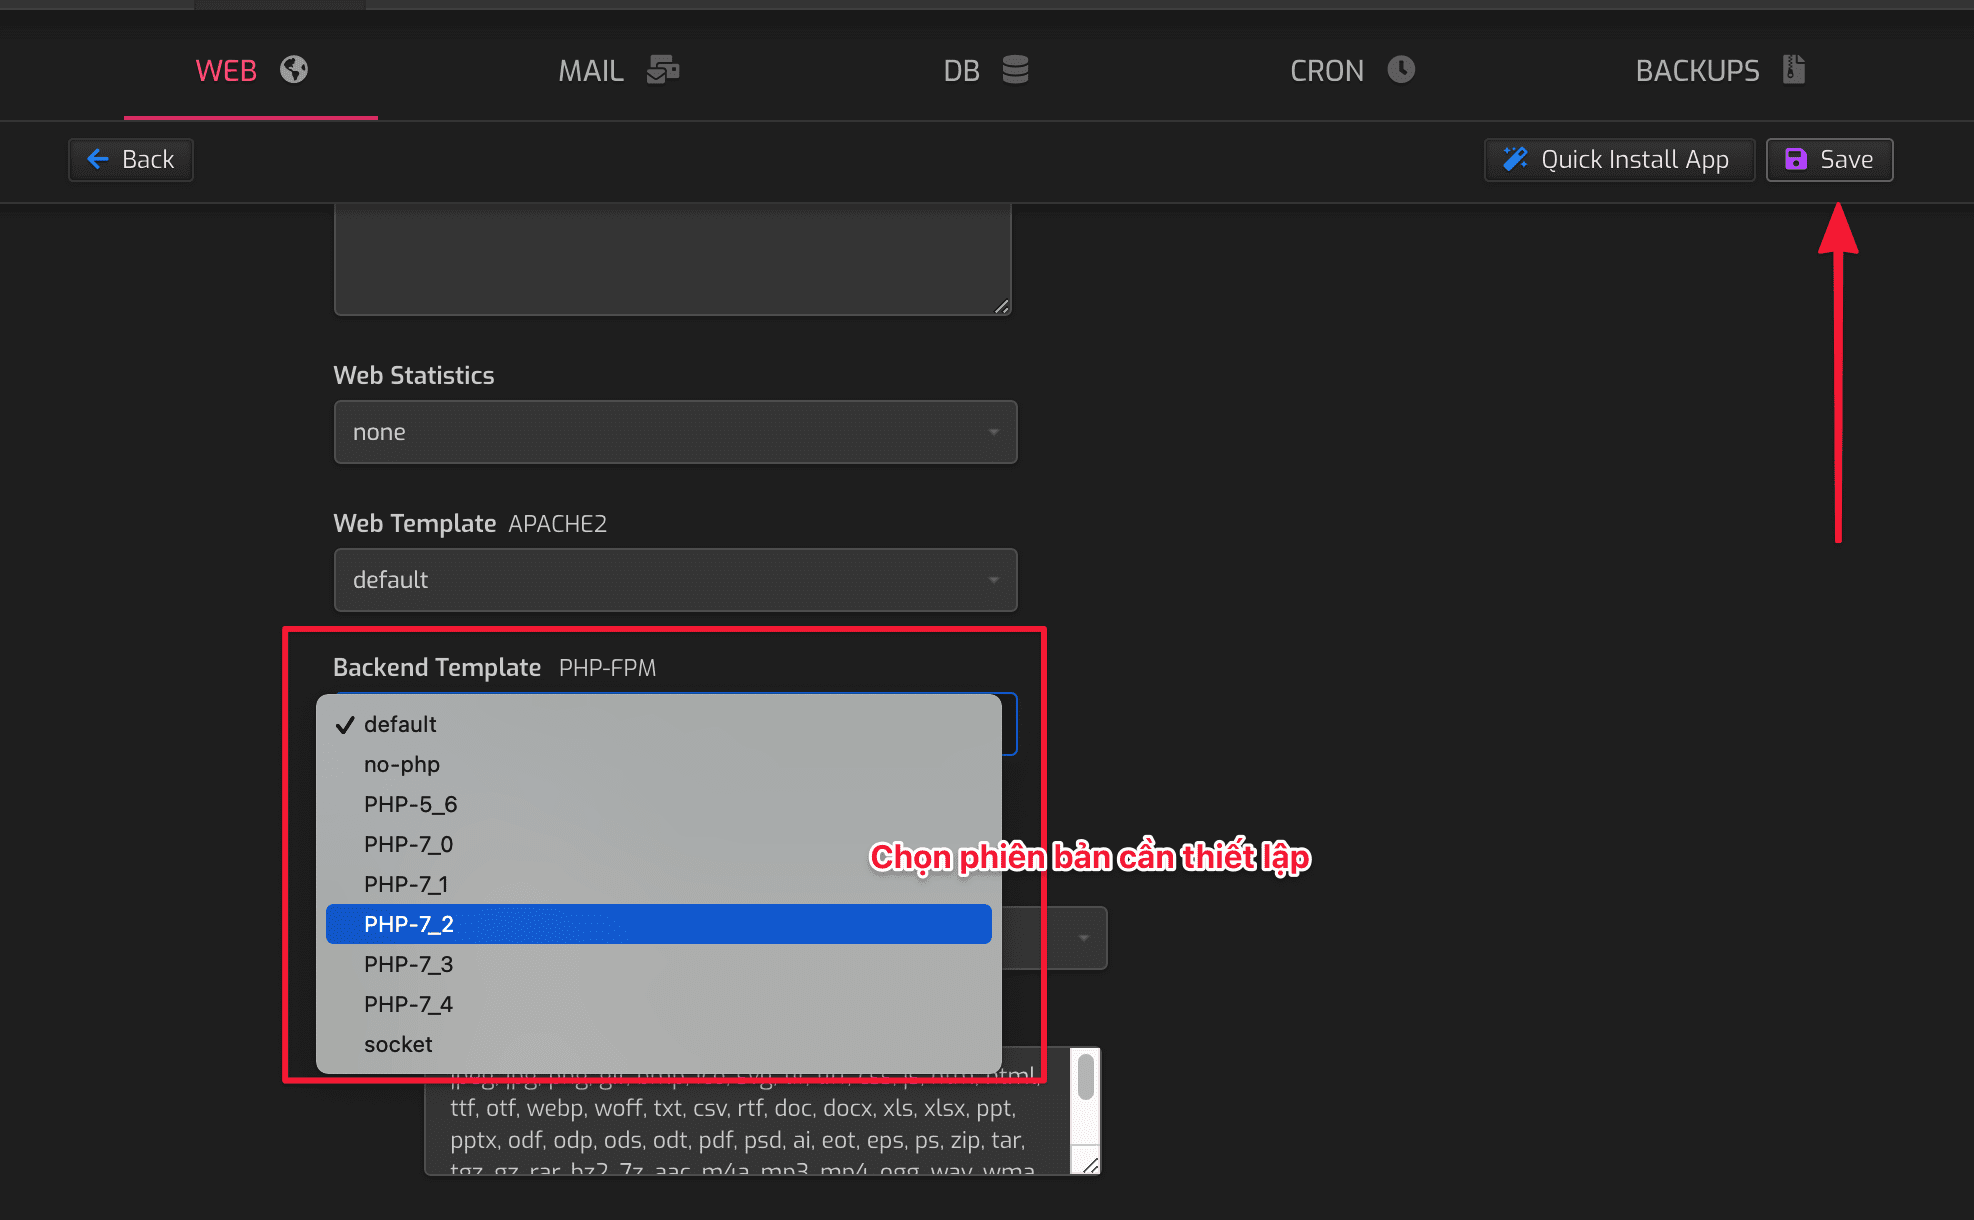
In the Backend Template PHP-FPM section, there are many pre-installed PHP versions and you just need to choose the version you need to use and save.
Step 3: Check the PHP version
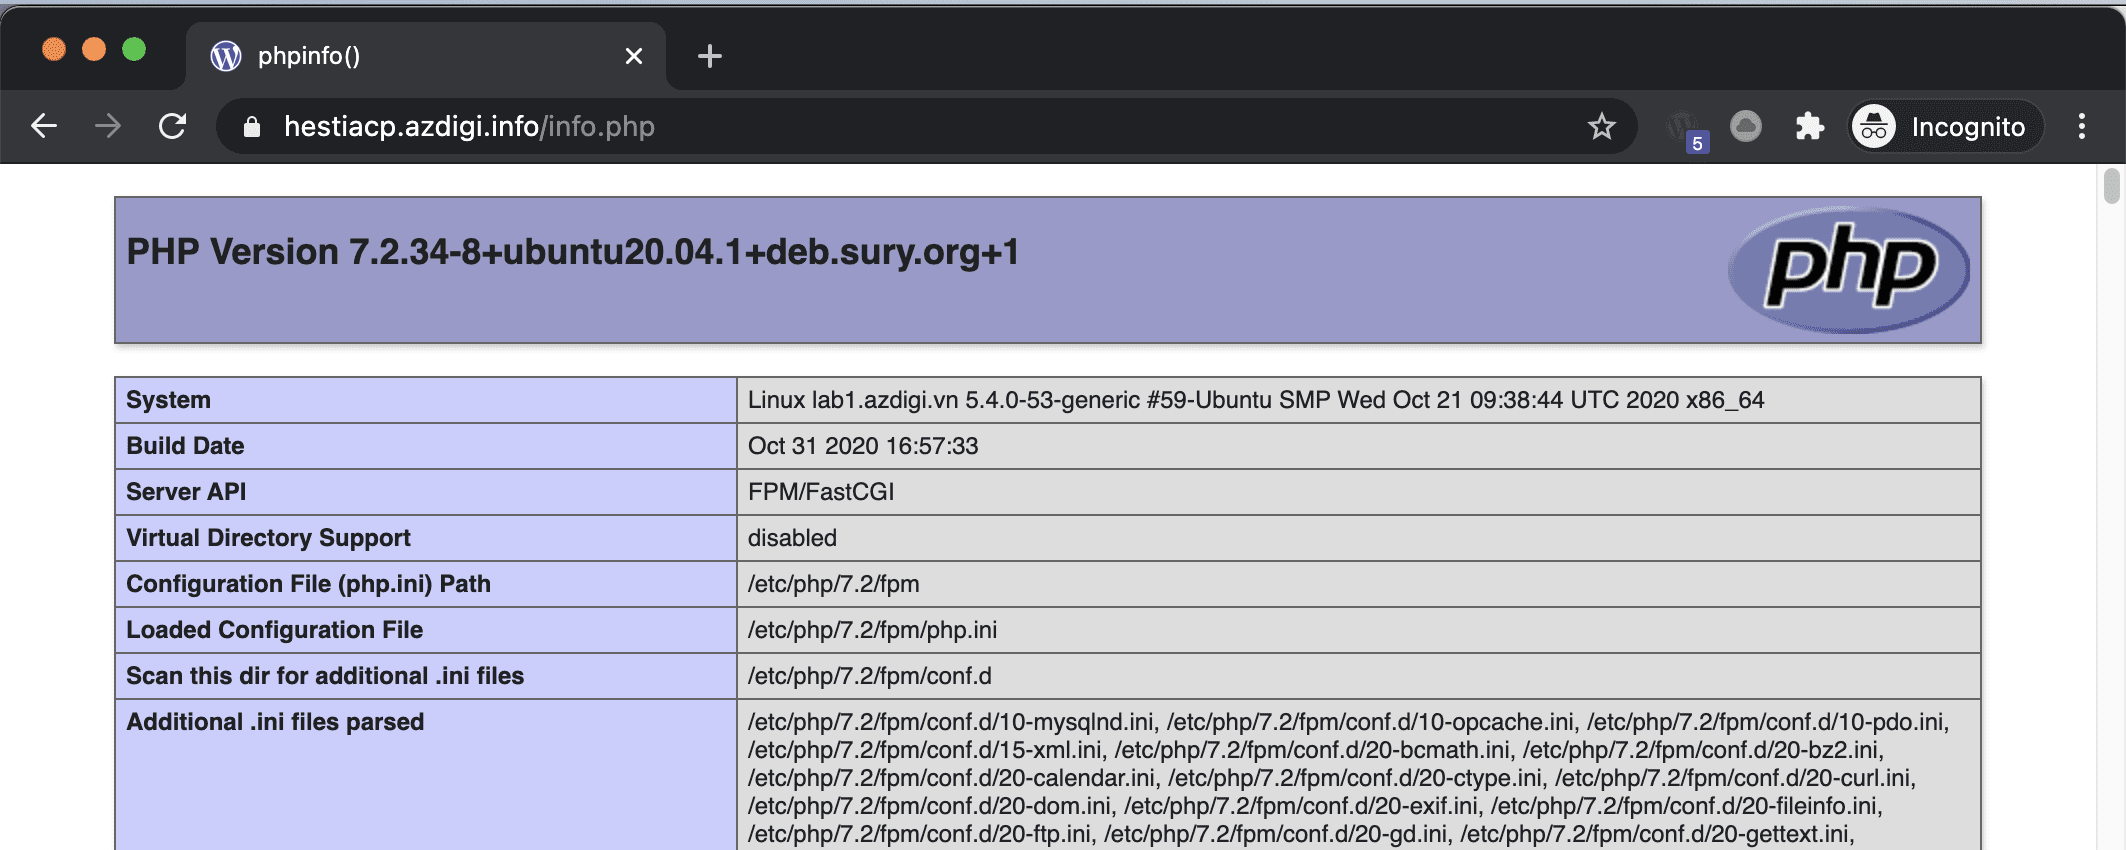
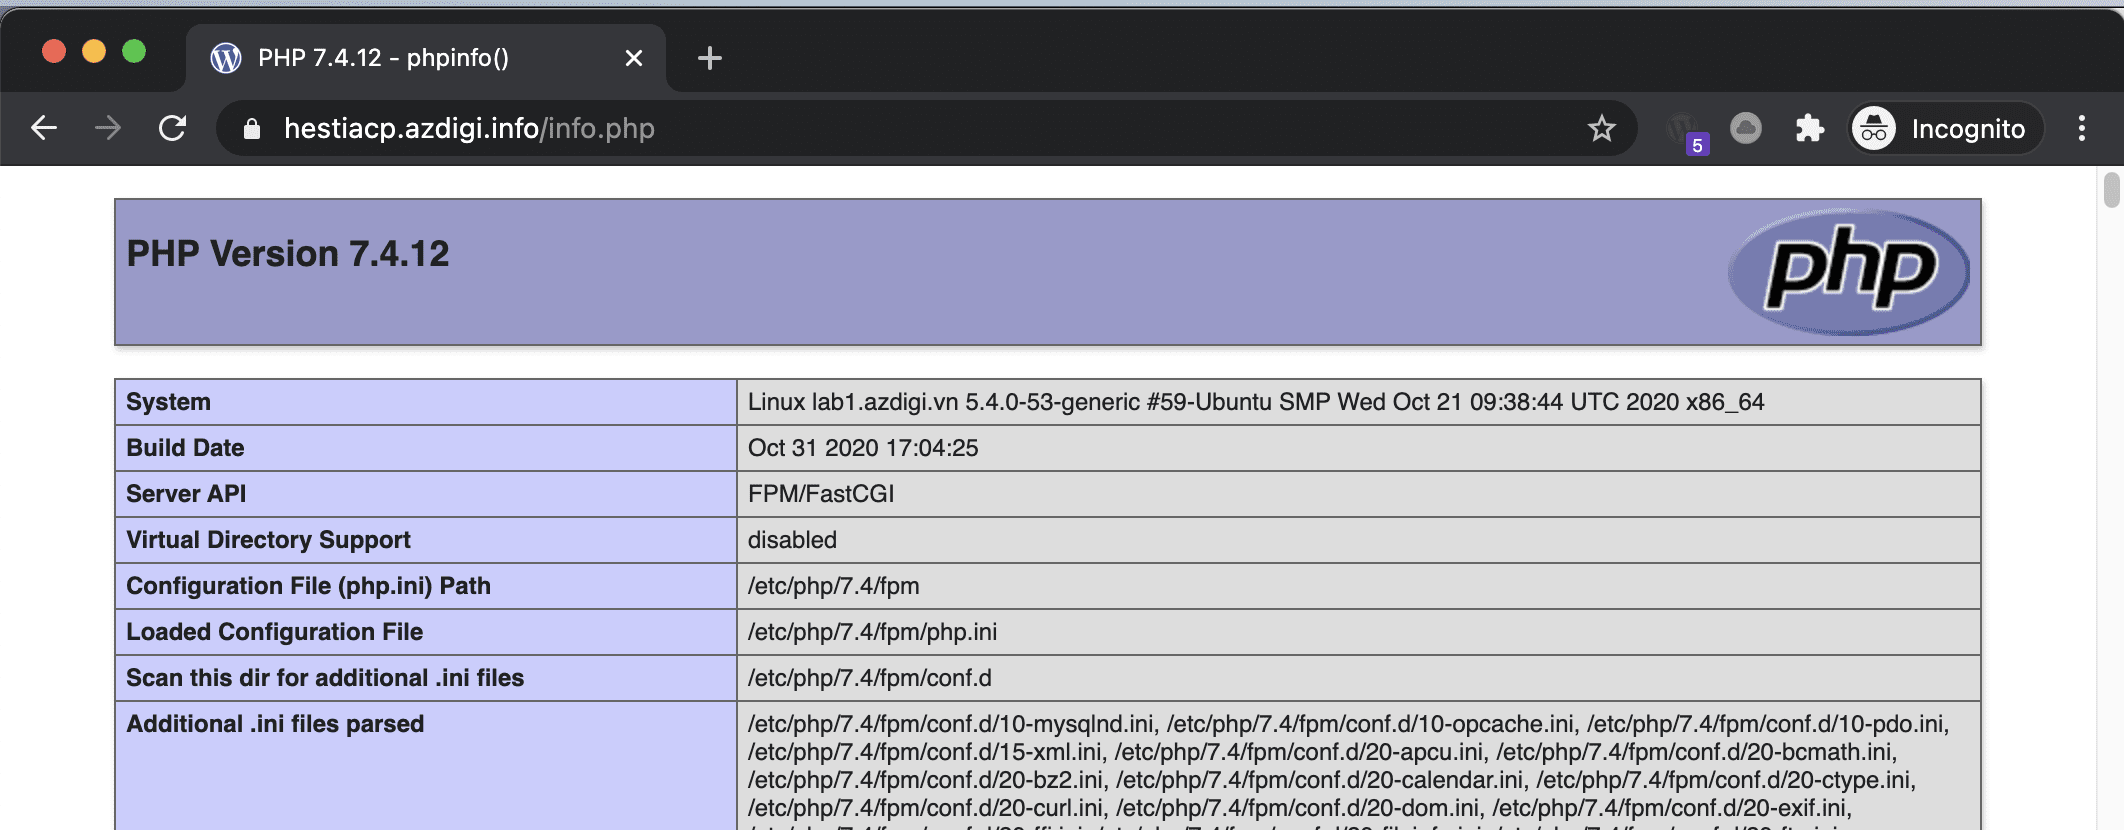
To check the PHP version, you can quickly create an info.php file at my-domain/public_html/info.php with the following content:
After creating it, go to my-domain/info.php and it will show the PHP version & the extensions installed under that version.
As the illustrations below, I customize 3 versions:
- Illustration 1: I choose PHP version 5.6
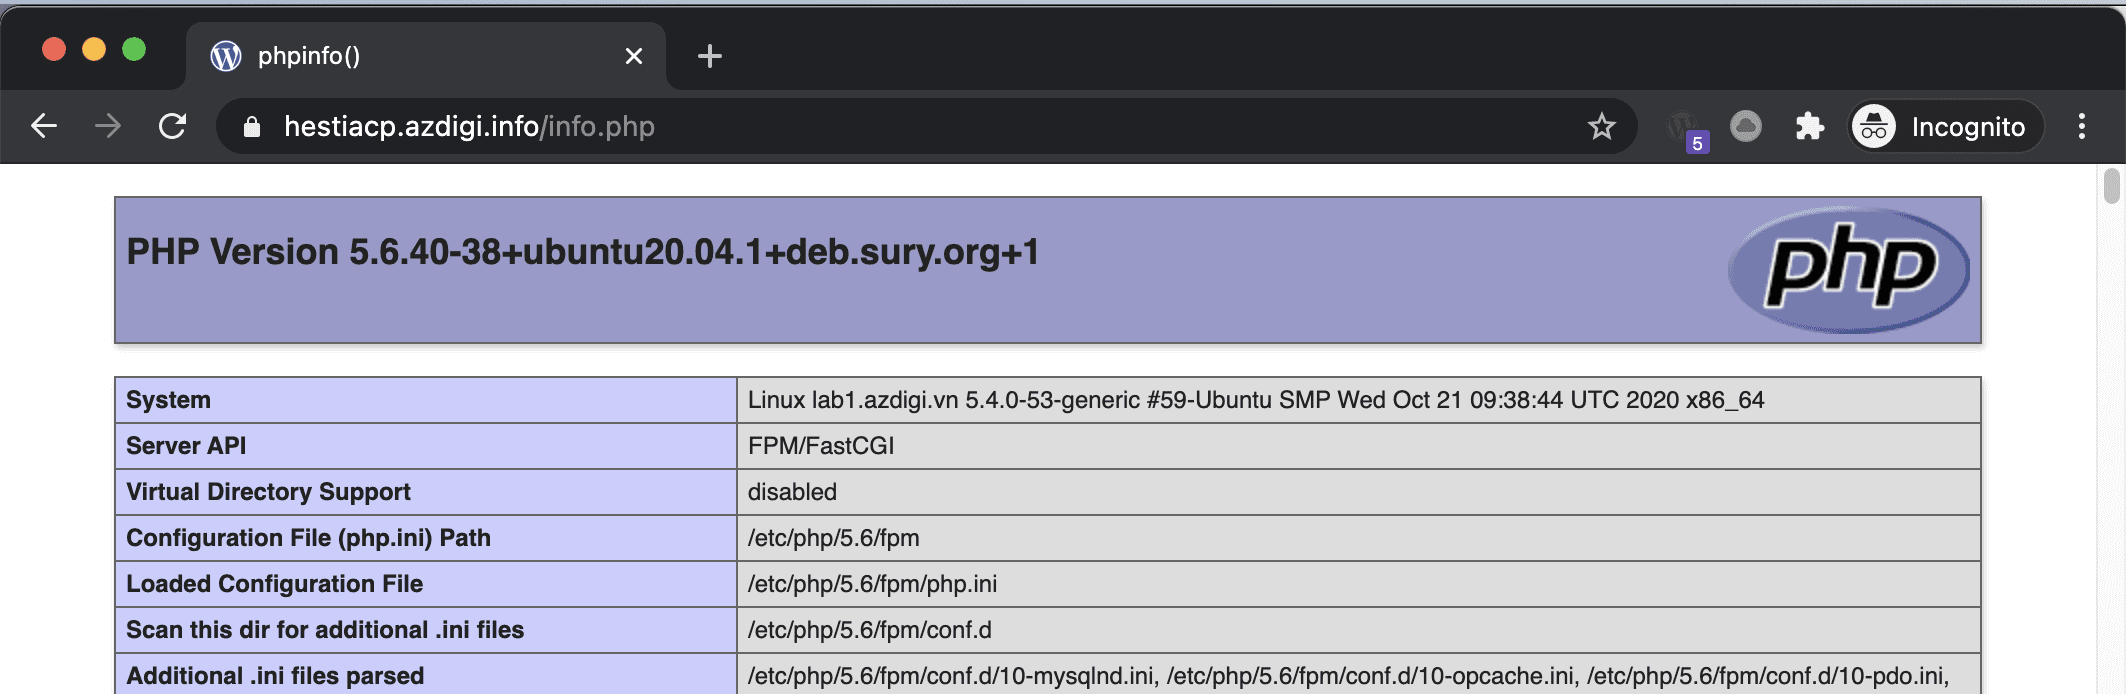
- Illustration 2: I choose PHP version 7.2
- Illustration 3: I choose PHP version 7.4
Although it is a free control, Hestia still fully supports the necessary features for a webmaster. I like this control Panel because it allows me to install and tweak many things. In the following articles, AZDIGI will guide you through configuring more advanced features, such as support modules for control and help speed up the website. Stay tuned!
III. Summary
Hopefully, this article will help you to manage the server using HestiaCP professionally and better. From there, you can rest assured to choose the service and install the control to suit your individual needs.
Wishing you success!
If you need assistance, you can contact support in the ways below:
- Hotline 247: 028 888 24768 (Ext 0)
- Ticket/Email: You use the email to register for the service and send it directly to: support@azdigi.com .
About the author

Thạch Phạm
Đồng sáng lập và Giám đốc điều hành của AZDIGI. Có hơn 15 năm kinh nghiệm trong phổ biến kiến thức liên quan đến WordPress tại thachpham.com, phát triển website và phát triển hệ thống.