Nội dung
Installing Portainer to Manage Docker on Ubuntu 22.04 with 3 steps.
Introduction
Portainer is a Docker Container management tool with an intuitive and easy-to-use interface. You can directly manage Docker Stacks, Containers, Images, Volumes, Networks, etc., through Portainer’s web interface.
And of course, to install and use Portainer, you need to make sure that Docker and Docker Compose have been successfully installed on your server. If you haven’t installed it yet, please refer to the instructions below:
We will use the docker run or docker-compose-up command to deploy applications on Docker by default. However, managing Docker using the command line will be more or less difficult for users with little experience in Linux administration. Therefore, to solve this problem, you can install Docker GUI tools to manage Docker more efficiently.
The advantage of Portainer is that it can install Docker applications quickly, you can suspend or delete applications with just a click of the mouse. And below are the details on how to install Portainer on Ubuntu 22.04, please follow along.
Implementation Guide
Step 1: Install Portainer
- Deploying Portainer on Ubuntu 22.04
docker volume create portainer_data
docker run -d -p 8000:8000 -p 9000:9000 --name=portainer --restart=always -v /var/run/docker.sock:/var/run/docker.sock -v portainer_data:/data portainer/portainer-ce
After successful installation, you will get the result as below:
root@VPN:~# docker volume create portainer_data
portainer_data
root@VPN:~# docker run -d -p 8000:8000 -p 9000:9000 --name=portainer --restart=always -v /var/run/docker.sock:/var/run/docker.sock -v portainer_data:/data portainer/portainer-ce
Unable to find image 'portainer/portainer-ce:latest' locally
latest: Pulling from portainer/portainer-ce
772227786281: Pull complete
96fd13befc87: Pull complete
dc6f8e90d5b4: Pull complete
0e84c6386ab3: Pull complete
Digest: sha256:52f9fdee1e4acfb1b5c4ddd15c88905287efb6e8f8058d2c5a2543ddc72e9dc0
Status: Downloaded newer image for portainer/portainer-ce:latest
f1cf275f6b759e496ad88ac475840dfab9d98c64fc7c1cb149d10b7b6f7dd6bc- Access to Portainer
To access Portainer, go to your browser and access the address below:
http://<IP-Address>:9000Step 2: Configure Portainer
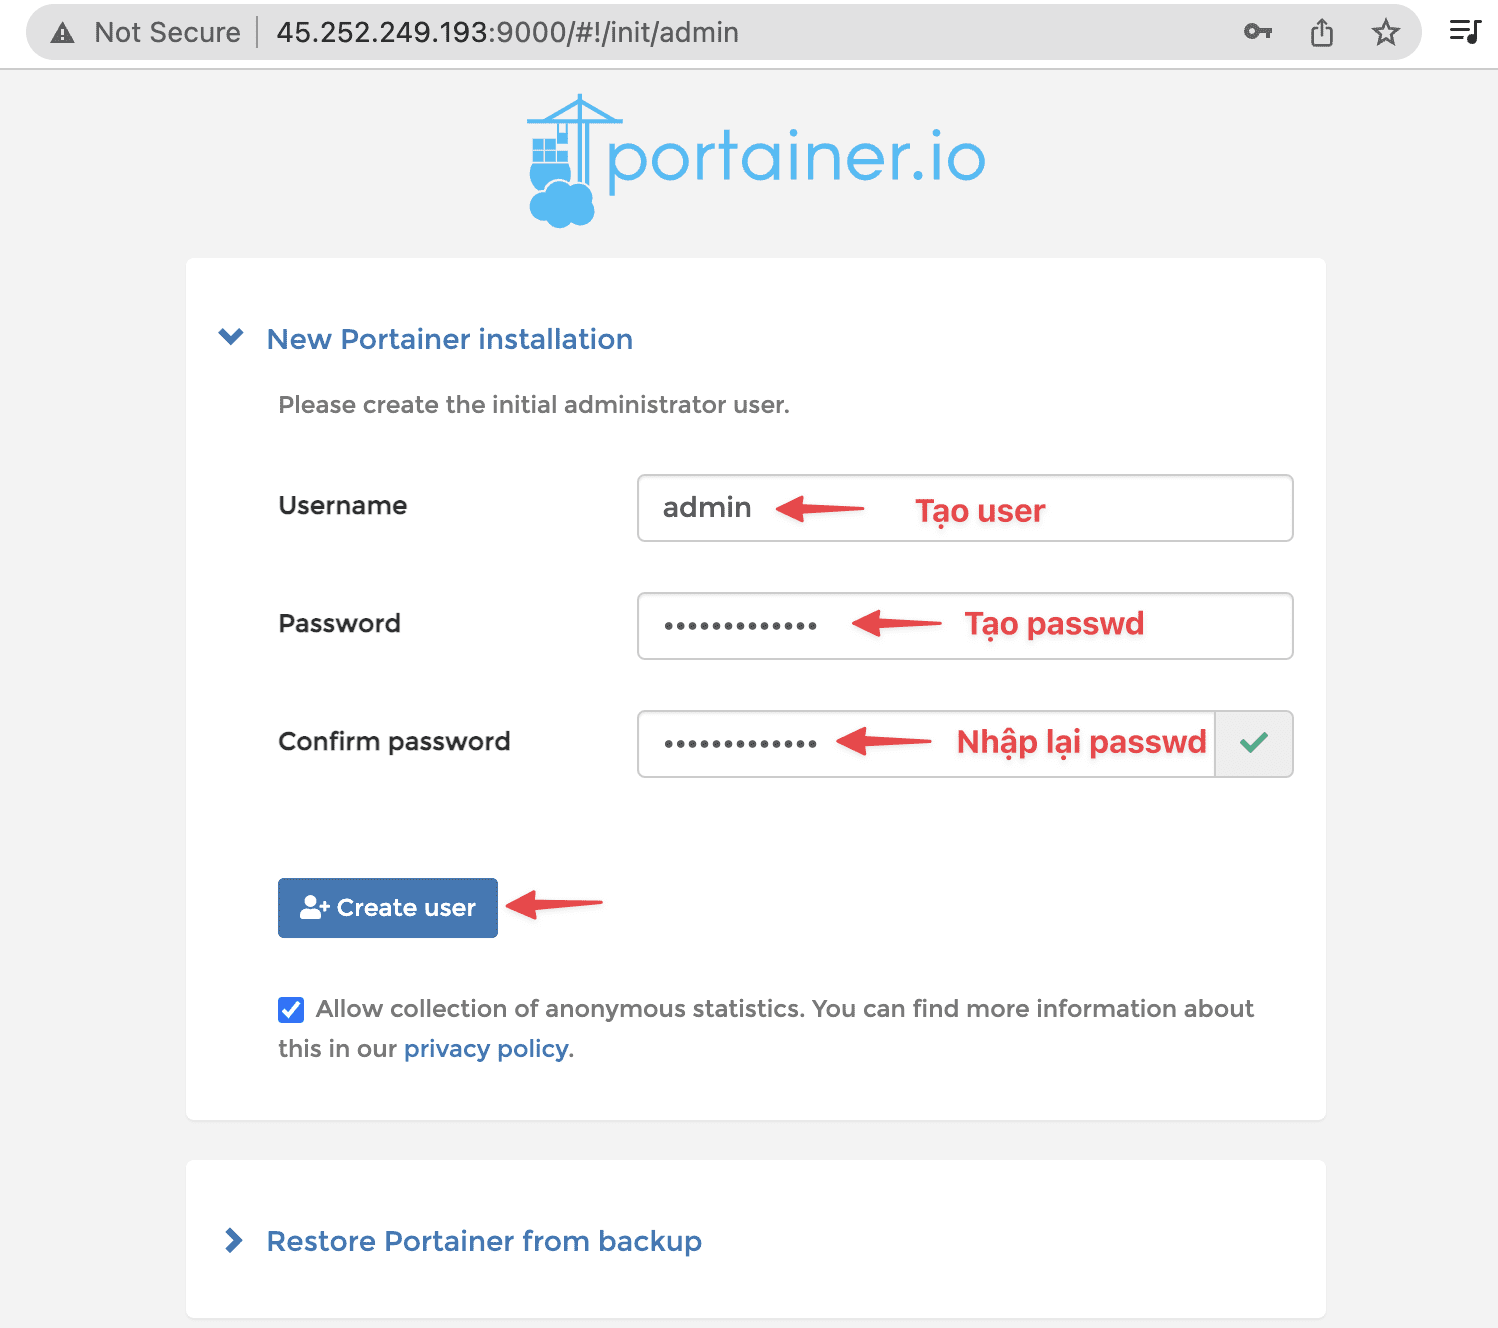
After successfully accessing Portainer, the Portainer interface will look like below. Now let’s set up user/password login information for Portainer.
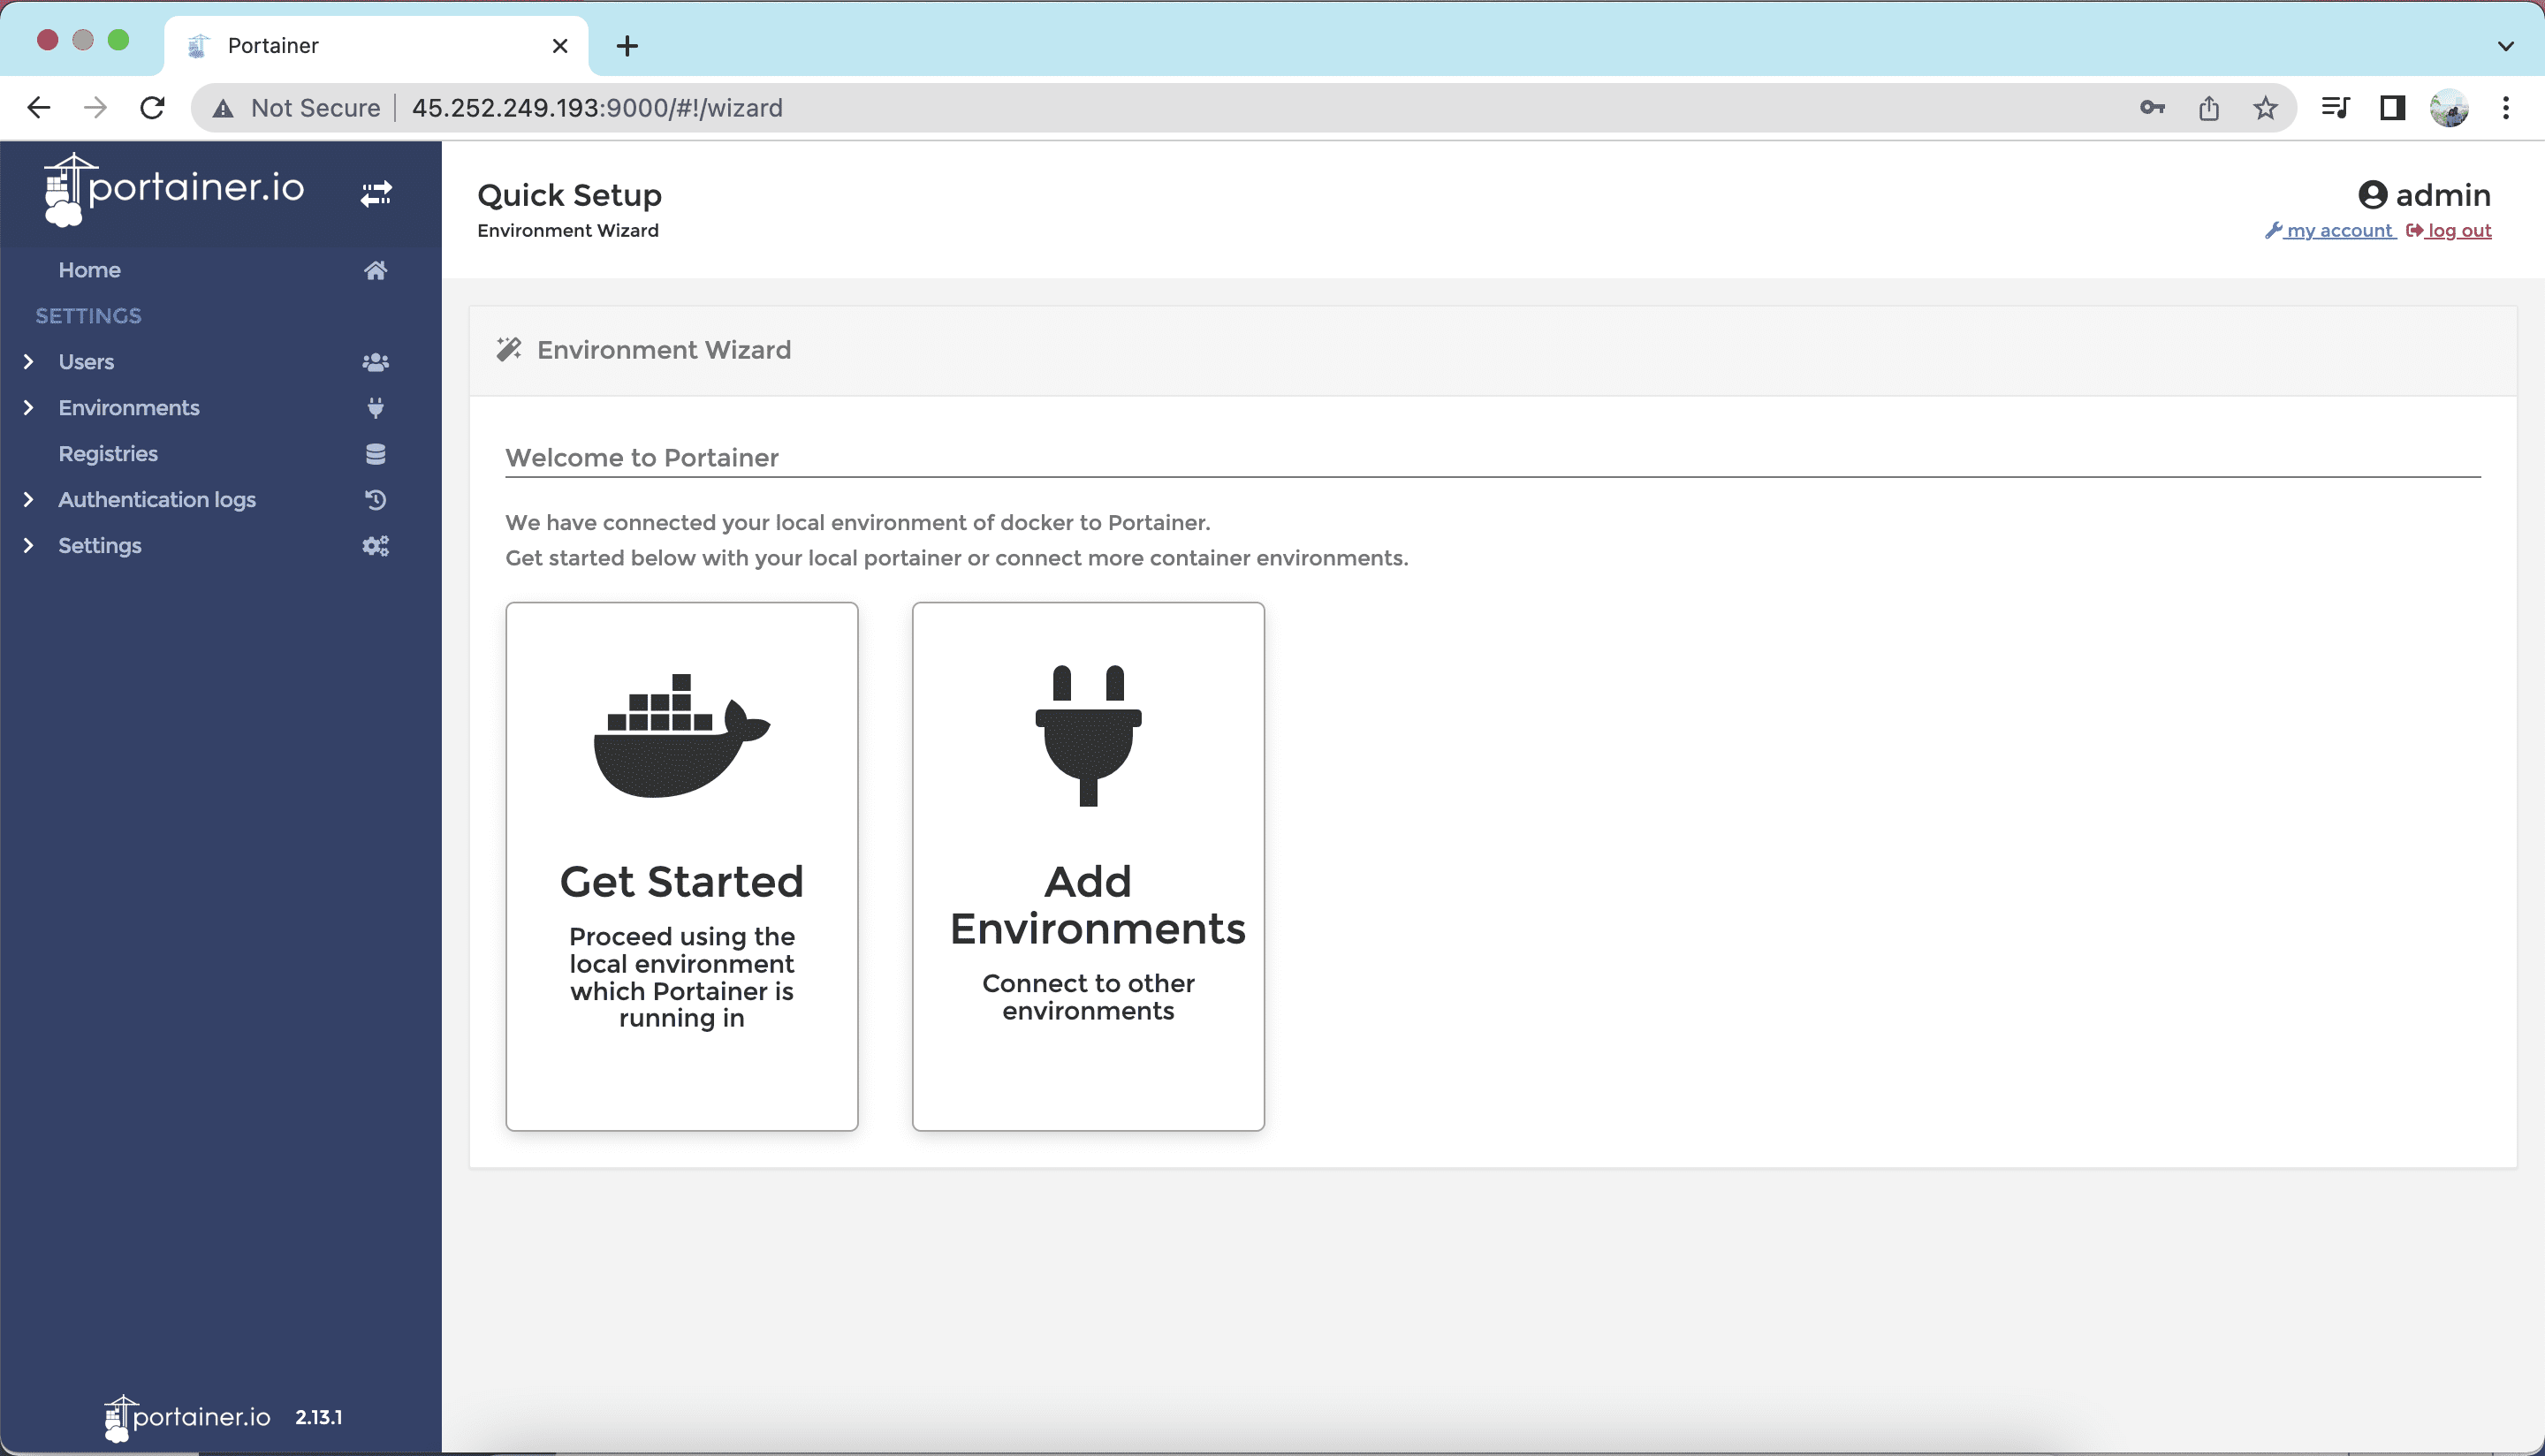
After successfully creating user and logging in to Portainer, the Portainer interface will be as below:
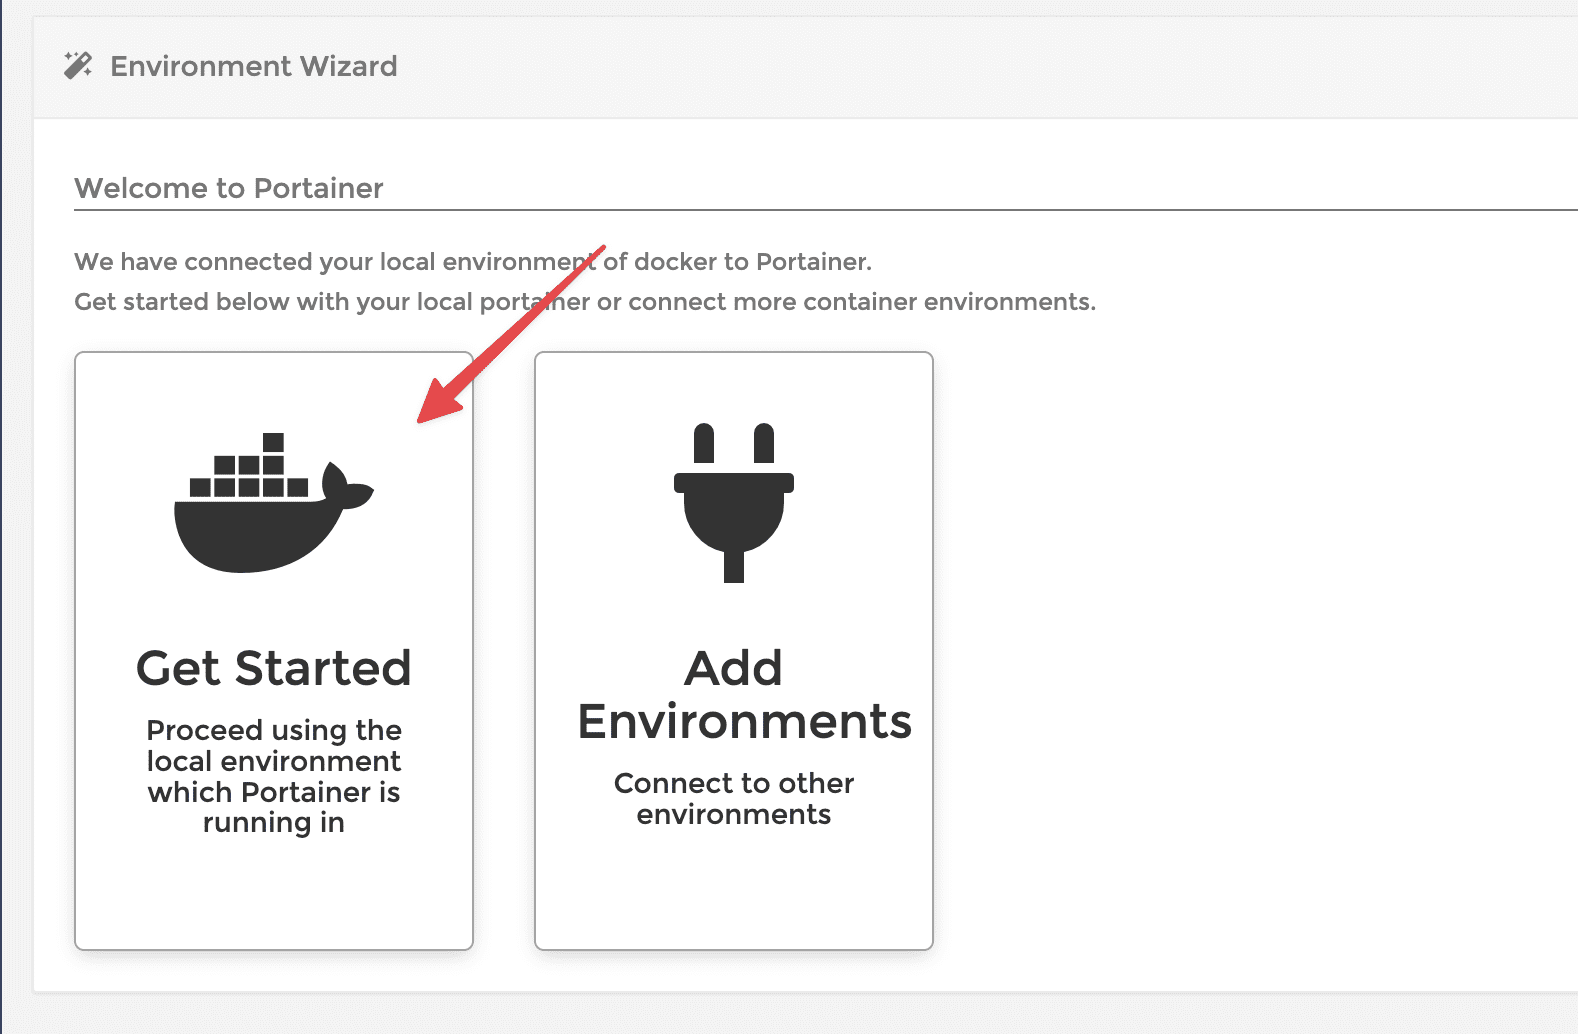
Step 3: Connect Portainer to Docker application on VPS
To connect Portainer to Docker applications on your VPS, click the Docker icon.
If successful, Docker will be added to the Portainer interface as shown below:
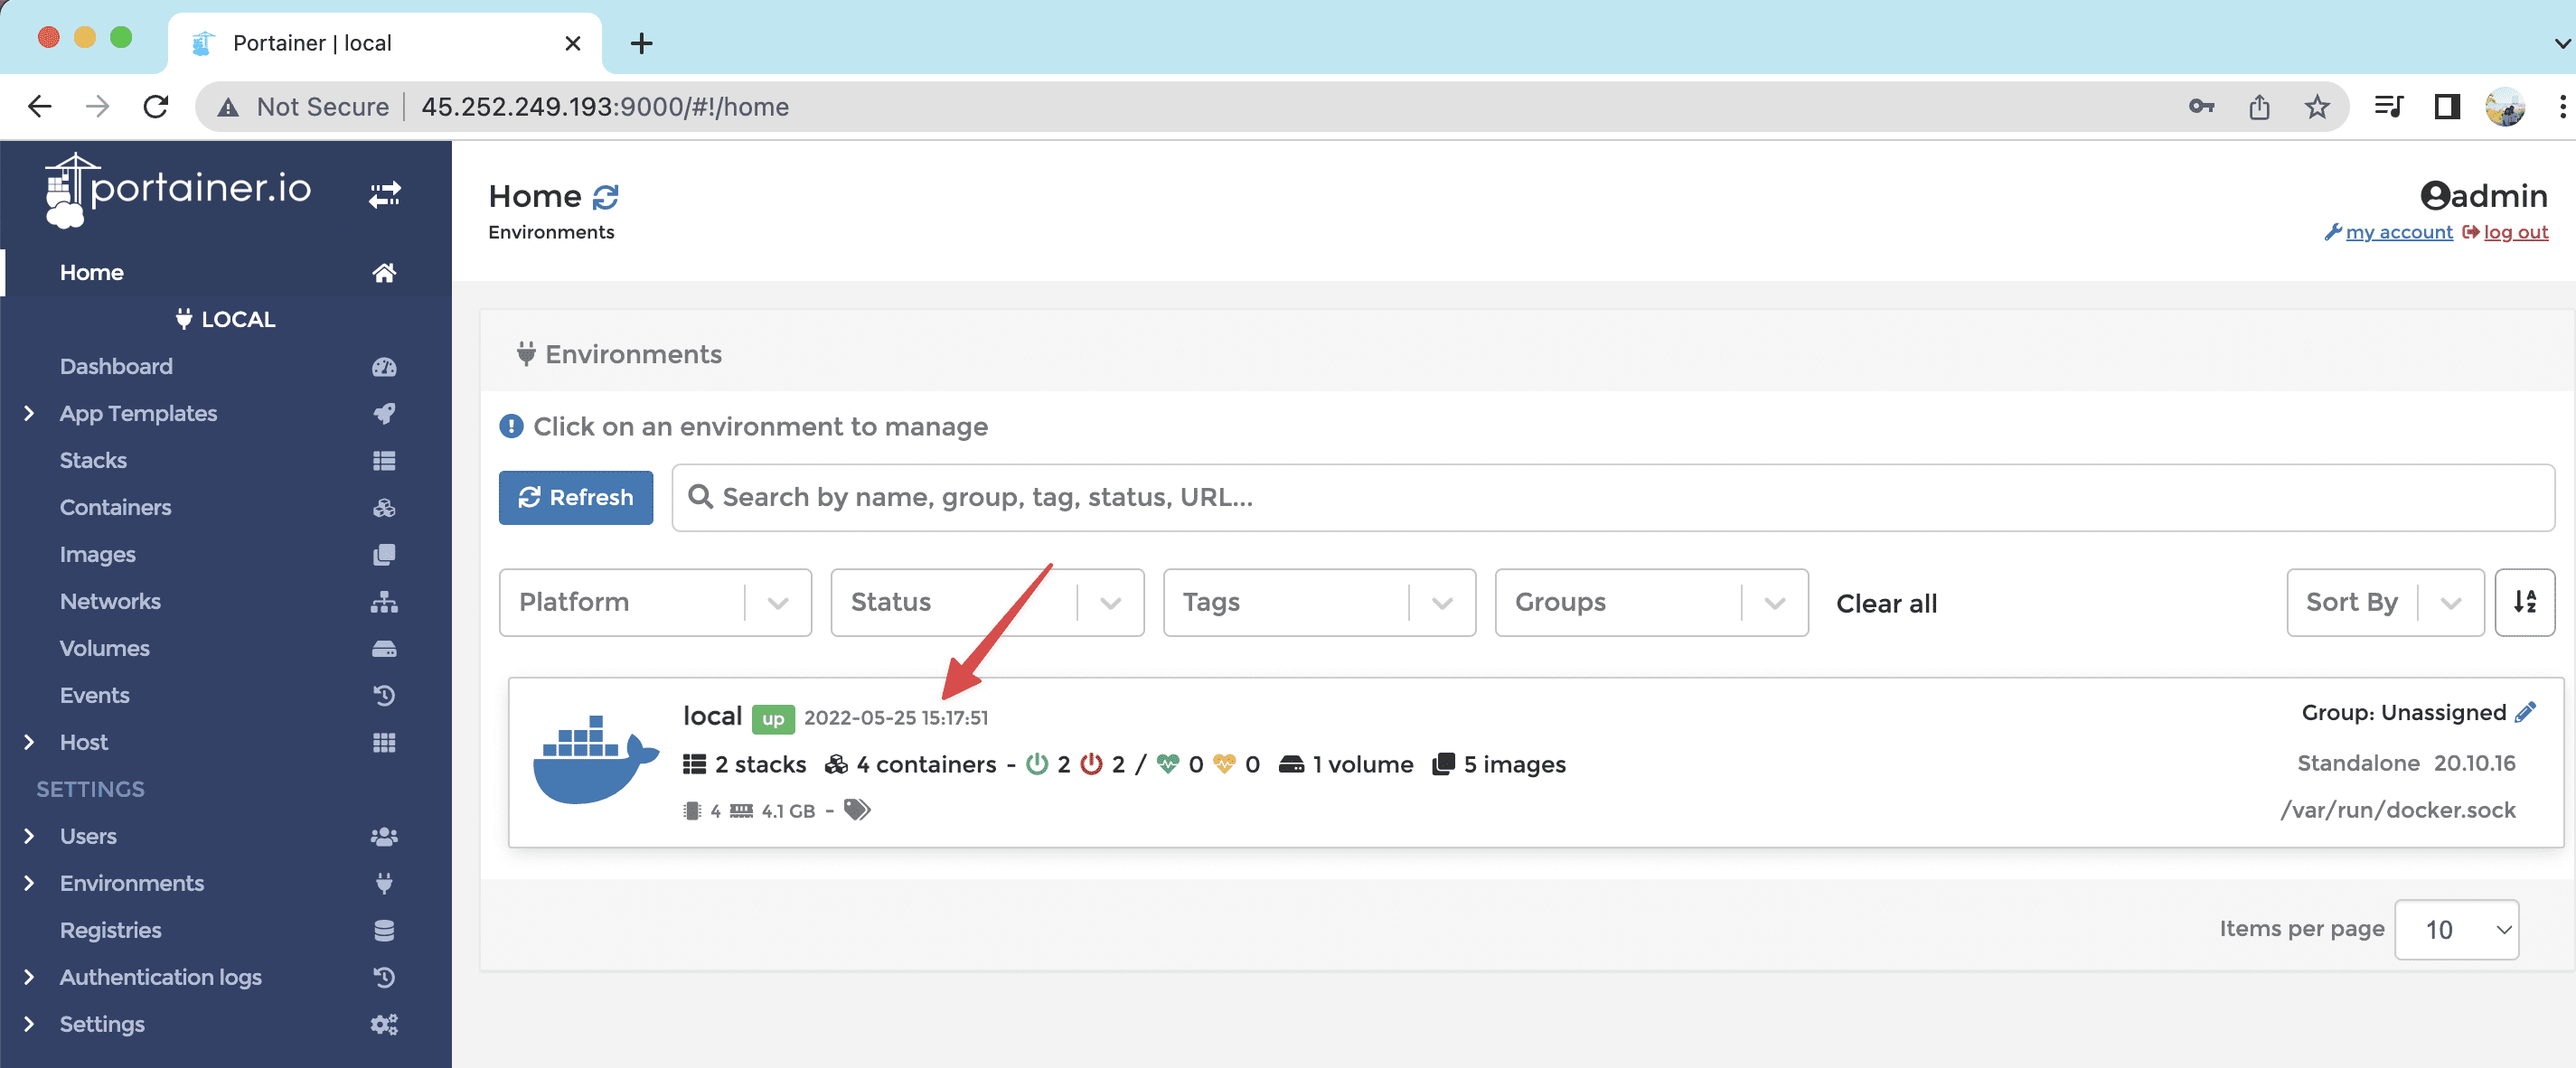
Click on the local section and you will see a list of Stacks, Containers, Images, Volume, Networks…
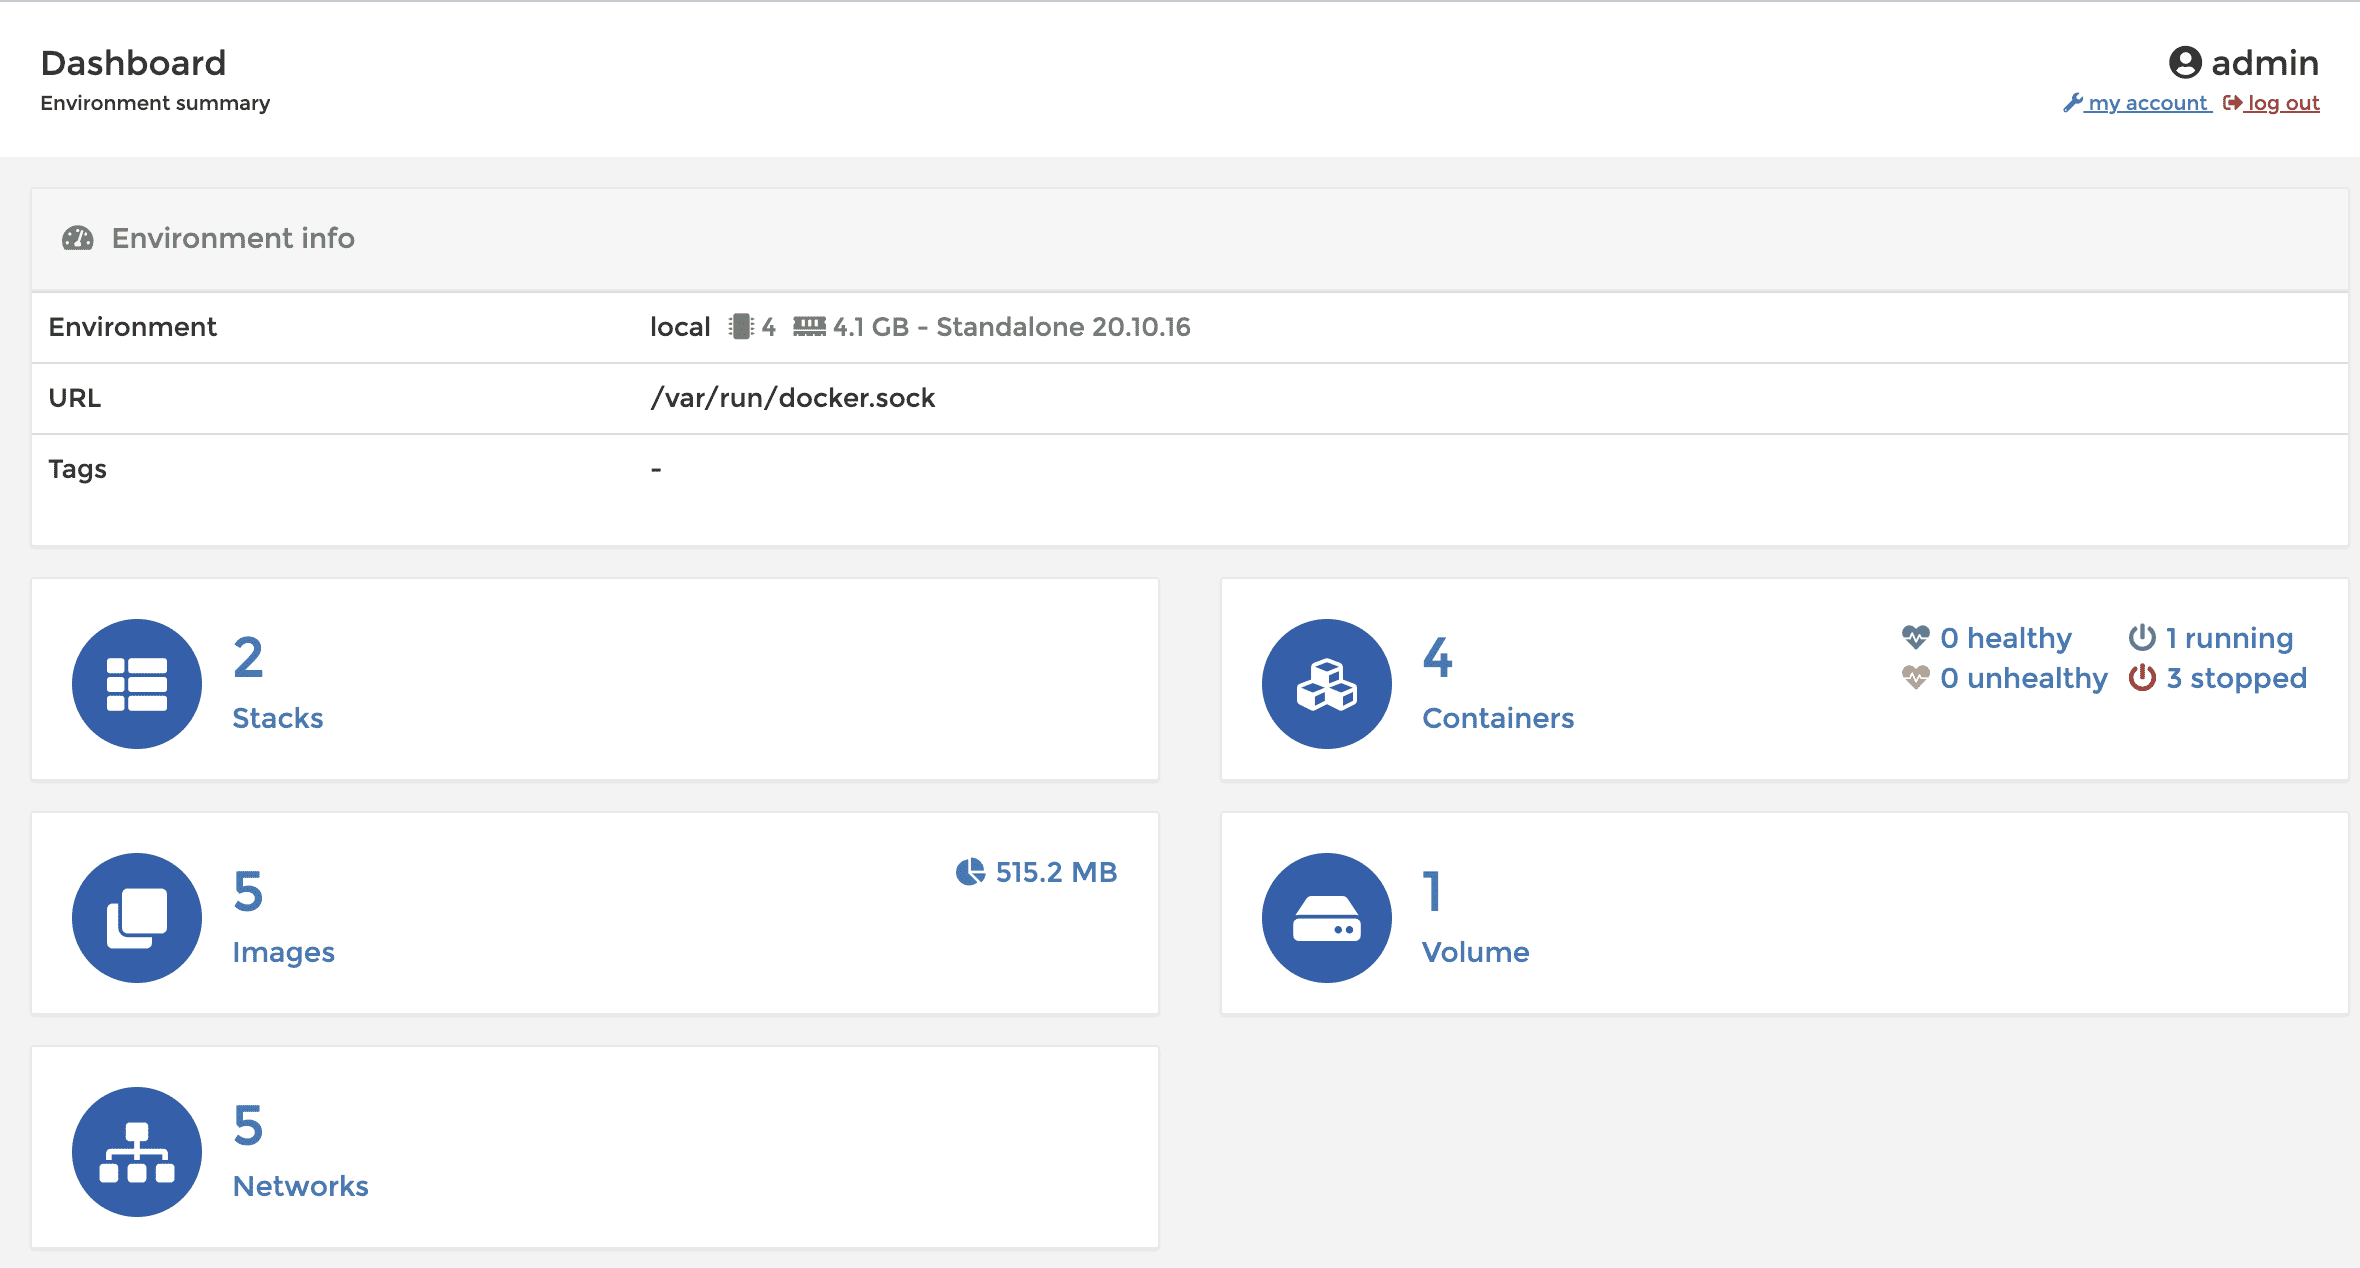
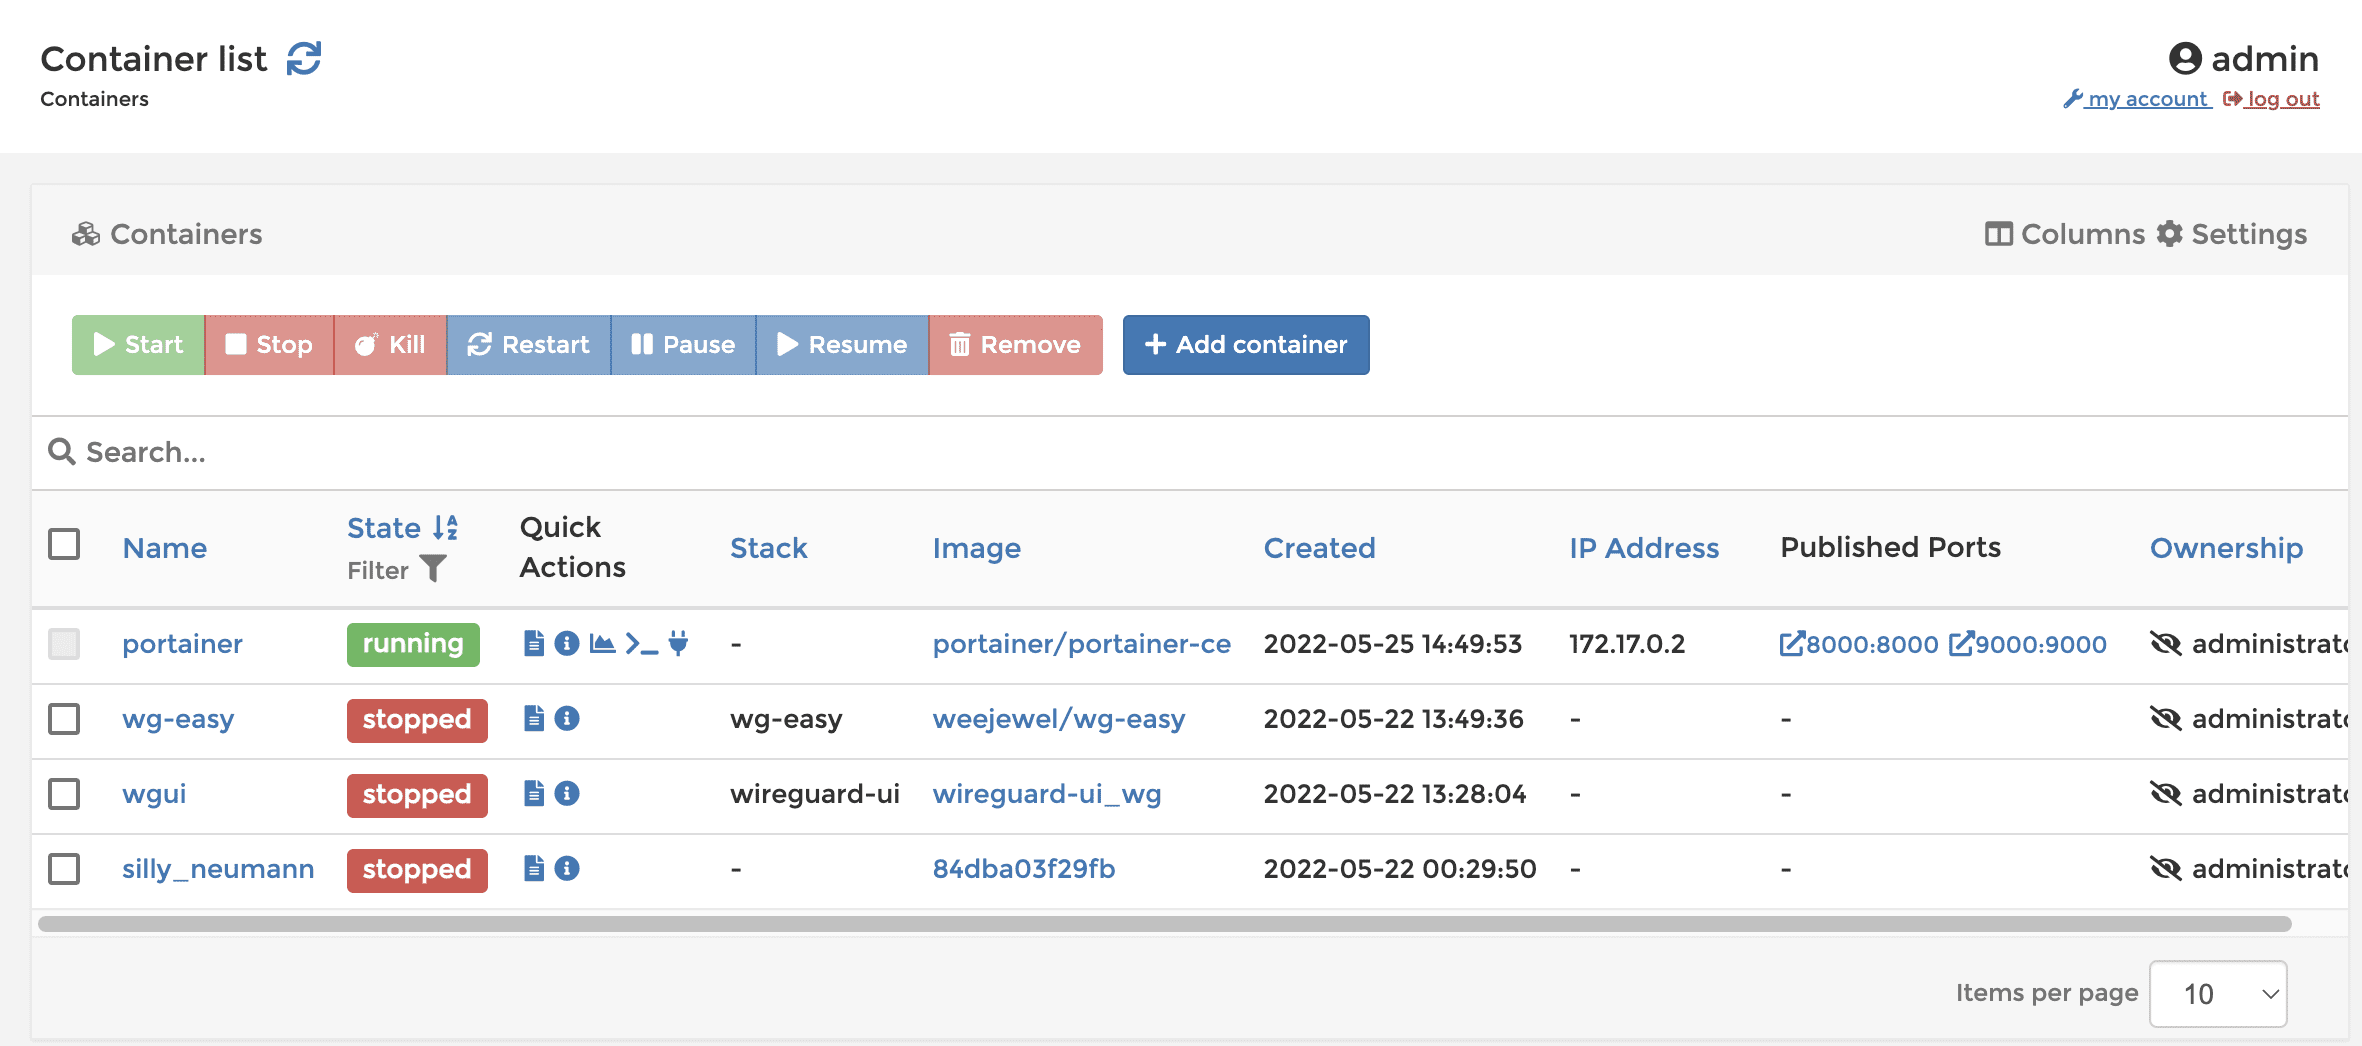
For example, if you need to manage Containers, you just need to click on the Containers section, now all the Containers running on the server will be listed. And you can Start/Stop/Kill those Containers with just one click.
So in this article, AZDIGI showed you how to install Portainer to manage Docker Containers. Portainer will make it very easy for you to administer Docker even if you don’t have much experience. In the next article, AZDIGI will show you how to use Portainer directly to deploy Containers without using command lines. Hopefully, this article will be helpful to you.

