Nội dung
Introduction
When setting up a hosting/VPS server system, a firewall system is indispensable, a solid “barrier” “wall” to protect the system. By default in OS CentOS is built-in Firewalld, but another tool that is used a lot is CSF (ConfigServer & Firewall). And in today’s article, AZDIGI will introduce CSF, the parameters as well as the internal features to help you gradually better understand and be proactive for security.
Commonly used commands in CSF (ConfigServer & Firewall)
| Command | Note: | Practical examples |
| csf -e | Enable csf (start csf) | [root@sv ~]#csf -e |
| csf -x | Disable csf (stop csf) | [root@sv ~]#csf -x |
| csf -s | Start the firewall rules | [root@sv ~]#csf -s |
| csf -f | Flush/Stop firewall rules | [root@sv ~]#csf -f |
| csf -r | Restart firewall | [root@sv ~]#csf -r |
| csf -a | Allow 1 IP to whitelist | [root@sv ~]#csf -a 45,252,249,102 |
| csf -td | Add IP to the temporary deny list (/var/lib/csf/csf.tempban) | [root@sv ~]#csf -td 45,252,249,102 |
| csf -tr | Remove IP from temporary ban or whitelist | [root@sv ~]#csf -tr 45,252,249,102 |
| csf -tf | Delete all IPs from temporary IP entries | [root@sv ~]#csf -tf |
| csf -d | IP ban. The IP after being banned will be in /etc/csf/csf.deny | [root@sv ~]#csf -d 45,252,249,102 |
| csf -dr [IP] | Unblock blocked IP in /etc/csf/csf.deny | [root@sv ~]#csf -dr 45.252.249.102 |
| csf -dr | This command without option will remove blocking all IPs in /etc/csf/csf.deny | [root@sv ~]#csf -dr |
| csf -g | Search the iptables and ip6tables rules for a match (eg IP, CIDR, Port Number) | [root@sv ~]#csf -g 45,252,249,102 |
| csf -t | Displays a current list of temporary IPs that allow and deny TTLs and comments. | [root@sv ~]#csf -t |
CSF configuration parameters need to be grasped.
After following the usage commands, AZDIGI will introduce and explain the parameters inside the configuration file so that you can set up a complete, safe config file with your own needs.
CSF Basics.
After installing the configuration file, CSF will be located in /etc/csf/csf.conf. Other configuration files like csf.allow, csf.deny, csf.logfiles… will be located at /etc/csf/
In which, the parameters when configuring are of the form ARGS = “VALUE” you need to be as follows:
- VALUE = “0” : Disable
- VALUE = “1” : Enable
- VALUE > 1 (VALUE = “20” , VALUE = “30” … ): Maximum limit (Example: Maximum limit of 30 connections)
- VALUE > 1 (VALUE = “1800” , VALUE = “3600”… ) : Maximum time (Example: Limit 1800s)
Basic configuration inside file /etc/csf/csf.conf
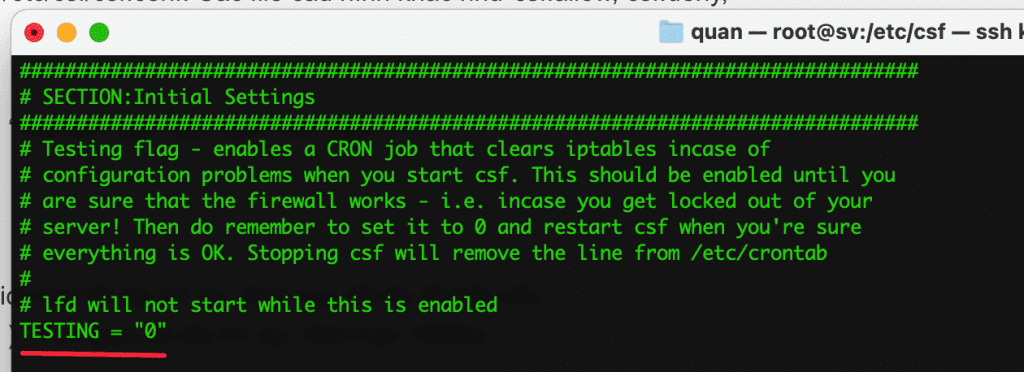
- TESTING = “0”
By default, when you just set TESTING = “1”, with TESTING = “1”, the LFD daemon (Login Fail Detect daemon) will not work, so if something goes wrong, the server will not block your IP. If the configuration is fine, then turn off TESTING so that the LFD starts working and blocks the attacking IPs.
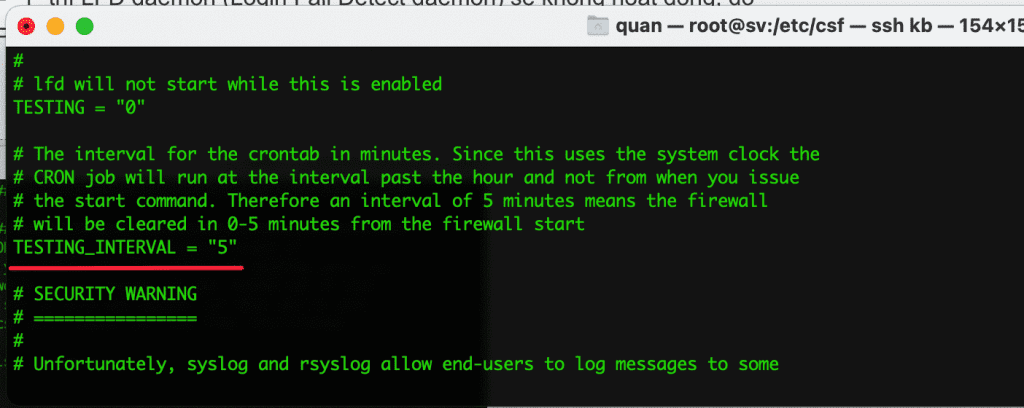
- TESTING_INTERVAL = “5”
Time to run cronjob to clear iptables if TESTING=1, in minutes.
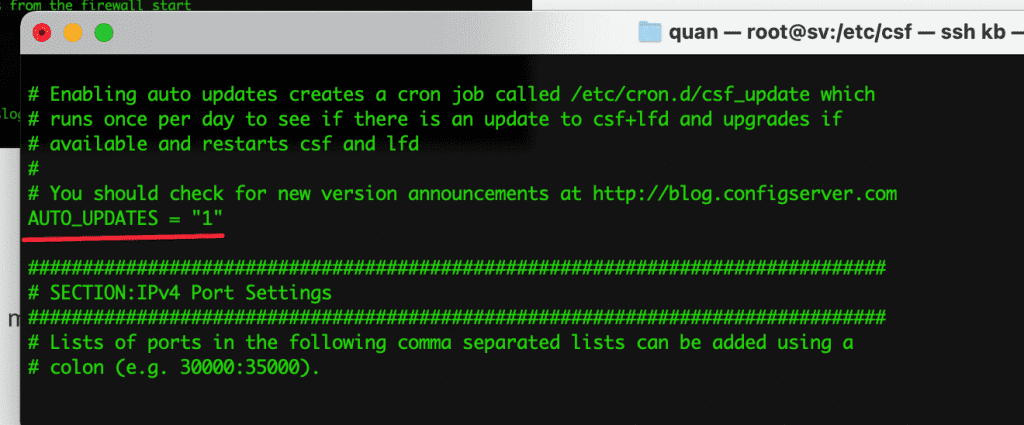
- AUTO_UPDATES = “0”
0 = Disable means to disable automatic updates. If you want to auto-update change to 1
- TCP_IN = “22,25,53,80,443 “
Allow incoming TCP ports: Allows users to connect to services with the corresponding port allowed, SSH, Mail, DNS… If you need to open more ports, add the Port here.
- TCP_OUT = “25.80 “
Allow outgoing TCP port: Allows the server to connect to the corresponding port.
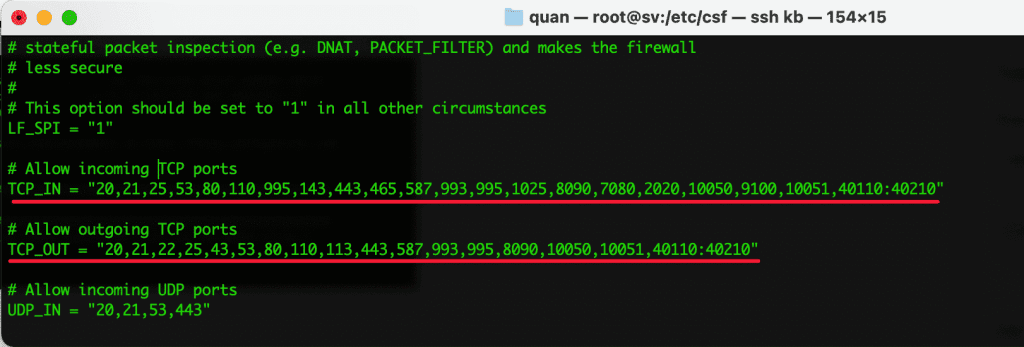
- UDP_IN = “20.21,53,443”
Allow incoming UDP ports: Allows the user to use the service with the corresponding port.
- UDP_OUT = “20,21,53,113,123,443”
Allow outgoing UDP ports: Allows the query server to connect to the corresponding outbound port.

- ICMP_IN = “1”
Allow users to PING to the server. If you do not want the user to PING, please change it to 0 corresponding to Disable.

- ICMP_IN_RATE = “1/s“
This parameter will limit the ping frequency to the server to 1/s. If you ping faster than this speed, you will get “Request timeout”. In case many people ping the server at the same time, most will receive “Request timeout” responses because the server only receives 1 request / s, this makes us think that the network connection has a problem, the network lagged, but that’s not really the case. Just raising this parameter a bit high or removing it (set value = 0) will fix the above situation. As shown below, I has been raised to 30 requests/s

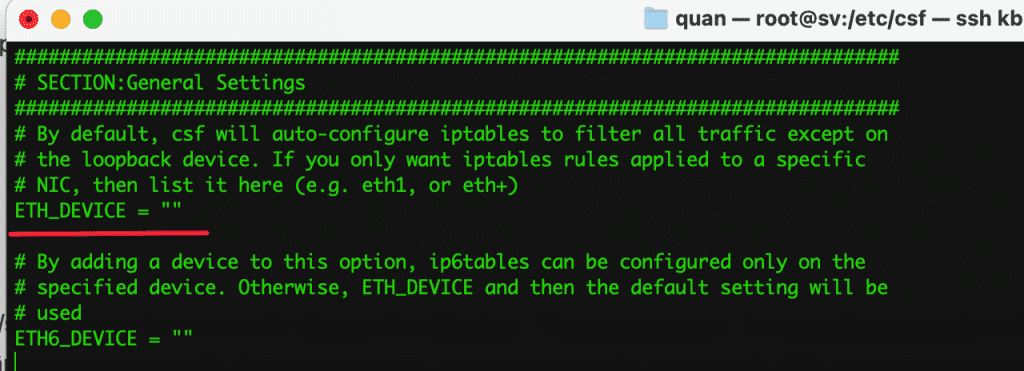
- ETH_DEVICE = “eth0“
By default, CSF will configure iptables to filter traffic on all network cards, except for the loopback card. If you want the iptables rules to be applied only to the network card “eth0”, then declare it here.
- ETH_DEVICE_SKIP = “eth1, eth2 “
If you don’t want the iptables rules not applied to any network card, declare it here. For example, card “eth1,eth2” is a local card, if you do not want to filter on this card, configure it as above.

- DENY_IP_LIMIT = “200”
Limit the number of IPs that are “permanently” blocked by CSF (these IPs will be stored in the file /etc/csf/csf.deny). This number depends on the resource of each server, if using VPS, this number is about “200” is reasonable, and the dedicated server is about “500”. When the number of blocked IPs exceeds this number, csf will automatically unblock the oldest IP (IP in line 1 of file /etc/csf/csf.deny).

- LF_DAEMON = “1”
Parameter 1 activates Login fail detection

- LF_CSF = “1”
Parameter 1 activates the Auto start feature when CSF is stopped

- PACKET_FILTER = “1”
Filter invalid TCP packets (INVALID state such as incorrect sequence number, the connection is not made through 3 handshakes…)

- SYNFLOOD = “1”
- SYNFLOOD_RATE = “75/s”
- SYNFLOOD_BURST = “25”
Enable synflood protection: If an IP sends 75 SYN calls within 1s and the number of SYN connections that exist on the server reaches more than 25, then block that IP (temp block).
- CONNLIMIT = “80;20“
Limit the number of new concurrent connections to the server per IP. The example above means: each IP is allowed to open 20 concurrent new connections to port 80 on the server.

- PORTFLOOD = “80;tcp;20;5“
This parameter will limit the number of connections to a particular port in a given time period. The example above means, if more than 20 TCP connections to port 80 are within 5s, then block that IP at least 5s from the last packet of that IP. After 5s, that IP will automatically be unlocked and accessed normally.

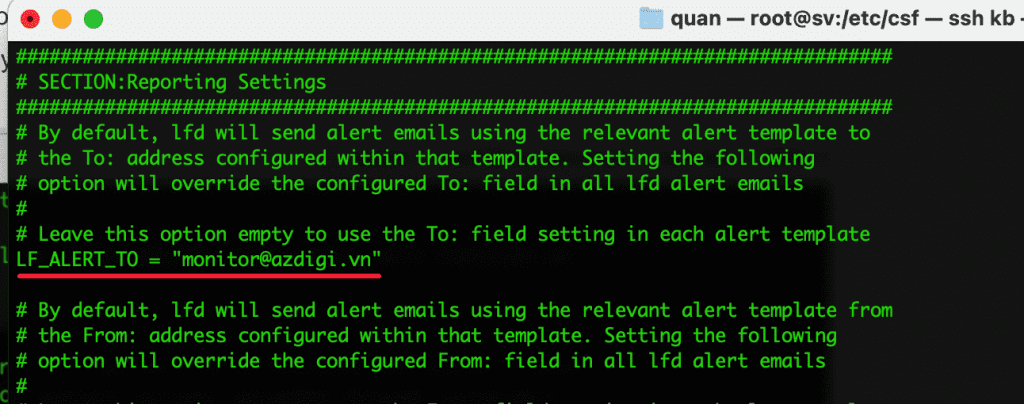
- LF_ALERT_TO = “email@domain”
By default, email notifications will be sent to the root of the server. If you want to send to another email, enter your email here.
- LF_SELECT = “1”
This parameter means that when an IP violates the rules of LFD, instead of blocking all traffic from this IP to the server, it will only block traffic to the service that this IP login fails (eg Login FTP, Mail is wrong many times, then block). access to FTP, Mail but still allow normal website access).

- LF_SSHD = “5”
- LF_SSHD_PERM = “1800“
when configuring this parameter, the wrong SSH 5 times will be locked IP.

- LF_DISTATTACK = “0”
When detecting a brute force attack from a botnet. If an account is incorrectly logged in beyond the allowable limit from many different IPs, it will block all the wrongly logged-in IPs.

- LF_DISTATTACK_UNIQ = “2”
Minimum number of IPs to recognize this as a distributed attack.

- CT_LIMIT = “150”
Limit the number of connections from one IP to the server. If that number exceeds 150 as configured then temp block that IP.
- CT_INTERVAL = “30”
Scans check every 30 seconds.

There are also a few other parameters that are rarely used that I will not mention here. Hopefully, this article will help you set up a good security configuration for your server from outside attacks.
If you have questions or need support, please live chat with Technical Department. Or send the ticket to the Technical Department according to the information below.
- Hotline 247: 028 888 24768 (Ext 0)
- Ticket/Email: You can use your email to register for the service and send it directly to: support@azdigi.com

