Nội dung
Currently, WordPress is a very developed open-source code that is trusted by the majority of the community, because of this growth, WordPress regularly upgrades and develops its features through new version updates. Upgrading to new versions will help provide a better experience and support patching backlog vulnerabilities from previous older versions, and this upgrade is always recommended by the developer.
In this article, AZDIGI will show you how to upgrade the WordPress version.
How to upgrade the WordPress version
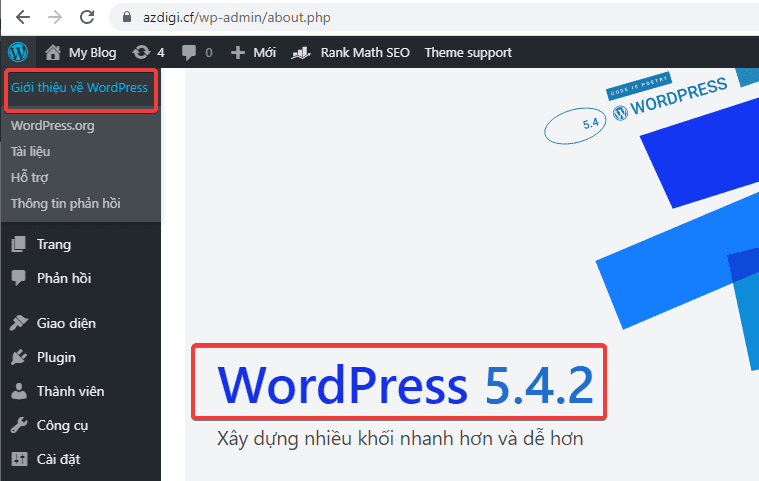
First, you need to check the current version you are using by Login to the WordPress admin page, you click on the WordPress icon in the left corner of the screen> About WordPress => (currently using version 5.4.2)
Note: Before implementing, you need to back up your website first.
Method 1: Upgrade WordPress directly from the WordPress admin page
At the admin page, click News Feed (1) => Update (2) => If there is a new WordPress version, the system will display the update here, so the latest version is 5.5 .1, you click Update now (3).

The upgrade process will take place as follows:
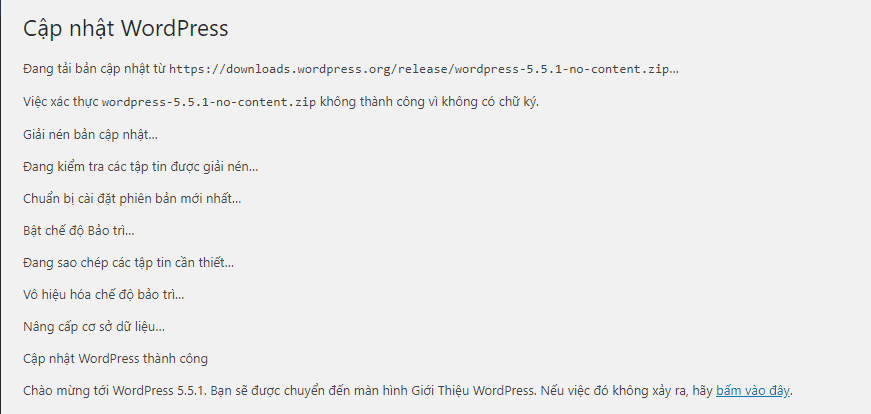
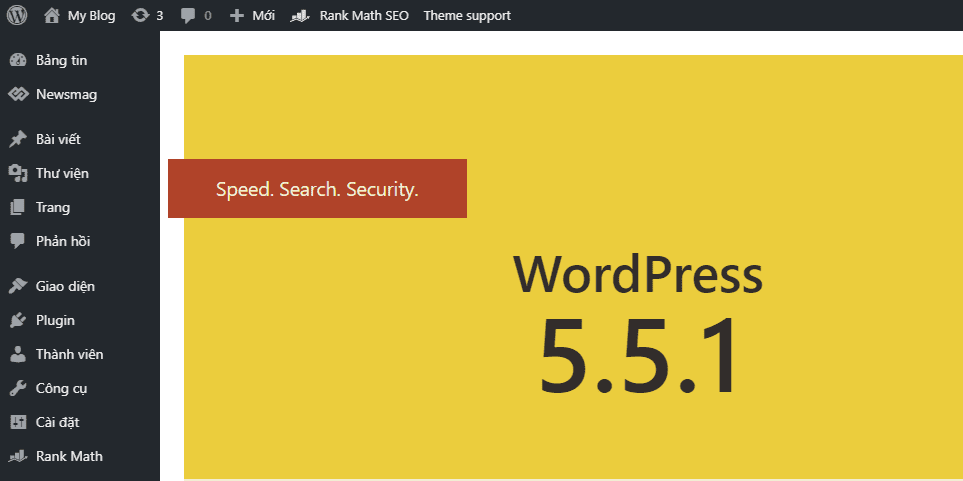
So you have successfully upgraded the WordPress version to 5.5.1.
Method 2: Upgrade the WordPress version manually
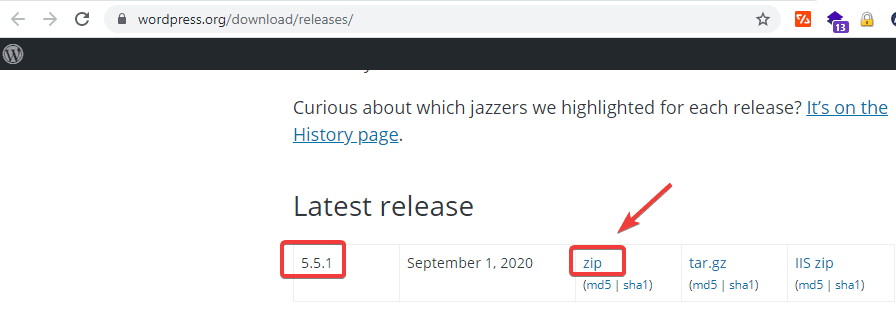
Step 1: Download the version of WordPress you need to upgrade from the homepage
To use this method, you need to download the version of WordPress to upgrade by accessing the link here (you should choose to download the file in .zip format).
Step 2: Process the downloaded data
You extract the source code (the file will be in the form wordpress-5.5.1.zip) and delete the wp-content folder and compress the edited data into the original .zip file.
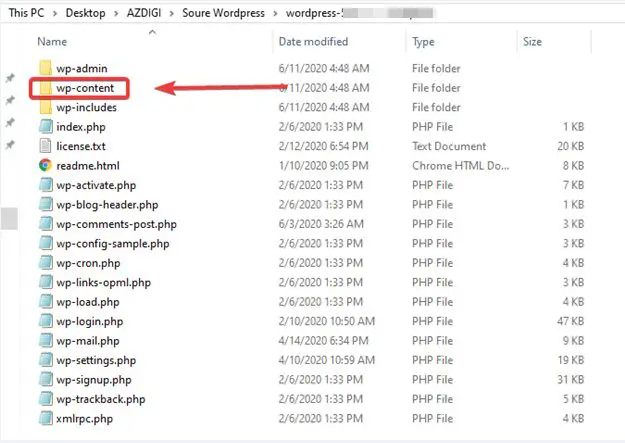
So you have finished processing the downloaded source code.
Step 3: Process the current data of the website
You can use FTP or File Manager on Hosting/VPS to access the directory path containing the source code of the current website (usually Public_html).
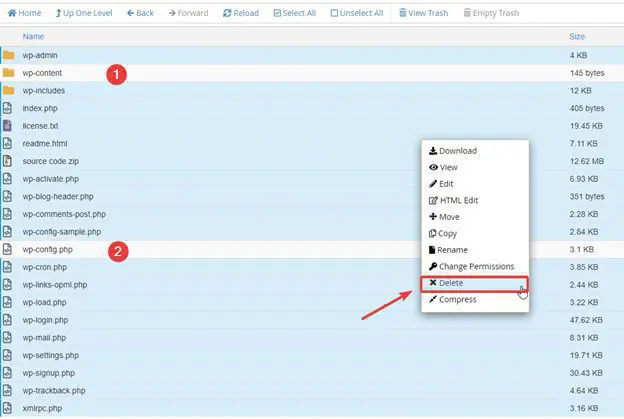
You keep the wp-content folder (1) and the wp-config.php file (2), the rest you can delete.
Note: If on the website there are files used to authenticate Google Search Console, API (for example, the file is in the form robots.txt), you should keep these files.
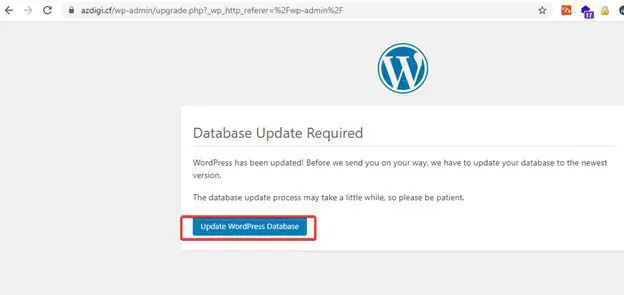
Next, you proceed to upload new data in Step 2, then go to the website to check and click Update WordPress Database to complete the process.
Method 3: Upgrade the WordPress version using WP-CLI
If the Server/VPS/Hosting you are using supports the Command and has WP-CLI installed, you can downgrade WordPress via WP-CLI with a simpler and faster operation than the above two methods.
You open your Command window and move to the folder containing the website source code and use the following commands:
- Check the current version in use
wp core version
[trungkie@chv10-24851 azdigi.cf]$ wp core version
5.4.2
Currently, I’m using version 5.4.2.
- Upgrade WordPress version
wp core update --version=5.5.1 --force
[trungkie@chv10-24851 azdigi.cf]$  wp core update --version=5.5.1 --force
Updating to version 5.5.1...
Downloading update from https://wordpress.org/wordpress-5.5.1.zip...
Unpacking the update...
Success: WordPress updated successfully.
[trungkie@chv10-24851 azdigi.cf]$ wp core version
5.5.1
Has been upgraded to 5.5.1 successfully.
Summary
Thus, in this article, AZDIGI has shown you some of the simplest ways to upgrade the WordPress version, you can choose which way suits your situation and the ability to do it. If you find the article useful, you can share it widely!
Wishing you success!
You can check out some of the tutorials below:
- Instructions for using WP-CLI to manage WordPress.
If you need assistance, you can contact support in the ways below:
- Hotline 247: 028 888 24768 (Ext 0)
- Ticket/Email: You use the email to register for the service and send it directly to: support@azdigi.com

