Để cài đặt WordPress lên hosting nhanh và đơn giản nhất AZDIGI xin hướng dẫn cài đặt bằng Softaculous, đây là một công cụ trả phí được tích hợp vào Hosting, giúp bạn thực hiện cài đặt WordPress, Opencart, Magento… nhanh chóng. Dưới đây AZDIGI sẽ hướng dẫn các bạn cách cài WordPress tự động sử dụng công cụ Softaculous.
Đầu tiên bạn truy cập vào mục Software sau đó click vào mục WordPress Manager by Softaculous để vào quản trị và cài đặt.
Ở AZDIGI, mặc định sẽ hiển thị trang tất cả các cài đặt Softaculous. Bạn chọn bên tay phải tìm Blogs => WordPress để tiến hành cài đặt mã nguồn này.
Và nhấp vào nút Install Now để vào trang cài đặt.
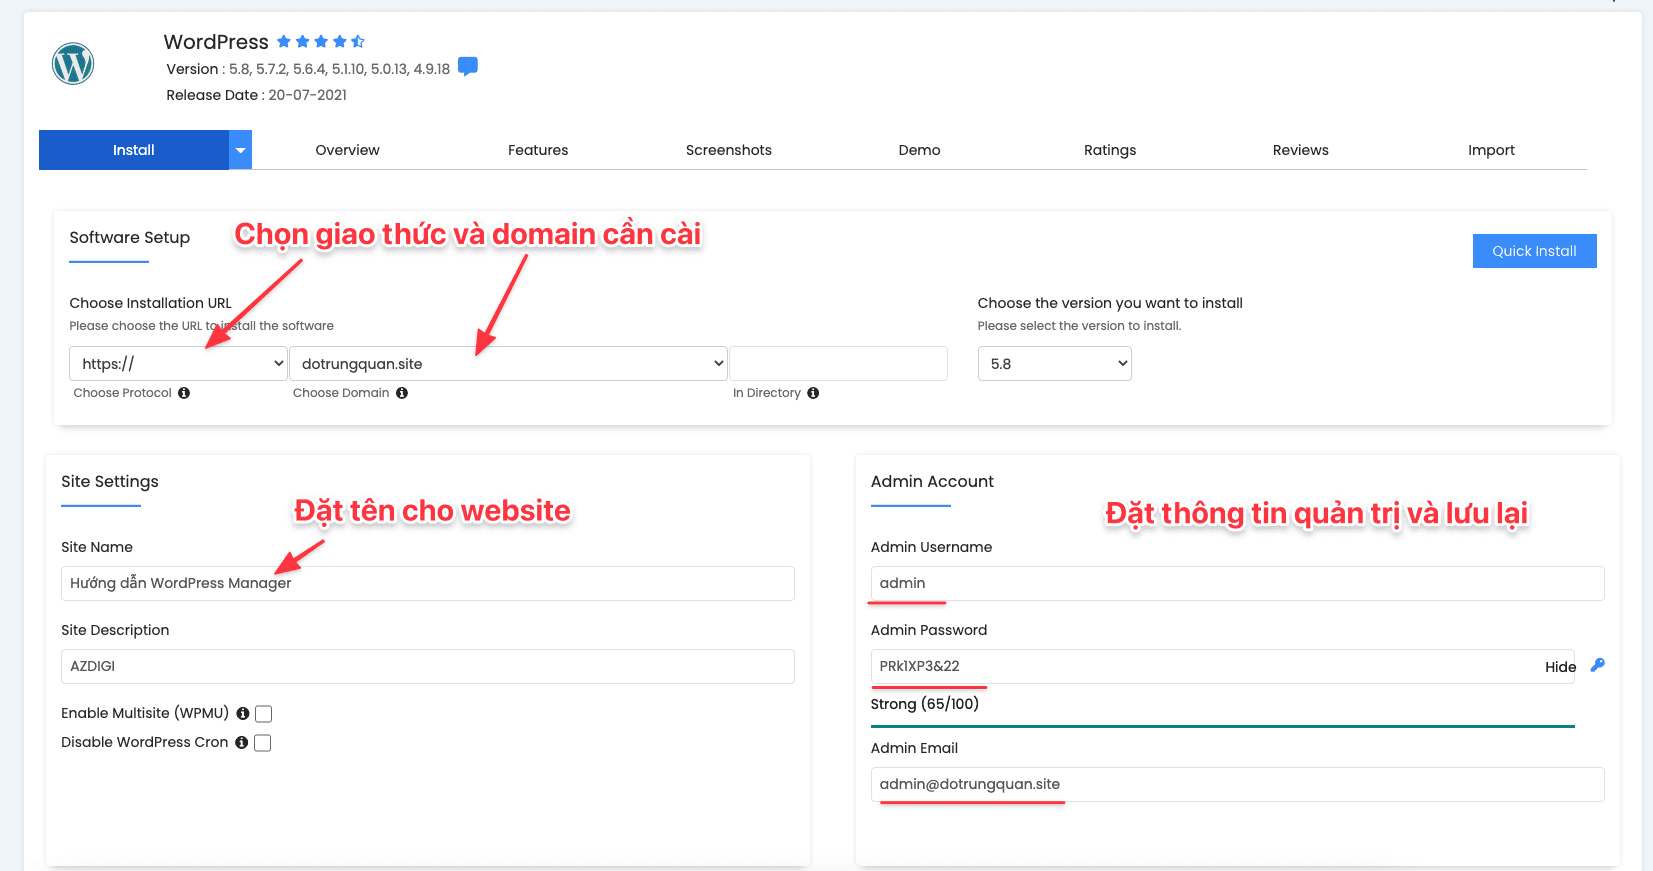
Tại đây, bạn sẽ nhập các thông tin Website cần thiết để tiến hành cài đặt
Chú thích:
- Choose Installation URL: Bạn hãy chọn giao thức HTTP:// hoặc là HTTPS:// và chọn domain cần cài đặt WordPress
- Site Settings: Bạn hãy đặt tên cho website của bạn.
Lưu ý: Chỉ tick vào Multisite (WPMU) khi bạn sử dụng WordPress Multisite, nếu không sử dụng bạn không tick vào đây
- Admin Account: Đây là thông tin quản trị dùng để đăng nhập vào WordPress. Bạn hãy đặt thông tin để quản lý.
Lưu ý: Không đặt Password quá đơn giản, mà cần đặt Password WordPress gợi ý sẽ bảo mật cao hơn. Tuyệt đối không đặt pass 123456 12345678 123567a
- Choose Language: Bạn hãy chọn ngôn ngữ cho website
- Select Plugins: Bạn hãy chọn Plugin cài đặt kèm theo WordPress. Ngoài ra bạn có thể chủ động thiết lập các Plugin cài đặt đi kèm. Hãy xem bài viết sau để tuỳ chọn thiết lập.

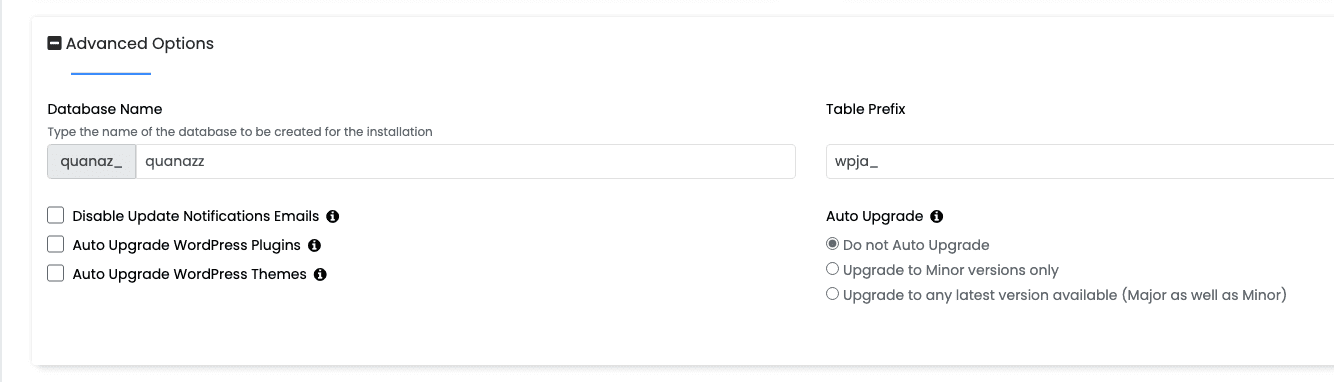
Ở phần Advanced Options bạn có thể tuỳ chỉnh như sau
- Database Name: Đặt tên database (tối đa 7 ký tự, viết liền không dấu)
- Table Prefix: Đặt tên Prefix trong Database
Ngoài ra một số thông báo như Vô hiệu thông báo qua email khi cập nhật, hoặc và tự động cập nhật Theme, Plugin khi có bản mới.
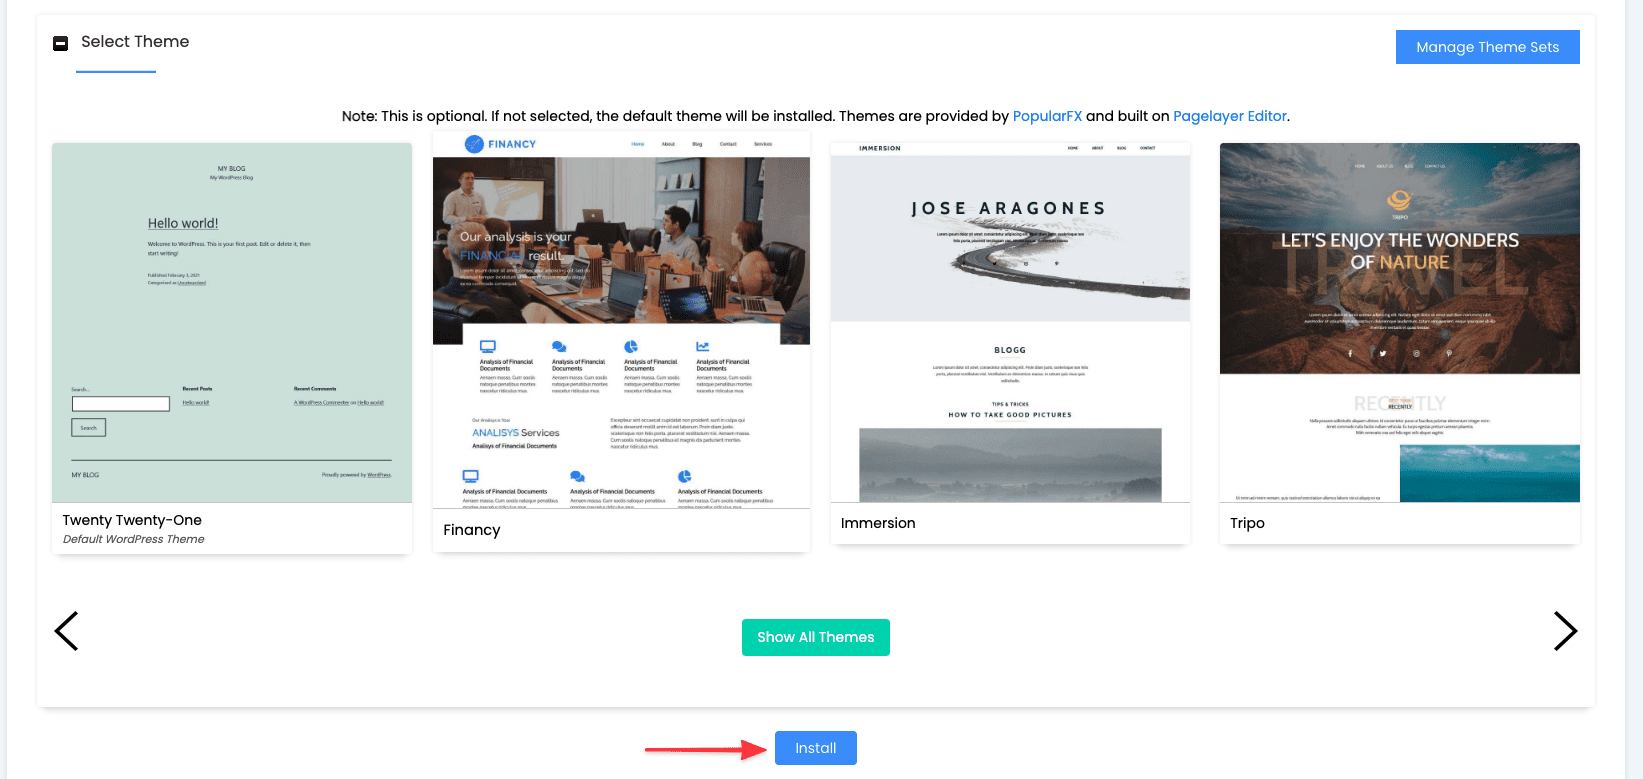
Sau đó bạn chọn Theme cài kèm hoặc bỏ chọn. Và click Install để bắt đầu cài đặt.
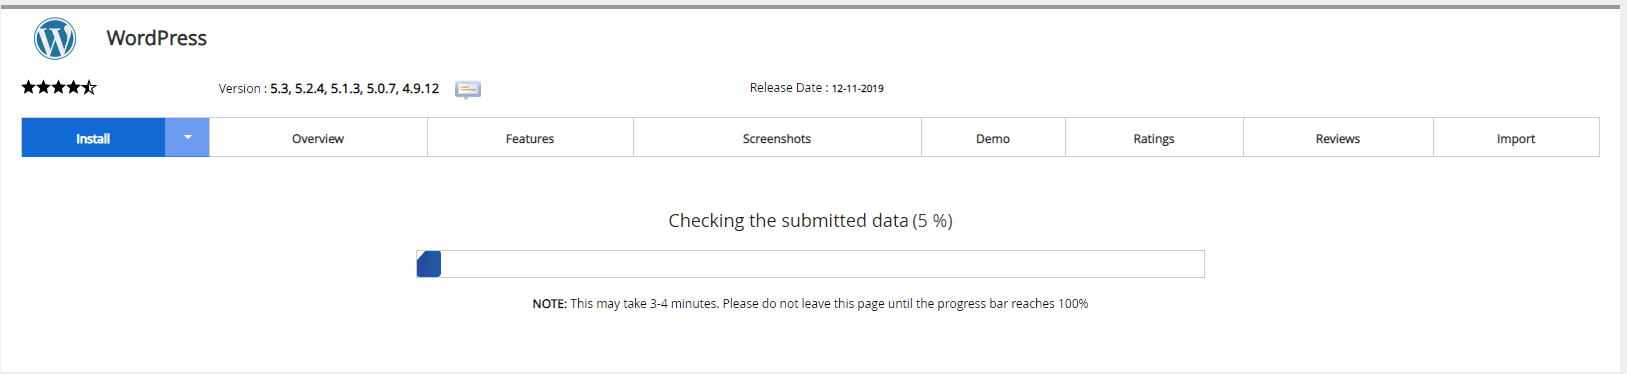
Quá trình cài đặt đang diễn ra. Bạn chỉ cần chờ ít phút thôi.
Và thông báo cài đặt hoàn tất.
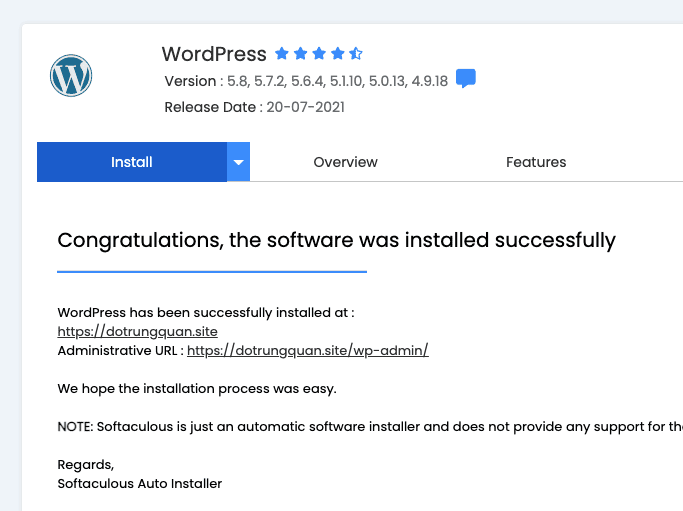
Sau khi cài đặt hoàn tất, bạn có thể tiến hành sử dụng website của mình ngay bây giờ.
You might also like
- Automatically install WordPress Multisite via Softaculous on cPanel with 2 steps
- Install WordPress automatically with Softaculous on SEO Hosting
- [WordPress Manager] Using WordPress Manage to manage Website
- [WordPress Manager] How to use WordPress Staging on Softaculous
- How to install the Magento website with Softaculous
- [WordPress Manager] Create a Theme, Plugin manager from WordPress Manager
About the author

Thạch Phạm
Đồng sáng lập và Giám đốc điều hành của AZDIGI. Có hơn 15 năm kinh nghiệm trong phổ biến kiến thức liên quan đến WordPress tại thachpham.com, phát triển website và phát triển hệ thống.