Nội dung
I. Giới Thiệu Chung
Nginx là một máy chủ web mã nguồn mở được sử dụng để phục vụ các trang web tĩnh và động. Ngoài ra cũng có thể được sử dụng làm máy chủ proxy hoặc cân bằng tải, và được sử dụng rộng rãi trong các ứng dụng web lớn.
Nginx có thể chạy trên các hệ điều hành Linux, Unix, macOS và Windows. Nginx có khả năng xử lý đồng thời nhiều kết nối lớn và là một trong những máy chủ webserver mạnh mẻ hiện nay.
Bạn có thể cài đặt NGINX bằng cách sử dụng Yum nhưng khi đi vào quản trị hệ thống thì bạn cần biết thêm cách cài đặt nữa đó là cài từ Source. Và trong hướng dẫn này sẽ giúp bạn thực hiện việc đó.
II. Cài Đặt Các Gói Mở Rộng
Đầu tiên bạn cần cài đặt một số gói mở rộng để hỗ trợ Compiled Nginx từ Source. Nếu không cài đặt sẽ gặp lỗi phát sinh. Bạn hãy thực hiện chạy các lệnh bên dưới để cài đặt
yum install -y epel-release net-tools bind-utils net-tools automake pigz git perl perl-ExtUtils-Embed libxslt libxslt-devel libxml2 libxml2-devel gd gd-devel GeoIP GeoIP-devel gcc-c++ pcre-devel openssl-devel zlib-devel wget && yum groupinstall "Development Tools"
Tiếp theo bạn hãy truy cập vào đây để chọn phiên bản nginx cần cài đặt. Trong hướng dẫn này tôi lựa chọn phiên bản nginx-1.13.2 để sử dụng.
wget https://nginx.org/download/nginx-1.13.2.tar.gz && tar zxvf nginx-1.13.2.tar.gz
Tiếp theo bạn giải nén và thực hiện Compiled NGINX. Trước khi thực hiện Compiled nginx phải tạo user và group và thư mục cache trước nếu cần.
   useradd --system --home /var/cache/nginx --shell /sbin/nologin --comment "nginx user" --user-group nginx
   mkdir -p /var/cache/nginx
III. Thực hiện Compiled Nginx từ Source
1. Tải về các modules
Để thực hiện Compiled thêm các modules, vì mặc định nginx không có. Như trong hướng dẫn này tôi sẽ thiết lập một số modules như sau
##-Tạo -Thư mục modules
mkdir /root/modules
cd /root/modules
mkdir /root/modules
cd /root/modules
git clone https://github.com/skinsnguyen/ngx_security_headers.git
git clone https://github.com/skinsnguyen/testcookie-nginx-module.git
git clone https://github.com/skinsnguyen/nginx-module-vts.git
git clone https://github.com/skinsnguyen/ngx_cache_purge.git
git clone https://github.com/skinsnguyen/nginx-sticky-module-ng.git
git clone https://github.com/skinsnguyen/nginx-dav-ext-module.git
git clone https://github.com/skinsnguyen/nginx-module-vts.git
git clone https://github.com/skinsnguyen/ngx_brotli.git
git clone https://github.com/skinsnguyen/zlib.git
git clone https://github.com/skinsnguyen/naxsi.git
wget https://www.openssl.org/source/openssl-1.1.1a.tar.gz && tar xzvf openssl-1.1.1a.tar.gz
wget https://www.openssl.org/source/openssl-1.1.0f.tar.gz && tar xzvf openssl-1.1.0f.tar.gz
wget https://sourceforge.net/projects/pcre/files/pcre/8.40/pcre-8.40.tar.gz && tar xzvf pcre-8.40.tar.gz
wget https://zlib.net/zlib-1.2.13.tar.gz && tar xzvf zlib-1.2.13.tar.gz
2. Thực hiện build modules
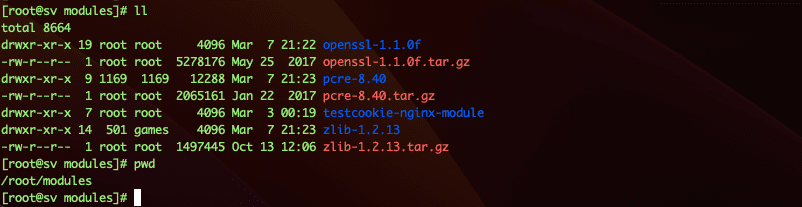
Để thực hiện build một số modules như: testcookie-nginx-module, zlib, pcre-8.40, openssl, bạn thực hiện tiếp như sau. Và đối với các modules khác bạn cũng build tương tự.
Sau khi thực download về các module cần build ở hình bên dưới.
Thực hiện build Compiled nginx với cấu hình bên dưới.
cd /root/nginx-1.13.2
./configure --prefix=/etc/nginx --sbin-path=/usr/sbin/nginx --conf-path=/etc/nginx/nginx.conf --pid-path=/var/run/nginx.pid --modules-path=/usr/lib64/nginx/modules --user=nginx --group=nginx --build=CentOS --builddir=nginx-1.19 --with-select_module --with-poll_module --with-threads --with-ld-opt=-Wl,-E --with-cc-opt=-Wno-error --with-file-aio --with-http_ssl_module --with-http_v2_module --with-http_realip_module --with-http_addition_module --with-http_xslt_module=dynamic --with-http_image_filter_module=dynamic --with-http_geoip_module=dynamic --with-http_sub_module --with-http_dav_module --with-http_flv_module --with-http_mp4_module --with-http_gunzip_module --with-http_gzip_static_module --with-http_auth_request_module --with-http_random_index_module --with-http_secure_link_module --with-http_degradation_module --with-http_slice_module --with-http_stub_status_module --with-http_perl_module=dynamic --with-perl_modules_path=/usr/lib64/perl5 --with-perl=/usr/bin/perl --http-log-path=/var/log/nginx/access.log --http-client-body-temp-path=/var/cache/nginx/client_temp --http-proxy-temp-path=/var/cache/nginx/proxy_temp --http-fastcgi-temp-path=/var/cache/nginx/fastcgi_temp --http-uwsgi-temp-path=/var/cache/nginx/uwsgi_temp --http-scgi-temp-path=/var/cache/nginx/scgi_temp --with-mail=dynamic --with-mail_ssl_module --with-stream=dynamic --with-stream_ssl_module --with-stream_realip_module --with-stream_geoip_module=dynamic --with-stream_ssl_preread_module --with-compat --with-pcre=/root/modules/pcre-8.40 --with-pcre-jit --with-zlib=/root/modules/zlib-1.2.13 --with-openssl=/root/modules/openssl-1.1.0f --with-openssl-opt=no-nextprotoneg --with-debug --with-ld-opt="-Wl,-rpath,/usr/local/lib" --with-compat --add-dynamic-module=/root/modules/testcookie-nginx-module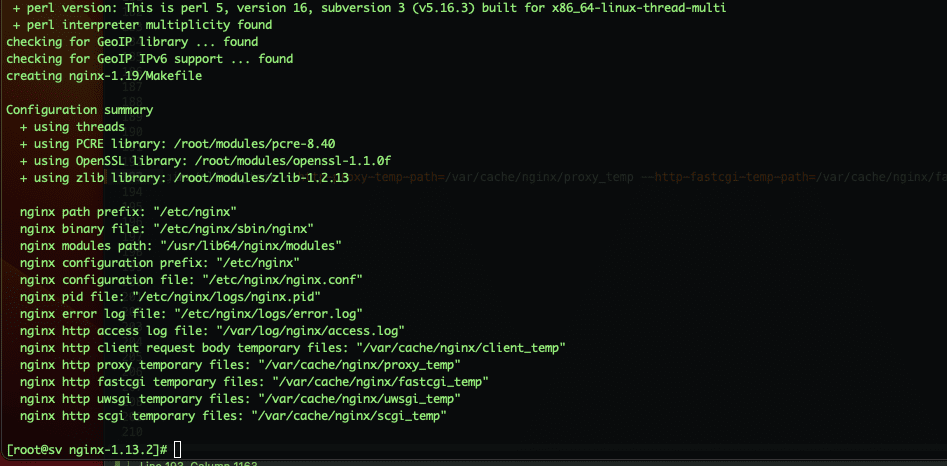
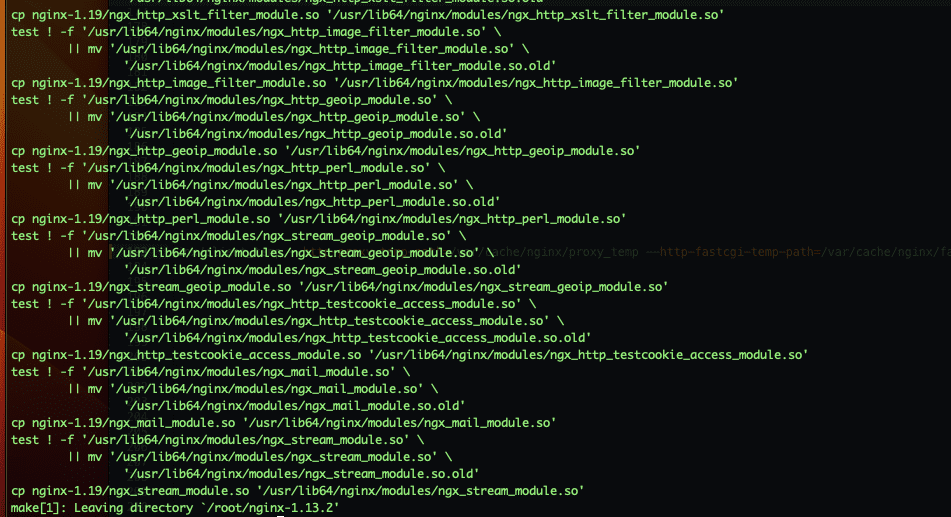
Sau khi đã thực hiện Compiled thành công rồi tiến hành cài đặt nginx, tiếp trình này sẽ diễn ra khá lâu và bạn chỉ cần chờ đợi.
make && make install
4. Tạo file systemd unit cho nginx
Bạn thực hiện tạo file nginx.service và dán vào nội dung sau
vi /etc/systemd/system/nginx.service
Dán nội dung sau vào file nginx.service
[Unit]
Description=nginx - high performance web server
Documentation=https://nginx.org/en/docs/
After=network-online.target remote-fs.target nss-lookup.target
Wants=network-online.target

[Service]
Type=forking
PIDFile=/var/run/nginx.pid
ExecStartPre=/usr/sbin/nginx -t -c /etc/nginx/nginx.conf
ExecStart=/usr/sbin/nginx -c /etc/nginx/nginx.conf
ExecReload=/bin/kill -s HUP $MAINPID
ExecStop=/bin/kill -s TERM $MAINPID

[Install]
WantedBy=multi-user.target
5. Kiểm tra và khởi động NGINX
Bây giờ bạn hãy nhập lệnh nginx -t. Nếu không có lỗi gì phát sinh hãy thực hiện khởi động kích hoạt bằng lệnh sau.
 systemctl daemon-reload
 systemctl enable nginx
 systemctl start nginx
 systemctl status nginx
 nginx -v
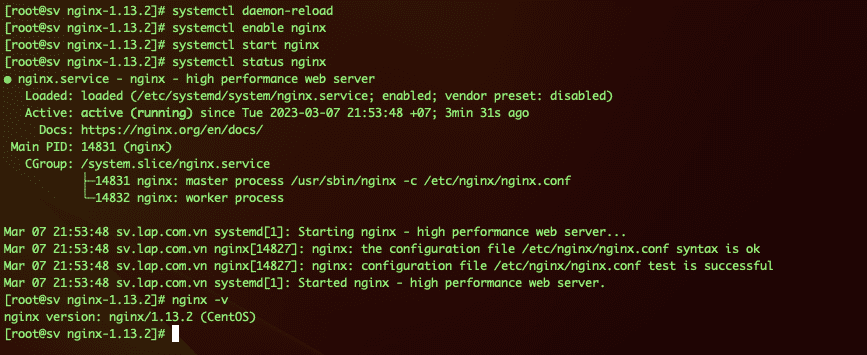
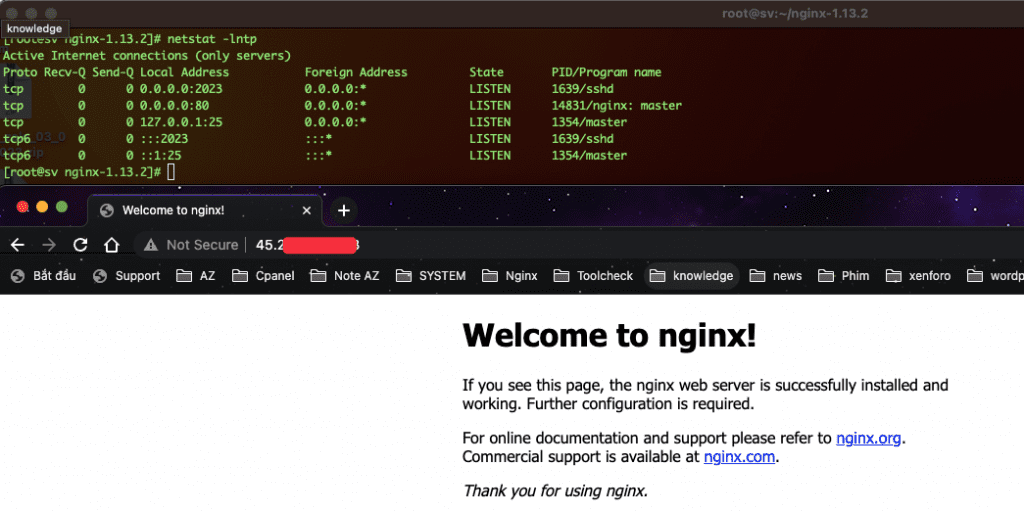
Ngoài ra bạn có thể kiểm tra bằng cách truy cập trực tiếp bằng IP hoặc dùng lệnh netstat để xem port đang lắng nghe. Nếu kết quả như ảnh đính kèm thì các bạn đã thực hiện Compiled Nginx thành công rồi.
VI Kết Luận
Trong bài viết này, chúng ta đã tìm hiểu cách cấu hình Nginx để phù hợp với nhu cầu của bạn. đặt biệt là from Source, để thêm các modules tuỳ ý.
Nginx là một web server phồ biến, vì vậy hãy thử cài đặt bằng from Source và cấu hình Nginx để trải nghiệm bạn nhé.