Nội dung

NextCloud là gì?
Nextcloud là một phần mềm (Mã nguồn mở) miễn phí giống như Dropbox, Google Drive, một nhánh của dự án ownCloud. Nextcloud được viết bằng PHP và JavaScript, nó hỗ trợ nhiều hệ thống cơ sở dữ liệu như MySQL / MariaDB, PostgreSQL, Oracle Database và SQLite. Để giữ cho các tệp của bạn được đồng bộ hóa giữa Máy tính để bàn và máy chủ của riêng bạn, Nextcloud cung cấp các ứng dụng cho máy tính để bàn Windows, Linux và Mac và một ứng dụng di động cho Android và iOS. Nextcloud không chỉ là một bản sao dropbox, nó cung cấp các tính năng bổ sung như Lịch, Danh bạ, Lên lịch tác vụ và phát trực tuyến phương tiện với Ampache.
Cài đặt NextCloud trên Ubuntu 20.04 với NGINX
Chuẩn bị:
- Máy chủ sử dụng Ubuntu 20.04 (Tham khảo các dịch vụ VPS tốt nhất tại đây)
- RAM: 1GB (Tối thiểu, nhưng để hoạt động tốt hơn bạn nên dùng VPS có cấu hình RAM cao)
- CPU: 1Core
- Disk: 20GB
Bước 1: SSH vào máy chủ
Việc đâu tiên bạn cần SSH vào máy chủ để thực hiện cài đặt. Nếu bạn chưa biết cách thực hiện mời tham khảo khảo tài liệu hướng dẫn bên dưới.
Bước 2: Cập nhật hệ thống
sudo apt update
sudo apt upgrade
apt install unzip -y
Bước 3: Cài đặt LEMP Stack
Thay vì sử dụng APACHE (LAMP Stack) mình luôn ưu tiên sử dụng NGINX làm máy chủ webserver. Bạn hãy thực hiện cài đặt bằng các lệnh sau:
- Cài đặt NGINX
Để cài đặt NGINX bạn có thể cài nhanh bằng lệnh sau
apt install nginx -y
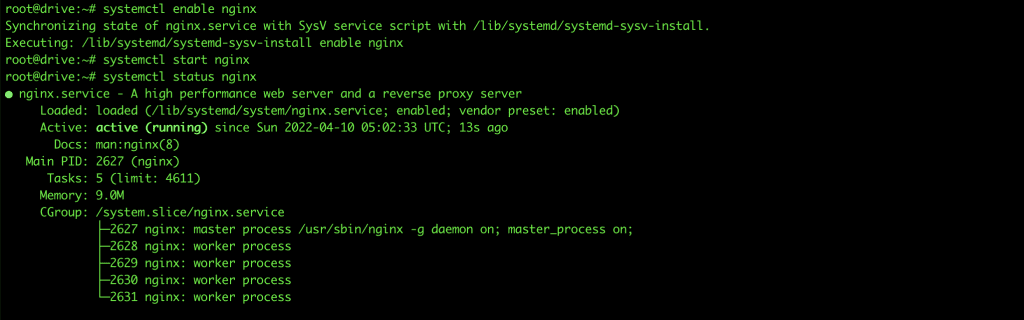
Kích hoạt và khởi động NGINX
systemctl enable nginx
systemctl start nginx
systemctl status nginx
- Cài đặt MariaDB Database Server
Mình sẽ sử dụng MariaDB làm máy chủ cơ sở dữ liệu. Bạn hãy cài đặt với lệnh sau.
apt install mariadb-server mariadb-client -y
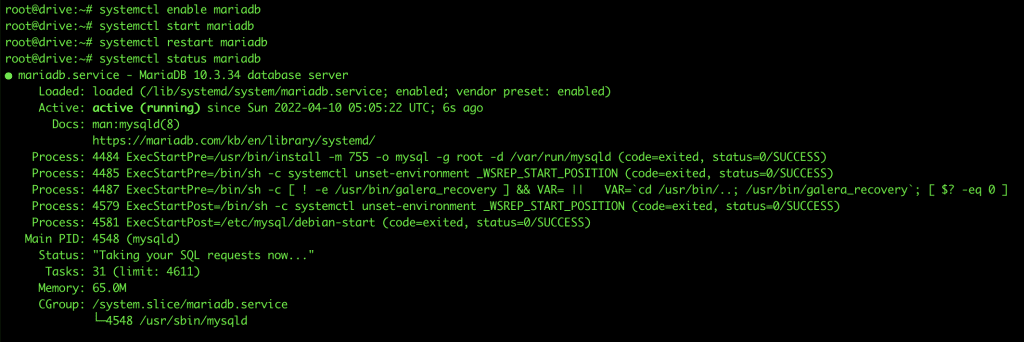
Khởi động và kích hoạt MariaDB
systemctl enable mariadb
systemctl start mariadb
systemctl restart mariadb
systemctl status mariadb
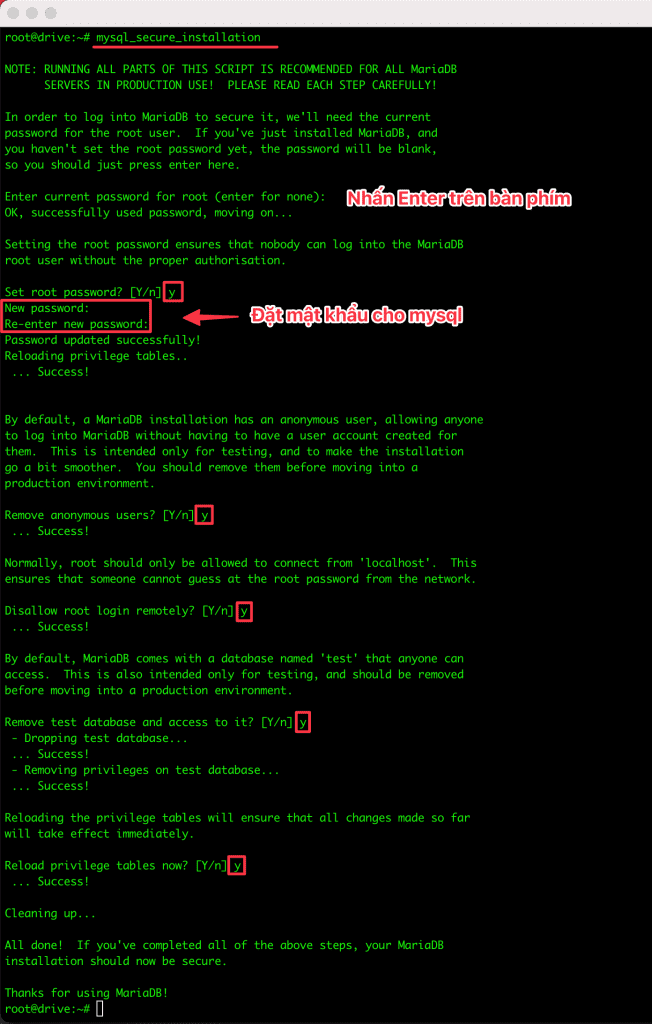
Cấu hình bảo mật MariaDB
mysql_secure_installation
- Cài đặt PHP
Ở đây mình sẽ cài đặt PHP7.4 và các extension đi kèm.
apt install imagemagick php-imagick php7.4-imagick php7.4-common php7.4-mysql php7.4-fpm php7.4-gd php7.4-json php7.4-curl  php7.4-zip php7.4-xml php7.4-mbstring php7.4-bz2 php7.4-intl php7.4-bcmath php7.4-gmp php7.4-zip
apt install -y libmagickcore-6.q16-6-extra
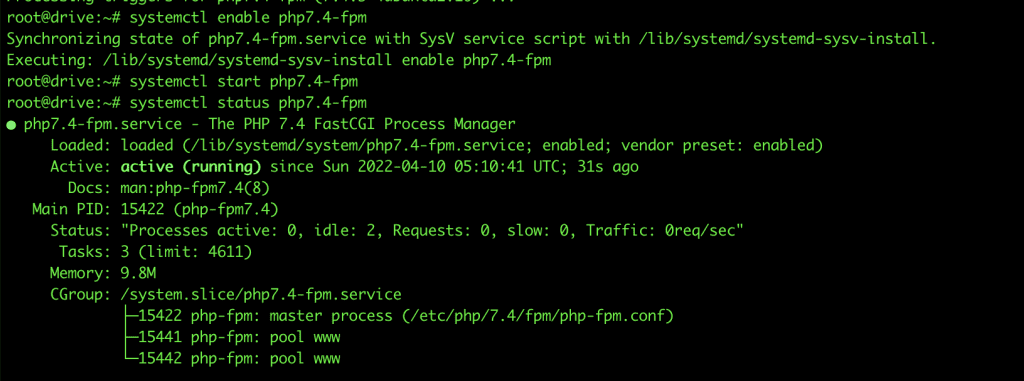
Kích hoạt và khởi động PHP cùng hệ thống
systemctl enable php7.4-fpm
systemctl start php7.4-fpm
systemctl status php7.4-fpm
Bước 4: Lấy chứng chỉ SSL cho ServerName NextCloud
Ở đây mình sẽ hướng dẫn bạn thực hiện cài đặt SSL Let’s Encrypt sử dụng Certbot
- Cài đặt Certbot
apt install certbot python3-certbot-nginx
Python3-certbot-nginx là plugin Nginx cho Certbot. Bây giờ hãy chạy lệnh sau để lấy và cài đặt chứng chỉ TLS.
Lưu ý: Thay đổi luutru.azdigi.online bằng tên miền của bạn
certbot certonly --standalone -d luutru.azdigi.online
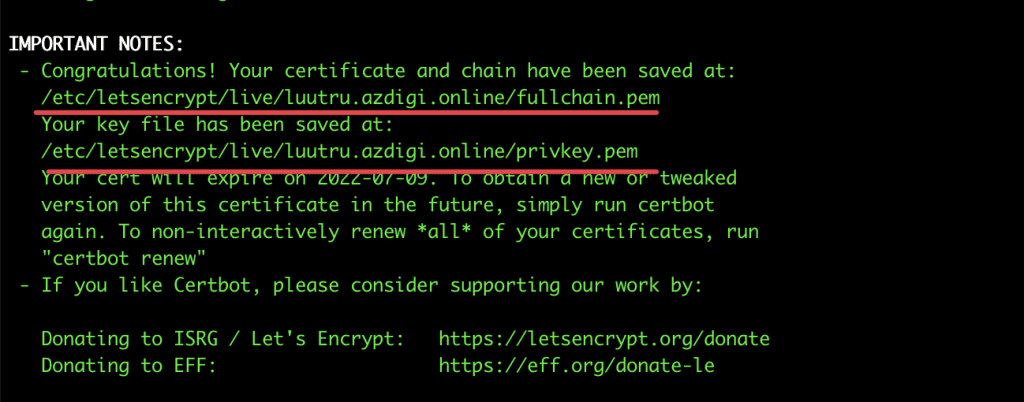
Sau khi yêu cầu cấp phát chứng chỉ SSL xong, bạn sẽ nhận được 2 đường dẫn như ảnh trên. Bạn hãy copy đường dẫn này lại để sử dụng cho Bước 5
Bước 5: Cài đặt NextCloud
Sau khi đã thiết lập xây dựng hoàn tất webserver và máy chủ cơ sở dữ liệu. Thì ở bước này chúng ta sẽ bắt đầu tải source và cài đặt NextCloud.
- Tài source NextCloud từ trang chủ về
wget https://download.nextcloud.com/server/releases/nextcloud-23.0.3.zip
Ở bài hướng dẫn này, mình sẽ cài đặt bản mới nhất hiện tại là bản 23.0.3
- Giải nén file NextCloud vừa tải về
unzip nextcloud-*.zip -d /usr/share/nginx/
chown -R www-data:www-data /usr/share/nginx/nextcloud/
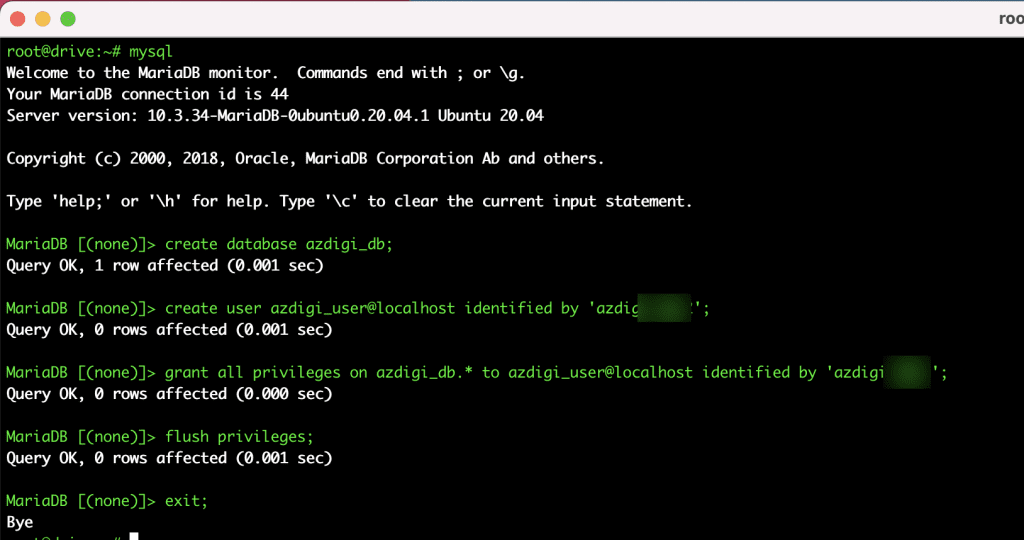
- Tạo Database cho NextCloud
Tiếp theo bạn đăng nhập vào mysql bằng lệnh mysql và thực hiện tạo database_name và database_user cho nextcloud.
create database azdigi_db;
create user azdigi_user@localhost identified by 'my-passwd';
grant all privileges on azdigi_db.* to azdigi_user@localhost identified by 'my-passwd';
flush privileges;
exit;
- Tạo file cấu hình NGINX NextCloud
Bây giờ bạn hãy tạo file cấu hình nginx cho nextcloud sử dụng.
vi /etc/nginx/conf.d/nextcloud.conf
Sau đó bạn nhập vào nội dung file cấu hình mẫu bên dưới vào.
Lưu ý: Thay server_name luutru.azdigi.online; bằng tên server_name của bạn. Và thay ssl_certificate, ssl_certificate_key bằng đường dẫn SSL bạn lấy ở Bước 4
upstream php-handler {
    #server 127.0.0.1:9000;
    server unix:/var/run/php/php7.4-fpm.sock;
}

server {
    listen 80;
    listen [::]:80;
    server_name luutru.azdigi.online;
    # enforce https
    return 301 https://$server_name:443$request_uri;
}

server {
    listen 443 ssl http2;
    listen [::]:443 ssl http2;
    server_name luutru.azdigi.online;

    # Use Mozilla's guidelines for SSL/TLS settings
    # https://mozilla.github.io/server-side-tls/ssl-config-generator/
    # NOTE: some settings below might be redundant
    ssl_certificate /etc/letsencrypt/live/luutru.azdigi.online/fullchain.pem; # managed by Certbot
    ssl_certificate_key /etc/letsencrypt/live/luutru.azdigi.online/privkey.pem; # managed by Certbot
    include /etc/letsencrypt/options-ssl-nginx.conf; # managed by Certbot
    ssl_dhparam /etc/letsencrypt/ssl-dhparams.pem; # managed by Certbot

    # Add headers to serve security related headers
    # Before enabling Strict-Transport-Security headers please read into this
    # topic first.
    #add_header Strict-Transport-Security "max-age=15768000; includeSubDomains; preload;" always;
    #
    # WARNING: Only add the preload option once you read about
    # the consequences in https://hstspreload.org/. This option
    # will add the domain to a hardcoded list that is shipped
    # in all major browsers and getting removed from this list
    # could take several months.
    add_header Referrer-Policy "no-referrer" always;
    add_header X-Content-Type-Options "nosniff" always;
    add_header X-Download-Options "noopen" always;
    add_header X-Frame-Options "SAMEORIGIN" always;
    add_header X-Permitted-Cross-Domain-Policies "none" always;
    add_header X-Robots-Tag "none" always;
    add_header X-XSS-Protection "1; mode=block" always;
    add_header Strict-Transport-Security 'max-age=31536000; includeSubDomains; preload';

    # Remove X-Powered-By, which is an information leak
    fastcgi_hide_header X-Powered-By;

    # Path to the root of your installation
    root /usr/share/nginx/nextcloud/;

    location = /robots.txt {
        allow all;
        log_not_found off;
        access_log off;
    }

    # The following 2 rules are only needed for the user_webfinger app.
    # Uncomment it if you're planning to use this app.
    #rewrite ^/.well-known/host-meta /public.php?service=host-meta last;
    #rewrite ^/.well-known/host-meta.json /public.php?service=host-meta-json last;

    # The following rule is only needed for the Social app.
    # Uncomment it if you're planning to use this app.
    #rewrite ^/.well-known/webfinger /public.php?service=webfinger last;

    location = /.well-known/carddav {
      return 301 $scheme://$host:$server_port/remote.php/dav;
    }
    location = /.well-known/caldav {
      return 301 $scheme://$host:$server_port/remote.php/dav;
    }

    # set max upload size
    client_max_body_size 512M;
    fastcgi_buffers 64 4K;

    # Enable gzip but do not remove ETag headers
    gzip on;
    gzip_vary on;
    gzip_comp_level 4;
    gzip_min_length 256;
    gzip_proxied expired no-cache no-store private no_last_modified no_etag auth;
    gzip_types application/atom+xml application/javascript application/json application/ld+json application/manifest+json application/rss+xml application/vnd.geo+json application/vnd.ms-fontobject application/x-font-ttf application/x-web-app-manifest+json application/xhtml+xml application/xml font/opentype image/bmp image/svg+xml image/x-icon text/cache-manifest text/css text/plain text/vcard text/vnd.rim.location.xloc text/vtt text/x-component text/x-cross-domain-policy;

    # Uncomment if your server is build with the ngx_pagespeed module
    # This module is currently not supported.
    #pagespeed off;

    location / {
        rewrite ^ /index.php;
    }

    location ~ ^\/(?:build|tests|config|lib|3rdparty|templates|data)\/ {
        deny all;
    }
    location ~ ^\/(?:\.|autotest|occ|issue|indie|db_|console) {
        deny all;
    }

    location ~ ^\/(?:index|remote|public|cron|core\/ajax\/update|status|ocs\/v[12]|updater\/.+|oc[ms]-provider\/.+)\.php(?:$|\/) {
        fastcgi_split_path_info ^(.+?\.php)(\/.*|)$;
        set $path_info $fastcgi_path_info;
        try_files $fastcgi_script_name =404;
        include fastcgi_params;
        fastcgi_param SCRIPT_FILENAME $document_root$fastcgi_script_name;
        fastcgi_param PATH_INFO $path_info;
        fastcgi_param HTTPS on;
        # Avoid sending the security headers twice
        fastcgi_param modHeadersAvailable true;
        # Enable pretty urls
        fastcgi_param front_controller_active true;
        fastcgi_pass php-handler;
        fastcgi_intercept_errors on;
        fastcgi_request_buffering off;
    }

    location ~ ^\/(?:updater|oc[ms]-provider)(?:$|\/) {
        try_files $uri/ =404;
        index index.php;
    }

    # Adding the cache control header for js, css and map files
    # Make sure it is BELOW the PHP block
    location ~ \.(?:css|js|woff2?|svg|gif|map)$ {
        try_files $uri /index.php$request_uri;
        add_header Cache-Control "public, max-age=15778463";
        # Add headers to serve security related headers (It is intended to
        # have those duplicated to the ones above)
        # Before enabling Strict-Transport-Security headers please read into
        # this topic first.
        #add_header Strict-Transport-Security "max-age=15768000; includeSubDomains; preload;" always;
        #
        # WARNING: Only add the preload option once you read about
        # the consequences in https://hstspreload.org/. This option
        # will add the domain to a hardcoded list that is shipped
        # in all major browsers and getting removed from this list
        # could take several months.
        add_header Referrer-Policy "no-referrer" always;
        add_header X-Content-Type-Options "nosniff" always;
        add_header X-Download-Options "noopen" always;
        add_header X-Frame-Options "SAMEORIGIN" always;
        add_header X-Permitted-Cross-Domain-Policies "none" always;
        add_header X-Robots-Tag "none" always;
        add_header X-XSS-Protection "1; mode=block" always;

        # Optional: Don't log access to assets
        access_log off;
    }

    location ~ \.(?:png|html|ttf|ico|jpg|jpeg|bcmap)$ {
        try_files $uri /index.php$request_uri;
        # Optional: Don't log access to other assets
        access_log off;
    }
}
Sau khi nhập file cấu hình xong, bạn hãy kiểm tra xem có lỗi không bằng lệnh sau:
root@drive:~# nginx -t
nginx: the configuration file /etc/nginx/nginx.conf syntax is ok
nginx: configuration file /etc/nginx/nginx.conf test is successful
Nếu nhận được thông báo syntax is ok bạn hãy khởi động lại NGINX
root@drive:~# service nginx restart
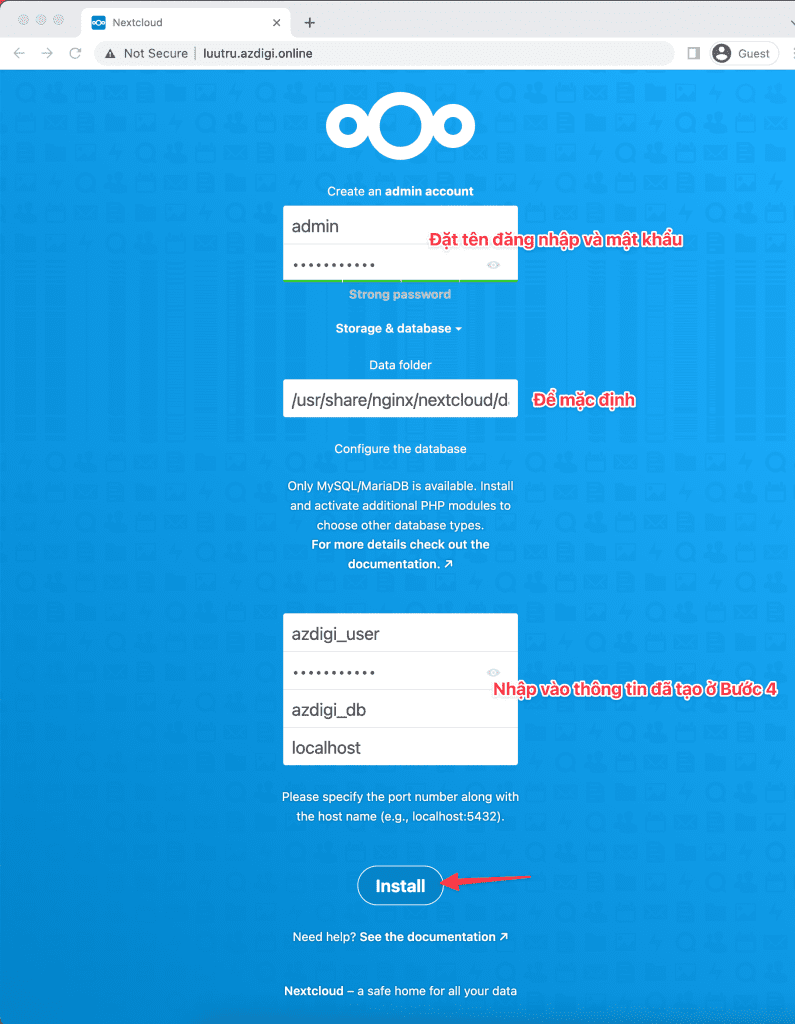
Sau khi khởi động lại dịch vụ NGINX. Lúc này bạn có thể mở trình duyệt lên và truy cập vào serer-ip hoặc hostname để thực hiện tiếp các bước thiết lập NextCloud
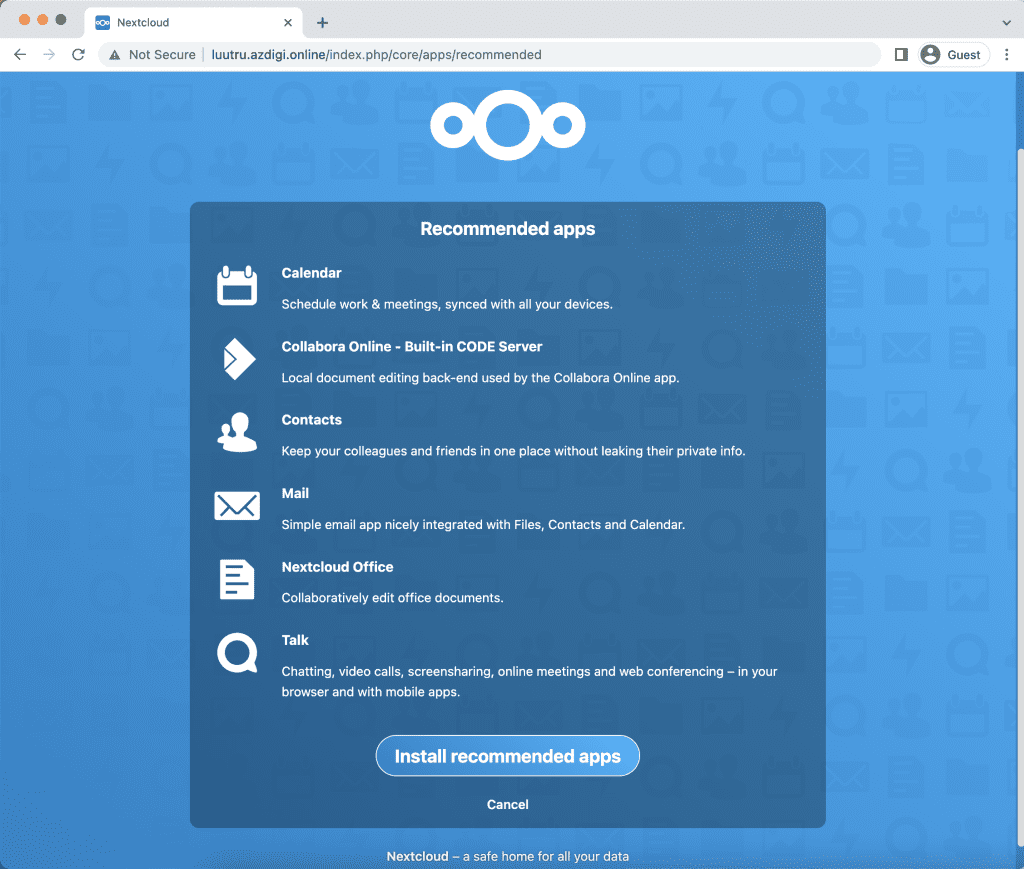
Click Install recommended apps để cài đặt các app cần thiết.
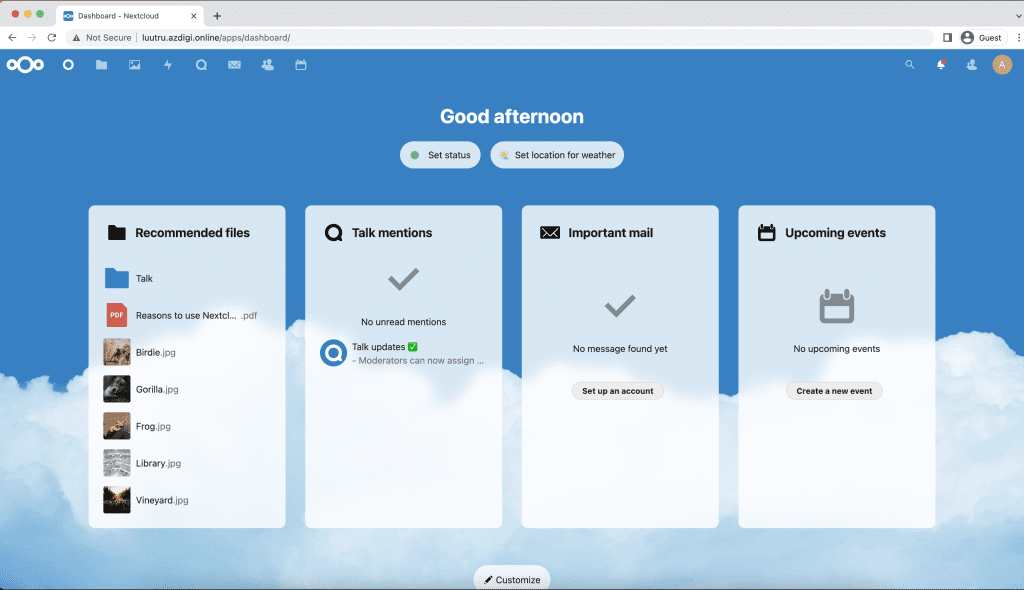
Sau khi cài đặt hoàn tất các ứng dụng. Một giao diện quản trị xuất hiện như bên dưới. Có nghĩa bạn đã cài đặt thiết lập thành công.
Bước 6: Tạo User và Upload File
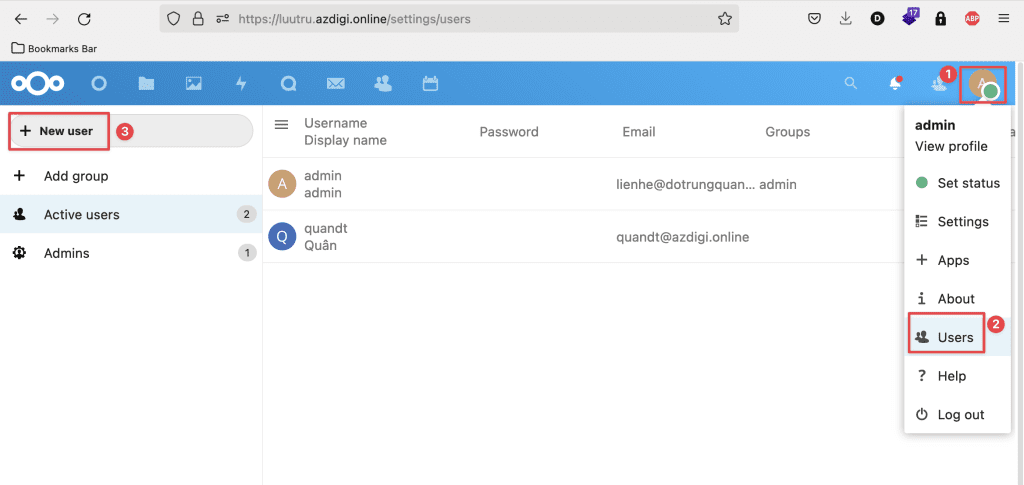
Để tạo User con bạn thực hiện như sau. Đâu tiên ở giao diện admin bạn click vào biểu tượng Profile sau đó chọn Users => New user
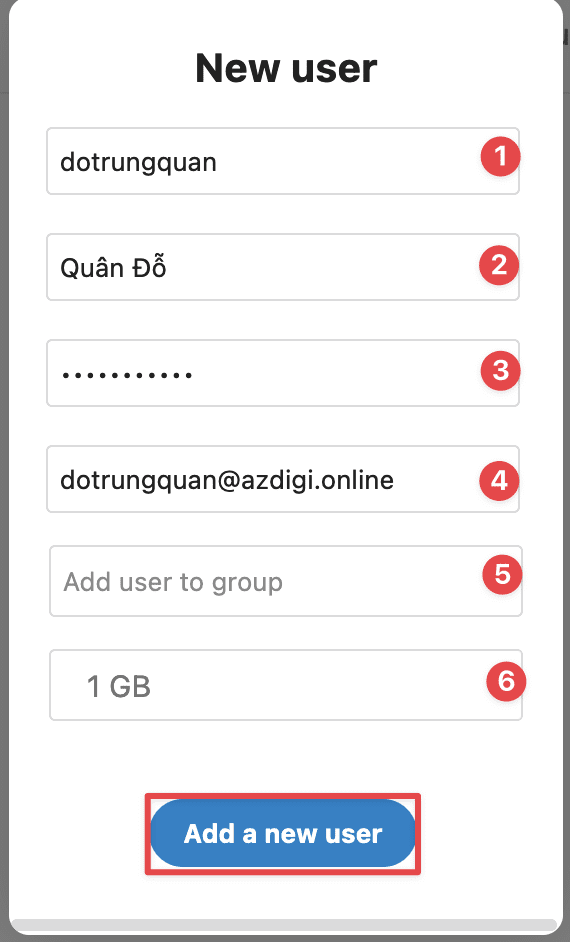
Tại giao diện New user bạn nhập vào các thông tin cần đặt cho User đó bao gồm:
- Username: Tên đăng nhập
- Display name: Tên hiển thị
- Password: Mật khẩu đăng nhập
- Email: Email của user
- Add user to group: Thêm vào nhóm
- Chọn dung lượng cho User
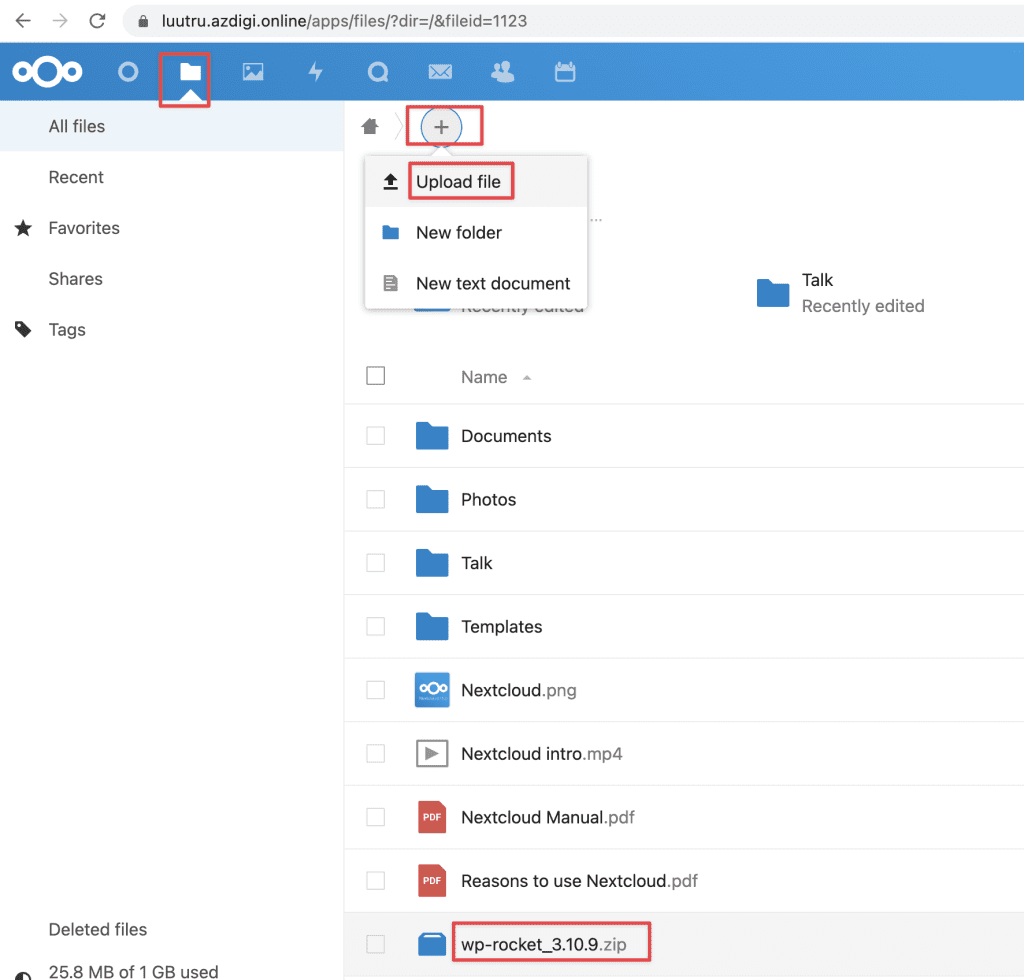
Sau khi tạo xong, bạn có thể đăng nhập vào User và thực hiện tải file lên sử dụng.
Bước 7: Cấu hình nâng cao
- Cấu hình Memory Limit
NextCloud yêu cầu memory_limit 512MB. Vì vậy bạn hãy thay đổi trong php.ini bằng lệnh sau.
sudo sed -i 's/memory_limit = 128M/memory_limit = 512M/g' /etc/php/7.4/fpm/php.ini
- Thiết lập PHP để truy vấn đúng các biến môi trường hệ thống
sudo sed -i 's/;clear_env = no/clear_env = no/g' /etc/php/7.4/fpm/pool.d/www.conf
- Tăng giới hạn Upload
sudo sed -i 's/upload_max_filesize = 2M/upload_max_filesize = 1024M/g' /etc/php/7.4/fpm/php.ini
- Thay đổi default_phone_region
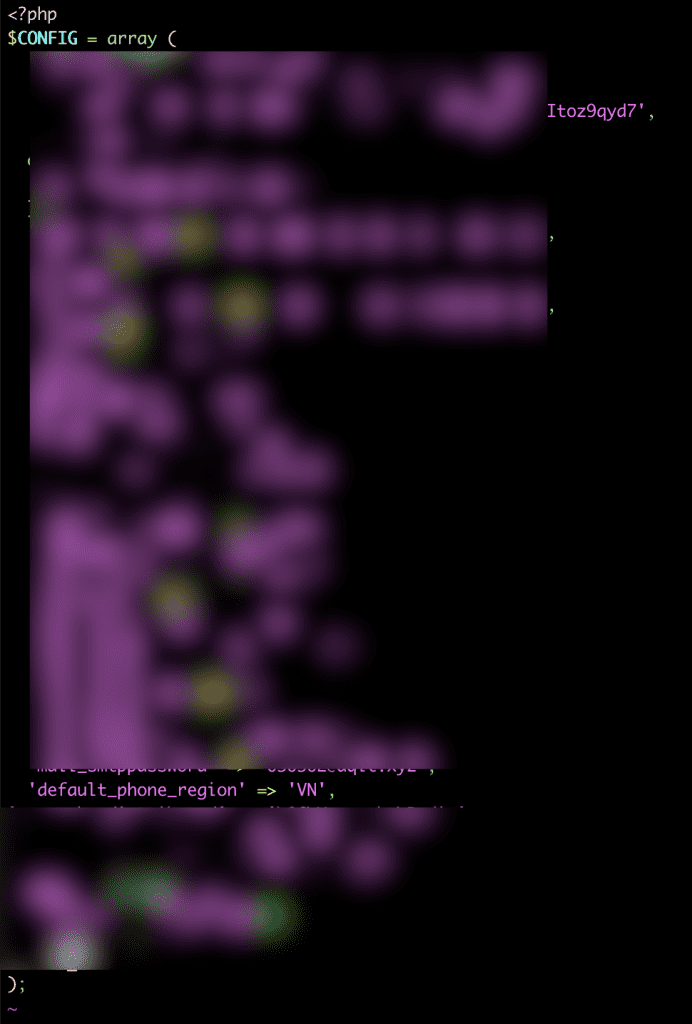
Bạn mở file /usr/share/nginx/nextcloud/config/config.php sau đó thêm dòng sau trên );
'default_phone_region' => 'VN'
- Cài đặt Redis Cache
apt install redis-server -y
apt install php-redis -y
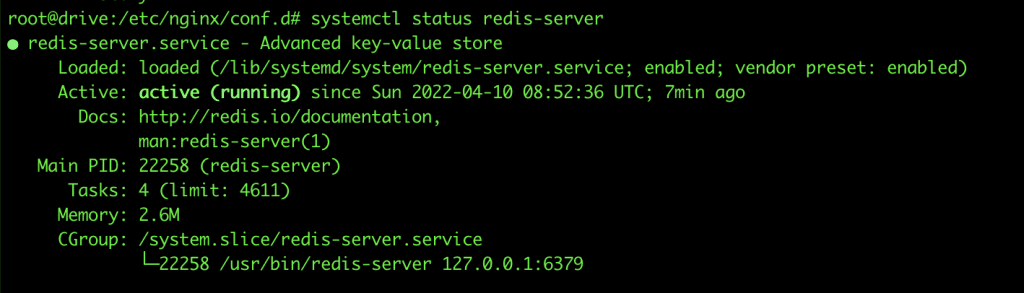
systemctl start redis-server
systemctl enable redis-server
systemctl status redis-server
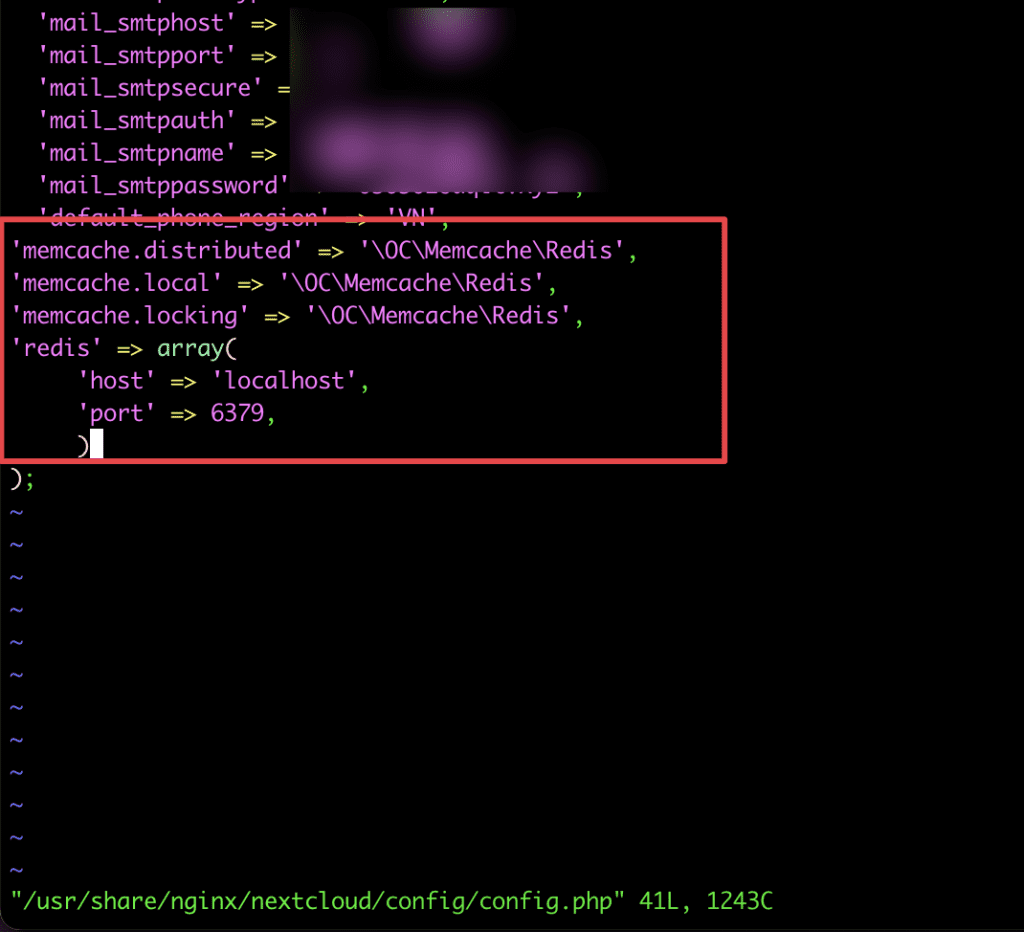
Sau khi cài Redis hoàn tất, bạn mở file vi /usr/share/nginx/nextcloud/config/config.php và thêm các dòng sau vào file config.php
'memcache.distributed' => '\OC\Memcache\Redis',
'memcache.local' => '\OC\Memcache\Redis',
'memcache.locking' => '\OC\Memcache\Redis',
'redis' => array(
     'host' => 'localhost',
     'port' => 6379,
     ),
Sau đó bạn khởi động lại dịch vụ nginx và php-fpm
service nginx restart
systemctl restart php7.4-fpm
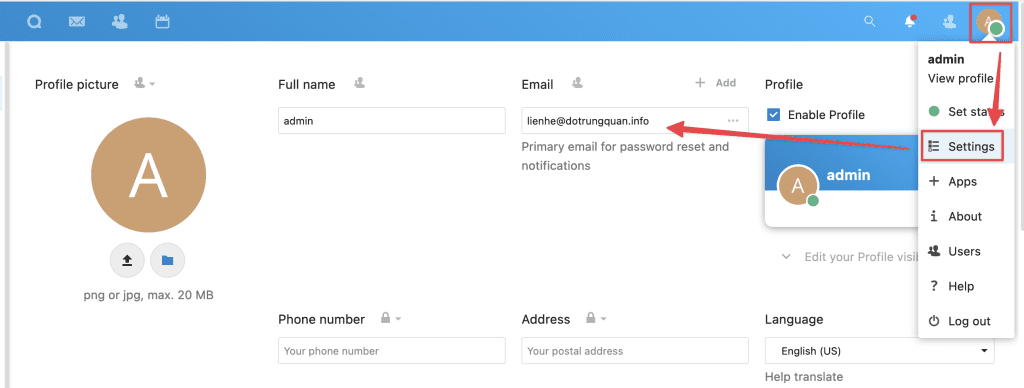
- Cấu hình Mail User
Bạn truy cập vào biểu tượng Profile sau đó chọn Settings => Email bạn nhập vào mail admin cần nhận thông tin
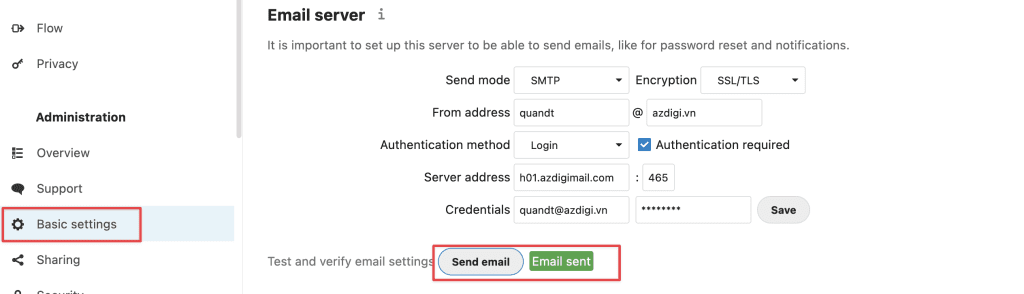
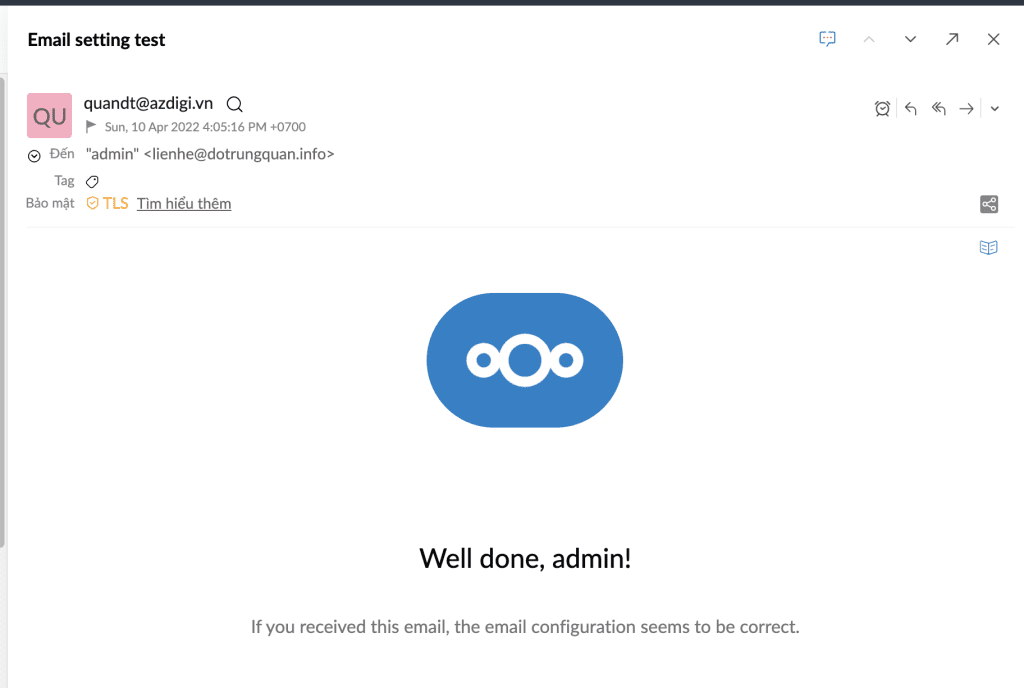
- Cấu hình SMTP
Để cấu hình SMTP bạn truy cập vào Basic settings. Sau đó nhập vào thông tin cấu hình SMTP cá nhân của bạn vào. Tiếp theo bấm Send email nếu hiện Email sent màu xanh là đã thành công.
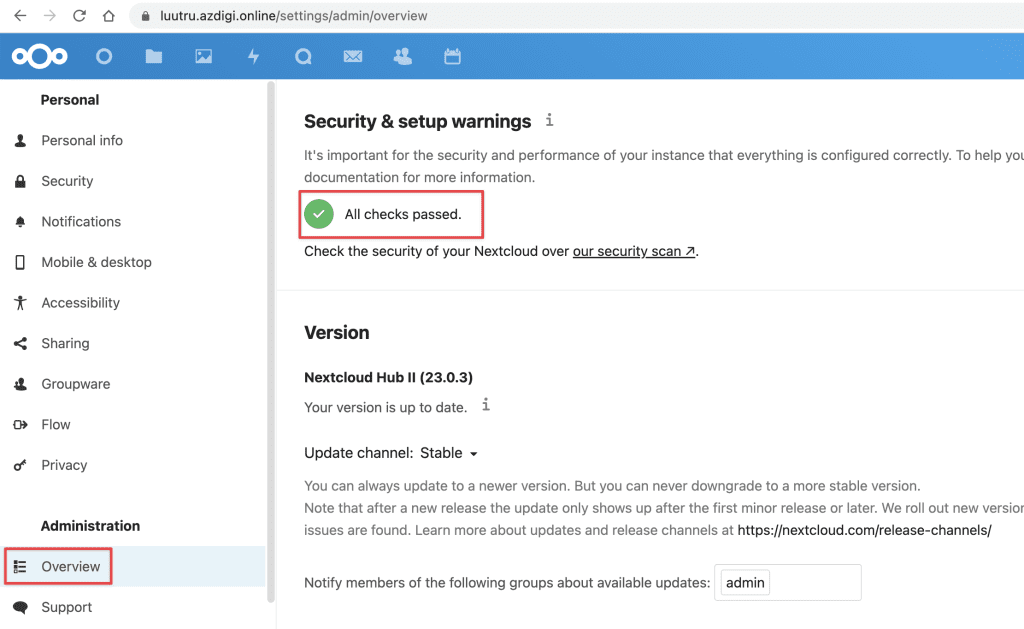
Kết luận
Sau khi cài đặt và cấu hình hoàn tất, nếu bạn truy cập hiện Tick Xanh như ảnh thì có nghĩa mọi thứ đã hoạt động tốt và an toàn. Như vậy mình đã hoàn tất hướng dẫn Cài đặt NextCloud trên Ubuntu 20.04 với NGINX.

Chúc bạn thực hiện thành công.
Các bạn có thể tham khảo thêm các hướng dẫn sử dụng khác tại link bên dưới
Nếu các bạn cần hỗ trợ các bạn có thể liên hệ bộ phận hỗ trợ theo các cách bên dưới:
- Hotline 247: 028 888 24768 (Ext 0)
- Ticket/Email: Bạn dùng email đăng ký dịch vụ gửi trực tiếp về: support@azdigi.com