Time to deploy your first application! This guide shows how to deploy static sites and React/Vue SPAs to Coolify from GitHub. Just paste the repo URL, and Coolify will automatically build and run it.
📖 Previous article: Part 4, Domain, DNS and SSL
I. Deployment Process on Coolify
Every deployment on Coolify follows a 5-step flow:
- Go to Project → Environment → + Add Resource
- Choose resource type (Public Repo, Private Repo, Docker Image, Docker Compose, Service)
- Configure: repo URL, branch, build commands, domain
- Click Deploy
- View build logs real-time, wait for container to start
II. Deploy Static Site from Public Repository
Start with the simplest method, deploying a static HTML site from a GitHub public repo.
Step 1: Create New Resource
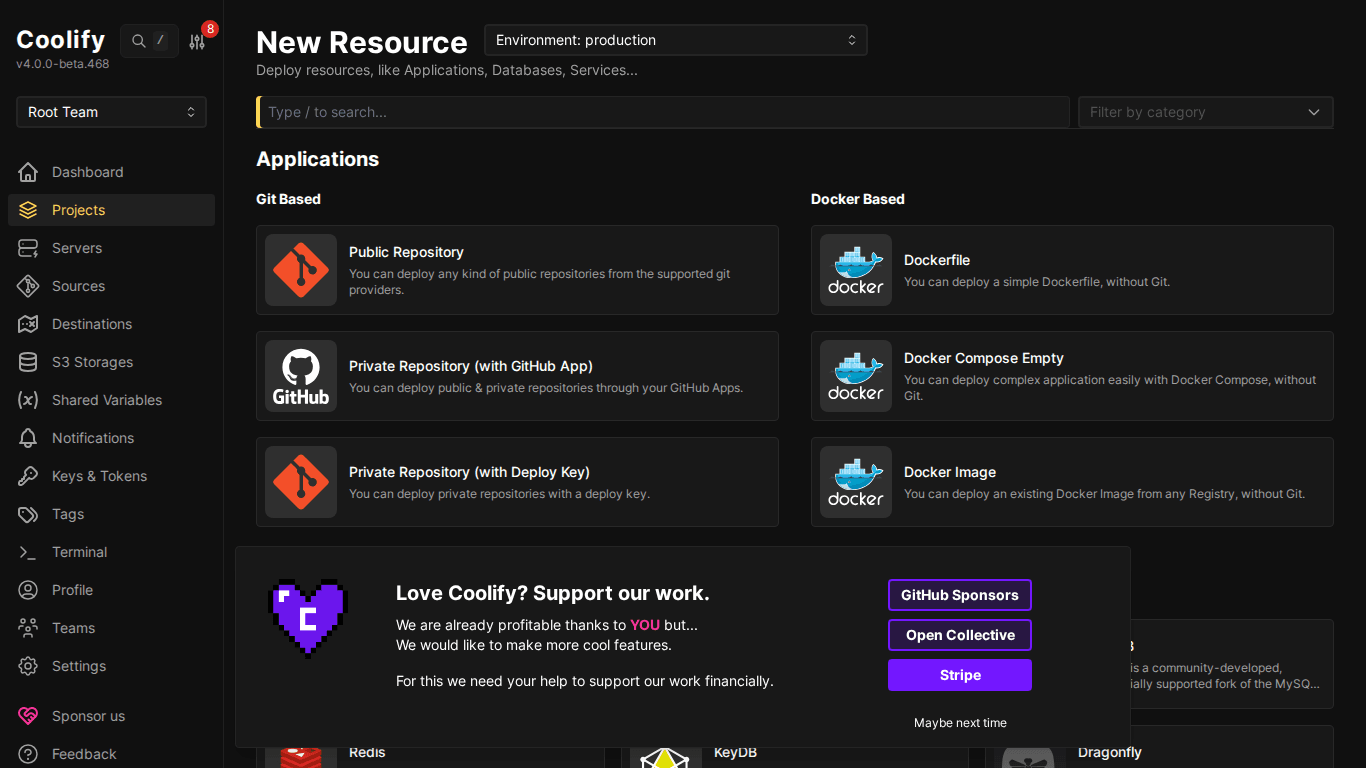
- Go to Projects → select project → select environment (Production)
- Click “+ Add Resource”
- Choose “Public Repository”
Step 2: Enter Repository URL
Paste the GitHub repo URL into the “Repository URL” field, click “Check repository”.
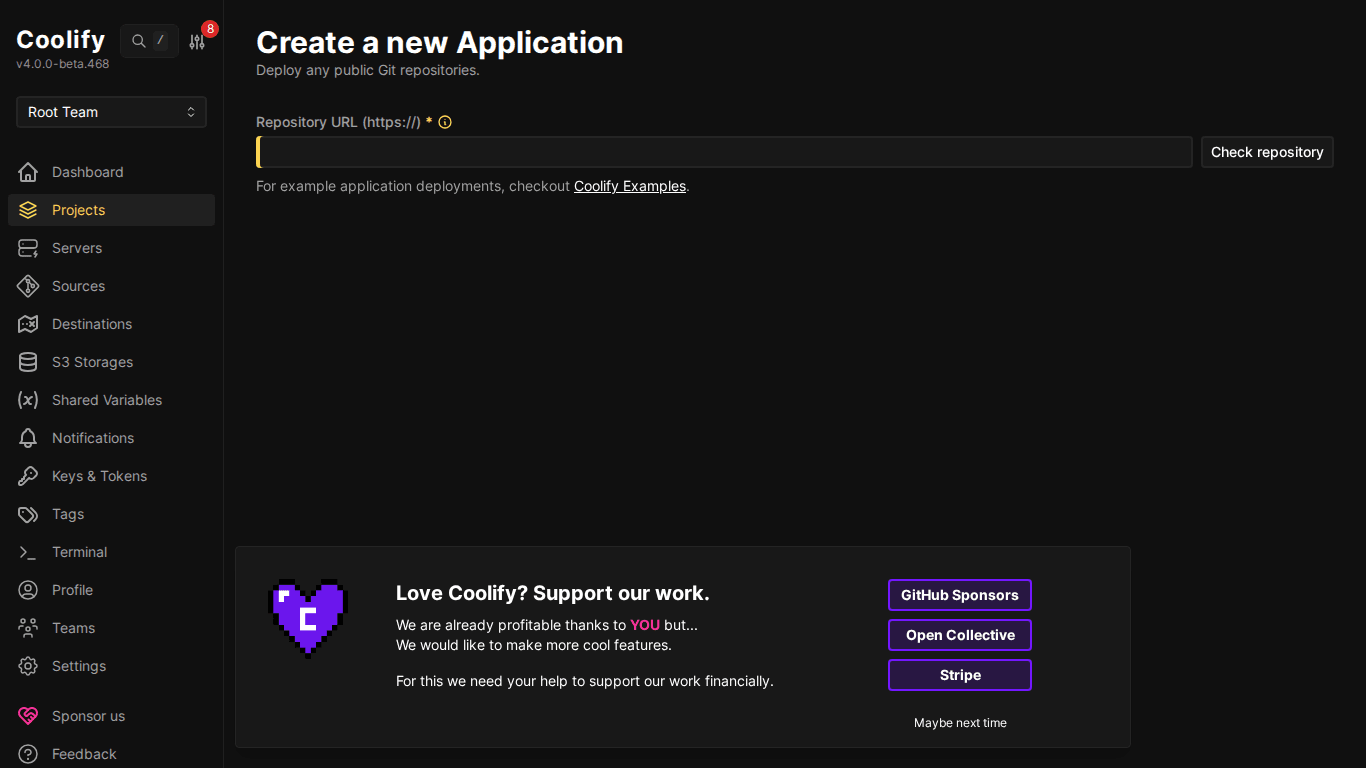
# Example static site repo
https://github.com/coollabsio/coolify-examples
Coolify will fetch the repo and display the list of branches. Choose a branch (usually main or master).
Step 3: Choose Build Pack
Coolify supports multiple build packs:
- Nixpacks (default): Auto-detects language and builds. Supports Node.js, Python, PHP, Go, Rust, Ruby, Java, .NET…
- Static: For pure HTML/CSS/JS: no build step needed
- Dockerfile: Uses existing Dockerfile in repo
💡 Nixpacks is intelligent, it reads package.json, requirements.txt, go.mod… and automatically knows how to build. 90% of the time you don’t need extra configuration.
Step 4: Configure and Deploy
After choosing build pack, Coolify creates the resource and takes you to the configuration page:
- Domain: Enter domain (e.g.,
https://demo.example.com) or leave blank to use IP:port - Port: Port the application listens on (Nixpacks auto-detects, usually 3000 or 80)
- Build Command: Build command (e.g.,
npm run build): Nixpacks auto-fills - Start Command: Command to run the app (e.g.,
npm start) - Base Directory: Root directory if repo has multiple apps (monorepo)
Click “Deploy” → Coolify starts building.
Step 5: View Build Logs
Coolify shows build logs in real-time, you see each step: clone repo → install dependencies → build → start container.
# Example build log
[+] Building with Nixpacks...
=> Detected: Node.js (package.json)
=> Installing dependencies: npm ci
=> Building: npm run build
=> Starting container on port 3000
==> Application is running!
III. Deploy React/Vue SPA
React and Vue SPAs deploy like static sites, Nixpacks auto-detects from package.json.
React App (Create React App / Vite)
- New Resource → Public Repository
- Paste React repo URL:
https://github.com/username/my-react-app - Build Pack: Nixpacks (auto-detect)
- Nixpacks automatically runs
npm install→npm run build→ serve static files
ℹ️ With Vite React, Nixpacks auto-detects and uses port 3000. If your app uses a different port, adjust it in Ports Exposes on the resource configuration page.
Vue App (Vue CLI / Vite)
Similar to React, Nixpacks reads package.json, detects Vue, builds and serves automatically. No extra configuration needed.
Next.js / Nuxt.js (SSR)
Next.js and Nuxt.js are also automatically supported by Nixpacks. Coolify detects from next.config.js or nuxt.config.ts and builds the correct mode (SSR or static export).
⚠️ For Next.js standalone mode, add output: "standalone" to next.config.js for Nixpacks to build correctly. Without this setting, the build image will be very heavy.
IV. Preview Deployments
Coolify supports Preview Deployments: each Pull Request automatically gets its own URL for testing before merging.
How to Enable Preview Deployments
- Connect repo via GitHub App (not Public Repository)
- Go to resource → Previews tab
- Enable “Preview Deployments”
- Each new PR → Coolify automatically creates a separate container with URL like
pr-123.app.example.com - When PR is closed/merged → container automatically deleted
💡 Preview deployments require GitHub App integration (covered in lesson 8). Public Repository doesn’t support webhooks so no preview deployments.
V. Auto-Deploy on Code Push
There are 2 ways to auto-deploy:
1. Webhook (GitHub App / Deploy Key)
When connected via GitHub App, Coolify automatically receives webhooks on every push → triggers rebuild. Zero configuration.
2. Polling (Public Repository)
With Public Repository (no webhooks), enable “Is Git Polling” in resource config. Coolify will check the repo every X minutes and deploy if there are new commits.
VI. Common Error Handling
- Build failed: “command not found”: Nixpacks didn’t detect correctly → manually set Build Pack or add Dockerfile
- App runs but shows blank page: Wrong port: check what port the app listens on and update Ports Exposes
- 502 Bad Gateway: Container hasn’t started yet or crashed: check Logs tab
- Permissions error during install: Some npm packages need
--unsafe-perm: add to Build Command
VII. Summary
Deploying applications on Coolify is extremely simple: paste repo URL, choose build pack, click Deploy. Nixpacks handles most things automatically. The next article will guide you through deploying backend applications: Node.js, Python, PHP.
You might also like
- How to Deploy Laravel to Coolify from Local to Server with Basic CI/CD
- Deploy Node.js, Python, PHP on Coolify
- Coolify Interface - Detailed Dashboard Usage Guide
- CI/CD on Coolify - Integrating GitHub, GitLab, Bitbucket
- Databases on Coolify — MySQL, PostgreSQL, Redis, MongoDB
- Deploy Docker Compose on Coolify - Complex multi-container applications
About the author

Trần Thắng
Expert at AZDIGI with years of experience in web hosting and system administration.