After static sites, the next step is deploying backend applications: Node.js, Python, PHP. Coolify supports all of them via Nixpacks or Dockerfile, along with environment variables, health checks, and persistent storage.
📖 Previous article: Part 5, Deploy Static Site & SPA
I. Deploy Node.js Application
Express.js App
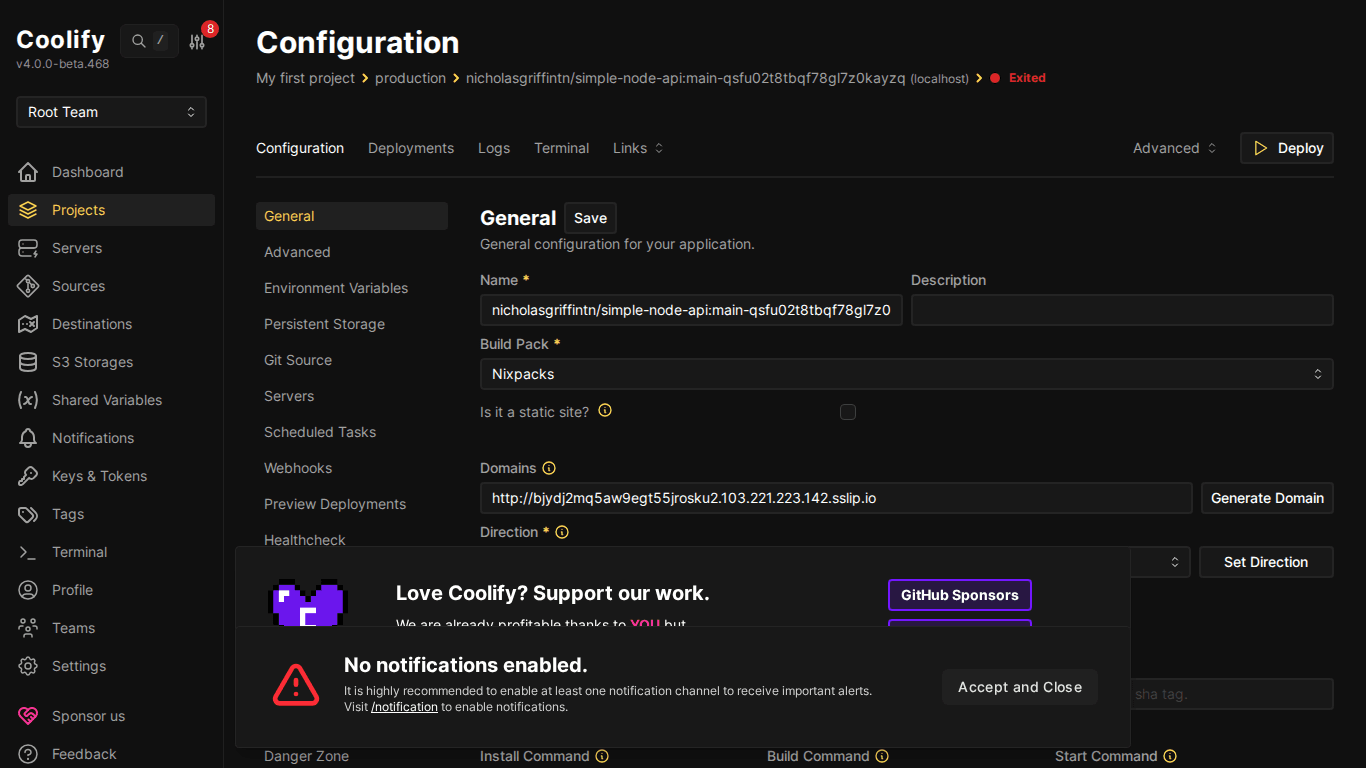
Create new resource → Public Repository → paste Node.js repo URL. Nixpacks auto-detects from package.json.
Example minimal package.json:
{
  "name": "my-api",
  "scripts": {
    "start": "node index.js",
    "build": "echo 'no build needed'"
  },
  "dependencies": {
    "express": "^4.18.0"
  }
}
And index.js:
const express = require('express');
const app = express();
const PORT = process.env.PORT || 3000;
app.get('/', (req, res) => {
  res.json({ message: 'Hello from Coolify!', time: new Date() });
});
app.get('/health', (req, res) => {
  res.status(200).json({ status: 'ok' });
});
app.listen(PORT, '0.0.0.0', () => {
  console.log(`Server running on port ${PORT}`);
});
⚠️ App must listen on 0.0.0.0 (not localhost or 127.0.0.1), Docker containers need to bind all interfaces for proxy traffic to reach them.
Important Configuration
- Ports Exposes: Port app listens on (e.g., 3000). Nixpacks usually auto-detects
- Start Command:
npm start(from package.json scripts.start) - Environment Variables: Add in “Environment Variables” tab:
NODE_ENV=production, database URLs, API keys…
II. Deploy Python Application
Flask App
Nixpacks detects Python from requirements.txt or Pipfile.
# app.py
from flask import Flask, jsonify
app = Flask(__name__)
@app.route('/')
def home():
    return jsonify({"message": "Hello from Flask on Coolify!"})
@app.route('/health')
def health():
    return jsonify({"status": "ok"})
if __name__ == '__main__':
    app.run(host='0.0.0.0', port=int(os.environ.get('PORT', 5000)))
# requirements.txt
flask==3.0.0
gunicorn==21.2.0💡 Use gunicorn for production instead of Flask dev server. Nixpacks auto-detects gunicorn in requirements.txt and uses it as start command: gunicorn app:app.
Django App
Django requires additional config:
ALLOWED_HOSTS = ['*']or specific domain in settings.pySTATIC_ROOTand runcollectstaticin build command- Database URL via environment variable (
DATABASE_URL)
III. Deploy PHP Application (Laravel)
Nixpacks supports PHP and Laravel natively. Detects from composer.json.
# Nixpacks auto-runs:
composer install --no-dev --optimize-autoloader
php artisan config:cache
php artisan route:cache
php artisan view:cache
Required configuration:
- Environment variables:
APP_KEY,APP_URL,DB_* - Persistent storage for
/storagedirectory - Queue worker (if used): create separate resource for
php artisan queue:work
IV. Build Packs – Comparison
| Build Pack | When to use | Pros | Cons |
|---|---|---|---|
| Nixpacks | Most apps | Auto-detect, zero config | Sometimes detects wrong version |
| Dockerfile | Custom build process | Full control | Must write Dockerfile |
| Docker Image | Pre-built image on registry | Fast, no build | Must build image yourself |
| Docker Compose | Multi-container apps | Multiple services at once | More complex config |

V. Environment Variables
Each resource has “Environment Variables” tab: add key-value pairs:
# Example environment variables
NODE_ENV=production
DATABASE_URL=postgresql://user:pass@db:5432/mydb
REDIS_URL=redis://redis:6379
API_KEY=sk-xxx
PORT=3000
ℹ️ Variables can reference other databases within the same Coolify instance. When creating a database, Coolify provides internal connection string using Docker network, no need to expose port externally.
VI. Health Checks
Health checks help Coolify know if app is running correctly:
- Configure in resource → Health Check tab
- Set Health Check Path:
/healthor/api/health - Coolify sends requests to this endpoint periodically: if doesn’t return 200, container gets restarted
- Useful for zero-downtime deployment: new container must be healthy before shutting down old container
VII. Persistent Storage
By default, data in containers is lost on restart. Use Persistent Storage for data that needs to persist:
- Go to resource → “Storages” tab
- Add mount: Source (path on host) → Destination (path in container)
- Example:
/data/uploads→/app/uploads
⚠️ Volumes are tied to specific server, if moving app to different server, data doesn’t auto-migrate. Backup before migrating!
VIII. Summary
Deploying backend apps on Coolify is as simple as frontend, Nixpacks handles most things automatically. Key points: app must bind to 0.0.0.0, set environment variables, and use health checks for production. Next article: Docker Compose for complex applications.
You might also like
- How to Deploy Laravel to Coolify from Local to Server with Basic CI/CD
- Coolify Interface - Detailed Dashboard Usage Guide
- Deploy Your First Application to Coolify - Static Site & React/Vue SPA
- Databases on Coolify — MySQL, PostgreSQL, Redis, MongoDB
- Multi-Server & Scaling on Coolify — Expanding Your System
- One-Click Services on Coolify — Deploy 294+ services with just 1 click
About the author

Trần Thắng
Expert at AZDIGI with years of experience in web hosting and system administration.