
When 1 server is not enough, you need to add servers for performance, redundancy, or to separate workloads. Coolify supports managing multiple servers from a single dashboard, deploying apps to any server.
📖 Previous article: Part 10, One-Click Services
I. When Do You Need Multi-Server?
- Workload separation: Server A runs production apps, Server B runs databases, Server C runs monitoring
- Scaling: 1 server runs out of RAM/CPU → add more servers
- Geographic distribution: Servers in multiple regions → reduced latency
- Build separation: Dedicated build server (powerful CPU) to avoid impacting production
- High availability: Main server down → failover to backup server
II. Adding Remote Server
Requirements
- New server must run Linux (Ubuntu, Debian, CentOS, Alpine…)
- SSH access (port 22 or custom port)
- Root access or user with sudo
- Open ports: 80, 443 (for web traffic)
- No need to install Docker beforehand: Coolify installs it automatically
Steps to add server
- Go to Servers → click “+ Add”
- Fill in information:
- Name: Server name (e.g., “production-02”)
- IP Address: IP or hostname
- Port: SSH port (default 22)
- User: root (or user with sudo)
- Choose SSH Key (use existing Coolify key or add new key)
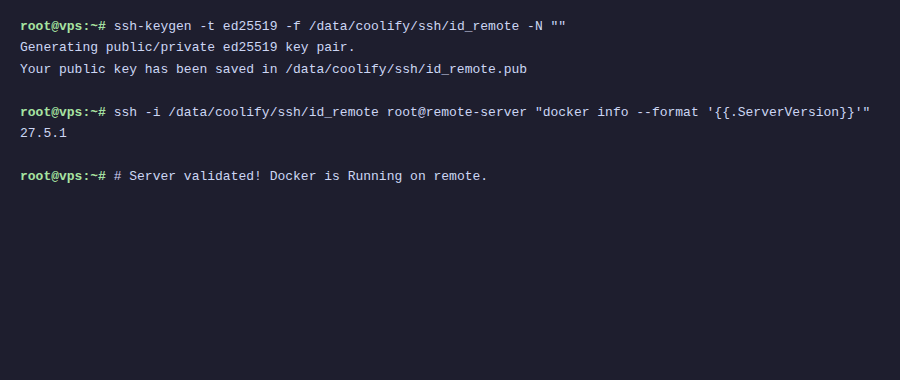
- Click “Validate Server”
- Coolify SSH connects → checks → installs Docker if not present
ℹ️ Before validation, copy Coolify public key (displayed on add server page) to ~/.ssh/authorized_keys on the new server.
III. Deploy App on Remote Server
After adding servers, when creating new resources, Coolify asks which server to deploy to:
- New Resource → choose type (App/Database/Service)
- “Select Server” step → choose target server
- Choose Destination (Docker network on that server)
- Configure and Deploy as usual
IV. Dedicated Build Server
Building Docker images consumes CPU and RAM. On production servers, building can reduce performance of running apps.
Solution: separate build to dedicated server:
- Add new server (powerful CPU, lots of RAM) → mark as “Build Server”
- In resource config → choose build server
- Coolify builds image on build server → pushes to production server
- Production server only runs containers: no build resource consumption
V. Docker Swarm Mode
Coolify supports Docker Swarm for clustering, running containers across multiple nodes with automatic load balancing.
Setup Swarm
- Go to server → “Swarm” tab
- Click “Init Swarm” on main server (manager node)
- Add other servers → click “Join Swarm” (worker nodes)
- When deploying, Swarm automatically distributes containers across nodes
⚠️ Docker Swarm mode is an experimental feature on Coolify. For most use cases, multi-server without Swarm, deploying separately on each server is sufficient.
VI. Resource Limits
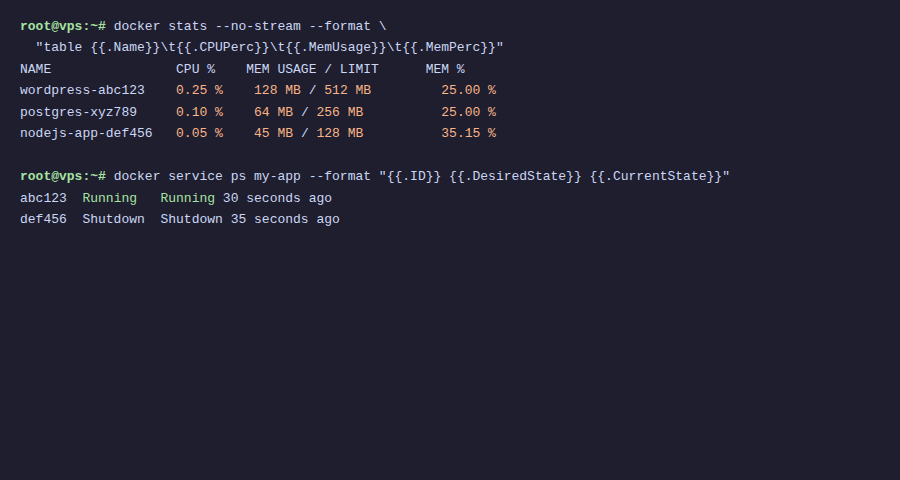
Limit CPU and RAM for each container:
- Go to resource → “Advanced” tab
- Set CPU limit (e.g., 1.5 cores)
- Set Memory limit (e.g., 512MB)
- Set Memory reservation (guaranteed minimum)
💡 Always set memory limits for production containers. If not, one app with memory leak can consume all server RAM, affecting all other apps.
VII. Rolling Updates
Coolify supports zero-downtime deployment:
- When deploying new version → Coolify starts new container
- New container must pass health check first
- When healthy → Traefik switches traffic to new container
- Old container is stopped and removed
Result: users see no downtime, even when deploying new versions.
VIII. Summary
Multi-server on Coolify allows scaling from a small VPS to multi-server infrastructure, all managed from one dashboard. Dedicated build servers, resource limits, rolling updates – sufficient for most production workloads. Final article: Best practices and troubleshooting.
👉 Next article: Part 12, Production Best Practices
You might also like
- Coolify Production - Backup, Security
- Coolify Interface - Detailed Dashboard Usage Guide
- Deploy Node.js, Python, PHP on Coolify
- Databases on Coolify — MySQL, PostgreSQL, Redis, MongoDB
- Deploy Docker Compose on Coolify - Complex multi-container applications
- How to Choose a Budget VPS: Specifications, Costs and Common Traps
About the author

Trần Thắng
Expert at AZDIGI with years of experience in web hosting and system administration.