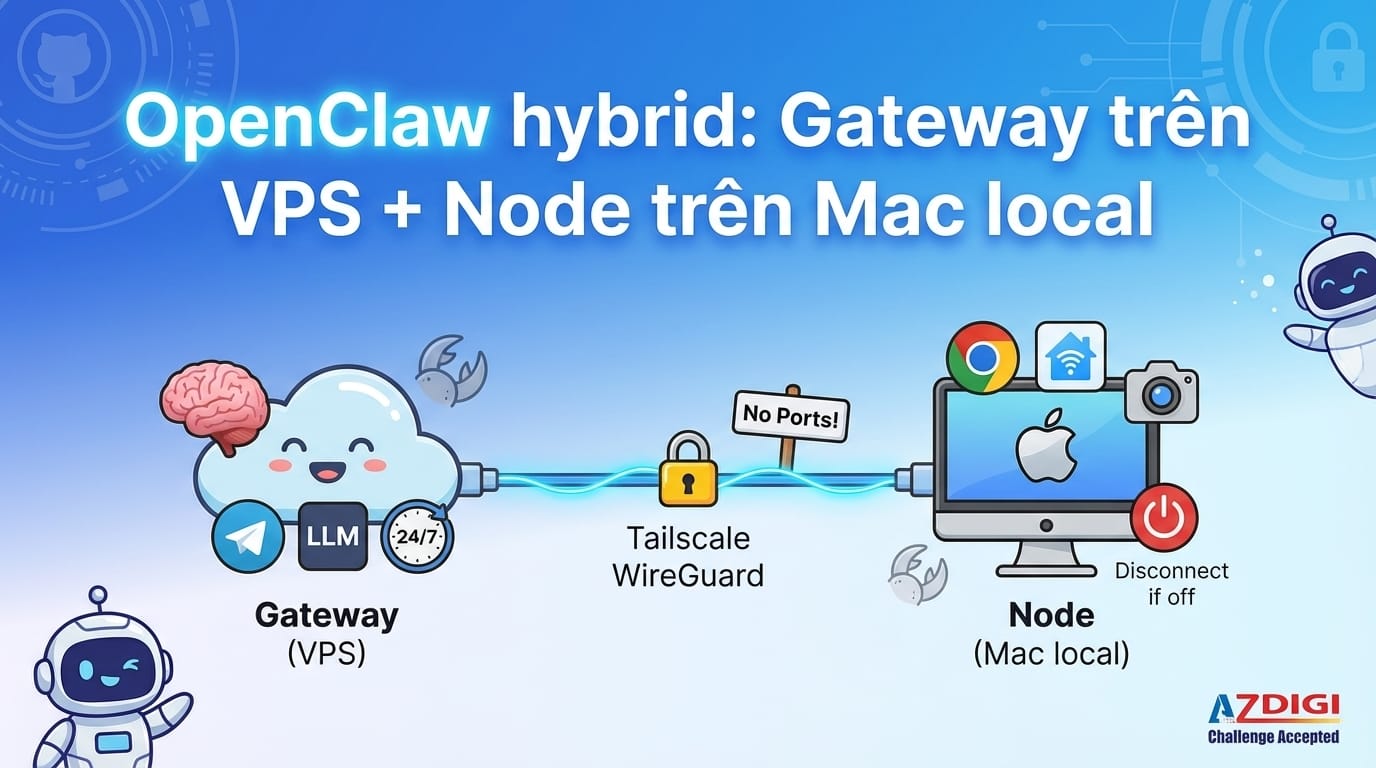
Running OpenClaw on a VPS gives you 24/7 uptime, but no GUI, no browser, no local hardware. Running it on your Mac gives you all of that, but the machine goes to sleep. The solution? Run both, each doing what it does best.
OpenClaw’s hybrid model lets you run the Gateway on a VPS (receiving messages, running AI, managing sessions) and connect a Node on your local Mac (running browser automation, controlling smart home devices, accessing camera). The two communicate through Tailscale, encrypted with WireGuard, no port forwarding needed.
This guide walks through every step of setting up this hybrid model. All commands have been tested on Ubuntu 22.04 (VPS) and macOS 14+ (Mac). If you’re new to OpenClaw, check out the comparison of different ways to run OpenClaw first.
Gateway vs Node architecture
OpenClaw splits into two main components: Gateway and Node. Understanding each role helps you know what runs where.
Gateway is the “brain” of the system. It receives messages from all channels (Telegram, Discord, WhatsApp, Slack…), calls LLMs for processing, manages sessions, runs cron jobs, and decides where each task should execute. Gateway runs as a single process, opening a WebSocket on port 18789 (default). All clients and nodes connect here.
Node is the “hands” that execute tasks. A Node connects to the Gateway via WebSocket with role: node, declaring its capabilities (browser, camera, screen recording, system.run…). When the Gateway needs to run a task on local hardware, it sends the command to the Node via WebSocket, the Node executes it and returns the result.
There’s a key concept here: exec host. Each time the agent needs to run a shell command, it chooses where to run it:
host=gateway: runs on the VPS. Suitable for curl, git, server management, API calls.host=node: runs on the local Mac. Suitable for Playwright headed browser, AppleScript, Sonos control, camera capture.
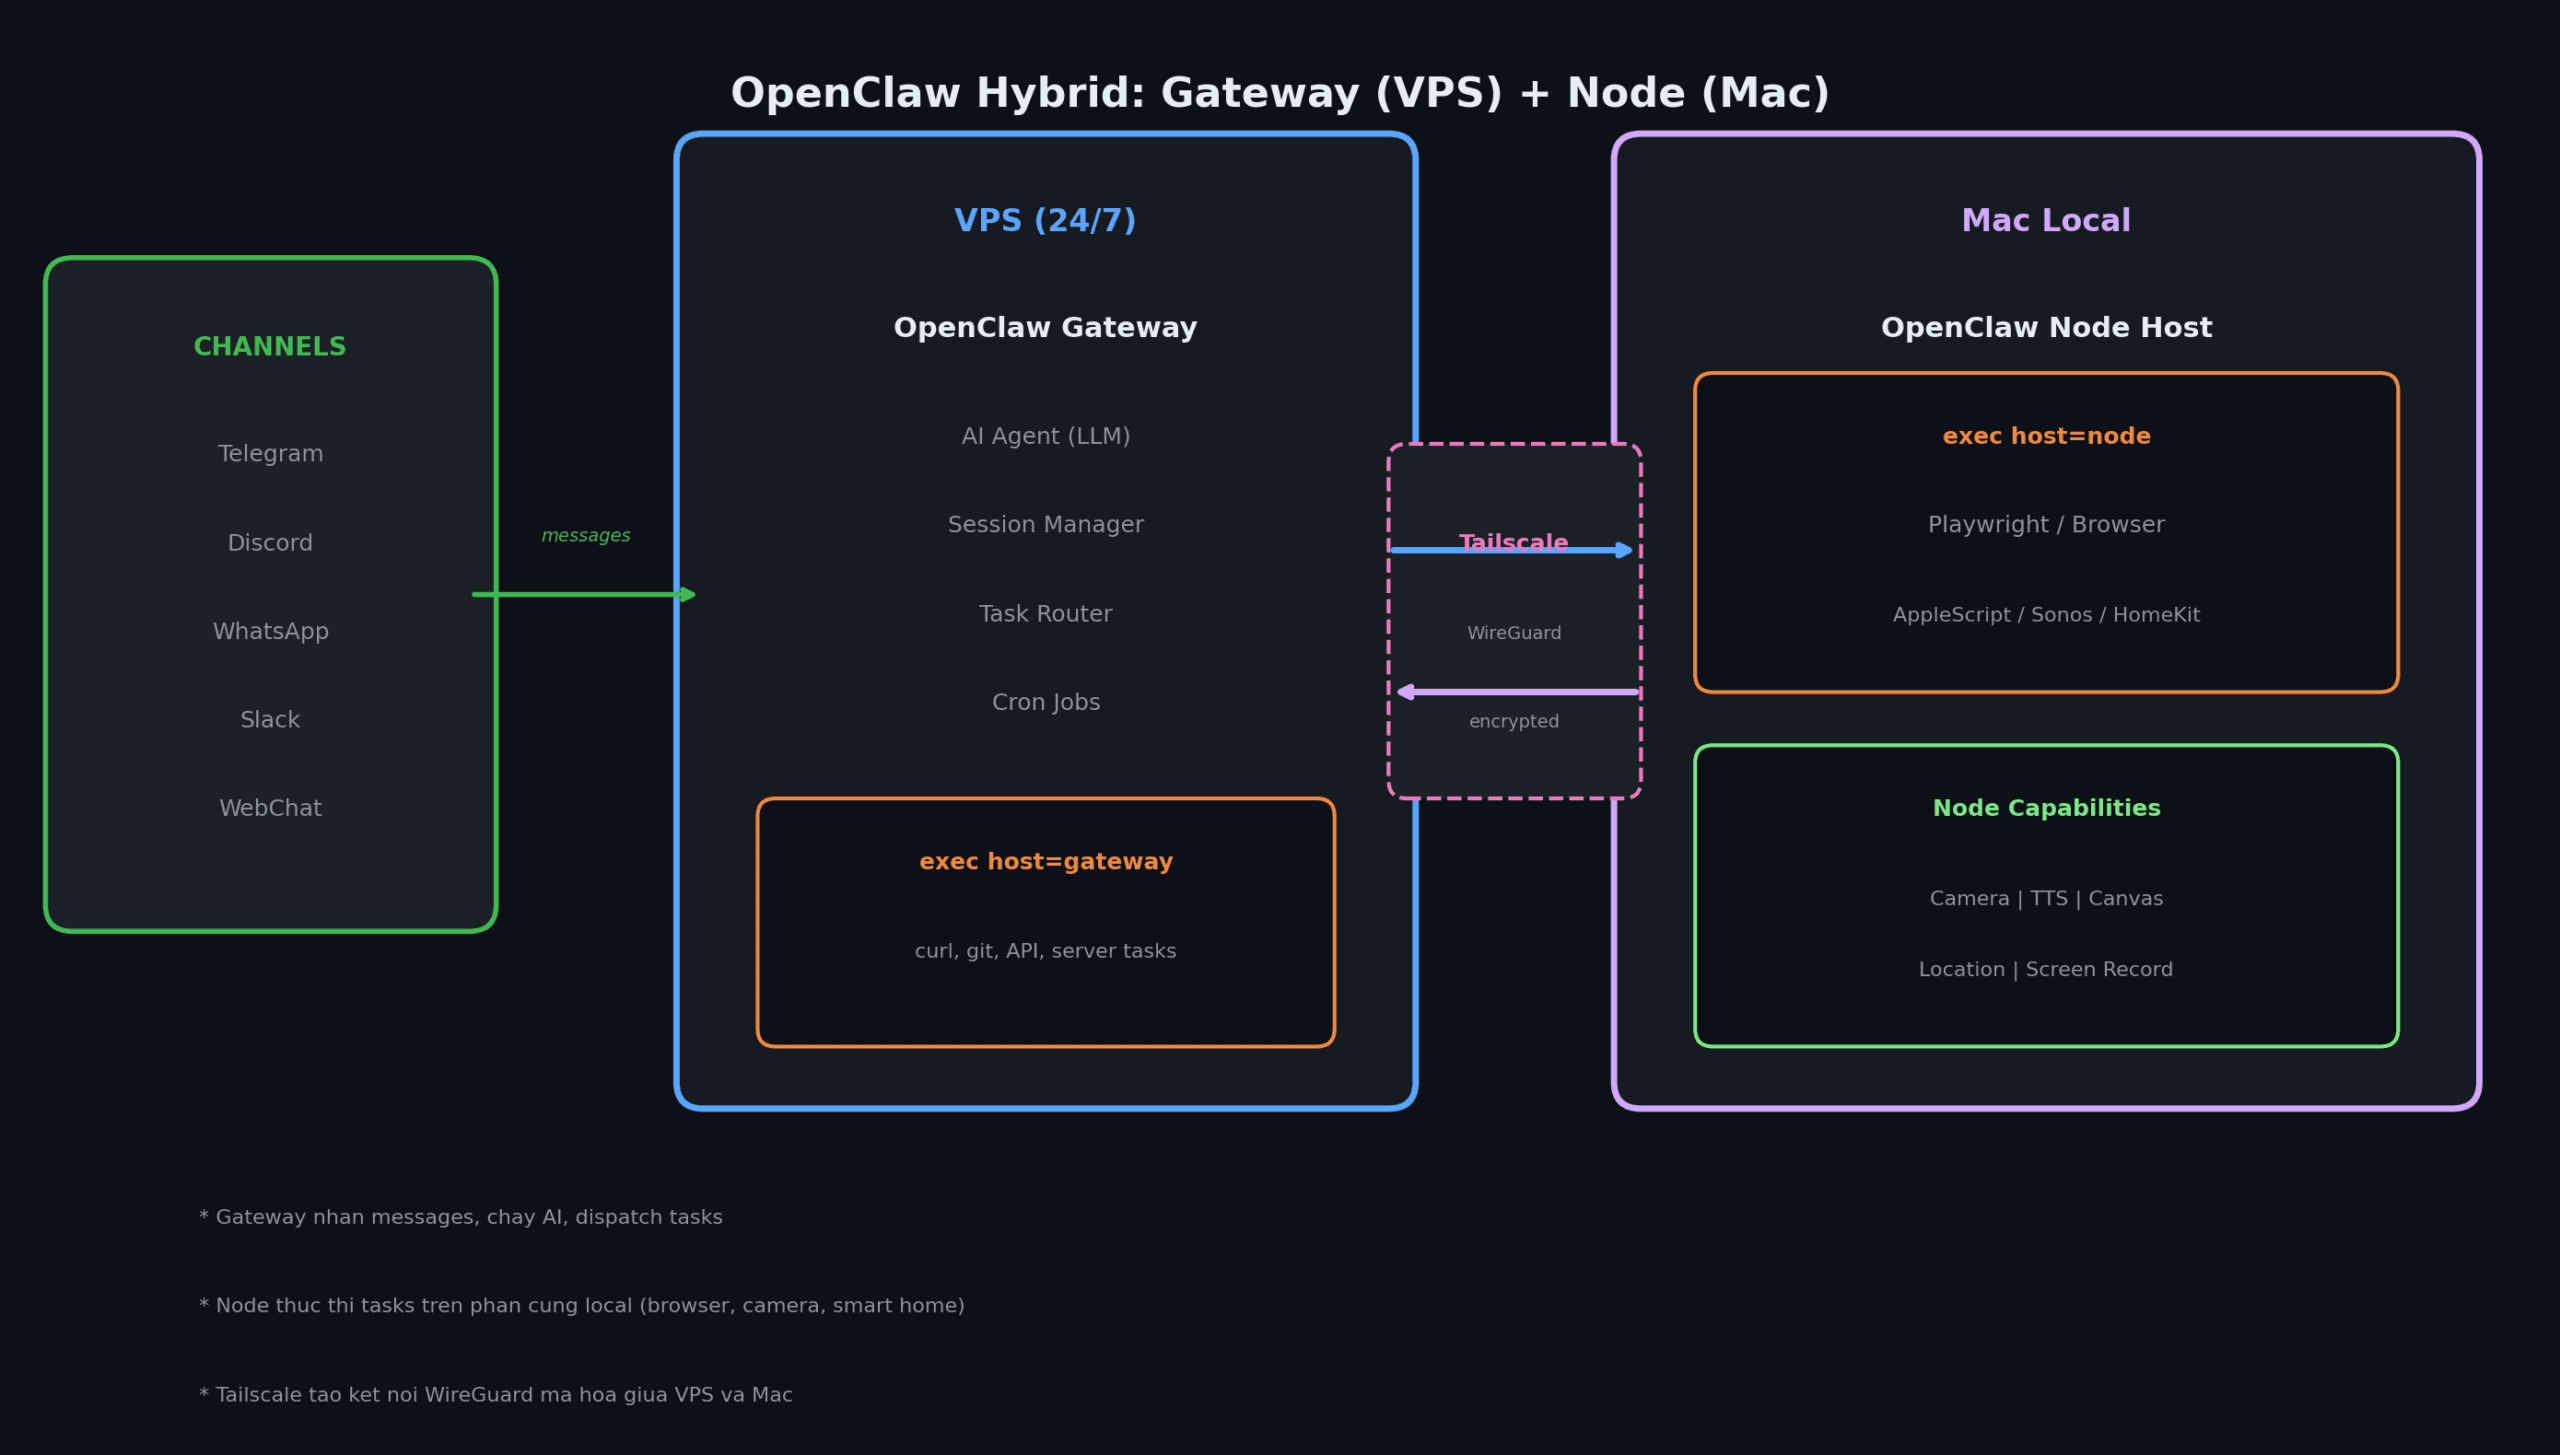
The nice thing here is that the Gateway doesn’t need to know where the Node is (same network, different network, behind VPN). As long as the Node can establish a WebSocket connection, it works. Tailscale makes this straightforward.
Prerequisites
Before you start, prepare the following:
VPS side:
- Ubuntu 22.04+ (or Debian 11+), minimum 2 vCPU, 2GB RAM
- Node.js 22+ (Node 24 recommended)
- SSH access with root or sudo privileges
Mac side:
- macOS 14+ (Sonoma or later)
- OpenClaw CLI installed (
npm install -g openclaw) - Tailscale installed
Shared:
- Tailscale account (free tier supports up to 100 devices)
- API key for your LLM provider (Anthropic, OpenAI, or similar)
If you don’t have a VPS yet, check out our VPS rental guide to pick the right plan.
Step 1: Install OpenClaw Gateway on VPS
SSH into your VPS and run the following commands.
Install Node.js and OpenClaw
# Install Node.js 22 (LTS)
curl -fsSL https://deb.nodesource.com/setup_22.x | sudo -E bash -
sudo apt-get install -y nodejs
# Install OpenClaw
npm install -g openclaw@latest
# Run onboarding wizard
openclaw onboard --install-daemon
The wizard will ask you a few things: choose Local for gateway mode, enter your LLM provider API key, and select Yes to install the daemon (systemd service that auto-starts on reboot).
Configure the Gateway
After onboarding, open the config file for additional settings:
nano ~/.openclaw/openclaw.jsonMinimum config for the hybrid model:
{
  "gateway": {
    "mode": "local",
    "bind": "loopback",
    "port": 18789,
    "auth": {
      "mode": "token",
      "token": "REPLACE_WITH_YOUR_TOKEN"
    },
    "tailscale": {
      "mode": "serve"
    }
  },
  "agents": {
    "defaults": {
      "workspace": "~/.openclaw/workspace",
      "model": {
        "primary": "anthropic/claude-sonnet-4-5"
      }
    }
  },
  "channels": {
    "telegram": {
      "enabled": true,
      "botToken": "YOUR_TELEGRAM_BOT_TOKEN",
      "dmPolicy": "pairing"
    }
  }
}
Key points:
gateway.bind: "loopback": Gateway only listens on 127.0.0.1. Safe, not exposed to the internet.gateway.auth.token: Generate a strong token withopenssl rand -base64 32. All clients and nodes need this token to connect.gateway.tailscale.mode: "serve": OpenClaw auto-configures Tailscale Serve, providing an HTTPS endpoint on your tailnet without opening any ports.
Generate token and start
# Generate random token
openssl rand -base64 32
# Start the gateway
openclaw gateway restart
# Check status
openclaw gateway status
openclaw status
If you see Runtime: running and RPC probe: ok, the Gateway is up.
Step 2: Set up Tailscale connection
Tailscale creates a private network (tailnet) between your machines, encrypted with WireGuard. Install it on both VPS and Mac so they can “see” each other without opening ports or configuring firewalls.
On VPS
# Install Tailscale
curl -fsSL https://tailscale.com/install.sh | sh
# Log in (open the link in browser to authenticate)
tailscale up
# Check Tailscale IP
tailscale ip -4
On Mac
Download Tailscale from the Mac App Store or tailscale.com/download, and log in with the same account as your VPS.
Verify connectivity
# On VPS or Mac, check both machines are online
tailscale status
# Test ping (replace with your VPS Tailscale IP)
ping 100.x.x.x
If you used gateway.tailscale.mode: "serve" in the previous step, check the Serve URL:
# On VPS
tailscale serve status
# Example output: https://my-vps.tailnet-abc.ts.net
This URL is the endpoint your Node will connect to. Note it down.
Step 3: Connect Mac Node to VPS Gateway
On your Mac, run a “node host” (headless, no GUI required). The node host connects to the Gateway via WebSocket and declares its capabilities.
Option 1: Connect via Tailscale Serve (recommended)
If your VPS uses Tailscale Serve (HTTPS), the Node connects directly via MagicDNS:
# Set token (same token configured on VPS)
export OPENCLAW_GATEWAY_TOKEN="your-token"
# Run node host foreground (test first)
openclaw node run \
  --host my-vps.tailnet-abc.ts.net \
  --port 443 \
  --tls \
  --display-name "Mac-Studio"
Option 2: Connect via SSH tunnel
If you’re not using Tailscale Serve, create an SSH tunnel and connect through localhost:
# Terminal 1: Create tunnel
ssh -N -L 18790:127.0.0.1:18789 user@vps-ip
# Terminal 2: Run node host through tunnel
export OPENCLAW_GATEWAY_TOKEN="your-token"
openclaw node run --host 127.0.0.1 --port 18790 --display-name "Mac-Studio"
Install as service (background)
After successful testing, install as a service for automatic startup:
# Install service (launchd on macOS)
openclaw node install \
  --host my-vps.tailnet-abc.ts.net \
  --port 443 \
  --tls \
  --display-name "Mac-Studio"
# Check status
openclaw node status
Approve pairing on VPS
The first time a Node connects, the Gateway creates a pairing request. You need to approve it on the VPS:
# View pending requests
openclaw devices list
# Approve (get requestId from list)
openclaw devices approve --latest
# Verify node is connected
openclaw nodes status --connected
If the Node shows “connected” status with the name you set (e.g., “Mac-Studio”), everything is working.
If the node keeps reporting disconnected (1008): pairing required, verify the token matches between VPS and Mac. A common mistake is extra quotes wrapping the token in environment variables.
Step 4: Configure task routing
Once Gateway and Node are connected, tell the agent when to run commands where.
How it works
By default, exec runs in a sandbox (Docker container). To use gateway or node, you need explicit configuration:
# Set default exec host to node (Mac)
openclaw config set tools.exec.host node
# Or specify which node
openclaw config set tools.exec.node "Mac-Studio"
# Set security mode
openclaw config set tools.exec.security allowlist
Or set per chat session with a slash command:
/exec host=node security=allowlist node=Mac-Studio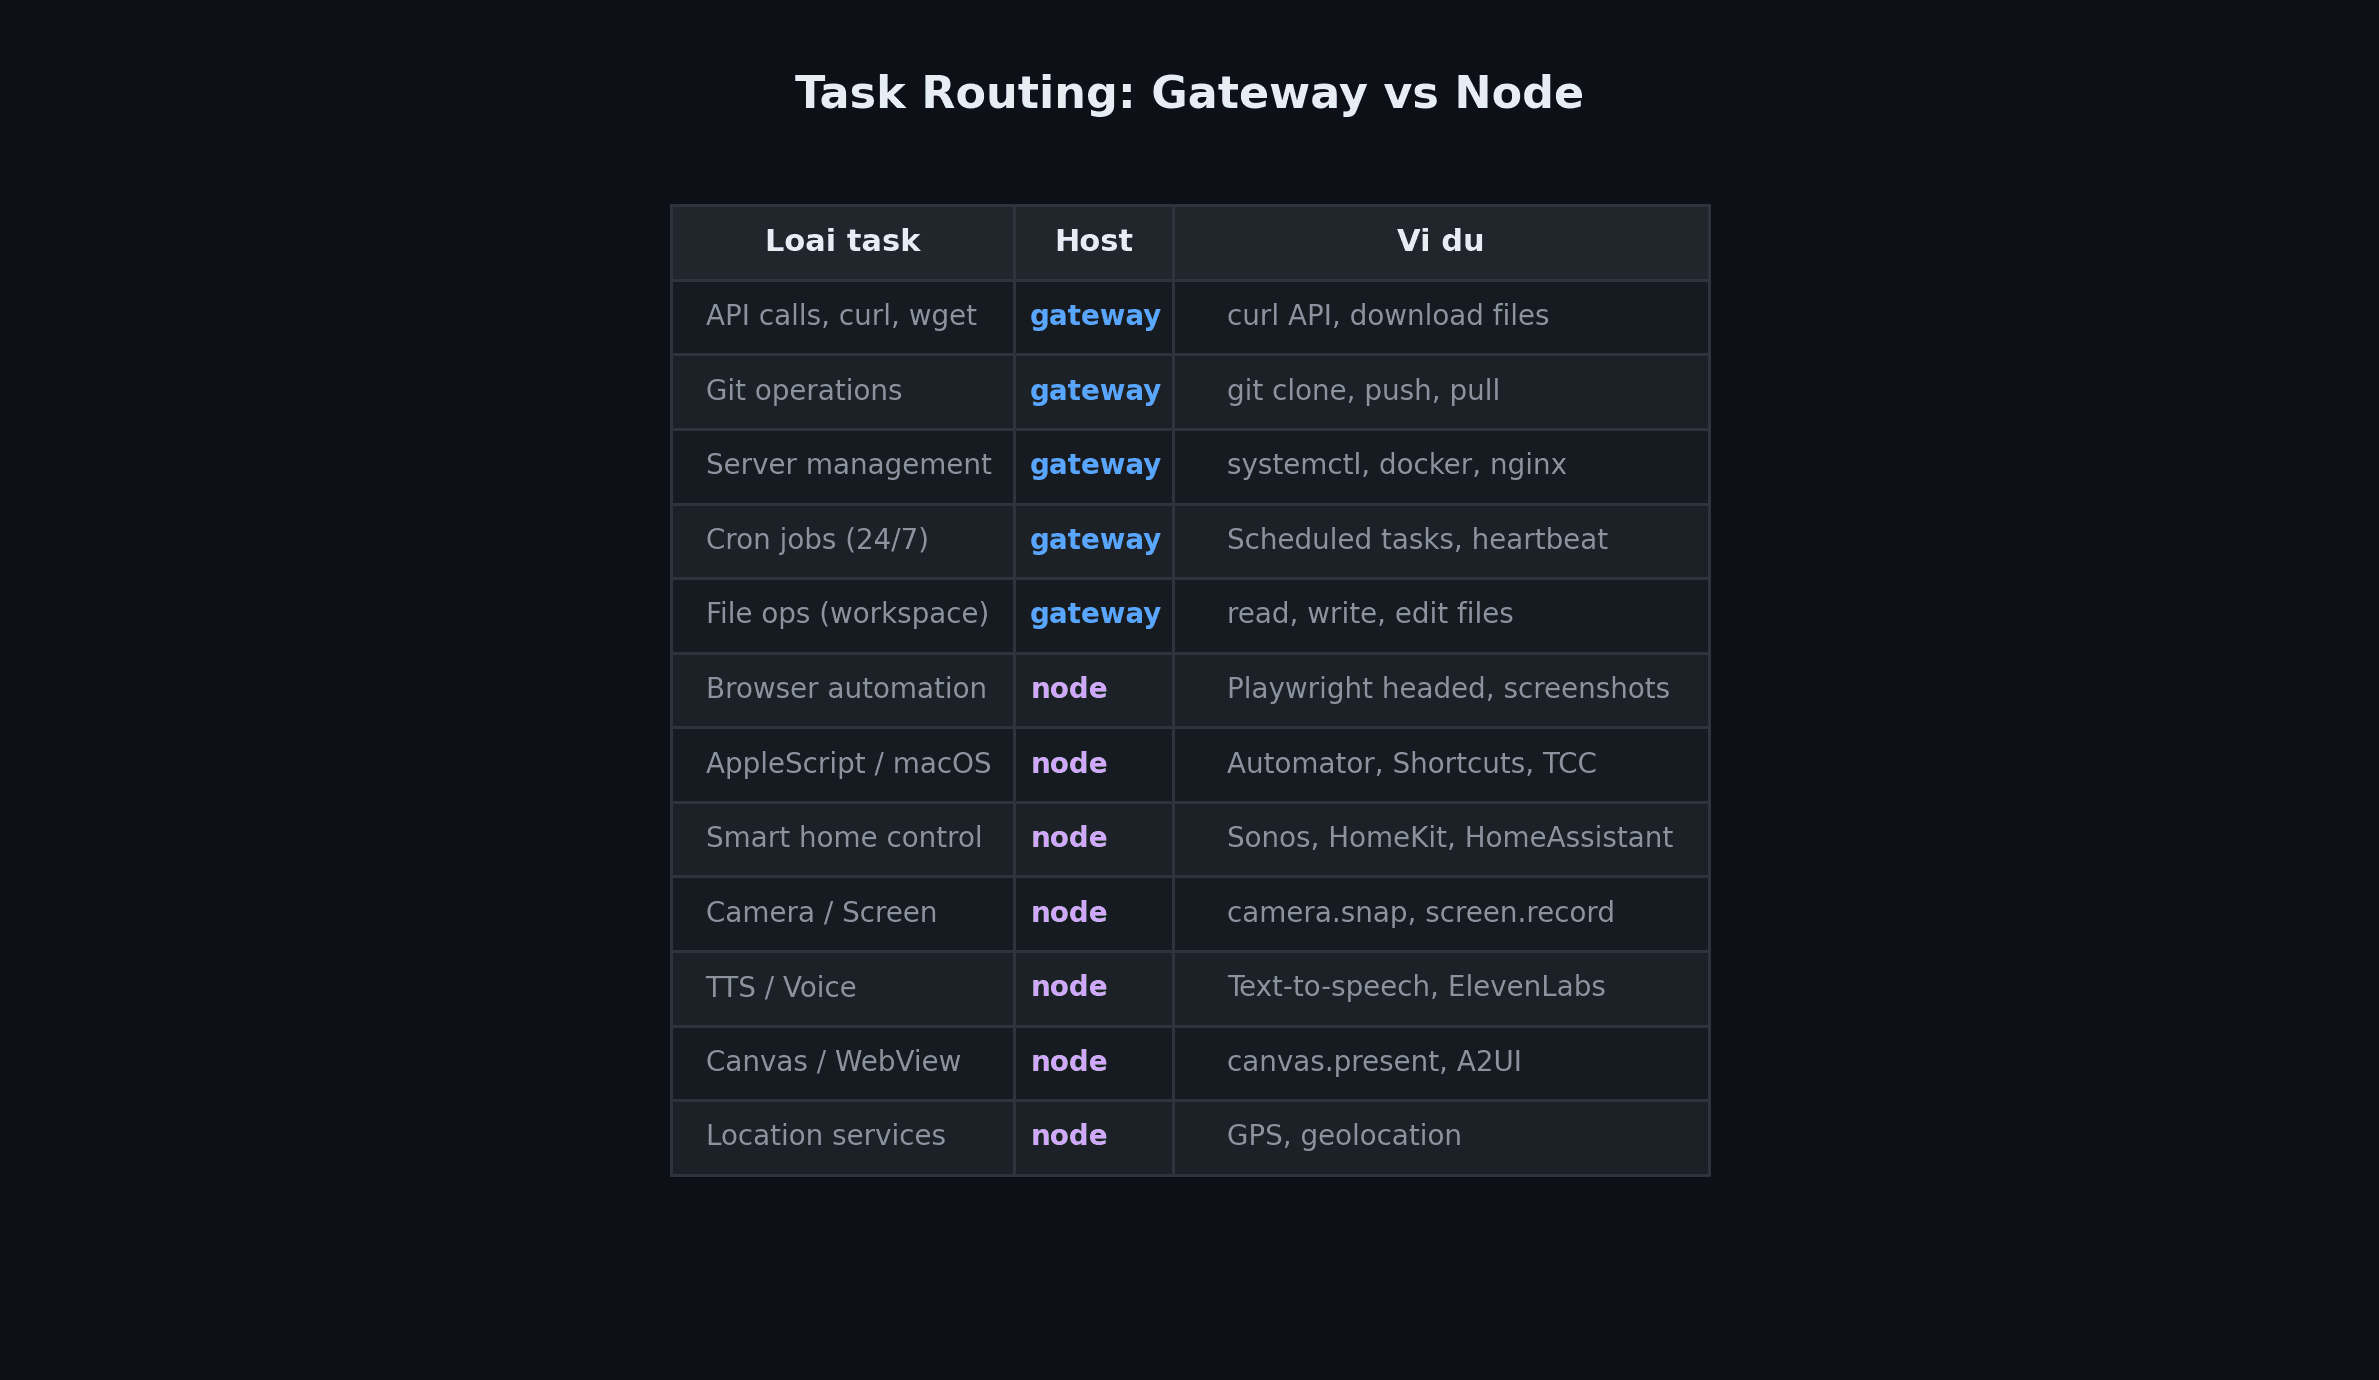
Exec approvals
With security=allowlist, the Node only allows pre-approved commands. The first time a new command runs, the Node asks for approval (if ask=on-miss, which is the default). After choosing “Always Allow”, the command gets added to the allowlist at ~/.openclaw/exec-approvals.json on the Mac.
You can also add allowlist entries from the Gateway:
# Add commands to allowlist for a node
openclaw approvals allowlist add --node Mac-Studio "/opt/homebrew/bin/rg"
openclaw approvals allowlist add --node Mac-Studio "/usr/bin/sw_vers"
Step 5: Test hybrid workflow
Send a few messages through Telegram (or whatever channel you configured) to test each scenario.
Test 1: Task running on VPS
Send: “Check server uptime”
The agent will use exec host=gateway to run uptime on the VPS and return the result. Mac doesn’t need to be on.
Test 2: Task running on Mac
Send: “Take a screenshot of https://example.com”
The agent sends the task to the Mac Node, the Node uses Playwright to capture the screenshot, returns the image to the Gateway, and the Gateway sends it to your Telegram chat.
Test 3: 24/7 cron job
Create a health check cron job:
/cron add --every 6h --name "health-check" --message "Check server status, brief report"Cron runs on the Gateway, 24/7, regardless of whether the Mac is on. Results are sent to the last channel you interacted with.
Test 4: Smart home
If your Mac has Sonos or HomeKit skills installed, send: “Play jazz on the living room speaker”
The Gateway receives the message, the agent decides it needs to run on the node, sends the command to the Mac, and the Mac controls Sonos. Everything happens within seconds.
Tips and troubleshooting
What if the Node goes offline?
When the Mac is off or disconnected, the Gateway continues running normally for tasks that don’t need a node. If the agent needs host=node but the node is offline, the task fails with a clear error. The agent can fall back to host=gateway if the task can run on the VPS.
Tailscale disconnection
Tailscale has auto-reconnect. If the network drops temporarily, the connection restores automatically when the network comes back. The node host (headless service) also has retry logic, automatically reconnecting to the Gateway when available.
Workspace synchronization
Gateway and Node have separate workspaces. If you need to share files between them, use git (push/pull) or rsync over Tailscale. Don’t put workspace on iCloud or cloud-synced folders, as they can cause file-lock conflicts.
Security
This model is quite secure by default:
- Gateway binds to loopback, not exposed to the internet
- Tailscale encrypts end-to-end with WireGuard
- Node requires pairing approval to connect
- Exec approvals control every command run on the node
For additional hardening, read the detailed OpenClaw security guide.
Frequently asked questions
Does everything stop when the Mac is off?
No. The Gateway on the VPS keeps running 24/7: receiving messages, responding, running cron jobs. Only tasks requiring Mac hardware (browser, camera, smart home) won’t work when the Mac is offline. Turn the Mac back on, and the node automatically reconnects to the Gateway.
Can I connect multiple Nodes at once?
Yes. You can run node hosts on multiple machines (Mac, Linux, even Raspberry Pi). Each node declares its own capabilities. Use tools.exec.node or /exec node=node-name to specify which node to run on.
Does Tailscale require payment?
Tailscale’s free tier supports up to 100 devices, more than enough for this setup. Tailscale Serve (exposing HTTPS on your tailnet) is also free. You just need a Tailscale account, no credit card required.
Can I run the Gateway in Docker?
Yes. OpenClaw has an official Docker image. However, note that the default bind mode is loopback (127.0.0.1 inside the container). With Docker bridge networking, you need to set bind: "lan" or use --network host. See the comparison of different ways to run OpenClaw for details.
Can I use SSH tunnel instead of Tailscale?
Absolutely. SSH tunnel is a valid fallback if you prefer not to install Tailscale. However, Tailscale Serve provides a better experience: auto-reconnect, automatic HTTPS, no need to keep an SSH terminal open.
Summary
The hybrid model (Gateway on VPS + Node on Mac) combines the strengths of both: VPS stays online 24/7 to receive messages and run AI, Mac provides browser, camera, and smart home capabilities when needed. Tailscale serves as the encrypted bridge between the two, no port forwarding or complex configuration required.
Initial setup takes about 30 minutes. After that, the system runs itself. Mac goes to sleep, Gateway keeps working. Mac wakes up, Node reconnects automatically. You can add more Nodes (Linux servers, Raspberry Pi, other Macs) as needed.
If you’re running OpenClaw on a single machine and hitting limitations, give this hybrid model a try. It’s considerably more flexible.
Related articles
- Compare ways to run OpenClaw: VPS, Mac Mini, Windows, Linux, Docker, Raspberry Pi
- OpenClaw security: step-by-step configuration guide
- Skills to consider for OpenClaw
- Managing multiple VPS with OpenClaw
- VPS rental: A-Z guide for beginners
- VPS checklist for beginners
- Turn OpenClaw into a NOC Engineer: 24/7 server monitoring with AI
You might also like
- OpenClaw Security: Step-by-Step Safe Configuration Guide
- Integrating OpenViking into OpenClaw: Upgrading AI Agent Memory, Reducing Token Costs by 83%
- Complete OpenClaw Guide: Step-by-Step Tutorial from A to Z
- Installing Dify AI on VPS - Free No-code AI Platform
- Some Skills Worth Considering for OpenClaw
- What is Claude Code Channels? Complete Guide to Connecting Claude Code with Telegram and Discord
About the author

Trần Thắng
Expert at AZDIGI with years of experience in web hosting and system administration.