By default, OpenClaw stores memory as Markdown files and uses SQLite vector search. This approach works fine, but when the context grows large, token costs increase and retrieval isn’t truly intelligent. OpenViking solves exactly this problem, reducing token costs by 83-96% and increasing task completion rate to nearly 50% according to official benchmarks.
In this article, I’ll guide you through installing OpenViking and integrating it with OpenClaw from scratch on the same Ubuntu VPS.
What is OpenViking?
OpenViking is an open-source context database from Volcengine (ByteDance), designed specifically for AI Agents. Instead of using traditional flat RAG vector databases, OpenViking organizes context using a “file system paradigm” with 3 tiers:
- L0 (Abstract): ~100 tokens, used for fast vector search
- L1 (Overview): ~2k tokens, used for reranking and understanding scope
- L2 (Detail): full content, loaded when needed
The agent only needs L0/L1 in most cases, only loading L2 when truly needing details. This is why token costs drop significantly.
OpenViking’s Role in OpenClaw
Simply put:
- OpenClaw = the brain (reasoning, decision making, running tools)
- OpenViking = the memory (storage, search, context organization)
OpenClaw still handles everything. When it needs to recall information, it calls OpenViking via HTTP API. OpenViking returns exactly the needed context with minimal tokens.
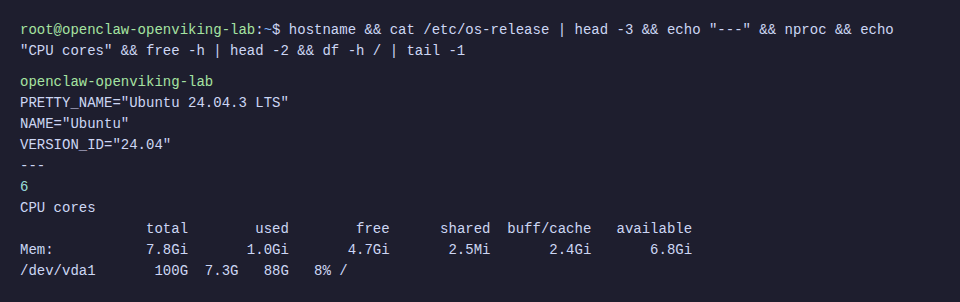
System Requirements
- Ubuntu VPS 22.04 or 24.04 (this tutorial uses 24.04)
- Minimum 2 CPU, 4GB RAM (recommended 4 CPU, 8GB RAM)
- 40GB+ storage
- Python 3.10+
- Node.js 18+ (for OpenClaw)
- API keys: OpenAI (for embedding) and DeepSeek (for VLM)
Step 1: Install Prerequisites
SSH into your VPS and install basic packages:
apt update && apt install -y build-essential gcc g++ make curl git python3-pip python3-venvInstall Go
OpenViking needs Go to build the AGFS component:
wget -q https://go.dev/dl/go1.23.6.linux-amd64.tar.gz -O /tmp/go.tar.gz
rm -rf /usr/local/go && tar -C /usr/local -xzf /tmp/go.tar.gz
echo 'export PATH=$PATH:/usr/local/go/bin' >> ~/.bashrc
source ~/.bashrc
go version
Install Rust
OpenViking’s CLI tool is written in Rust:
curl --proto '=https' --tlsv1.2 -sSf https://sh.rustup.rs | sh -s -- -y
source ~/.cargo/env
rustc --version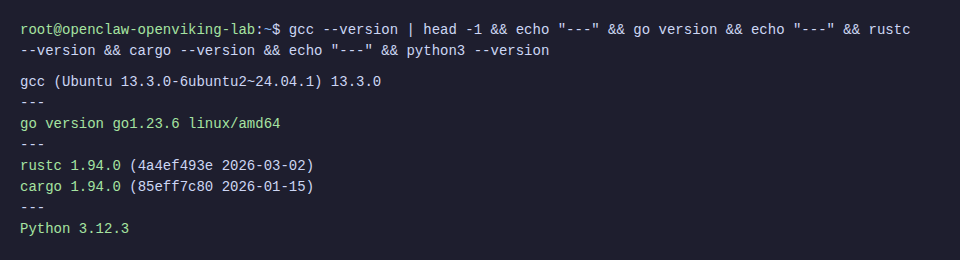
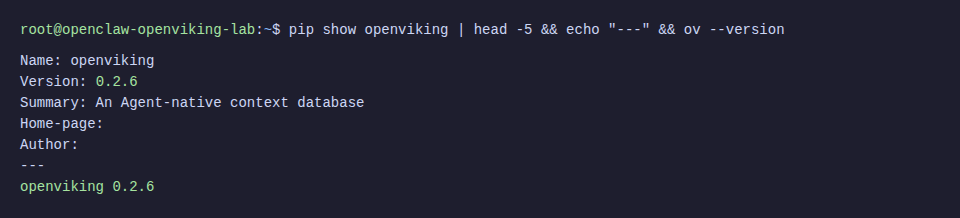
Step 2: Install OpenViking
⚠️ Ubuntu 24.04 blocks system-wide pip install (PEP 668). Must use virtual environment, don’t use --break-system-packages.
Install Python Package
# Create virtual environment
python3 -m venv /opt/openviking-env
source /opt/openviking-env/bin/activate
# Install OpenViking
pip install openviking --upgrade --force-reinstall
Install CLI Tool
The CLI (ov) helps manage resources, search, and monitor from terminal:
cargo install --git https://github.com/volcengine/OpenViking ov_cliℹ️ Building CLI from source takes about 2-3 minutes. If SSH times out, add -o ServerAliveInterval=30 to your SSH command.
Step 3: Configure OpenViking
OpenViking needs 2 model APIs: embedding (to vectorize content) and VLM (to understand semantics, create L0/L1). Here I use OpenAI for embedding and DeepSeek for VLM.
Create Server Config
mkdir -p ~/.openviking /var/lib/openvikingCreate file ~/.openviking/ov.conf:
{
  "embedding": {
    "dense": {
      "api_base": "https://api.openai.com/v1",
      "api_key": "sk-proj-YOUR_OPENAI_KEY",
      "provider": "openai",
      "dimension": 3072,
      "model": "text-embedding-3-large"
    },
    "max_concurrent": 10
  },
  "vlm": {
    "api_base": "https://api.deepseek.com",
    "api_key": "sk-YOUR_DEEPSEEK_KEY",
    "provider": "litellm",
    "model": "deepseek/deepseek-chat",
    "max_concurrent": 50
  },
  "storage": {
    "workspace": "/var/lib/openviking/data",
    "agfs": { "backend": "local" },
    "vectordb": { "backend": "local" }
  },
  "server": {
    "host": "0.0.0.0",
    "port": 1933,
    "root_api_key": "your-secret-api-key",
    "cors_origins": ["*"]
  }
}
💡 Besides OpenAI + DeepSeek, you can use Jina (embedding), Claude, Gemini, or Ollama (local VLM) as desired. See more at OpenViking Configuration Guide.
Create CLI Config
Create file ~/.openviking/ovcli.conf for CLI to connect to server:
{
  "url": "http://localhost:1933",
  "api_key": "your-secret-api-key",
  "output": "table"
}
Step 4: Run OpenViking Server
Quick Test
source /opt/openviking-env/bin/activate
openviking-server
Run Production with systemd
Create file /etc/systemd/system/openviking.service:
[Unit]
Description=OpenViking Context Database Server
After=network.target
[Service]
Type=simple
WorkingDirectory=/var/lib/openviking
ExecStart=/opt/openviking-env/bin/openviking-server
Restart=always
RestartSec=5
Environment="OPENVIKING_CONFIG_FILE=/root/.openviking/ov.conf"
Environment="PATH=/usr/local/go/bin:/usr/local/sbin:/usr/local/bin:/usr/sbin:/usr/bin:/sbin:/bin"
[Install]
WantedBy=multi-user.target
systemctl daemon-reload
systemctl enable openviking
systemctl start openviking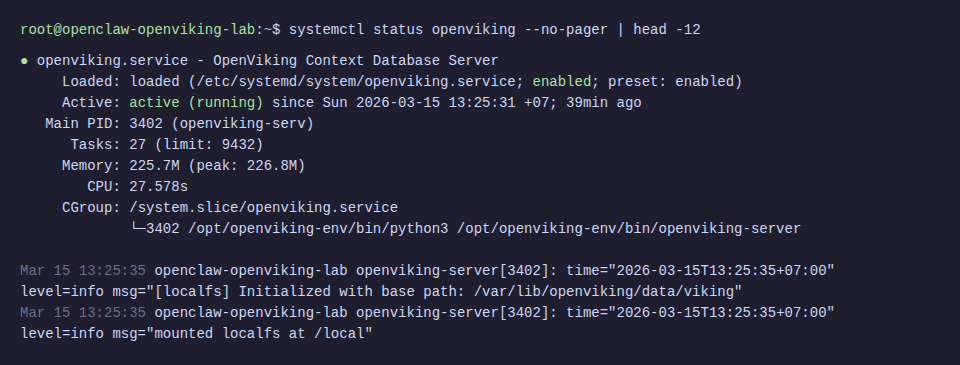
Check Server
# Health check
curl -s http://localhost:1933/health
# Readiness check
curl -s http://localhost:1933/ready | python3 -m json.tool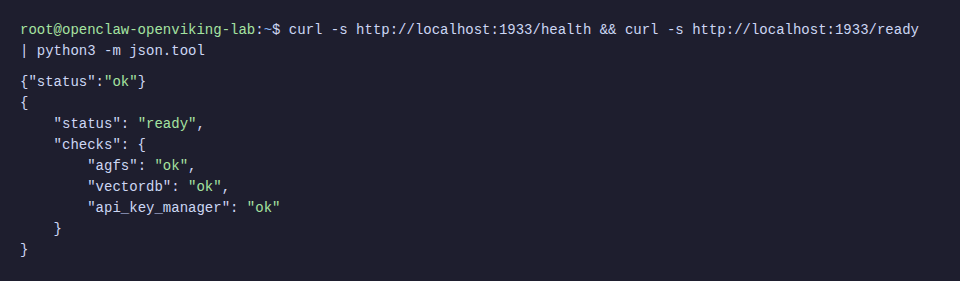
Step 5: Test OpenViking
Before integrating with OpenClaw, test OpenViking alone to ensure everything works.
Add Resource
source /opt/openviking-env/bin/activate
source ~/.cargo/env
# Add document from URL
ov add-resource https://raw.githubusercontent.com/volcengine/OpenViking/refs/heads/main/README.md
# List resources
ov ls viking://resources/
# Check processing status
ov observer system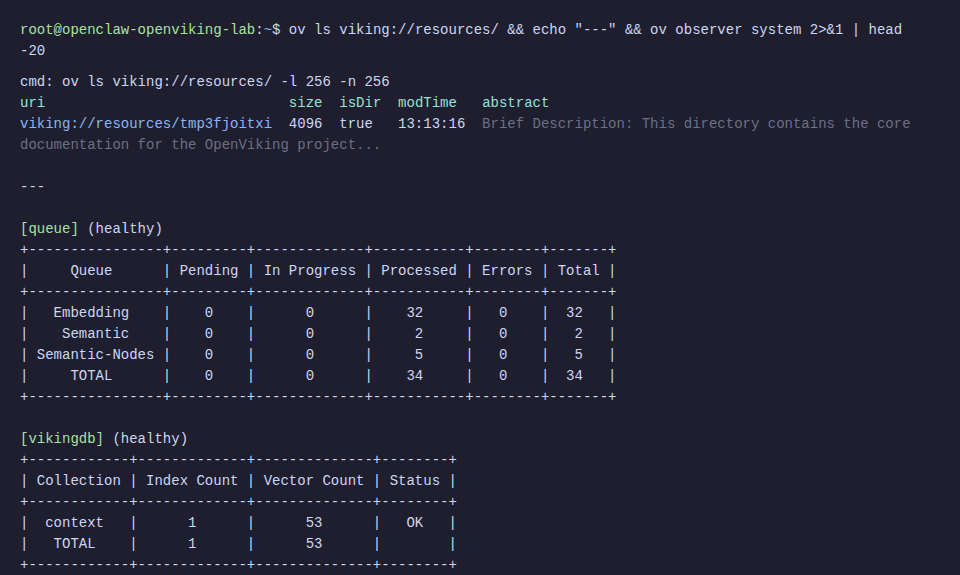
Test Semantic Search
ov find "what is openviking"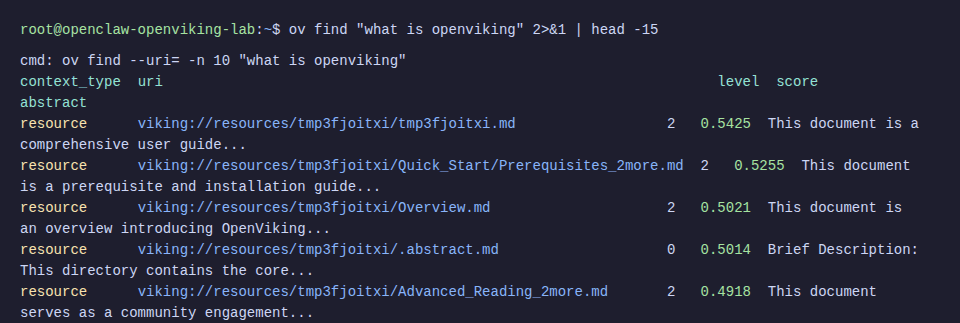
Results return relevant content with relevance scores. OpenViking also automatically creates abstract (L0) and overview (L1) for each resource.
Step 6: Install OpenClaw
If your VPS doesn’t have OpenClaw yet, quick install (see more details at OpenClaw Installation Guide).
curl -fsSL https://openclaw.ai/install.sh | bash
openclaw --version
Step 7: Integrate OpenViking into OpenClaw
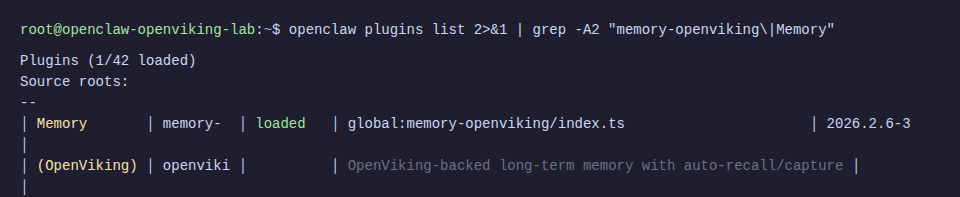
This is the most important part. OpenViking provides a ready-made memory plugin for OpenClaw, replacing the default memory-core.
Install Plugin
# Clone OpenViking repo (to get plugin files)
cd /tmp
git clone --depth 1 https://github.com/volcengine/OpenViking.git
# Copy plugin to OpenClaw extensions
mkdir -p ~/.openclaw/extensions/memory-openviking
cp /tmp/OpenViking/examples/openclaw-memory-plugin/{index.ts,config.ts,client.ts,process-manager.ts,memory-ranking.ts,text-utils.ts,openclaw.plugin.json,package.json,.gitignore} \
  ~/.openclaw/extensions/memory-openviking/
# Install dependencies
cd ~/.openclaw/extensions/memory-openviking && npm install
Configure OpenClaw to Use Plugin
# Enable plugins
openclaw config set plugins.enabled true
openclaw config set plugins.allow '["memory-openviking"]' --json
# Specify OpenViking as memory backend
openclaw config set plugins.slots.memory memory-openviking
# Configure remote mode (pointing to OpenViking server)
openclaw config set plugins.entries.memory-openviking.config.mode "remote"
openclaw config set plugins.entries.memory-openviking.config.baseUrl "http://localhost:1933"
openclaw config set plugins.entries.memory-openviking.config.apiKey "your-secret-api-key"
# Enable auto-recall and auto-capture
openclaw config set plugins.entries.memory-openviking.config.autoRecall true --json
openclaw config set plugins.entries.memory-openviking.config.autoCapture true --json
ℹ️ autoRecall: agent automatically searches memory when receiving messages. autoCapture: agent automatically saves important information from conversation to memory.
Configure Model for OpenClaw
# Set API key via environment variable
export OPENAI_API_KEY="sk-proj-YOUR_OPENAI_KEY"
# Set default model
openclaw config set agents.defaults.model "openai/gpt-4o"
# Set gateway mode
openclaw config set gateway.mode "local"
⚠️ Must set gateway.mode = "local" before running gateway, otherwise it will be blocked with “Gateway start blocked” message.
Start Gateway
openclaw gatewayIn the logs, you’ll see confirmation that the plugin has connected:
[gateway] memory-openviking: initialized (url: http://localhost:1933, targetUri: viking://user/memories, search: hybrid endpoint)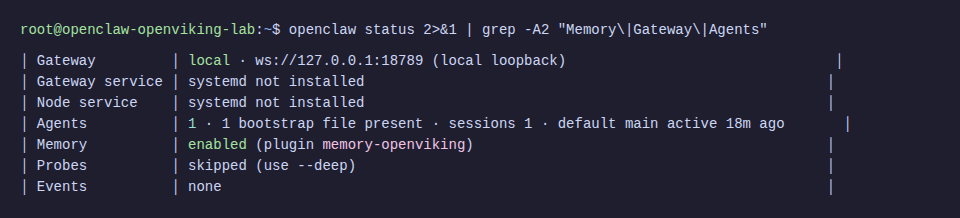
Step 8: Verify Official Operation
Now test whether the agent can save and recall information through OpenViking.
Save Memory
openclaw agent --agent main --message "Please remember that my favorite color is blue and I love Vietnamese coffee."
Recall Memory
openclaw agent --agent main --message "What is my favorite color and what drink do I love?"
View Memory in OpenViking
ov ls viking://user/default/memories/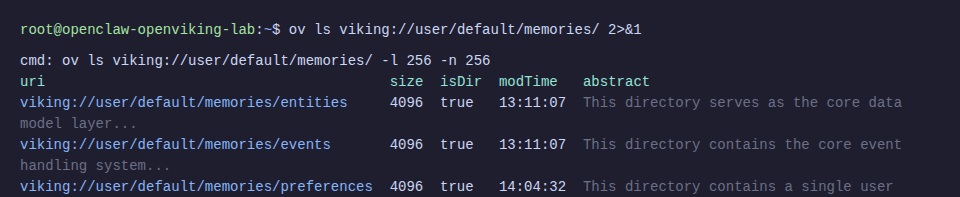
The neat thing is OpenViking automatically categorizes memory into folders: entities (people, projects, concepts), events (events), preferences (preferences), and profile (personal information). The agent doesn’t need to worry about organizing data.
Before and After Comparison
According to OpenViking’s official benchmark (tested on LoCoMo10 dataset, 1540 cases):
| Setup | Task Completion | Input Tokens |
|---|---|---|
| Original OpenClaw (memory-core) | 35.65% | 24.6M |
| OpenClaw + LanceDB | 44.55% | 51.6M |
| OpenClaw + OpenViking | 52.08% | 4.3M |
Nearly 50% increase in task completion, 83% reduction in token cost. This number has real-world significance: the agent understands context better and costs significantly less in API fees.
Troubleshooting
pip install blocked on Ubuntu 24.04
Error: error: externally-managed-environment
Cause: Ubuntu 24.04 implements PEP 668, blocking system-wide pip install.
Fix: Use virtual environment:
python3 -m venv /opt/openviking-env
source /opt/openviking-env/bin/activate
pip install openviking
SSH timeout during Rust CLI build
Error: ssh: connect to host ... Connection timed out
Cause: cargo install build takes 2-3 minutes, SSH session times out.
Fix: Add keepalive to SSH command:
ssh -o ServerAliveInterval=30 -o ServerAliveCountMax=10 root@your-serverOpenClaw gateway blocked
Error: Gateway start blocked: set gateway.mode=local
Fix:
openclaw config set gateway.mode "local"Memory shows disabled or memory-core
Cause: Plugin hasn’t been specified as memory backend.
Fix:
openclaw config set plugins.slots.memory memory-openvikingOpenViking server doesn’t auto-start after reboot
Fix: Create systemd service as in Step 4 and run systemctl enable openviking.
Subscription vs API Key: When OpenViking Actually Saves Money
Not everyone benefits equally from OpenViking. Depending on how you pay for LLM, the savings will vary.
API Key Users Paying Per-Token
This is the group that benefits most. 83% reduction in input tokens (24.6M to 4.3M according to benchmark) means real money savings.
Quick calculation: Claude Opus input costs $15/M tokens. With 24.6M tokens, you pay $369. The same workload through OpenViking only costs 4.3M tokens = $64.50. Saving about $300.
Task completion also increased from 35% to 52%. So the agent is both cheaper and works better.
Subscription Users (Claude Pro/Max, ChatGPT Pro)
Input tokens aren’t charged separately, you pay a fixed monthly fee ($20-200/month depending on plan). Reducing tokens doesn’t directly reduce bills.
But there are indirect benefits:
- Smaller context = each turn uses less quota, fewer rate limits
- Less compaction so sessions run smoother
- Agent remembers more accurately (52% vs 35% task completion)
If you often hit “session limits” on Claude Max, OpenViking helps reduce context per turn, extending sessions before hitting limits.
Additional Costs When Using OpenViking
OpenViking isn’t completely free. You need to factor in:
- Embedding API: OpenAI text-embedding-3-large about $0.13/M tokens
- VLM API: DeepSeek about $0.14/M input tokens
- With
autoRecall+autoCaptureenabled, each message calls these 2 APIs - Server resources: 2-4 CPU, 4-8GB RAM
Suitable for users who already have VPS or OpenClaw configuration powerful enough to run both OpenClaw and OpenViking together, and the actual money savings significantly outweigh the OpenViking investment costs.
Quick Comparison Table
| API Key | Subscription | |
|---|---|---|
| Reduce token costs | ✅ Real 83% reduction | ❌ Doesn’t reduce bills |
| Reduce rate limits | ✅ | ✅ |
| Better task completion | ✅ +50% | ✅ +50% |
| Additional costs (embedding + VLM) | Yes, but smaller than savings | Yes, pure additional cost |
| Use when | Token cost > $50/month | Often rate limited or need strong memory |
In summary: if you’re paying per-token and token costs are significant, OpenViking is almost certainly worth trying. If using subscription, consider based on memory needs and rate limit frequency. With subscription that doesn’t hit limits, OpenClaw configuration optimizations (heartbeat, cron, compaction) might be sufficient.
💡 If you use subscription (Claude Pro/Max, ChatGPT Pro), before installing OpenViking try optimizing OpenClaw configuration first: heartbeat interval, cron model, compaction, context pruning. These simple changes can reduce background task costs by 70% without additional infrastructure. See details: Optimize OpenClaw Costs: How to Reduce Token Usage by 70%
Conclusion
After this article you have:
- OpenViking server running stably on the same VPS as OpenClaw
- OpenClaw using OpenViking as long-term memory instead of default memory-core
- Agent can save, search, and recall memory more intelligently with much lower token costs
Final stack running on 1 VPS:
- OpenViking: port 1933 (systemd service)
- OpenClaw: port 18789 (gateway)
- Embedding: OpenAI API (text-embedding-3-large)
- VLM: DeepSeek API (deepseek-chat)
If you’re using OpenClaw and feel memory isn’t intelligent enough or token costs are high, OpenViking is an upgrade worth trying.
You might also like
- What Is Hermes Agent? Installation and Usage Guide
- OpenClaw hybrid: Gateway on VPS + Node on local Mac
- What is Claude Code Agent Teams? How to coordinate multiple AI agents in parallel
- What is MCP? How AI agents connect to tools and external data
- Some Skills Worth Considering for OpenClaw
- OpenClaw Security: Step-by-Step Safe Configuration Guide
About the author

Trần Thắng
Expert at AZDIGI with years of experience in web hosting and system administration.