
Currently, there are many password management software or applications, from free to paid options like 1Password, LastPass, Dashlane…
Among them, Bitwarden is an open-source solution that many individual users and small businesses choose when they need a password management tool that allows self-control of data.
Bitwarden is not only used to store accounts and login passwords. You can also use it as a storage place for other sensitive information such as API keys, secret keys, OTP codes, secure notes, or internal access information that needs to be kept confidential.
Moreover, this is also a suitable choice when combined with OpenClaw. Instead of storing sensitive data in plain text format, you can separate them to Bitwarden and only retrieve them when needed. However, if using this approach, you should separate a dedicated Bitwarden account for OpenClaw or use a separate server to avoid mixing with the main data vault.
Bitwarden supports complete applications on computers like macOS, Windows, Linux; on mobile devices like iOS, Android; and even browser extensions on popular browsers like Chrome, Firefox, Safari, Tor Browser. Thanks to this, whether you use it on a personal computer, phone, or web browser, the user experience remains quite consistent.
Preparation
Before starting the installation, you should prepare some basic requirements to make the Bitwarden self-hosted deployment process go smoothly. If missing one of the following parts, the installation is very likely to stop midway, especially in the SSL configuration and service initialization steps.
- A server or VPS/Cloud with administrative privileges: you can use Linux or Windows, but in practice Linux is still a more popular choice because it’s easier to deploy according to Bitwarden’s official documentation. If you need to refer to more system requirements, you can view them at Bitwarden’s official self-host documentation.
- Sufficient server configuration: this article uses a Linux VPS with 2 vCPU, 4GB RAM, and 40GB storage capacity. This is a suitable configuration level to start deployment and use for personal needs or small groups.
- A dedicated domain or subdomain for Bitwarden: for example
vault.your-domain.tld. This domain needs to be pointed to the VPS IP beforehand so that Bitwarden can request a free SSL certificate from Let’s Encrypt during the deployment process. - SSH access to the server: you should prepare an account with
sudoprivileges to install Docker, create a dedicated user for Bitwarden, and work with configuration files later.
If you have all the above conditions, you can continue with the installation part according to the standard method that Bitwarden recommends.
Installation
There are several different ways to install Bitwarden on VPS from manual installation to standard installation (through Docker), reference documentation:
- https://bitwarden.com/help/self-host-bitwarden/
- https://bitwarden.com/help/install-on-premise-linux/ (recommended)
- https://bitwarden.com/help/install-on-premise-manual/
- https://bitwarden.com/help/install-on-premise-windows/
This article will use the standard installation method on Linux VPS according to the proper guide that Bitwarden recommends. This is also the most suitable method if you want a stable system that’s easy to update later.
Create a dedicated user for Bitwarden on Linux
sudo adduser bitwarden
sudo groupadd docker
sudo usermod -aG docker bitwarden
sudo mkdir /opt/bitwarden
sudo chmod -R 700 /opt/bitwarden
sudo chown -R bitwarden:bitwarden /opt/bitwarden
Install Docker and Docker compose
If the VPS doesn’t have Docker and Docker Compose installed, install them quickly through the get.docker.com script.
  curl -fsSL https://get.docker.com -o /tmp/get-docker.sh
  chmod +x /tmp/get-docker.sh
  sudo /tmp/get-docker.sh
Run automatic Bitwarden installation script
First, switch to the bitwarden user created earlier, then install.
su bitwarden
cd
Bitwarden provides an automatic installation script according to the standard method and you should use this method.
curl -Lso bitwarden.sh "https://func.bitwarden.com/api/dl/?app=self-host&platform=linux" && chmod 700 bitwarden.sh
./bitwarden.sh install
During installation, the script will ask you to enter the domain to use for Bitwarden and ask whether to enable Let’s Encrypt to create a free SSL certificate. If the domain has been correctly pointed to the VPS IP beforehand, you should choose to enable it so the system has HTTPS from the beginning.
===================================================
bitwarden.sh version 2026.2.1
Docker version 29.3.0, build 5927d80
Docker Compose version v5.1.0
(!) Enter the domain name for your Bitwarden instance (ex. bitwarden.example.com): bw.domain.com
(!) Do you want to use Let's Encrypt to generate a free SSL certificate? (y/n): y
Although Bitwarden is free, during installation it will ask you to enter an installation code (installation id). To get this code, you access https://bitwarden.com/host/ and fill in your email address and data region.
⚠️ Note: This is important to pay attention to. If you’re using the free version, you can choose any region, but if you plan to use Bitwarden for multiple people (company/organization), you will need a paid version and this region must match the region that your organization account registered with Bitwarden.
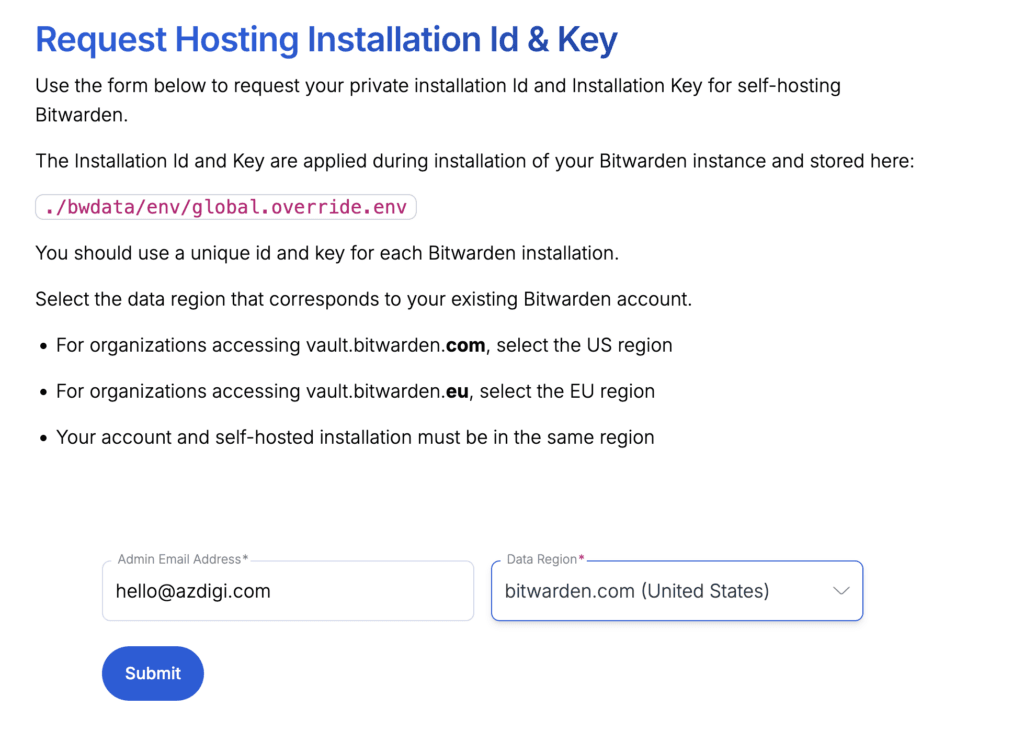
After registration, Bitwarden will provide you with an installation id and installation key. You just need to copy these two pieces of information and enter them sequentially in the installation screen on the VPS.
(!) Enter your installation id (get at https://bitwarden.com/host): 6c5afc35-xxxxxxxxxxxxxxx
(!) Enter your installation key: WkNIxxxxxxxxxxxxxxxxxxx
Invalid input for region. Please try again.
(!) Enter your region (US/EU) [US]: US
After installation is complete, run startup.
./bitwarden.sh startAfter completion, you access the domain configured for Bitwarden to start using. On the first access, the system will display the new account creation interface.
You will need to click the Create Account button to start creating your own personal account.
Configure SMTP
If you want to use Bitwarden’s admin panel, you need to configure SMTP first. The reason is that the login link to the admin panel will be sent via email, so if there’s no SMTP, you won’t be able to log in normally.
For example, you can use Gmail SMTP with an application password (Application Password – created at https://myaccount.google.com/apppasswords).
Open the global.override.env file at ~/bwdata/env/global.override.env and find the information below and change it to your SMTP information (for example, I’m using Gmail SMTP with application password):
globalSettings__mail__replyToEmail=azdigi.blog@gmail.com
globalSettings__mail__smtp__host=smtp.gmail.com
globalSettings__mail__smtp__port=587
globalSettings__mail__smtp__ssl=false
globalSettings__mail__smtp__username=azdigi.blog@gmail.com
globalSettings__mail__smtp__password=jsue xskd dkdw hihi
Then run the command ~/bitwarden.sh restart to restart.
Set up admin email
After creating the account, you can declare your email address as an admin account. This is how that email gets permission to log into Bitwarden’s admin area.
Open the global.override.env file at ~/bwdata/env/global.override.env and find adminSettings__admins then add your email.
adminSettings__admins=azdigi.blog@gmail.comThen run the command ~/bitwarden.sh restart to restart.
Block others from registering accounts
If you have installed Bitwarden publicly on VPS, you should disable account registration after you have completed your registration. Open the file ~/bwdata/env/global.override.env and find globalSettings__disableUserRegistration change the value to true.
globalSettings__disableUserRegistration=trueThen run the command ~/bitwarden.sh restart to restart.
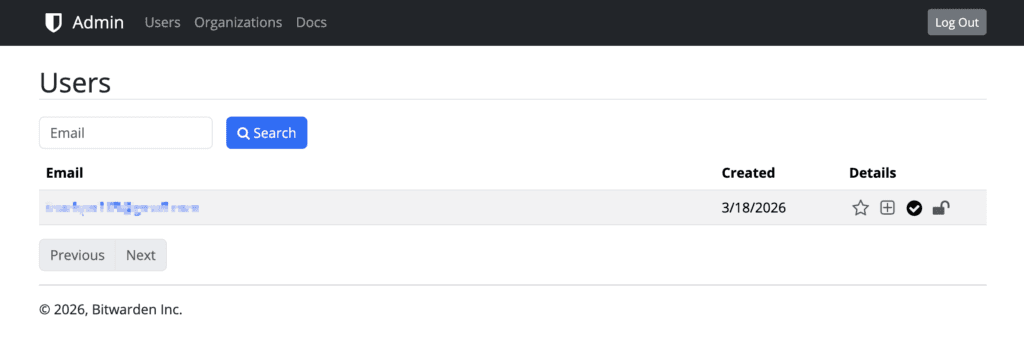
Log in to admin panel
After completing the above steps, you access https://vault.your-domain.tld/admin to log into the admin panel with the email address declared earlier. Bitwarden’s admin interface doesn’t have too many features, but enough to check some basic settings related to the self-hosted system.
Using Bitwarden
Using with browser extension
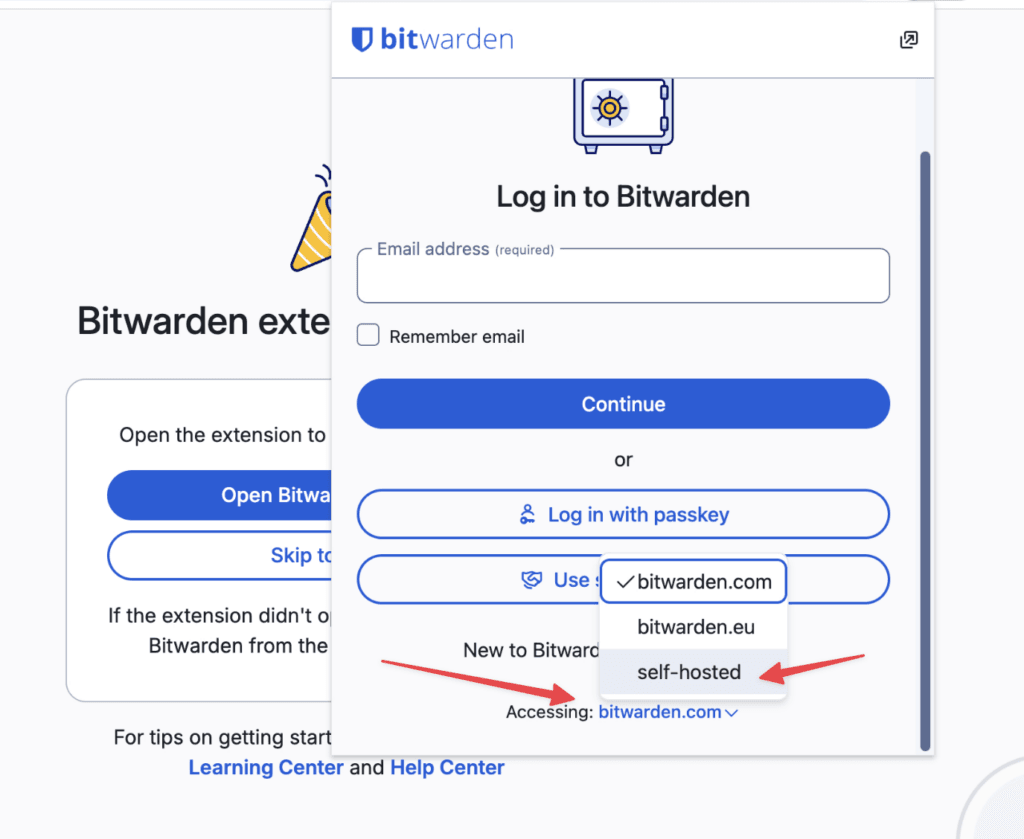
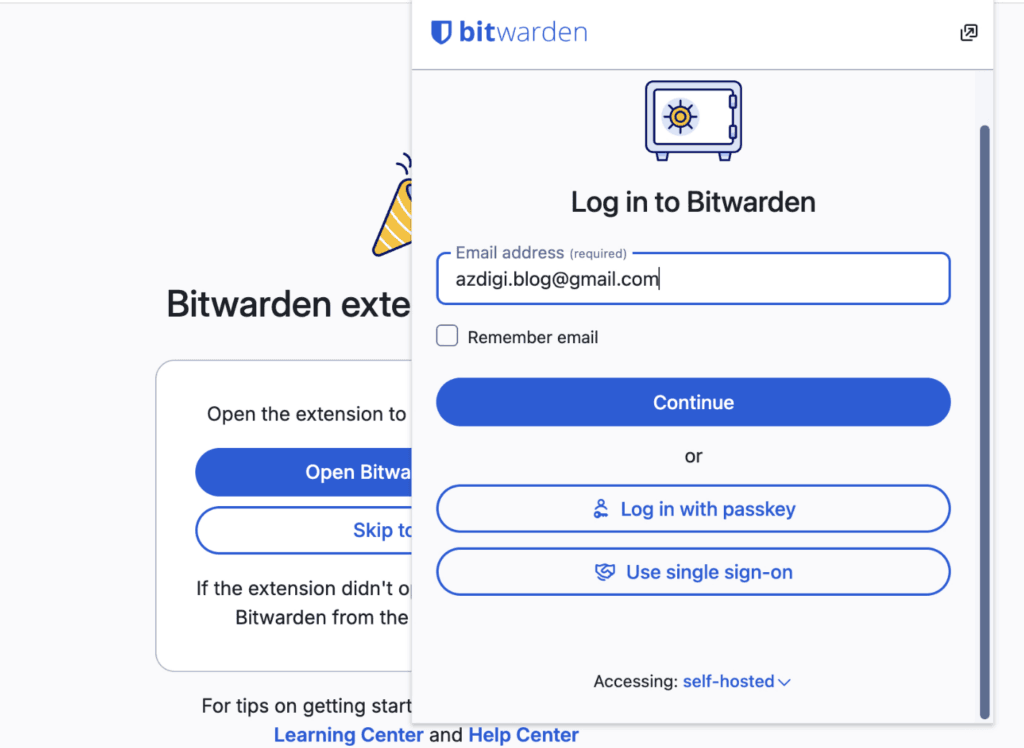
You can download the Bitwarden extension for your browser at https://bitwarden.com/download/.
Then access that extension on the browser and start logging in. Note that you must choose Self-hosted at the bottom of the window to log into your own server correctly.
Then enter the exact address of the Bitwarden self-hosted that you installed on VPS.
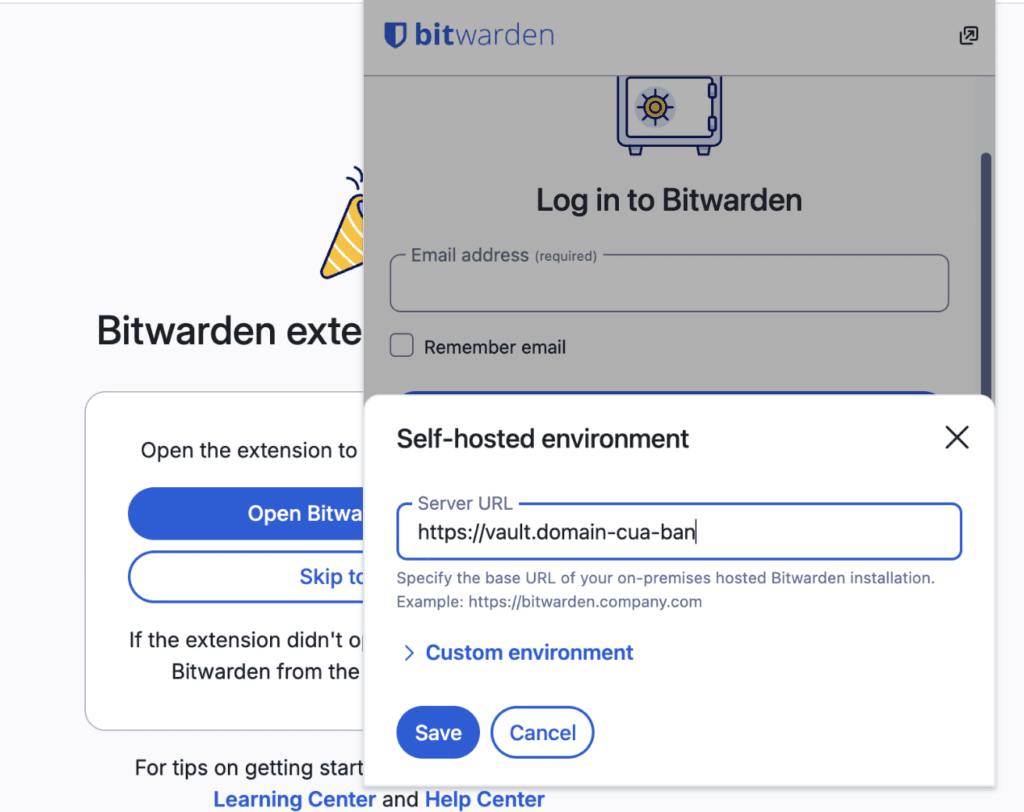
When you have correctly pointed to the self-hosted server, you log in normally to start using your own vault.
Besides browser extensions, Bitwarden also supports desktop applications on macOS, Windows, Linux and even CLI for command line operations.
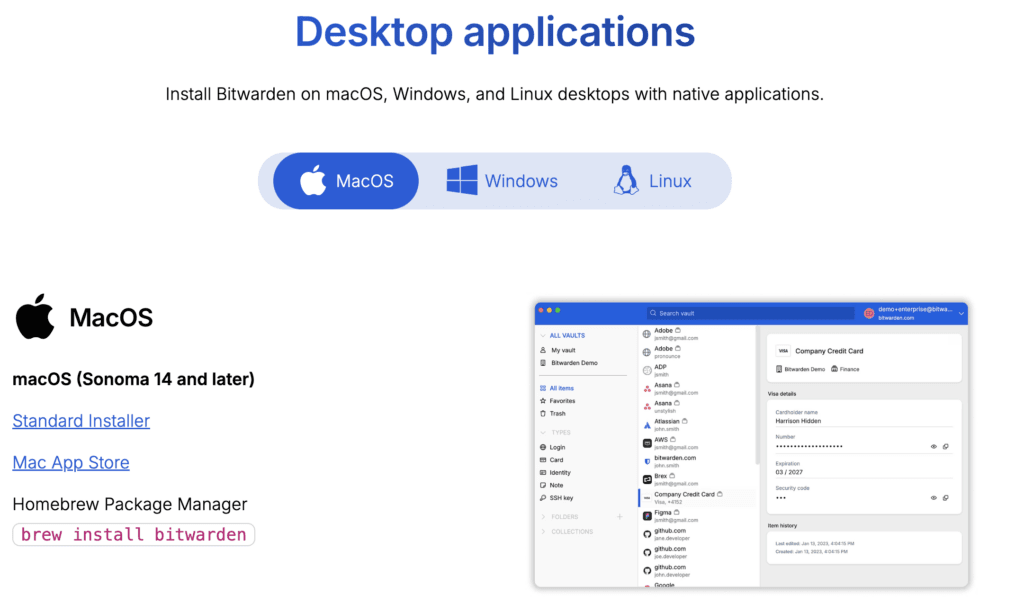
You can access https://bitwarden.com/download/#downloads-desktop to download the Bitwarden application for desktop. If you plan to integrate Bitwarden with OpenClaw on the same machine you’re using, you should install additional desktop applications and CLI so that commands like bw work more stably.
Using Bitwarden CLI
ℹ️ If you use a machine with arm64 architecture like Apple Silicon, you must install Bitwarden-CLI via the command npm install -g @bitwarden/cli
To start using Bitwarden CLI with self-hosted, you must first set up the Bitwarden path with the bw config command:
bw config server https://bw.domain.comTo use Bitwarden CLI more conveniently for automation tasks, you should log in with API Key. In Bitwarden’s web interface, go to Settings → Security → Keys, then choose View API key to get client_id and client_secret.
Next, you run the command bw login --apikey then enter the corresponding client_id and client_secret to authenticate.
After configuration is complete, each time you need to operate with Bitwarden CLI you will have to run bw unlock, enter the master password, then use commands like bw list items, bw get password or other commands as needed.
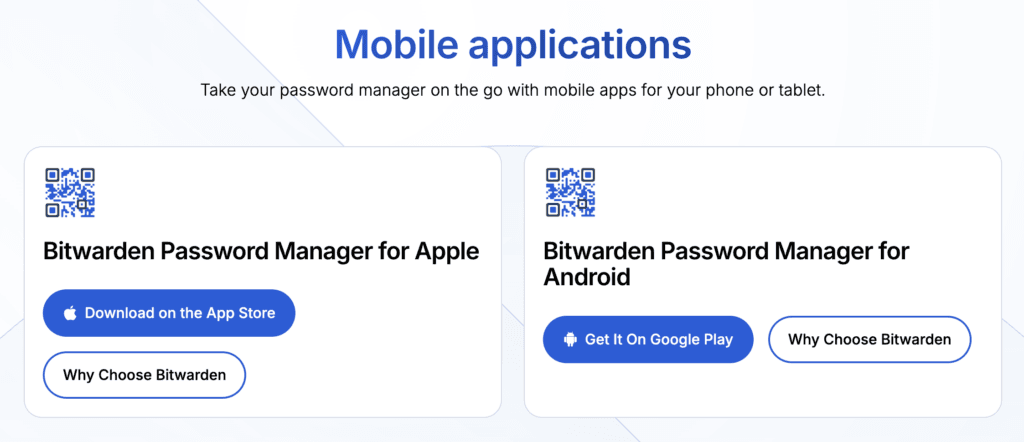
Using on mobile
Similar to desktop, you can also download the Bitwarden application from App Store or Google Play to use on your phone. When you have entered the correct self-hosted server address, data will be synchronized with your own Bitwarden server instead of using the default cloud service.
Conclusion
Bitwarden self-hosted is a worthy consideration if you want to self-control your login data, secret vault, and sensitive information instead of relying completely on third-party services. When properly deployed on VPS, you can use Bitwarden stably on browsers, computers, phones, and even CLI for more advanced needs.
The most important point when self-hosting Bitwarden is to prepare correctly from the beginning: choose a VPS with sufficient resources, point the domain accurately, enable SSL, configure SMTP, and disable public account registration after creating the admin account. Doing all these steps will help the system be safer and easier to operate later.
If you need a dedicated server to deploy Bitwarden self-hosted, you can refer to the affordable VPS packages at AZDIGI to get started with suitable costs.
You might also like
- 4 Free and Open-Source Coolify Alternatives for Self-Hosting Applications
- AZDIGI Tools User Guide - Free DNS, Network, SSL Checker Toolkit
- What Is Hermes Agent? Installation and Usage Guide
- Coolify Interface - Detailed Dashboard Usage Guide
- Installing Coolify on VPS - Detailed Step-by-Step Guide
- What is Business Hosting? Guide to Choosing the Right Plan
About the author

Trần Thắng
Expert at AZDIGI with years of experience in web hosting and system administration.